Wedding Cakes, Sesame Street and more!

Well, I did say it could be a while. However, I am back, and back with lots of photos of cake! The last month has been absolutely flat out with cakes for me, and it doesn’t look like I’ll be slowing down any time soon! Which is not a bad thing, it is nice to busy making cake, than busy writing essays! Anyway, lets get to the important stuff – this cake below was made for a very special family wedding in late November, and I was super happy with how they turned out:

WeddingCake

WeddingCake1

The top cake was a 4” vanilla bean layer cake, filled with lemon curd. All of the cupcakes were a nice simple vanilla bean, with fondant flowers to match the bride’s beautiful dress. I love making vanilla bean cake, because it’s so simple, but has such a lovely flavour (providing you use good quality paste or beans). I am definitely a chocolate girl at heart, but vanilla bean brings a nice change and is so underrated.

WeddingCake2

I used the trusty vanilla bean cupcake recipe by Taste.com, which I have been using for years, for both cakes. The recipe is so versatile – the result is always great with cupcakes, and small and large layer cakes.

WeddingCake3

These cupcakes below have to be the most fun I have ever had making cakes! I was a little nervous to make these because I have never done anything like it before, but I was very happy with the results! As you probably know from my previous work, I am not a fan of fondant at all, but I had to make a slight exception for these cuties 🙂

photo 1-2

It was only the second time I have attempted bright red buttercream, because the first time, it was a nightmare! Red is such a difficult colour to get right, because you have to use sooooo much colour for it to be deep enough. However, if you add too much gel to the buttercream, it splits due to the amount of liquid = disaster. It took me two times to get it right, and the trick for me was to start with a deep pink, and then add the red to deepen the colour. If anyone has any tips for red buttercream – please let me know!! 🙂

photo 2-2

Below are some other Birthday and Christmas cupcake orders I have been lucky enough to make 🙂

photo

photo 5-2

photo 4

photo 3-2

photo 1-3

photo 2-3

Happy Christmas baking to you all, stay tuned for a delicious festive dessert soon! x

P.S. For more regular photos and updates, follow me on Instagram – @whiskitforabiscuit


Halloween Spooky Spider Chocolate Oreos

Can you believe it’s Halloween already?! I’m a little bit excited about this, as it means it’s getting nice and close to the best time of year – Christmas! Halloween is not really a huge deal in Australia, although it seems to have become more popular in recent years. This is only the second post I’ve ever done on Halloween, and I’m definitely looking forward to doing more. There are some pretty cool baking ideas I found on Pinterest for Halloween. People are so creative. These Oreos, however, are probably not the most creative. They are, in fact, very easy to make and insanely delicious.


000_0005

I am a little bit obsessed with chocolate covered Oreos at the moment. I see stacks of them on Instagram, and some people make them look  like the most amazing little morsels of sparkly treasure, and you would never know that a humble Oreo biscuit was nestled inside. I have officially been inspired. Yum.

000_0002

So, why not cover an Oreo with a totally justifiable amount of chocolate, and then whack another Oreo on top? Just as well I could turn them into spiders, and that it’s coincidentally the week of Halloween!

000_0004

My chocolate piping skills are very obviously flawed! I can’t say I have really ever piped melted chocolate before, and it’s really not the easiest thing to do. The designs on these Oreos definitely could have been cleaner, but I don’t mind too much as the taste totally makes up for it! There is no recipe for these Oreos, it’s pretty self explanatory. A little bit of chocolate in the mould, the Oreo, and more chocolate. You just have to have the right moulds (I got mine from Baking Pleasures).

These Oreos are awesome. They are quick and easy to make, a great idea for cooking with kids and super versatiile – you can make them any colour and design them however you wish, and best of all, they are super delicious.

Happy Halloweeeeeeeeeeen!

000_0006

Coming Up Carrot Cupcakes with Chocolate Cinnamon Soil

How is Easter almost here already?! It scares me how fast time flies these days, but hey, any excuse to bake, really. I found the idea for these awesome coming up carrot cupcakes on the ever-inspiring Pinterest. Unfortunately, I only saw them once and couldn’t find them again, so I don’t know whose idea they originally were, but they are pretty awesome.

 010

I first thought of crushing up dark chocolate biscuits for the soil, but I found this recipe to make your own by making a sugar syrup and adding dark chocolate. I was a little sceptical, but it worked really well, tasted great and added a nice crunchy texture to the cake. This was the first time I had ever make carrot cake, and I can’t really say I am a huge fan, but the cream cheese icing makes it all worthwhile!

 005

Carrot Cupcakes: (from Taste.com)

Makes approximately 20 cupcakes

  •  160g butter, softened, not melted
  • 2/3 cups firmly packed brown sugar
  • 1 tsp ground nutmeg
  • 2 eggs
  • 1 cup self-raising flour
  • 1 1/4 cups buttermilk
  • 1/2 cup plain (all purpose) flour
  • 1 cup grated carrot (I used 2 medium sized carrots)
  • 75g crushed pecans (original recipe calls for walnuts, but I am allergic, and I like pecans better anyway)

Preheat oven to 180c, and line cupcake tins. Beat the butter, sugar and nutmeg until pale and creamy. Add eggs, one at a time until well combined. Stir in self-raising flour until well combined, and then stir in the buttermilk until well combined, and then the plain flour until well combined. Stir in the carrot and the nuts. Spoon batter into cupcake cases, and bake for approximately 25 minutes, or until a skewer is inserted, and comes out clean. Leave in tins to cool for 5 minutes, and then turn out onto wire rack.

Chocolate Soil:

I really love this recipe. It’s so clever – I never even thought of this combination actually working. The recipe is from The Lone Baker, and I would really recommend you try it, especially if you are familiar with making sugar syrups. Chocolate soil is so versatile, and could be used for a variety of novelty cakes and desserts.

  • 100g caster (white) sugar
  • 75g 70% dark chocolate, chopped (ensure you use dark chocolate, because you need that little bit of bitterness when combined with all that sugar!)
  • – 1 tsp ground cinnamon

Line an oven tray with non-stick baking paper. Place sugar with 2 tbs cold water in a small-medium saucepan, and heat on low-medium until the sugar dissolves, and starts to go slightly yellow around the edges – this can take a while, it took me about  8 minutes to get to this point. Once the sugar begins to go yellow, take it straight off the heat and quickly whisk in the chocolate and cinnamon with a balloon whisk. The consistency of soil will appear very quickly, and some of the mixture will stick to the sides of the pan. You can just scrape this off with a butter knife. Pour soil out onto prepared oven tray.

Soil

Cream Cheese Icing: (see Parisian Red Velvet Cupcakes)

  • 225g butter, chopped and softened, not melted
  • 340g cream cheese, slightly softened
  • 1 tsp vanilla extract/paste
  • 2 cups icing (confectioner’s) sugar
  • Orange colouring gel/liquid

Beat butter, cream cheese and vanilla together until pale and creamy, approximately 3 minutes. Gradually add the icing sugar. I use 2 cups, as I think that is sweet enough, but you can add more or less if you want to. Place 5 tablespoons of icing in a separate bowl, and colour with orange colouring gel/liquid.

004

Assembly:

With a small sharp knife, carefully carve out a small circle in the top of the cupcakes, leaving a hole to pipe in the carrots. Place the icing in a piping bag fitted with a wide round nozzle, and pipe circles around the hole made in the cupcake. Dip iced cake in the chocolate soil. You can add more soil to the cupcake with your hands if dipping it doesn’t cover the icing enough. Once all the cupcakes have soil on them, place the orange icing in a piping bag fitted with a small round nozzle. Pipe ‘carrots’ into the holes in the cupcakes, piping up so that the icing is approximately 1-2cm above the top of the cupcake. For the tops of the carrots, I used the green part of a sour strap, cutting them with scissors, with an incision of the middle of the strap. Place it in the carrot, far enough that it will not fall over.

007

You can find my previous Easter posts here. Happy Baking!


St. Patrick’s Day Rainbow Cupcakes

Happy (belated) St. Patrick’s Day to you all, and top of the morning to ya! 😉 I have seen these super cute cupcakes many times on Pinterest, so I thought it was time to give them a go. They’re so adorable 🙂

000_0001

I used my trusted vanilla cupcake recipe for these, and once again, they worked a treat as always. To get the rainbow effect throughout your cake, you just need to divide your batter into separate bowls, colour them, and spoon them separately into the cupcake cases before baking.

 Cakes

I also loved the sour strap rainbow. As cute as it looked, it also gave the cupcake a nice sour tang and cut through the buttercream. Deeeeeeelicious.

000_0005

These little gems are really easy to make, too, and would be fun for kids to have a go at. You obviously don’t have to colour the batter, either. And you don’t have to pipe grass on the cupcakes, which I discovered is quite time consuming to get right!

IG

Happy Baking, Guinness drinking and potato eating! Hope you all have a great weekend 🙂

Lamington Cake with Balsamic Strawberry Jam

Happy Australia Day to all you Aussies! I hope everyone is having a relaxing long weekend 🙂 As a country, Australia does not really have a defined cuisine of its own. I guess it has something to do with being derived from Britain, and not really having a whole lot of history of our own. However, there is one sweet that we do claim do be our own (aside from the humble Pav, of course!). It is the delicious Lamington. If you do not know what a Lamington is, you are missing out, big time! They are slices of sponge-y cake, filled with jam, and covered in chocolate icing and coconut. Yum! I had actually never made a Lamington before, so I wasn’t sure how it would go, but I decided on a cake version for my Mum’s birthday, and I must say, it was delicious, and a big hit.

000_0008

I was going to use the recipe from the ‘BAKE’ book, from the Australian’s Women’s Weekly (AWW are the go-to’s for great recipes for many Aussies), for normal Lamington’s. However, I just had to look on my favourite site, Taste, of course, to see if they may have had a recipe for a cake. Luckily, I found the perfect one with great reviews, so I went with that, with a few of my own additions. I guess I could be more sure of the measurements this way, instead of having to adapt a slice into a cake. Anyhoo, the recipe was great – easy to follow and not ridiculously time consuming, either. Winner 🙂

000_0004

Lamington Cake: (recipe from Taste.com)

  • Cooking oil spray, to grease
  • 1/2 cup self-raising flour
  • 1/4 cup plain (all-purpose) flour
  • 1/4 cup cornflour
  • 4 eggs, at room temperature
  • 3/4 cup caster (white) sugar
  • 2 cups coconut
  • 250ml thickened cream
  • 1/3 cup icing (confectioner’s) sugar
  • 1 tsp vanilla bean paste/natural extract

Preheat your oven to 180c/356f. Grease two 20cm round springform baking tins with cooking oil spray, and line with non-stick baking paper. Set aside.

Sift all three flours into one bowl. In a separate bowl, beat all of the eggs, and the sugar, for approximately ten minutes, or until the mixture is thick, pale and creamy. Then, sift half of the flour mixture into egg mixture, and  gently fold it in with a metal spoon until well combined. Repeat with the remaining flour. Make sure the flour is all combined as it can be difficult to see in a large bowl – the flour will just sink to the bottom. And remember to be gentle as you don’t want to knock too much air out of the sponge.

Divide the mixture evenly into the 2 prepared tins. Smooth the surfaces with a metal spoon to ensure the mixture is even. Bake for 12-15 minutes (mine took 14, but ensure you check at 12). Insert a skewer to ensure cake is cooked – the skewer will come out clean. Leave in tins to cool, then place on a wire rack.

Chocolate Icing:

  • 2 cups icing (confectioner’s) sugar
  • 1/3 cup good quality cocoa powder
  • 1/2 cup water

Sift the icing sugar and cocoa into a bowl together, and add the water. Mix well until combined and smooth. Pour the icing into a large, shallow dish. Pour the coconut out onto a large baking tray.

Place one side of the sponge cake into the icing, cover the sides, then dip the other side of the sponge in the icing. Cover in coconut and place on a large cake stand. Repeat with remaining sponge cake, except place this one on a plate or another baking tray. I found this process super messy and it took me a while, but I got there in the end!

000_0001

Balsamic Strawberry Jam:

  • 1 medium punnet of strawberries, hulled and quartered
  • 1 tsp vanilla bean paste/natural extract
  • 1 cup caster (white) sugar
  • 1/3 cup balsamic vinegar
  • Splash of water

Place strawberries and water (I literally used a splash, just to moisten the strawberries) in a medium sized saucepan. Cook on a medium heat until the berries begin to soften (about 2 minutes). Add the vanilla and sugar, and cook over a low heat for about 10 minutes, or until strawberries have broken down. Add balsamic vinegar, and continue cooking on low until mixture becomes a sticky, jam like consistency. Pour into a bowl, and leave to cool. If you are not using the jam on the day of making it, cover with cling wrap and place it in the fridge. I made my jam two days beforehand.

Lamington Cake

Assembly:

Whip up 250ml thickened cream, with 1/3 cup icing (confectioner’s) sugar, and 1 tsp of vanilla bean paste/natural extract. With one sponge cake already on the cake stand, cover with whipped cream, ensuring you spread the cream right to the edges of the cake (if you want to decorate it like my cake, leave a little bit of cream behind to pipe on top). Then, spread over the strawberry jam – although this time don’t spread it right to the edges, leave about 1cm. Place the other sponge on top of the cream and jam. Decorate as desired 🙂 EAT!

Messy goodness

HAPPY AUSTRALIA DAY! (check out my past Australia Day posts here.)

000_0011

Pork Belly with Apple Cider Vinegar Gravy and Roasted Apples

I can’t believe Christmas is over already! 😦 This makes me a bit sad, because it is, by far, my favourite time of the year. My favourite time from this Christmas was probably eating this pork belly. It was that good, even if I do say so myself. Pork Belly is hands down, one of my favourite foods in general. If the piece of tender meat along with the layer of juicy fat isn’t enough to whet your appetite, then the thick slab of crispy, salty crackling (that should always be there) surely must!

Served

The recipe that I used was awesome to say the least, and it will certainly be making a regular enough appearance on my kitchen table. I searched for awhile to find a recipe I was happy with, and that didn’t seem too hard, because pork belly is definitely not the easiest thing to cook. I really loved the roasted apples that went with the pork, because they were all lovely and caramelised from the butter and brown sugar I put with them in the oven, and it was a welcome change from the standard super sweet store bought apple sauce! Plus, the whole apples look much nicer on the plate, too.

Apples, butter and sage

I’m not going to worry about writing the recipe out for you, because I followed it word for word from Taste.com, my go to site for awesome recipes. You can find it here. If you are going to try cooking pork belly yourself, I have a couple of tips for you. Not that I am an expert on the subject, but they certainly helped me out. Firstly, ask your butcher to score the pork rind for you, it makes preparing the meat a lot easier. Second, do not be afraid of salt! Salt will draw moisture out of the pork, and create crispy, crackly goodness. I put three layers of coarse sea salt on my rind, along with the fennel seeds called for in the recipe. Lastly, if your pork is not as crispy in the middle as it is on the edges, it is okay to leave it in the oven for longer, just turn down the temperature a little, and it is unlikely that the meat will dry out.There is a lotttttttttttt of fat in pork belly, it will keep the meat moist.

Before1

And, of course, enjoy every moment of eating that pork. I am not often happier than I am when eating freshly roasted pork crackling, as silly as it sounds. I love it!

After

I hope you all had a wonderful Christmas, and enjoy bringing in 2014! Thanks very much for reading whiskitforabiscuit’s adventures this year 🙂 See you next year. Happy Baking!

Poached Pear and Salted Caramel Macarons

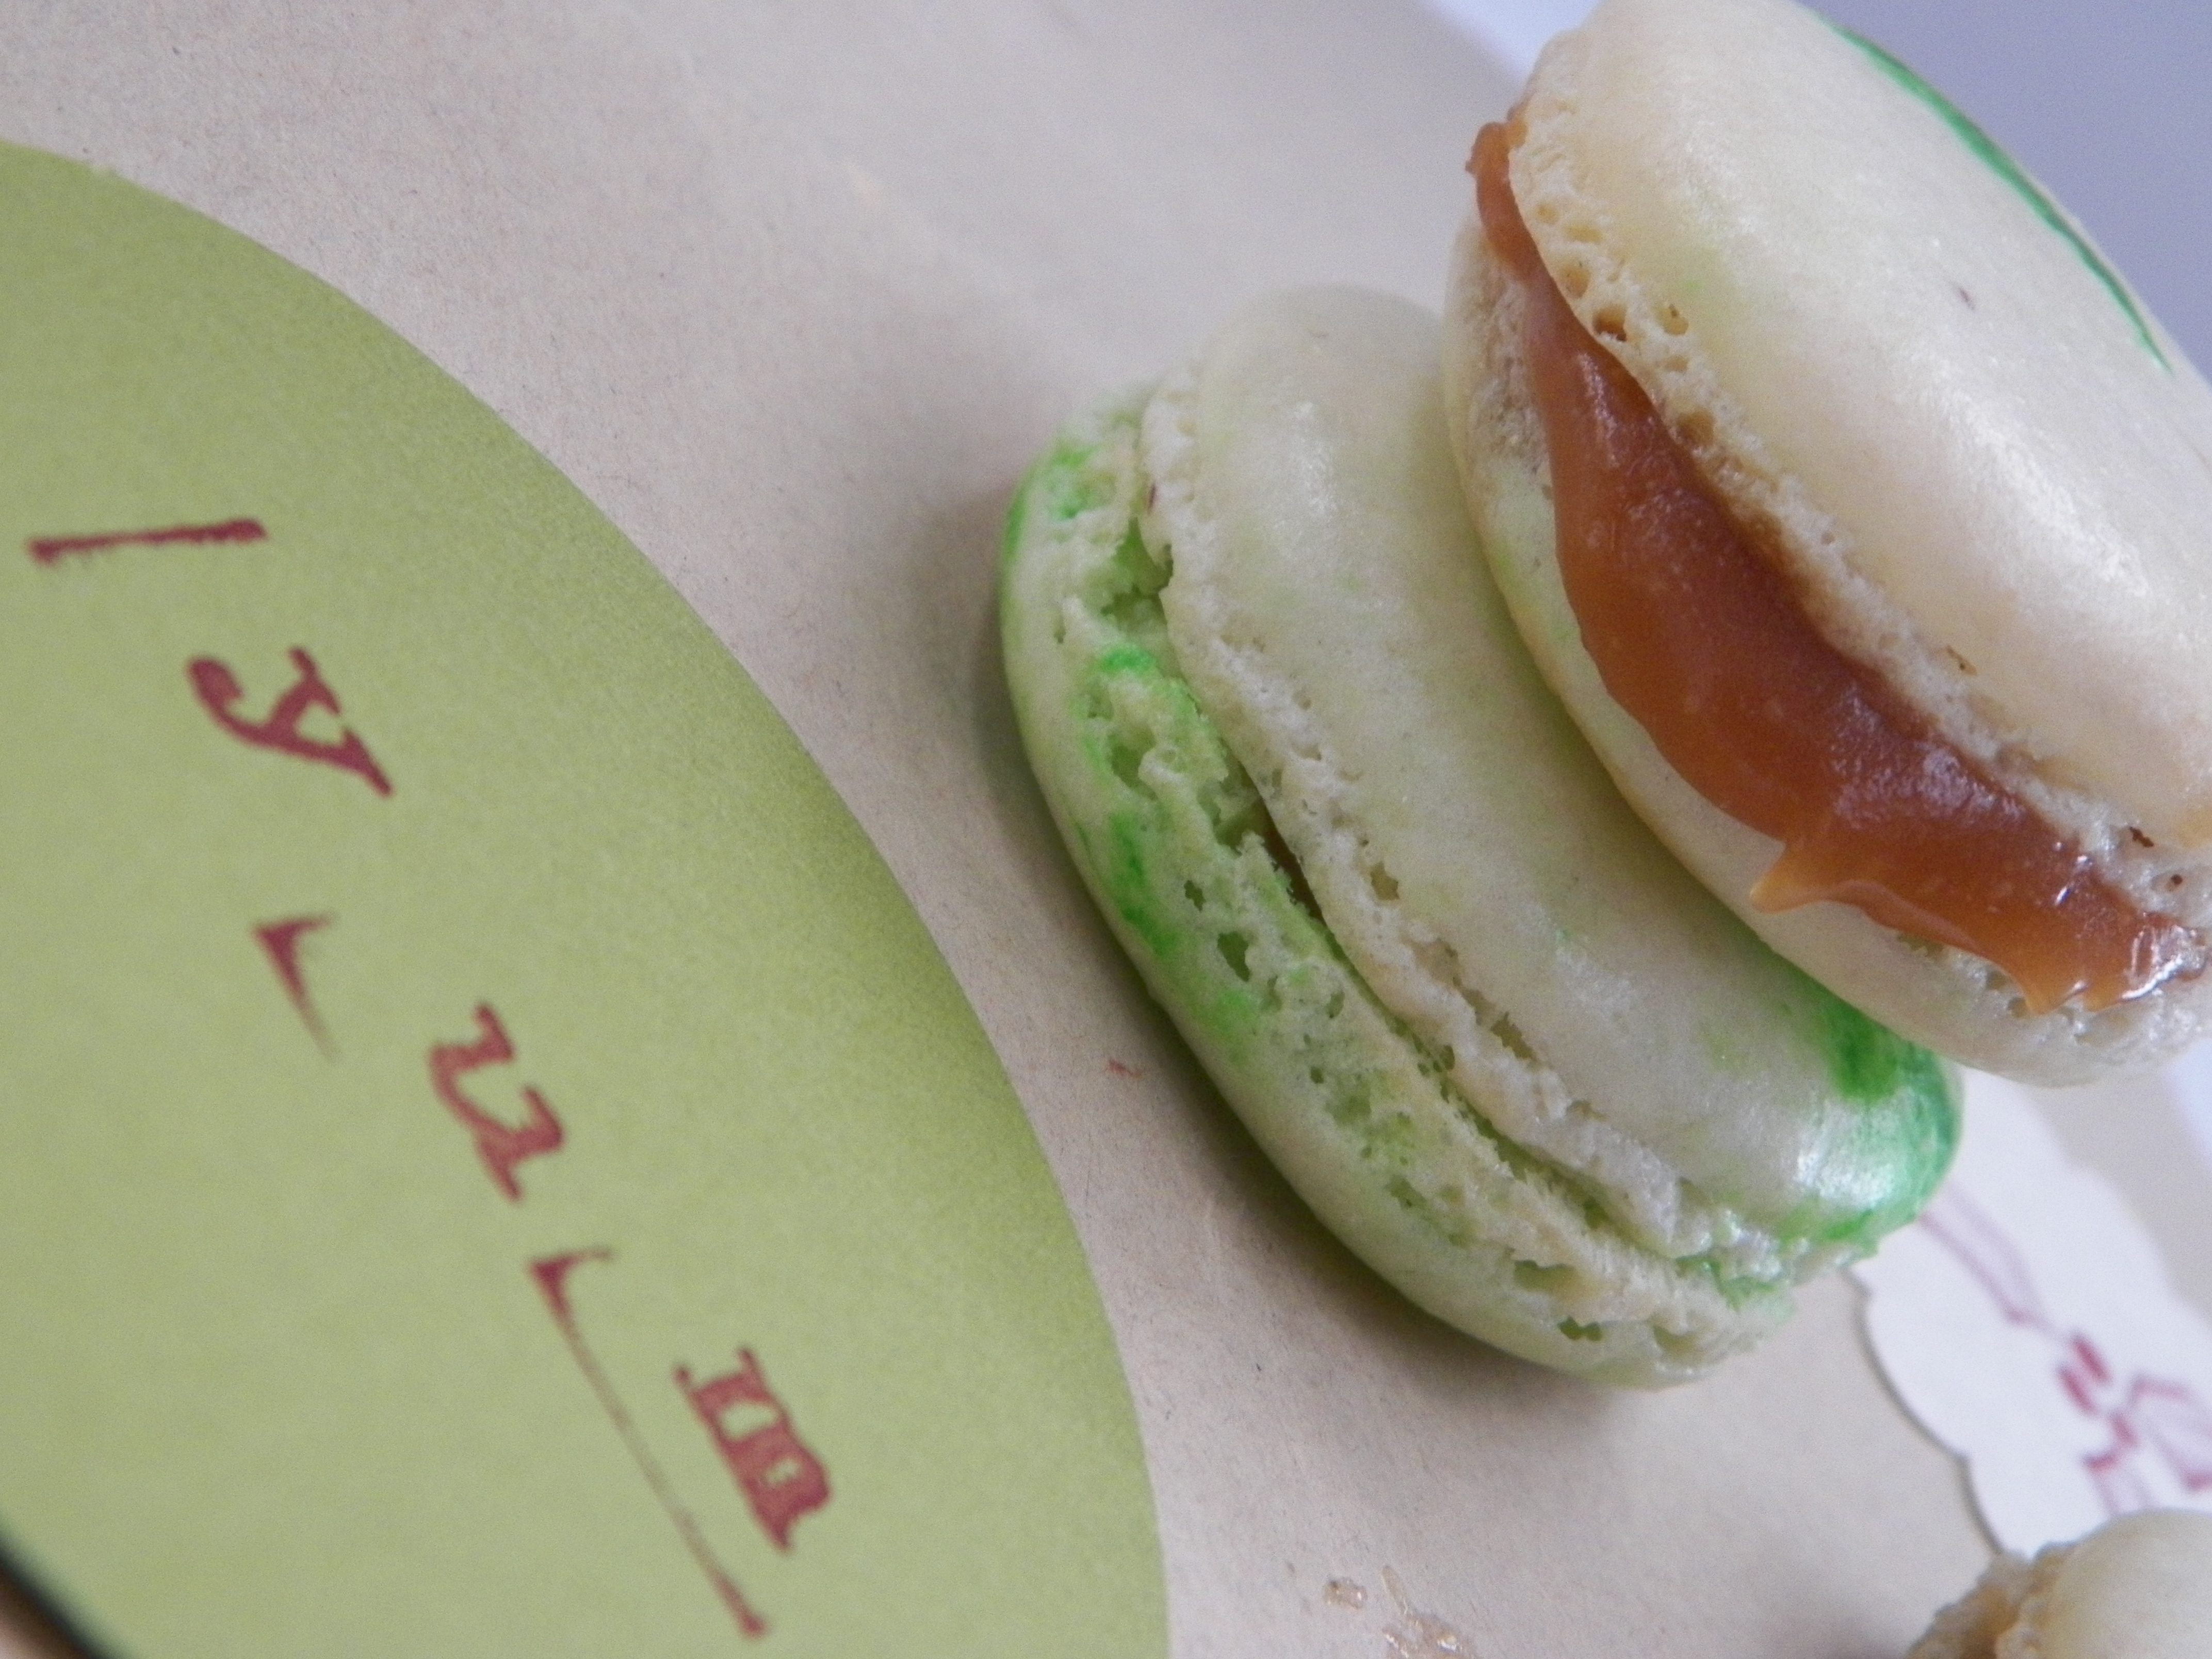
After four months of no baking, it feels good to be back! I can’t believe it’s been THAT long, nearly half a year of no butter and sugar action, which is a just a bit wrong, really. When I stepped back into the kitchen and begun measuring my ingredients out, it all came flooding back. It was reassuring to know that I hadn’t completely lost my touch, and the macaron recipe I use has remained engraved in my brain – it’s the only recipe I know off by heart, no surprise. I had been planning  these macarons for about a week to mark the beginning of my Christmas baking schedule, which is very hectic – again, no surprise, as I always become over ambitious with these things, trying to do waaaaay too much in so little time. Whilst this flavour is not quintessentially Christmass-y, it is extremely delicious. Anything involving salted caramel is. I poached the pears in vanilla and cinnamon, so I guess that means I can claim it as a Christmas flavour?

 IG

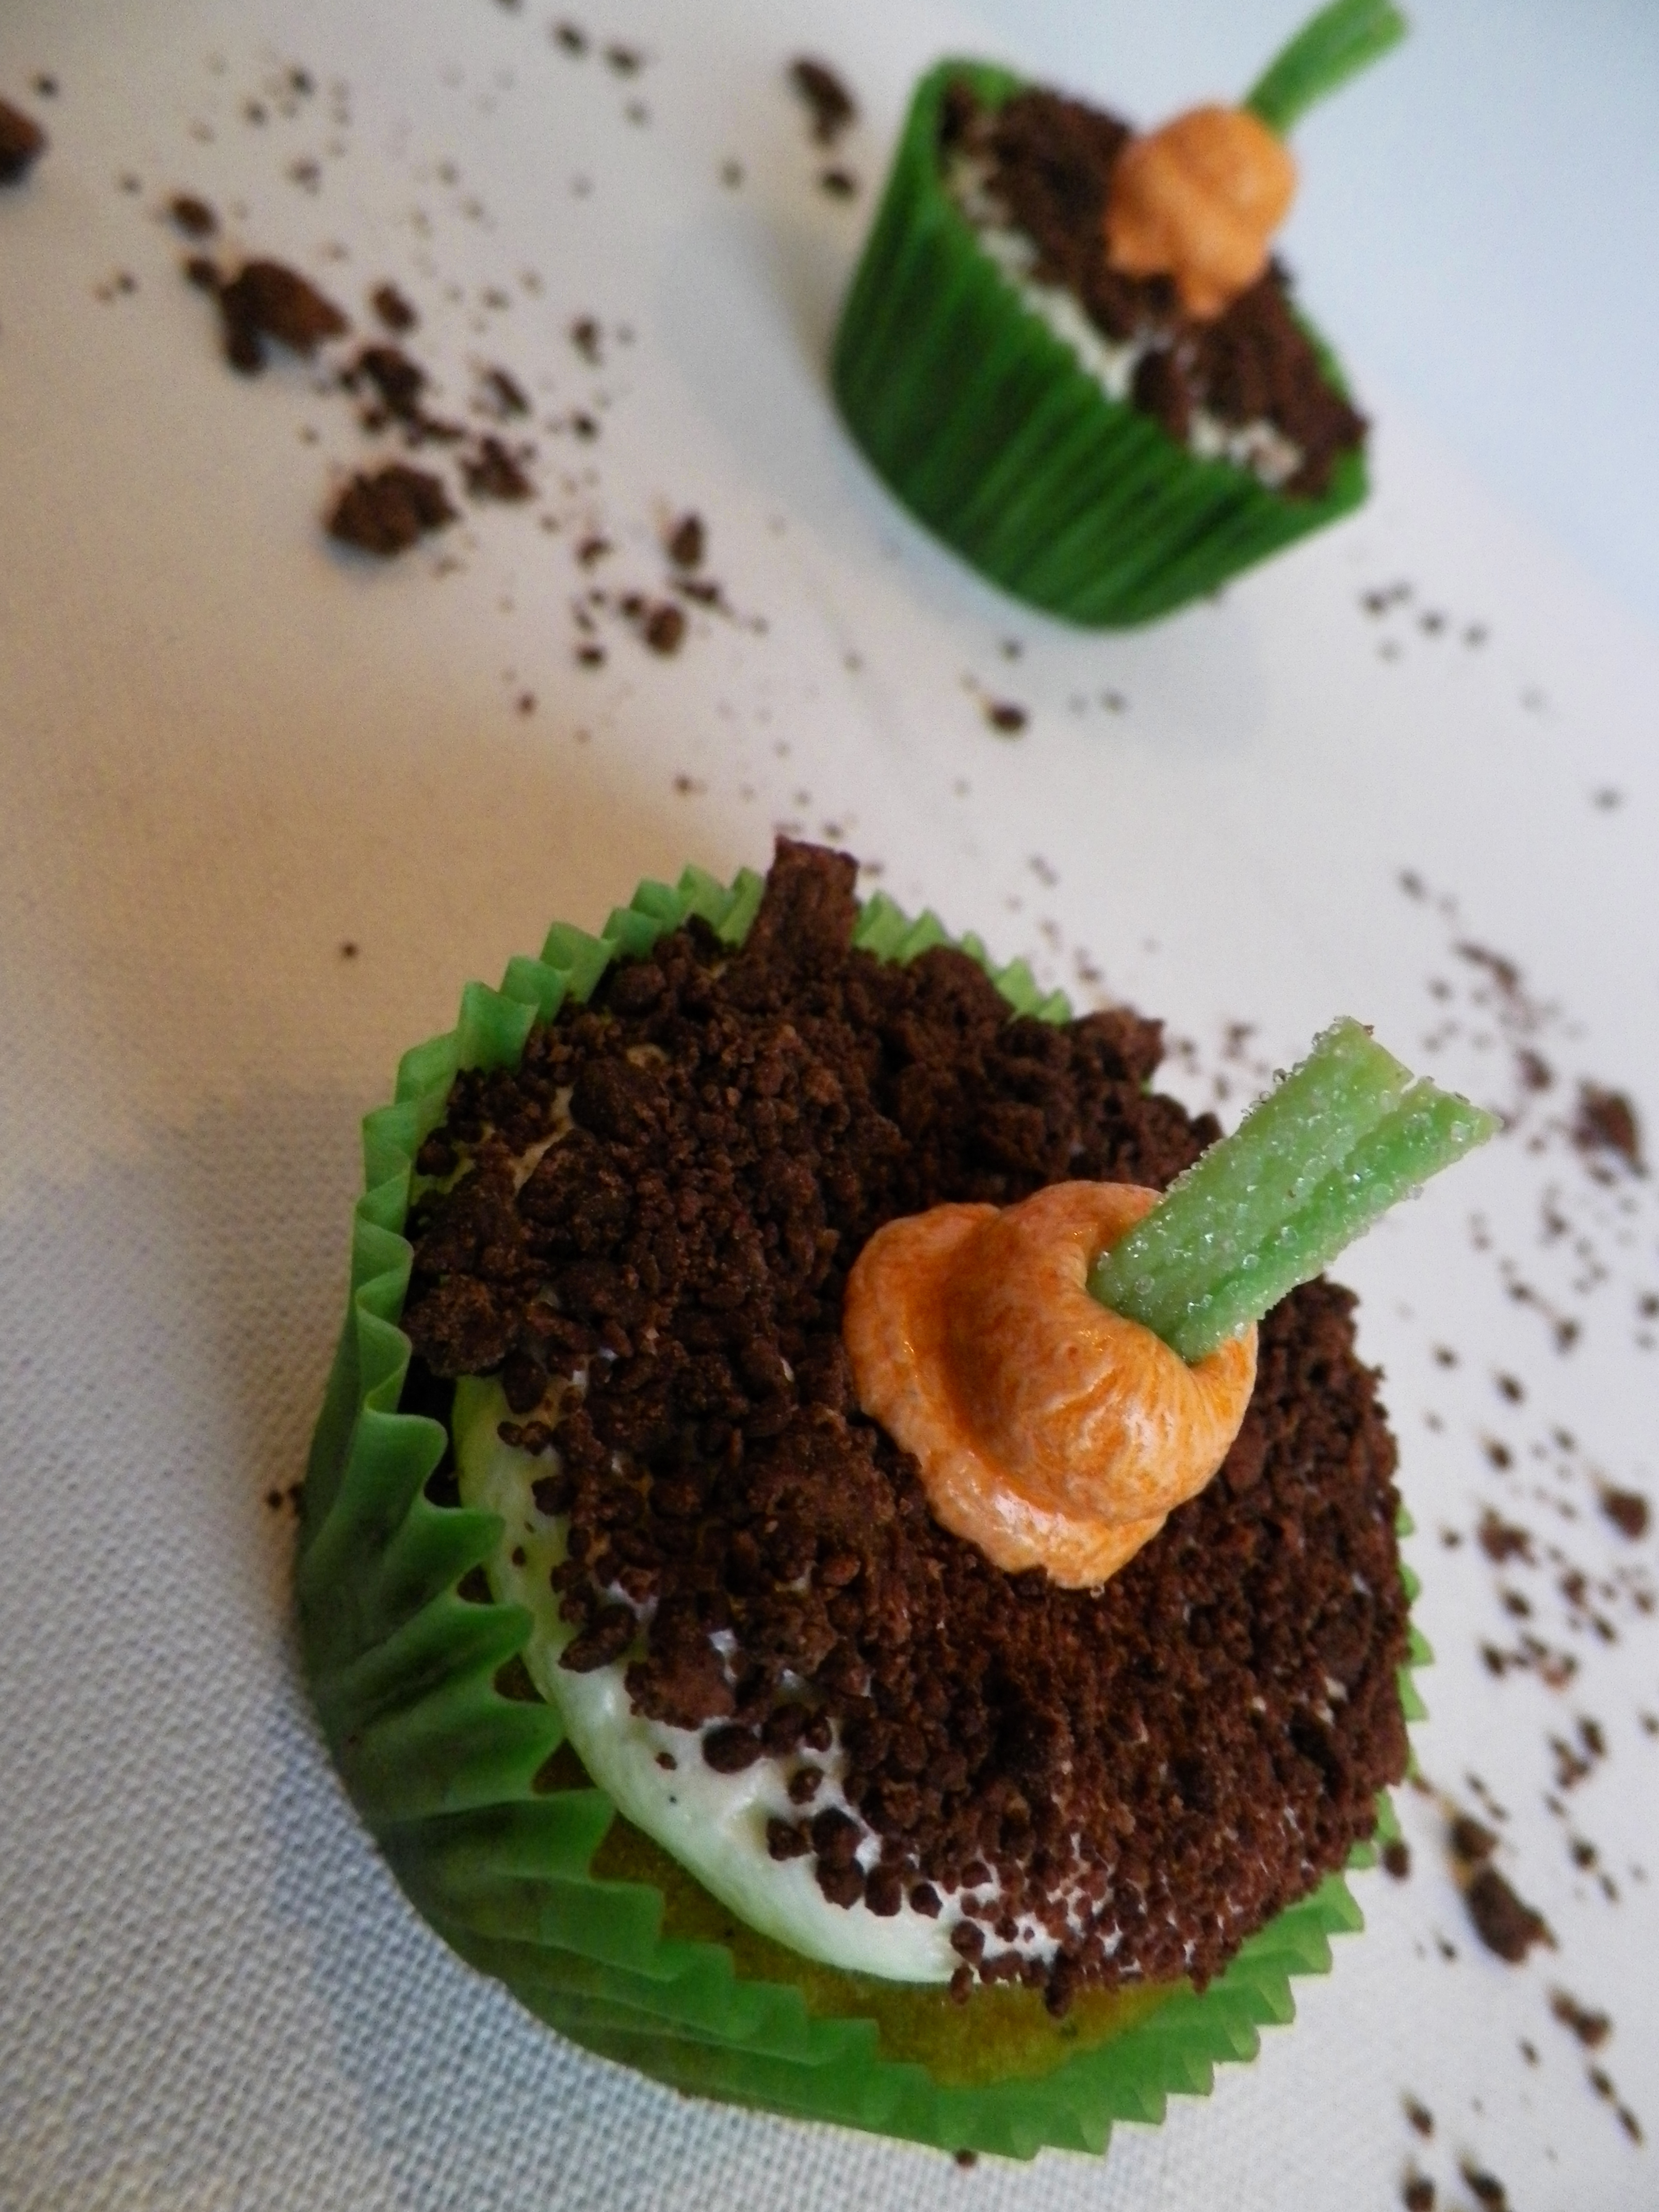
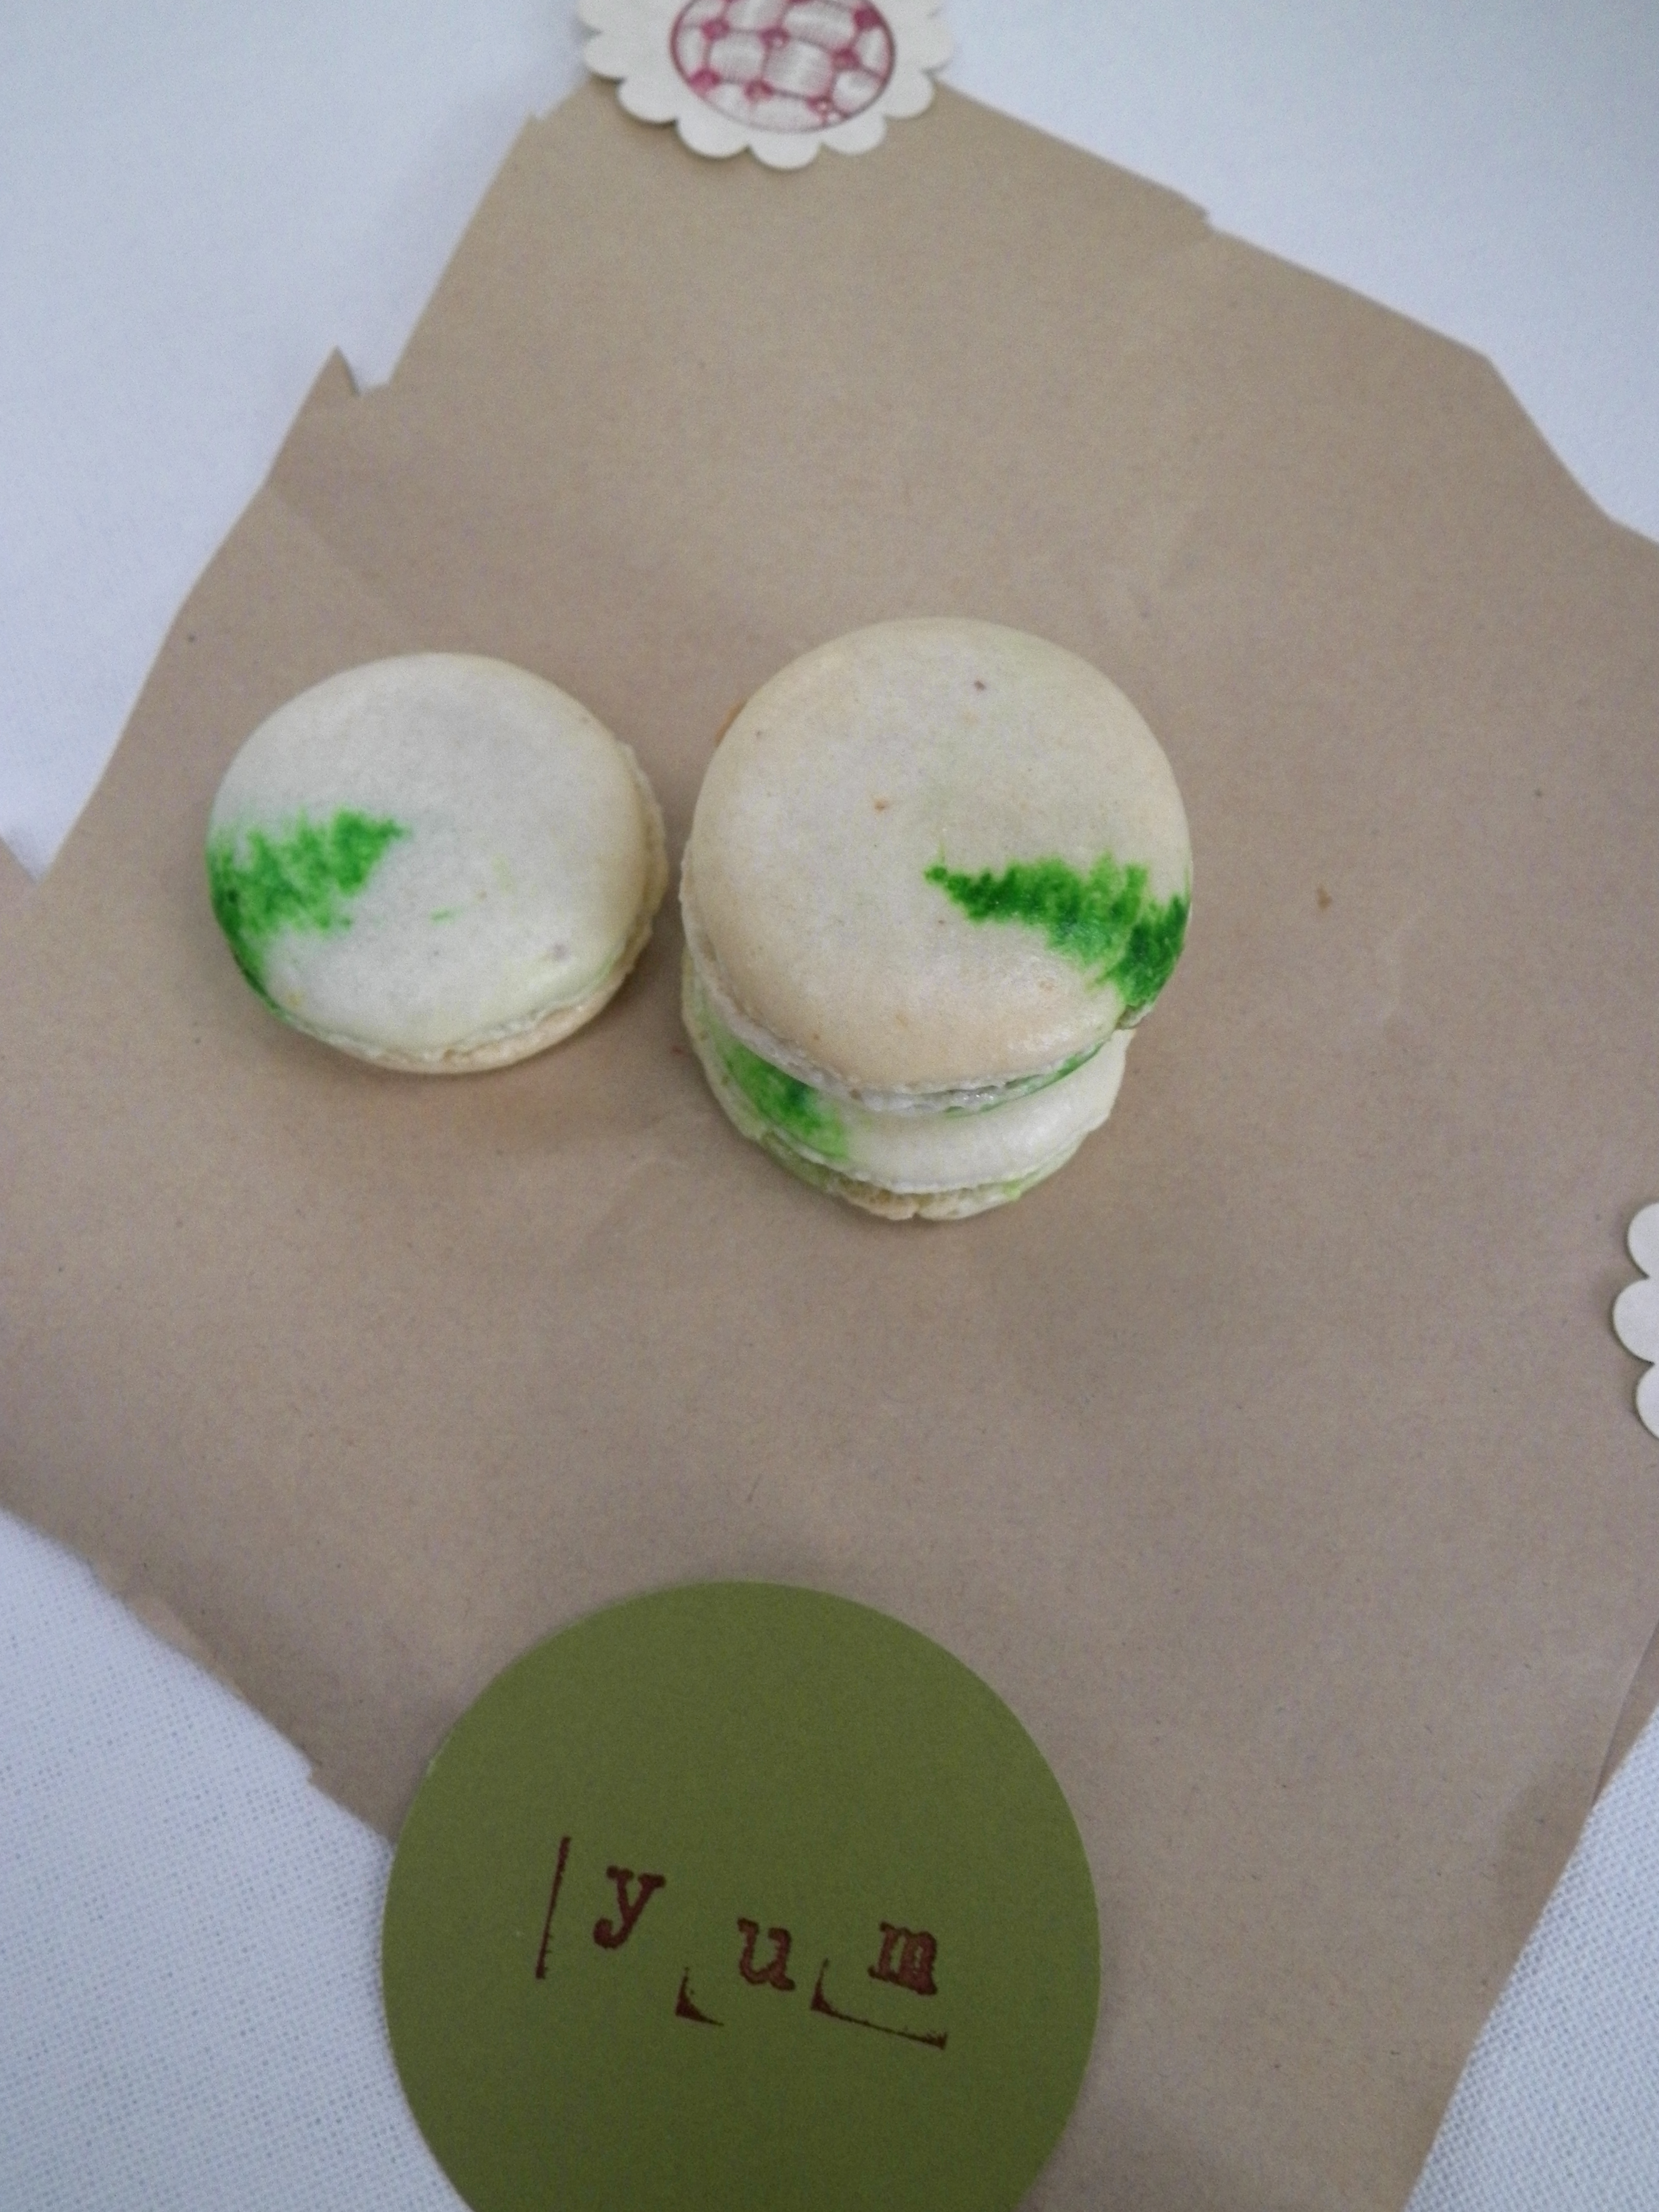
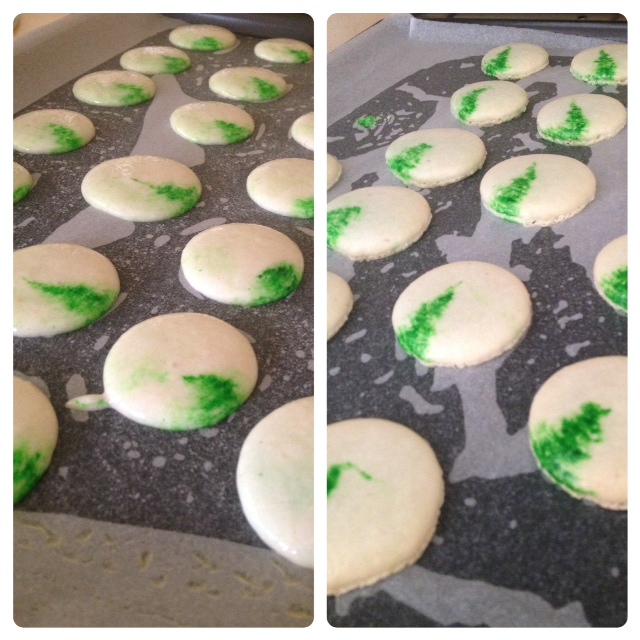
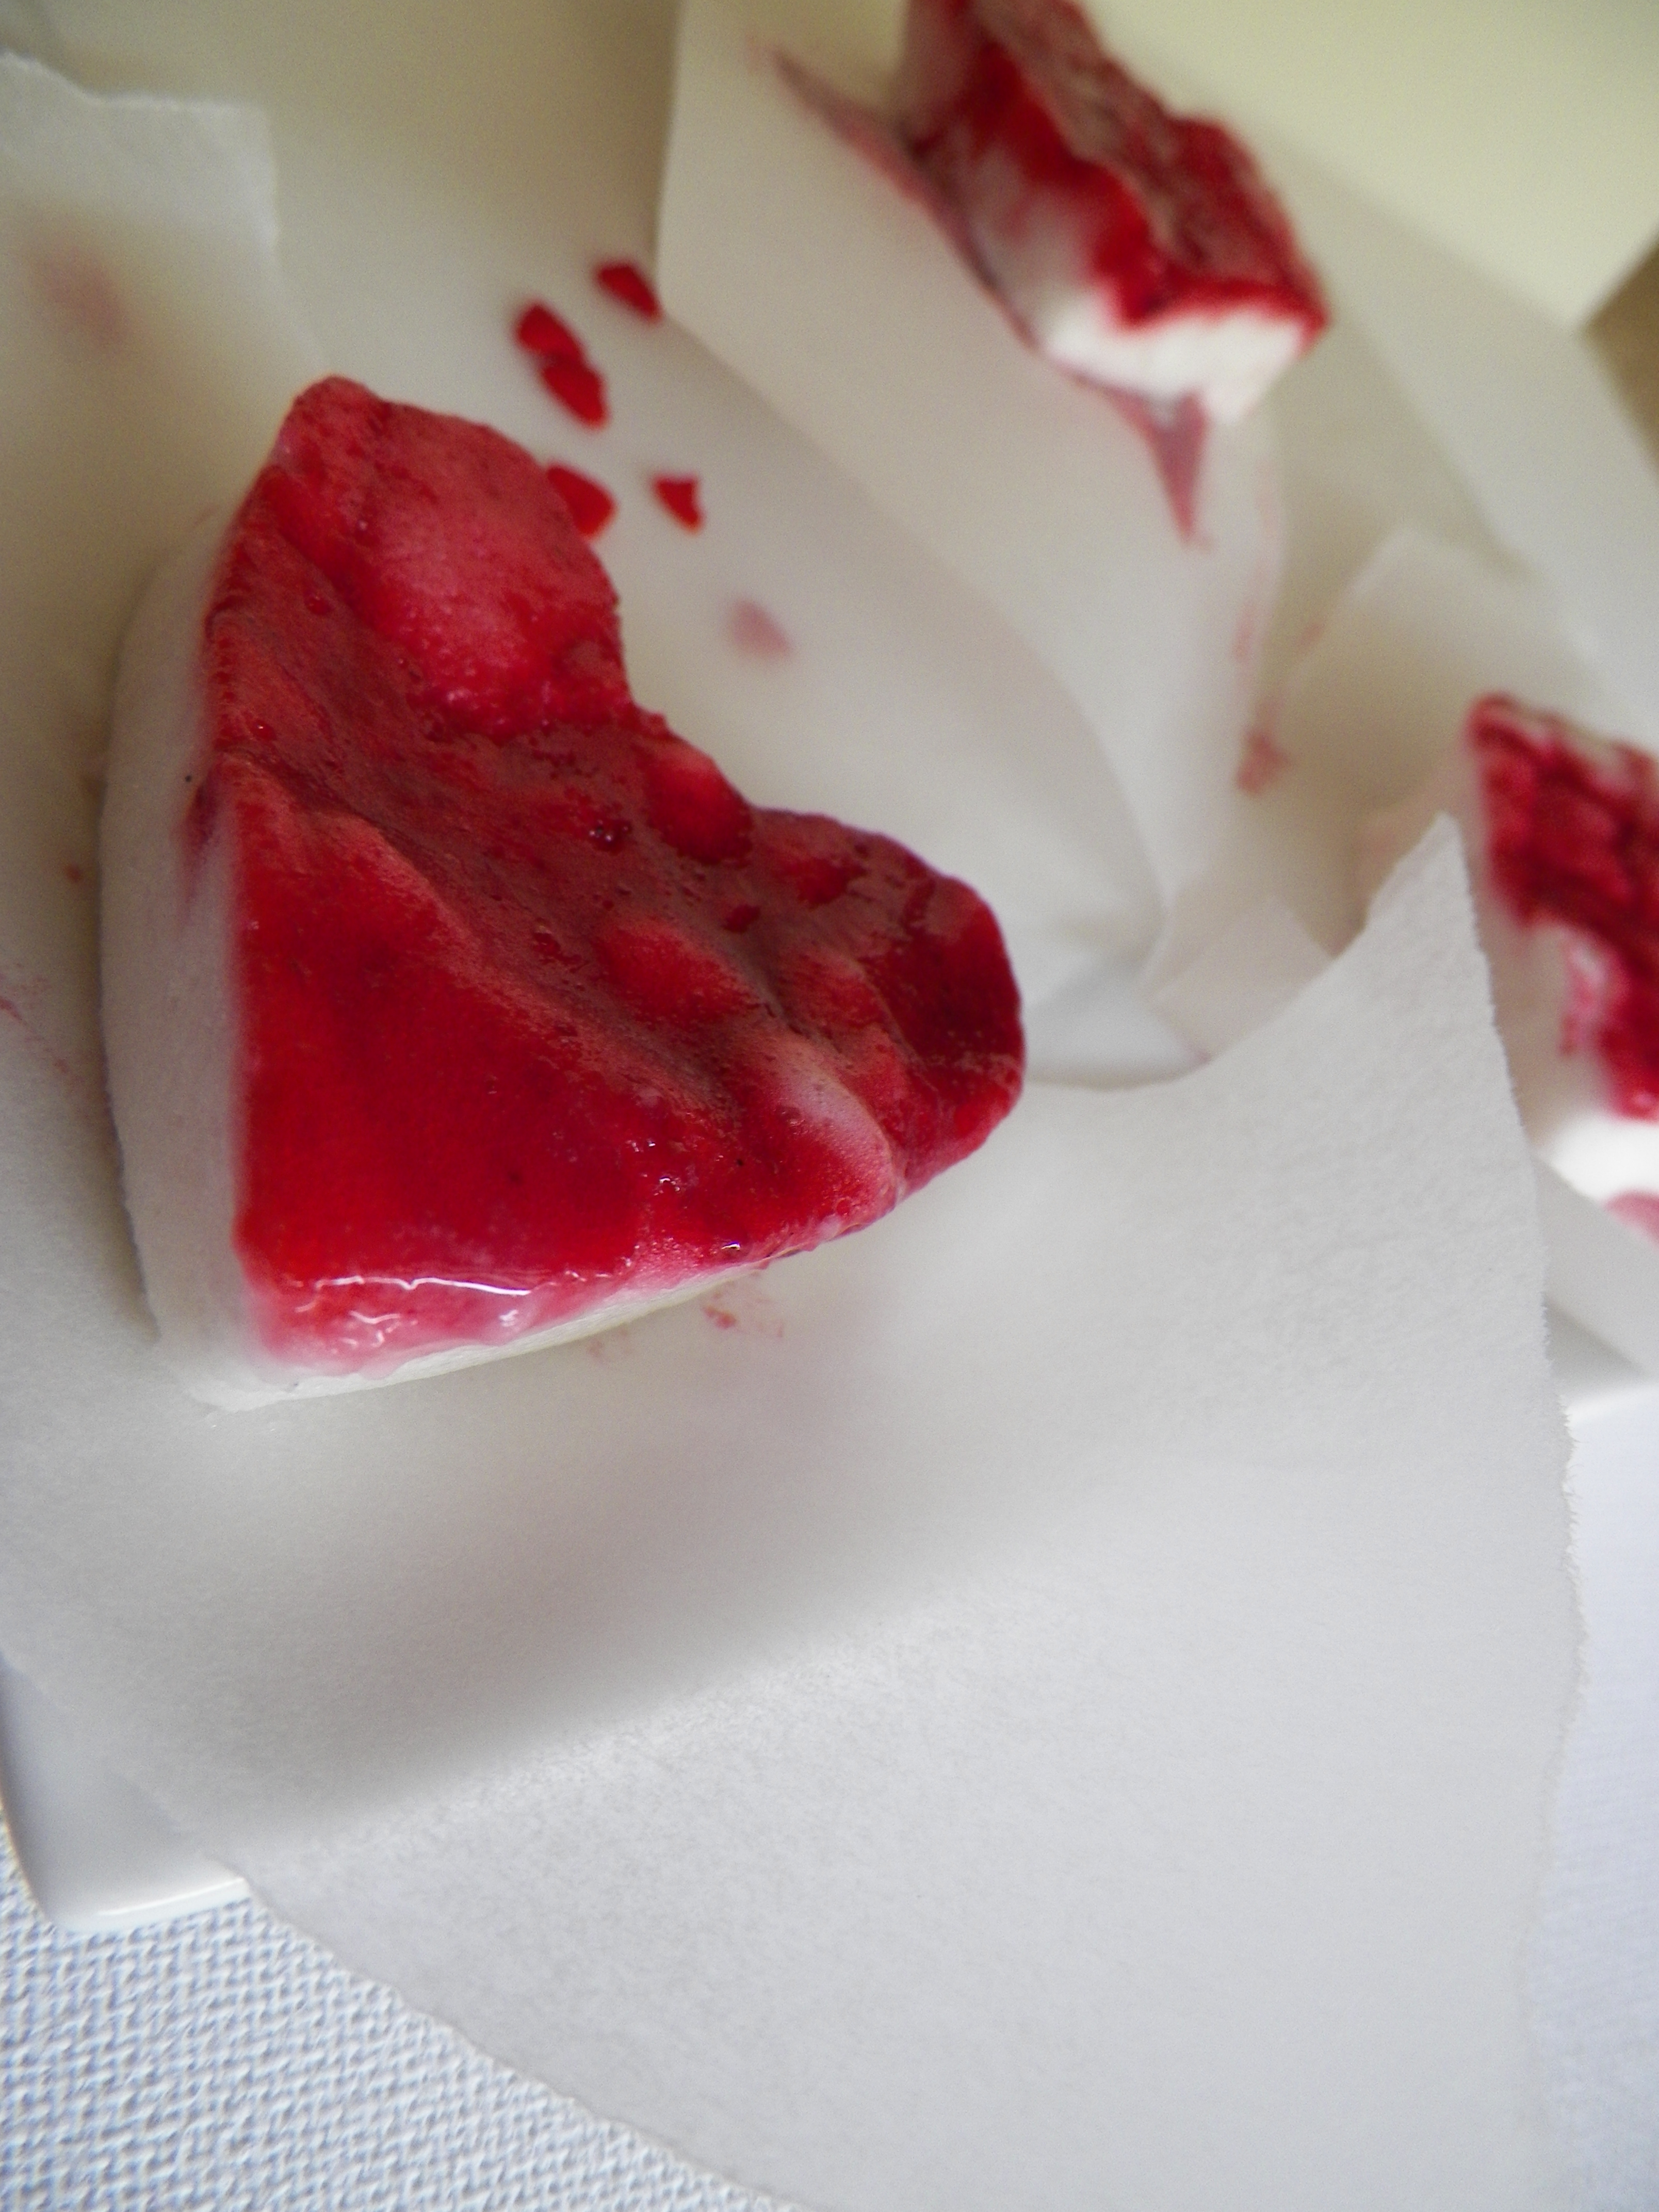
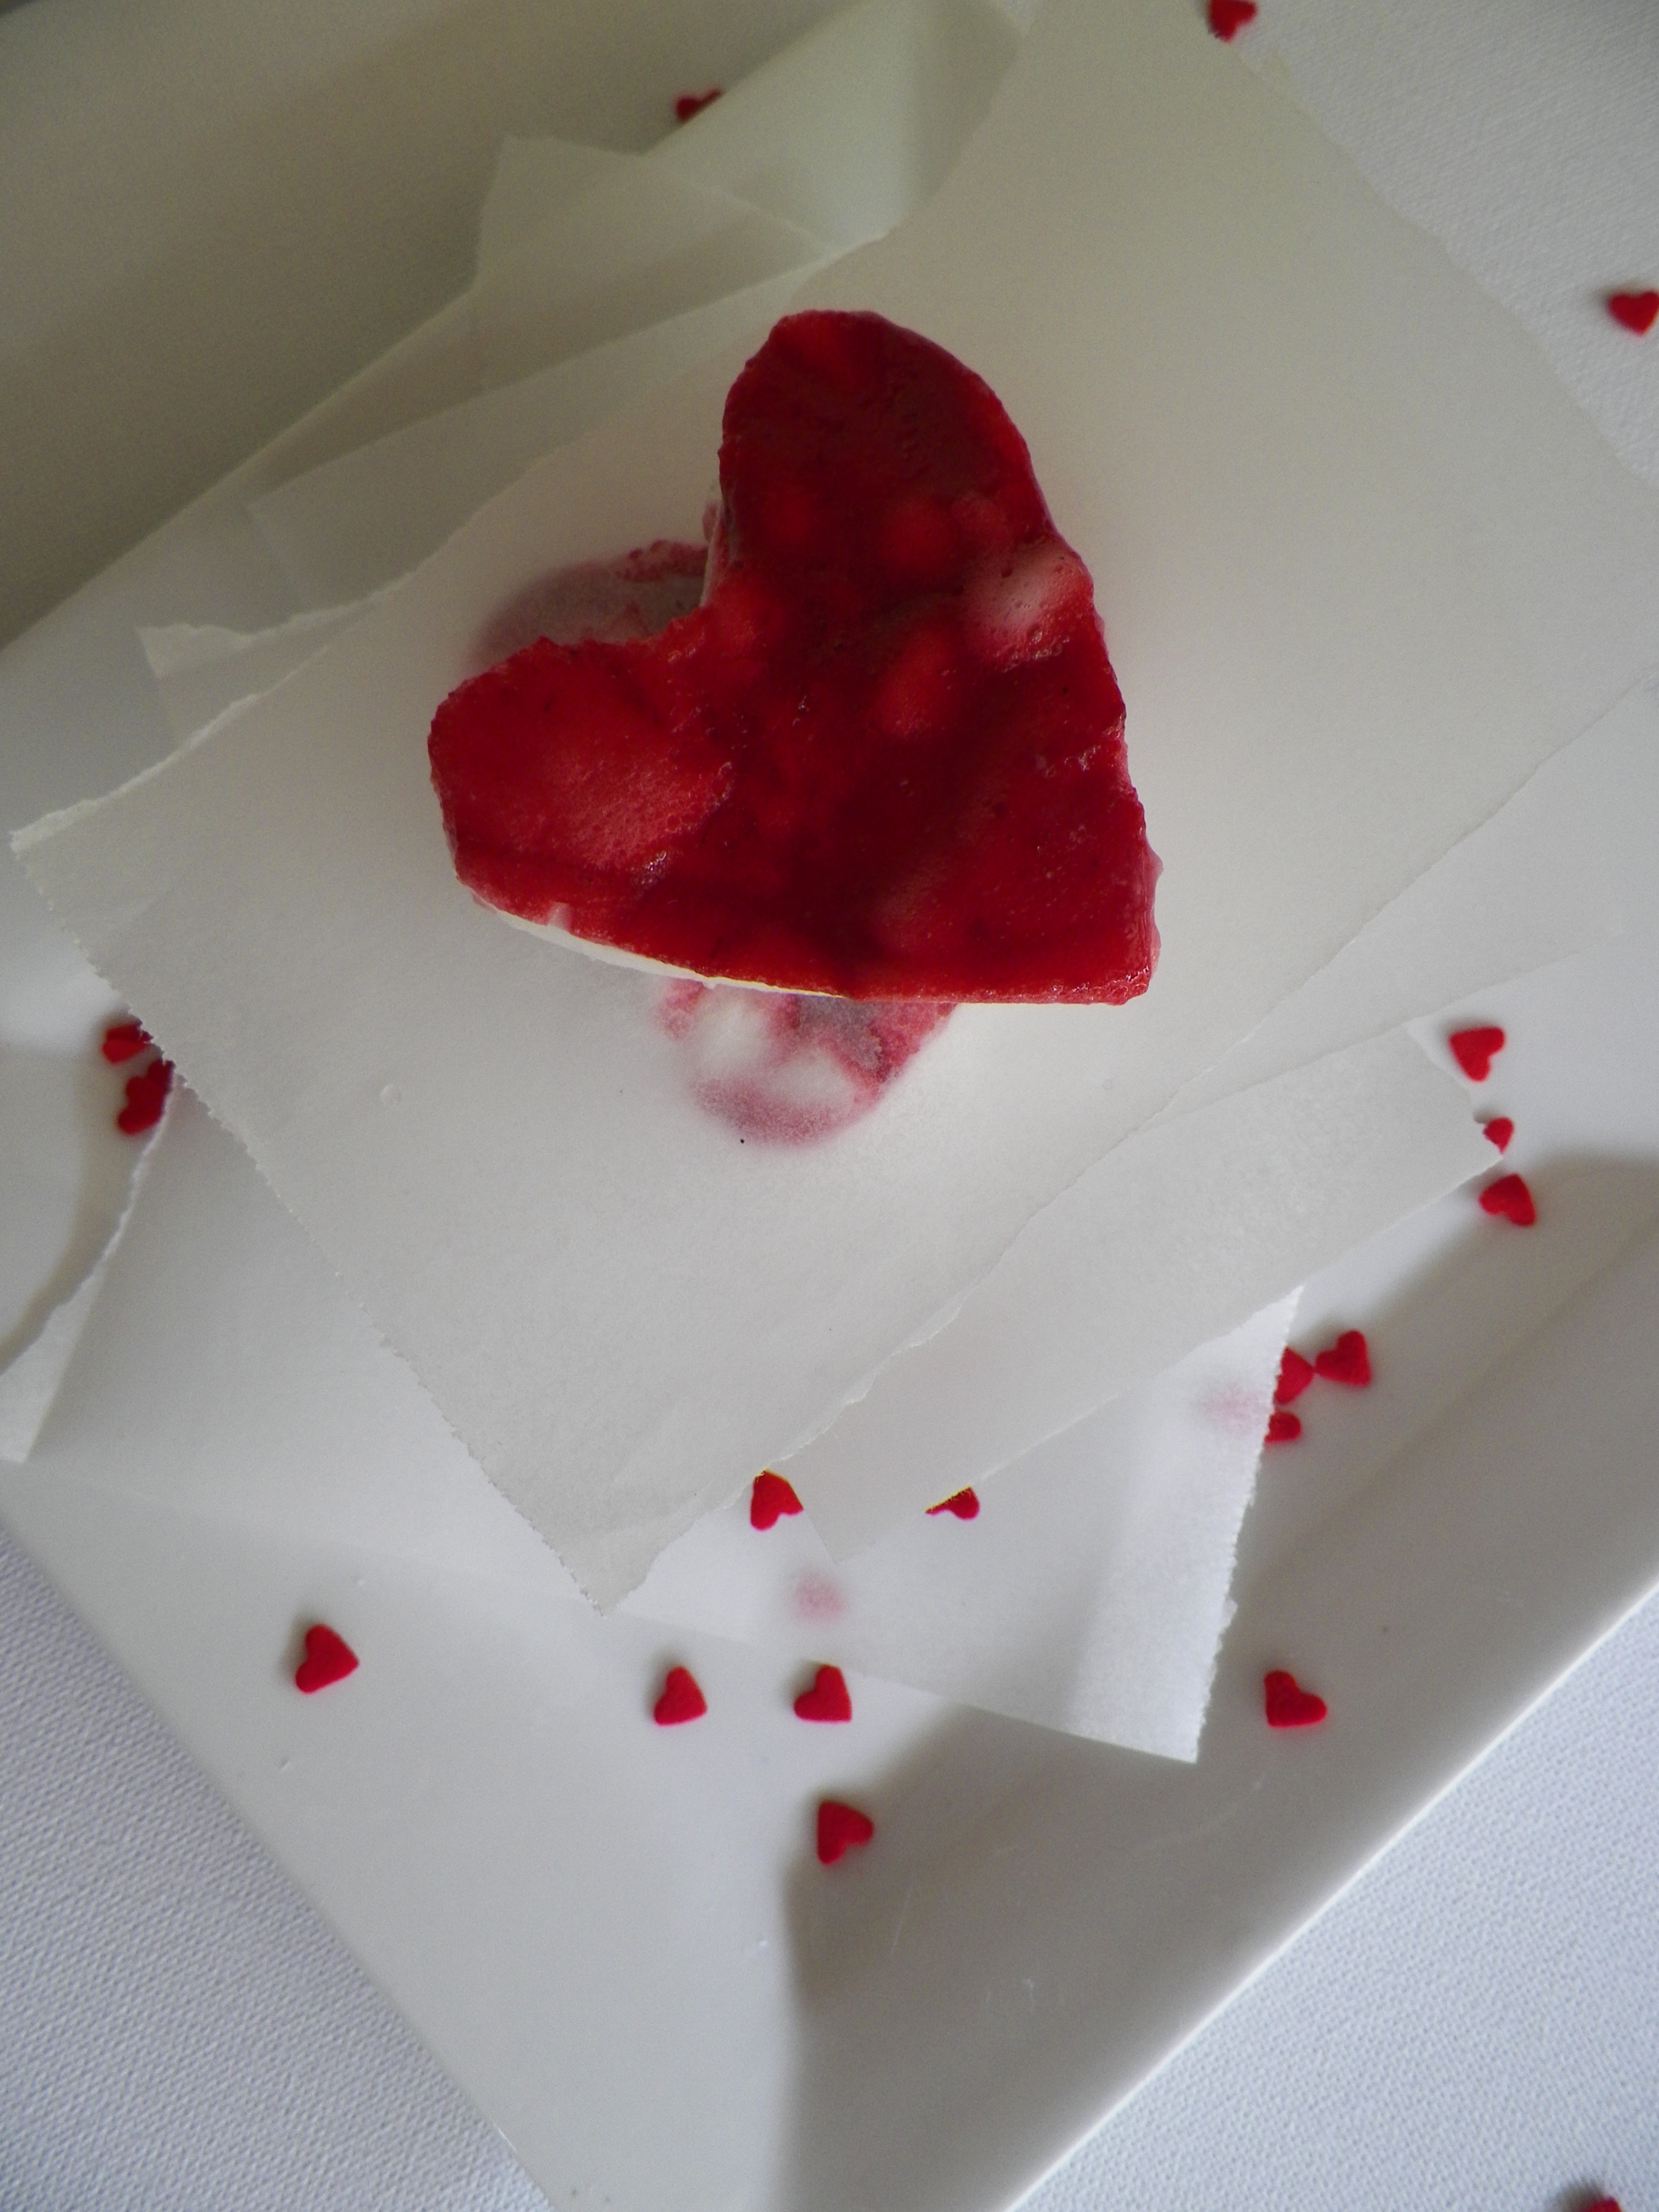
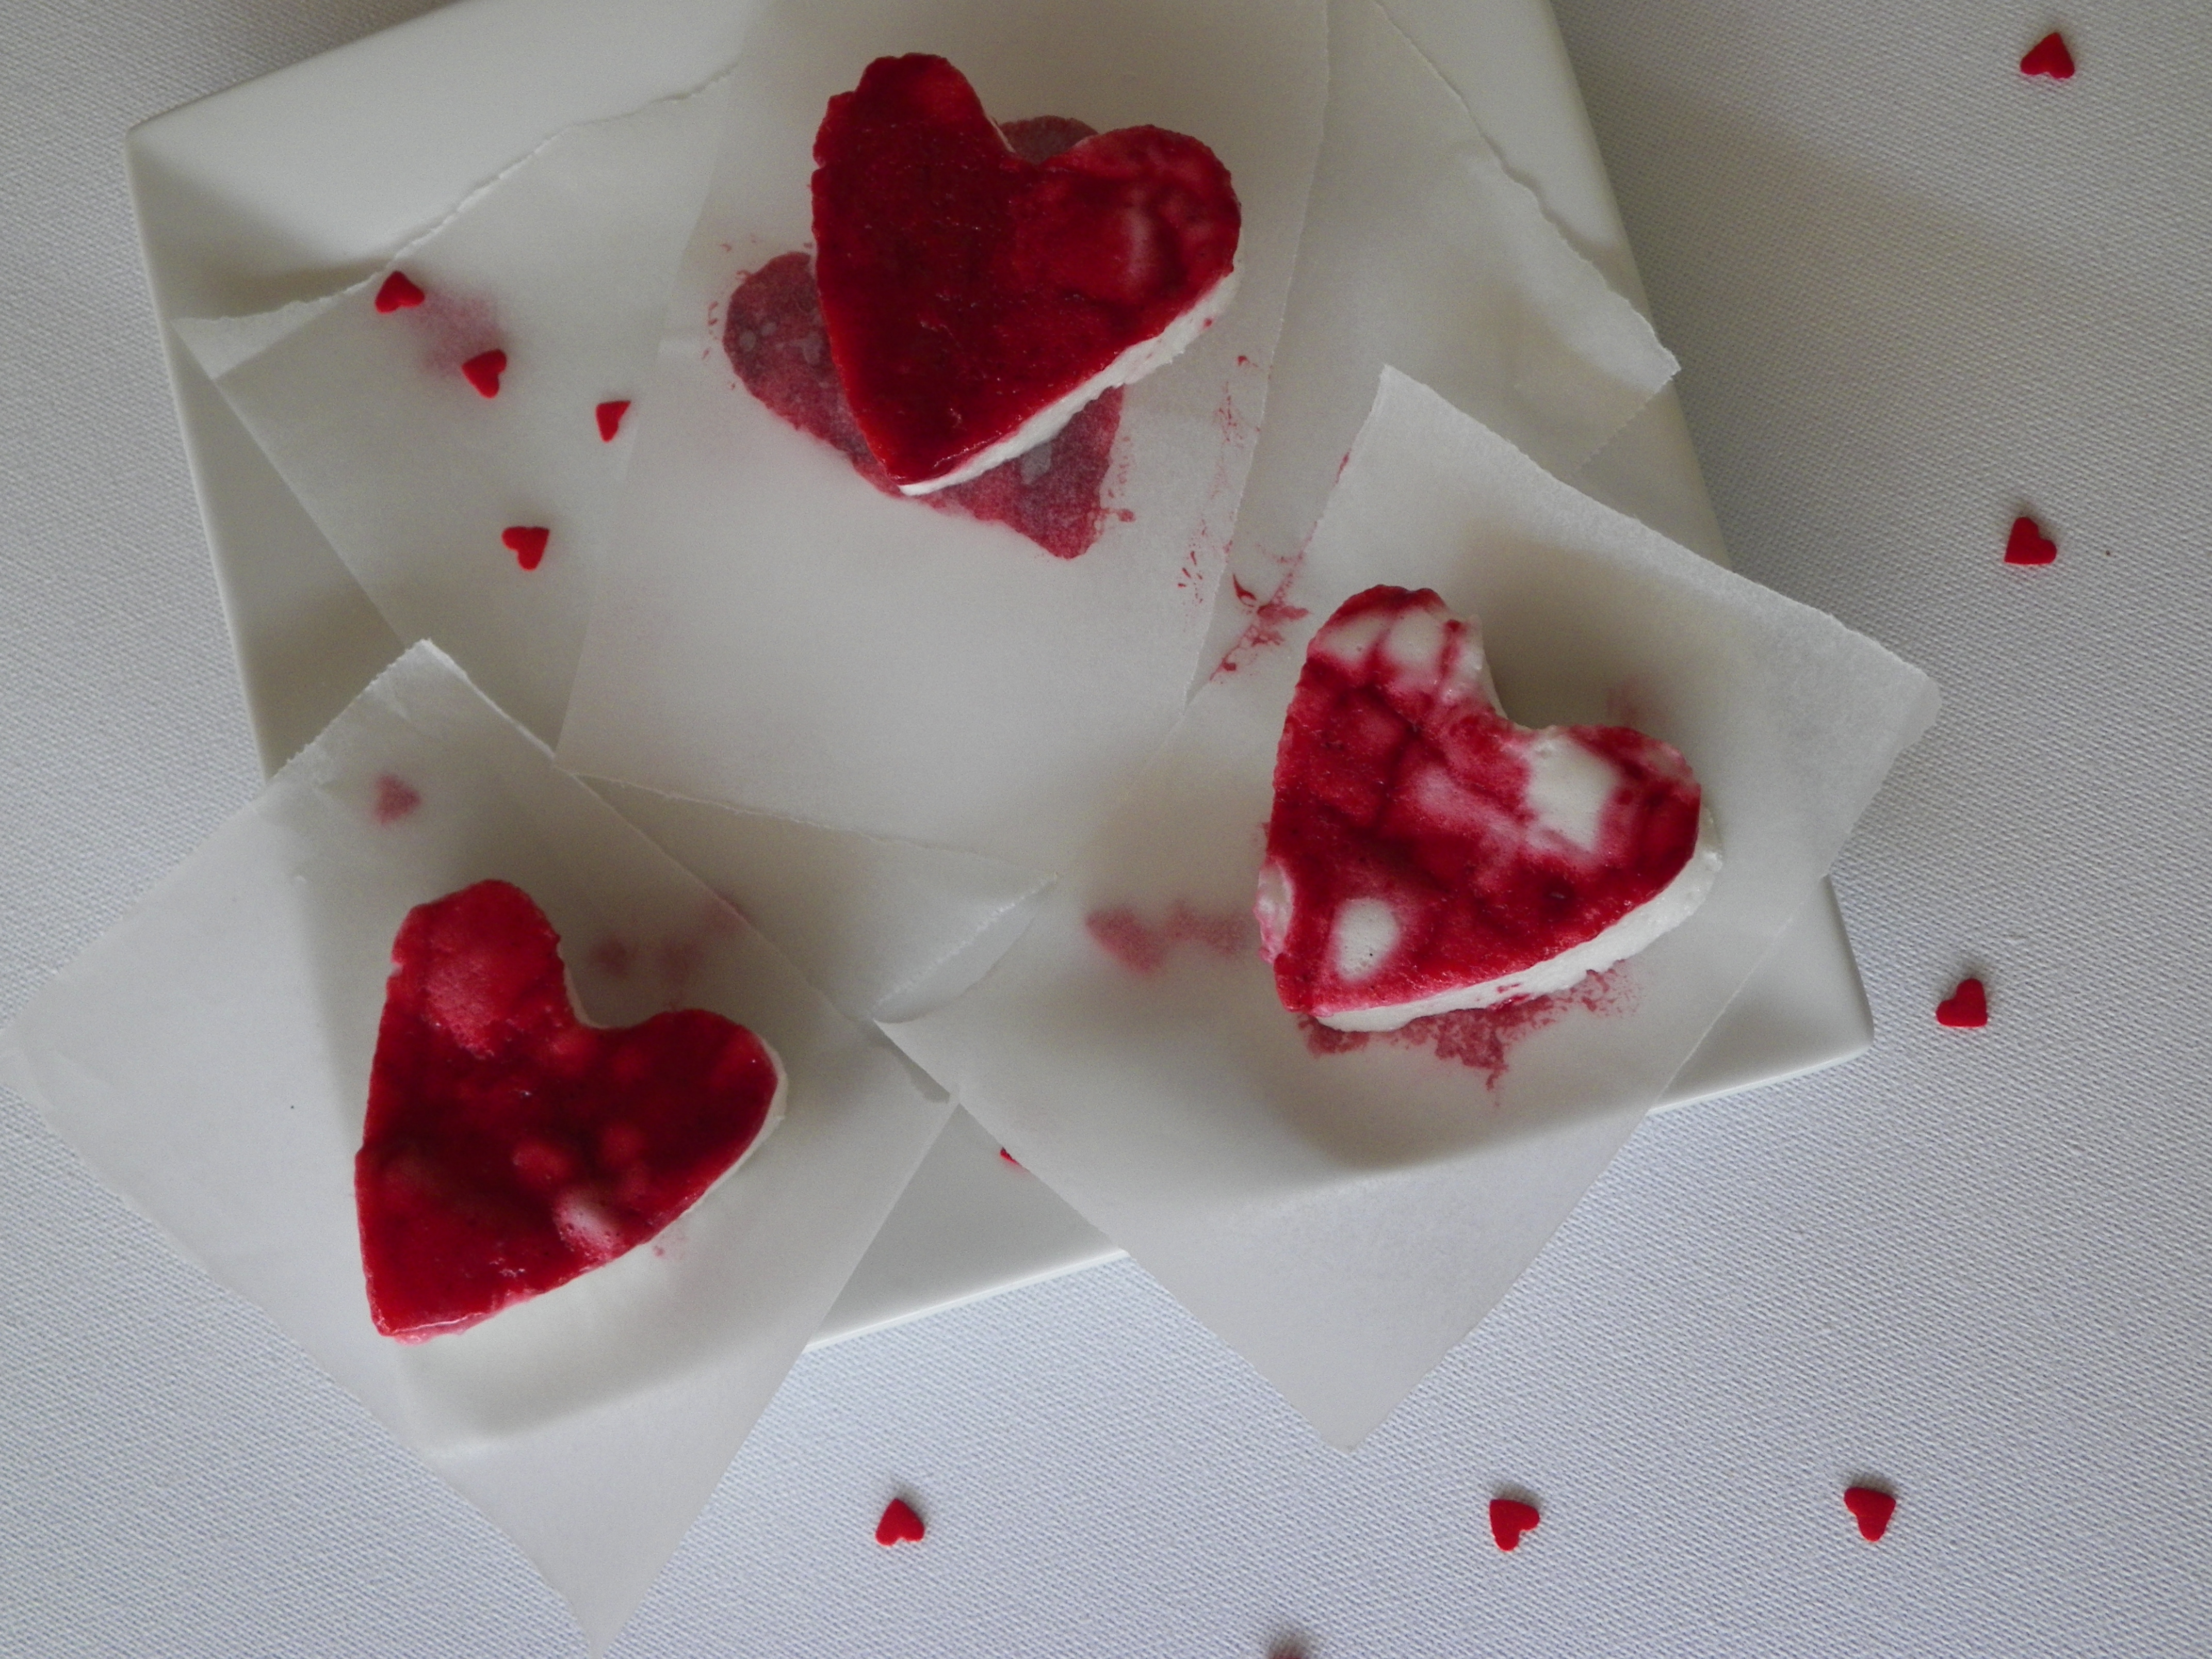
I loved the fresh hit of the pear in the midst of the creamy caramel, however I think it made the shells  bit soggy unfortunately. Next time, I would maybe try making my own pear jelly and have little cubes in the middle. They were delicious nonetheless. The green Christmas trees on the shells were incidental actually. I just thought it would be nice to add a little green touch to represent the pear, but I’m happy with the result!

 000_0006

Macarons:

This recipe is Adriano Zumbo’s, and was published a couple of years ago in the Herald Sun. You will definitely need kitchen scales to make macarons.

  • 135g almond meal
  • 135g icing sugar
  • 125g caster sugar
  • 45g egg whites
  • 50g egg whites
  • 40g water
  • Colouring gel, green

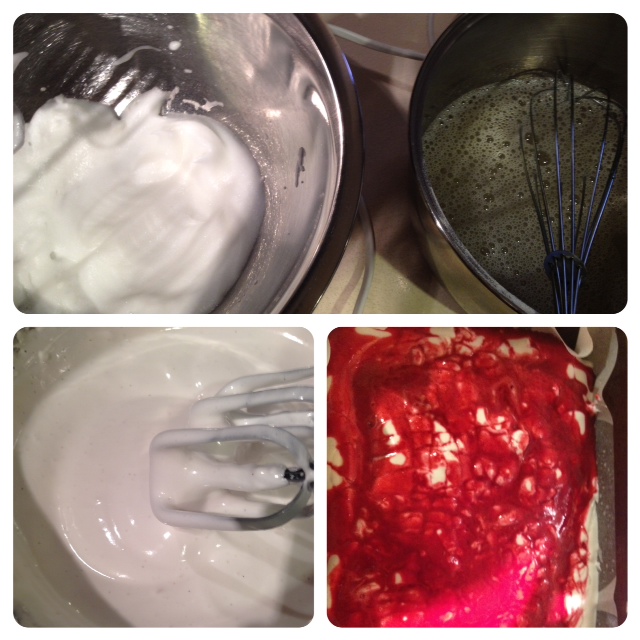
Spray four oven trays with cooking oil spray around the edges, and line with baking paper and set aside. Place almond meal and icing sugar in a large bowl, and sift together 3 times. Set aside, along with the 45g egg whites. Put 50g egg whites in a separate bowl. Heat caster sugar and water in a small saucepan, over a low-medium heat, until the sugar completely dissolves (if it slightly burns my tongue, it’s done!). If you do not want to burn your tongue, Zumbo suggests investing in a candy thermometer and heating the syrup until it reaches 118 degrees C (244 degrees F). If the syrup becomes thick and powdery in appearance, you will need to start again. This is because the sugar has been heated too much, too quickly, and instead of dissolving, it has cooked.

Begin beating the 50g egg whites with one hand, and with the other, stream the hot sugar syrup down the side of the bowl to create an italian meringue. Beat until stiff peaks form, the meringue should be thick and very glossy. If you want to add flavouring/colouring, now’s your moment. So add the colouring now. Just lightly beat them into the meringue. Pour meringue into the almond meal, icing sugar and 45g egg whites mixture and mix roughly to combine. When combined, fold mixture together (one single stroke) until there are no air bubbles left. Make a spread across the top of the mixture, and it should disappear in about 20 seconds. Spoon mixture into a piping bag fitted with a round nozzle. (If you don’t have a piping bag set, most supermarkets sell plastic ones, they are Multix brand, in an orange box and contain 5 piping bags with a few different nozzles, plus they’re only about $3. You should be able to find them in the baking aisle). Dip a skewer into green colouring gel, and wipe up one side of the piping bag, creating a straight line. Lock the bag by spinning the top around 4 times. Pipe 3-4cm rounds on the oven trays prepared earlier. Tap the bottom of the trays on the kitchen bench and let them sit for about half an hour, or until mixture is dry to the touch. Meanwhile, preheat the oven to 145c (135c fan forced).

Place in oven and bake for 16-20 minutes. Check macarons at 16 minutes, and to test if they are cooked, pull a macaron off the baking paper. If it is stuck, keep cooking and checking regularly. Cool on trays for 5 minutes, then peel off and place on a wire rack. The mixture should make about 12 -15 large macarons, and about 25 smaller macarons. Macarons keep really well (about 5 days in the fridge) and some say that the longer they are refrigerated, the more the flavour is likely to develop. Macarons taste best when they are stored in the fridge, then brought down to room temperature to eat.

 PicFrame

Caramel Maison: (from p. 242 of Adriano Zumbo’s book, Zumbo):

•220g pouring (whipping) cream (35% fat)
•1 vanilla bean, split and seeds scraped (I used 1 tsp vanilla bean paste)
•120g water (this is just under 1 cup)
•300g caster (white) sugar
•60g liquid glucose (available at most supermarkets)

Place the cream and vanilla in a small saucepan over a medium heat and bring to the boil. Then, remove from the heat, and remove the vanilla bean if you are using one. In the meantime, place the water, sugar and glucose in a larger saucepan over a low-medium heat and cook until the glucose and sugar are fully dissolved, stirring occasionally. Zumbo’s says to use a clean pastry brush dipped in water to clean the sides of the saucepan in order to avoid crystalisation, however you can also just place the saucepan in really hot water with suds just after use and the sugar will melt off really easily. Increase the heat to medium, and cook the sugar mixture until it reaches a dark amber colour. This does take quite a while, and I was getting worried that mine would not work, but persistence is key here, it will eventually darken after 6-7 minutes. Very carefully stir the cream mixture into the sugar mixture slowly – be very careful because it spits and releases lot of heat. I found the best way to do this was with a spoon with a very long handle, as you want to keep your face as far away from the saucepan whilst it is spitting. If you don’t have a spoon with a super long handle, just add the cream really slowly and try to stir as best you can! Keep stirring as much as you can until the caramel settles down, then stir until completely smooth. Transfer to a bowl, let it cool to room temperature, cover with plastic wrap and place in the fridge.

Caramel Buttercream: (this recipe is on page 42 of Zumbo’s cookbook)

•150g unsalted butter, chopped and softened
•300g caramel maison
•4.5g sea salt flakes

Place the butter in a bowl, and beat until light and fluffy. Warm the caramel maison in the microwave until it reaches a pouring consistency (mine needed 1 min, 20 seconds on high as it was in the fridge overnight), however, just warm it in stages to prevent burning the caramel. With the beater running slowly, add the caramel maison to the butter and continue mixing until thick. Once I had added about half of my caramel, I got a bit worried because it looked like it was curdling, however as I kept adding the caramel, it began to thicken up. So don’t freak out until you have added all of the caramel to the butter. Once you have added all of the caramel, fold in the salt. I did not measure my salt, as I used a shaker. So if you too are using a shaker, just salt to taste.

 000_0015

Poached Pears: (recipe adapted from Taste.com.au)

  •         2 packham pears
  •        3 cups cold water
  •        1 cup caster (white) sugar
  •         ½ teaspoon vanilla bean paste or ½ vanilla bean with seeds scraped
  •        1 cinnamon stick
  •        Lemon juice

Peel pears from the stem down, and coat in lemon juice. Place all ingredients in a medium sized saucepan and simmer over a medium heat for around 20 minutes, or until pear is soft. You can test the pear with a fork, however do not make too many holes as they can become waterlogged. Once pear is cooked through, place in fridge for approximately 30 minutes to cool completely. Once cooled, cut into small bite sized pieces.

Assembly:

Pair up likely macaron shells. Scoop caramel into a piping bag fitted with a round nozzle. Pipe a small circle on one shell, place a piece of pear on the caramel, and pipe another small circle over the top of the pear. Sandwich together, and place in an airtight container in the fridge. When ready to eat, bring macarons down to room temperature.

000_0012

Easter Egg Nest Chocolate Cupcakes

This week has been a great one for whiskitforabiscuit. With Easter arriving, I have had a lot of new visitors to the blog, which is so nice to see. I have also had a number of people telling me that they have tried my recipes, such as the Chai and White Chocolate Hot Cross Buns, and how they have succeeded and tasted awesome! So, thanks so much guys, I appreciate it more than you could know and I absolutely love hearing everyones stories and feedback 🙂 It’s also really nice to know that people are actually reading this and it’s not just me writing to my sad and lonely self, lol. Now, to the cupcakes.

IG

I had seen a few different takes on these egg nest cupcakes, on various sites such as Pinterest, and they just all looked so fantastic and fun! I had to give them a go, and use one of my all-time favourite childhood treats, the chocolate spider. No words can ever describe how much I adore the chocolate spider, seriously, they are just that delish. I really could go on forever and ever about these morsels of goodness, and it’s so great that they only have 3 ingredients! Life = complete.

000_0010

I have used this amazing chocolate cupcake recipe countless times, including in My First Order, and it’s never let me down! You can find the recipe here.
Makingcakes
Buttercream:
  • 350g butter, chopped and softened
  • 2 1/3 – 3 cups icing sugar mixture
  • 1 tsp vanilla bean paste or extract
  • Wilton’s colourng gel, green
Beat butter until pale and creamy, about 4-5 minutes. Gradually add in the icing sugar mixture until well combined. Beat in vanilla and green colouring until desired colour is achieved. Spoon buttercream into a piping bag with a large round nozzle. Pipe rounds on the cupcakes.
000_0014
Chocolate Spider Egg Nests:
  • 1 packet Chang’s noodles (available at most Australian supermarkets. I am sure there would be an equivalent in the US and UK, however I do not know what the brand is)
  • 2 tbs crunchy peanut butter
  • 200g chocolate, milk or dark
  • 1 packet M&M Crunchy speckled eggs, or Cadbury Mini Eggs

Makingspiders

Place chocolate and peanut butter in a microwavable bowl, and microwave for 60 seconds on high. Stir with a metal spoon, even if it does not look melted. If it needs more time, microwave in 10 second increments until completely melted. Don’t do what I did and keep microwaving because you can still see lumps,and then realise it’s just the nuts from the crunchy peanut butter. Idiot. Pour contents of noodles packet into the chocolate and peanut butter mixture until well coated. With two teaspoons, make small ‘nests’, on oven trays with baking paper. Place three speckled eggs on each nests straight away, as you do not want the chocolate to set, otherwise the eggs will not stay on the nests. Place in fridge. You can make these a few days in advance, just pop them in an airtight container when they have set.
Place egg nest onto the green buttercream on the cupcake. Done!
 000_0005
I hope everybody has a fantastic Easter with their loved ones! I am so lucky I have a little sister who gets so excited about the Easter bunny and the annual hunt we have on Easter Sunday morning, it makes it so much more fun with little kids around!
000_0003
Don’t forget to follow me on Instagram – GemmaAsh! Until next time…X

Chai & White Chocolate Hot Cross Buns with Cranberry Butter

Wow. It’s so hard to believe that Easter is upon us already! Even though I have been eating the occasional hot cross bun in secret since January 1st when they are available at the supermarket, I guess the week before Easter is finally the socially acceptable time to eat one, two or twenty hot cross buns. So, here we are. And they’re not too bad even if I say so myself. I made a couple of batches of original and choc-chip buns a few years back and I promised myself I would try to make them each year for Easter as they were just so damn good! Although, last year, I substituted the real things for something almost as good, Hot Cross Macs. This year, I wanted to try making the buns again, with a bit of a different flavour 🙂
IG
I found some really good chai tea from T2 in the cupboard, bursting with cardamom pods, cinnamon sticks and broken star anise. I knew then, I had to make my buns with this awesome chai. Mmm, and what to go with it? I didn’t want them to be too traditional, and since I was little, I have always been a loyal fan of the choc-chip variety (what kid hasn’t?!). White chocolate it was. I thought it would give the chai a bit of sweetness and provide the same great chunkiness as the choc-chip bun, and the white chocolate wouldn’t overpower the flavour of the chai like milk or dark chocolate would (I’m trying so hard not to sound like a wanker when I describe the flavour, lol).
000_0003
Chai and White Chocolate Hot Cross Buns (adapted from Sasko flour):
For the chai tea:
  • 2 x teabags, or T2 sachets or teaspoons of chai (if you are using sachets or teaspoons, you will need to strain before adding the honey, milk and vanilla)
  • 500 ml water
  • 1/2 tsp vanilla bean paste or extract
  • 30ml honey
  • 125ml milk
Place the tea in a saucepan, with the water. Simmer on a low heat until the water colours, and the flavours are prominent (about 8 mins). If you need to, strain the tea, and place back in the saucepan once strained. Stir in vanilla, honey and milk, and set aside to cool slightly.
MakingDough
For the dough:
  • 540g plain flour
  • 30g butter, at room temperature
  • 35g caster sugar
  • 1/2 tsp salt
  • 1 tsp cinnamon
  • 7g yeast
  • 1 egg, lightly beaten
  • 1 1/3 cups white chocolate chips
  • 100g plain flour
  • Water
Sift flour into a bowl, rub in the butter with your fingers, and stir in the cinnamon, salt and sugar. Measure out 280ml of the chai tea mixture, and lightly mix in the yeast. When it begins to foam (you only need a few bubbles, don’t freak out if it doesn’t look like a bubble bath – I have made this mistake before), add to the flour mixture, along with the lightly beaten egg. Mix with hands until a dough if formed. If the dough is too crumbly, add a tiny bit of water. Oil a large bowl, and place dough inside. Put a tea towel over the top of the bowl, and put in a warm place for about an hour, or until the dough has doubled in size. I put my dough in a sunroom and it was perfect. You could also put it beside a window which is getting some sunshine.
MakingDough1
Preheat the oven to 200c. Once the dough has doubled, remove from the bowl and knead with hands on a clean surface until soft and springy. Add white chocolate in 2 batches and knead well. Shape the dough into 12 even balls, and place in an oiled or greased tray. Leave in a warm place to double in size once again, for about 30-45 minutes. Use the 100g of flour and some water to make a paste. Keep adding small amounts of water until desired consistency is reached. Remember you can put more water in, but you can’t take it out! You want the paste to be rough but not stodgy. Place flour paste in a piping bag fitted with a medium sized round nozzle (the ones you get with the Multix ones are perfect). Pipe crosses on the buns, and place in preheated oven for 12-15 minutes. Remove from oven and let cool in tray.
Bunsintheoven
To make the glaze, use 100ml of chai tea mixture and 1/2 cup caster sugar, and place in a saucepan. Simmer on a medium heat until it comes to the boil. Remove from heat, and brush buns with a pastry brush. I needed 2 coats on mine for them to be glossy enough.
000_0006
Cranberry Butter:
  • 1/3 cup dried cranberries (craisins), roughly chopped
  • 1/2 cup butter
  • 1/2 tsp cinnamon
Place all ingredients in a small bowl and stir until combined. Spread on warm hot cross buns.
000_0008
Hot cross buns are heaps of fun to make. They are not difficult, but you definitely need to read the recipe beforehand. The only other thing is, you do need a bit of time, but I promise they are worth it! Don’t feel confined to making buns with the original flavours if you don’t wish to, mix it up with different fruits such as berries and citrus, and sweets such as different types of chocolates, caramel, nutella or jam.
000_0002
Enjoy! X

Raspberry Marshmallow Lovehearts + Fenix

I must admit, I’m not really a huge fan of Valentine’s Day. The worst part is everything becomes so expensive just for one day! Anyhow, I took it as an excuse to make something yummy and heart-shaped, and so here are my first ever homemade marshmallows. The raspberry on top gave them quite a tangy hit, as they were so, so sweet on their own. I am trying really hard to avoid sugar during the week at the moment – has anyone else ever tried to do this? It’s really difficult, as it is hidden in the most random things, like gluten free twisties :/ Anyway, the hearts were the perfect size – if they were any bigger they just would have been too sickly for one person. I would suggest if you were to make homemade marshmallow, to use small cookie cutters or cut them in very small squares (hey, at least they go further!).

photo

I wanted to create more of a raspberry swirl, like Mowielicious, instead of a raspberry layer. I tipped too much of the raspberry mixture on top of the marshmallow, so when I used the skewer to create the swirl, it got a bit messy. Next time, I will either add it slowly and swirl, and use maybe half the sugar in the marshmallow, or make a proper raspberry layer to really give a balance between the sweet and the sour. Oooh, another idea could be making lemon curd and swirling it through the marshmallow. Or, using the lemon curd and the raspberry. Or maybe even orange and a chocolate layer to make Jaffa? Oh, the possibilities!
006
Raspberry Swirl/Layer: (recipe from Mowielicious)
 
  • 200g raspberries, fresh or frozen
  • 50g icing sugar (you could leave this out if you wanted to)
Place raspberries and sugar in a small saucepan, over a medium heat. Keep stirring until raspberries break down and become a syrup. Push mixture thought a sieve to get rid of the seeds. Discard the seeds, and set bowl aside to cool.
003
Homemade Marshmallow: (recipe from Raspberri Cupcakes)
 
  • 1 cup caster (white) sugar
  • 2 tsp liquid glucose (available in most supermarkets)
  • 1 tbs gelatin powder
  • 1 large egg white
  • 1/2 tsp vanilla bean paste
  • 1/4 cup icing sugar
  • 1/4 cup cornflour
Line a lamington style baking tray with olive oil spray and baking paper (the tray needs to be a couple of inches deep – my tray would have been about 20-30 cms long). Place caster sugar, 100ml cold water and glucose in a medium sized saucepan. Place on a low heat and stir until sugar has dissolved. In the meantime, place another 100ml of cold water and the gelatine in a small bowl to soften, and set aside. After you have done this, turn the heat up on the sugar syrup, and insert a sugar thermometer (I use my Dad’s milk one that he uses for coffee, but you can buy them from $2 shops and homeware’s stores also). When the syrup reaches 120c, which for me took about 40 seconds, add the gelatin mixture, and whisk until there are no lumps. Place an egg white in a clean mixing bowl and beat until soft peaks form. Very slowly add the hot sugar and gelatin mixture to the egg white and beat until thick and glossy (5-10 minutes). Pour marshmallow mixture into prepared tray and smooth with spatula until evenly spread. Spoon a little of the raspberry topping onto the marshmallow and swirl with a skewer, or pour all of the raspberry topping onto the marshmallow to make an even top layer. Leave marshmallow to set overnight at room temperature.
Image
Combine icing sugar and cornflour in a small bowl. If using a cookie cutter, dip in hot water then coat in sugar and cornflour mixture, and begin pressing shapes in the marshmallow. If using a knife, simply dip in hot water and cut squares. Once you have shapes and/or squares, roll them in the sugar and cornflour mixture so they are no longer super sticky. It was a bit difficult to this with the raspberry topping as I didn’t want to coat the bright red. Instead I just made sure the bottom and sides had been coated. Serve immediately, or store in refrigerator in an airtight container.
013
I also wanted to share some photos from a restaurant my boyfriend and I went to recently. Fenix is owned by Gary Mehigan, who is a judge on Masterchef Australia, and I must say, it was pretty awesome. I had heard mixed reviews about Fenix, but they had a fantastic deal going throughout January, so we decided to give it a go, and lucky we did! We shared three entrees between us, which, in hindsight, was probably a bit too much. My boyfriend had crab crostini with aioli, avocado mousse and smoked tomato, and I had the braised pork belly with scallops, and we also shared gruyere and sweetcorn cigars. I really liked all three of the entree’s, but the pork belly was absolutely fantastic! I actually dreamt about the crackling that night 😛
photo(1)

For our mains, I had the sticky beef short ribs with mustard mash and watercress, and it was sooooo good. The meat just fell apart and I could have happily drank the gravy! My other half had a whole snapper which was also fairly delish. By this time, I was really struggling! For dessert, I had the coconut creme caramel with roasted pineapple and pina colada sorbet. It was really yummy, but just too big! The best part was the pina colada sorbet because it was so cold and refreshing after such a big meal! The boy had a chocolate fondant, which I was a bit jealous of- it was amazing. I will definitely be having that one when I go back! I believe they have a similar deal for February as well, so head to their website to check it out if you’re in Melbourne.

photo(2)

Follow me on Instagram – GemmaAsh 🙂 Happy Valentine’s Day to you all!