Coming Up Carrot Cupcakes with Chocolate Cinnamon Soil

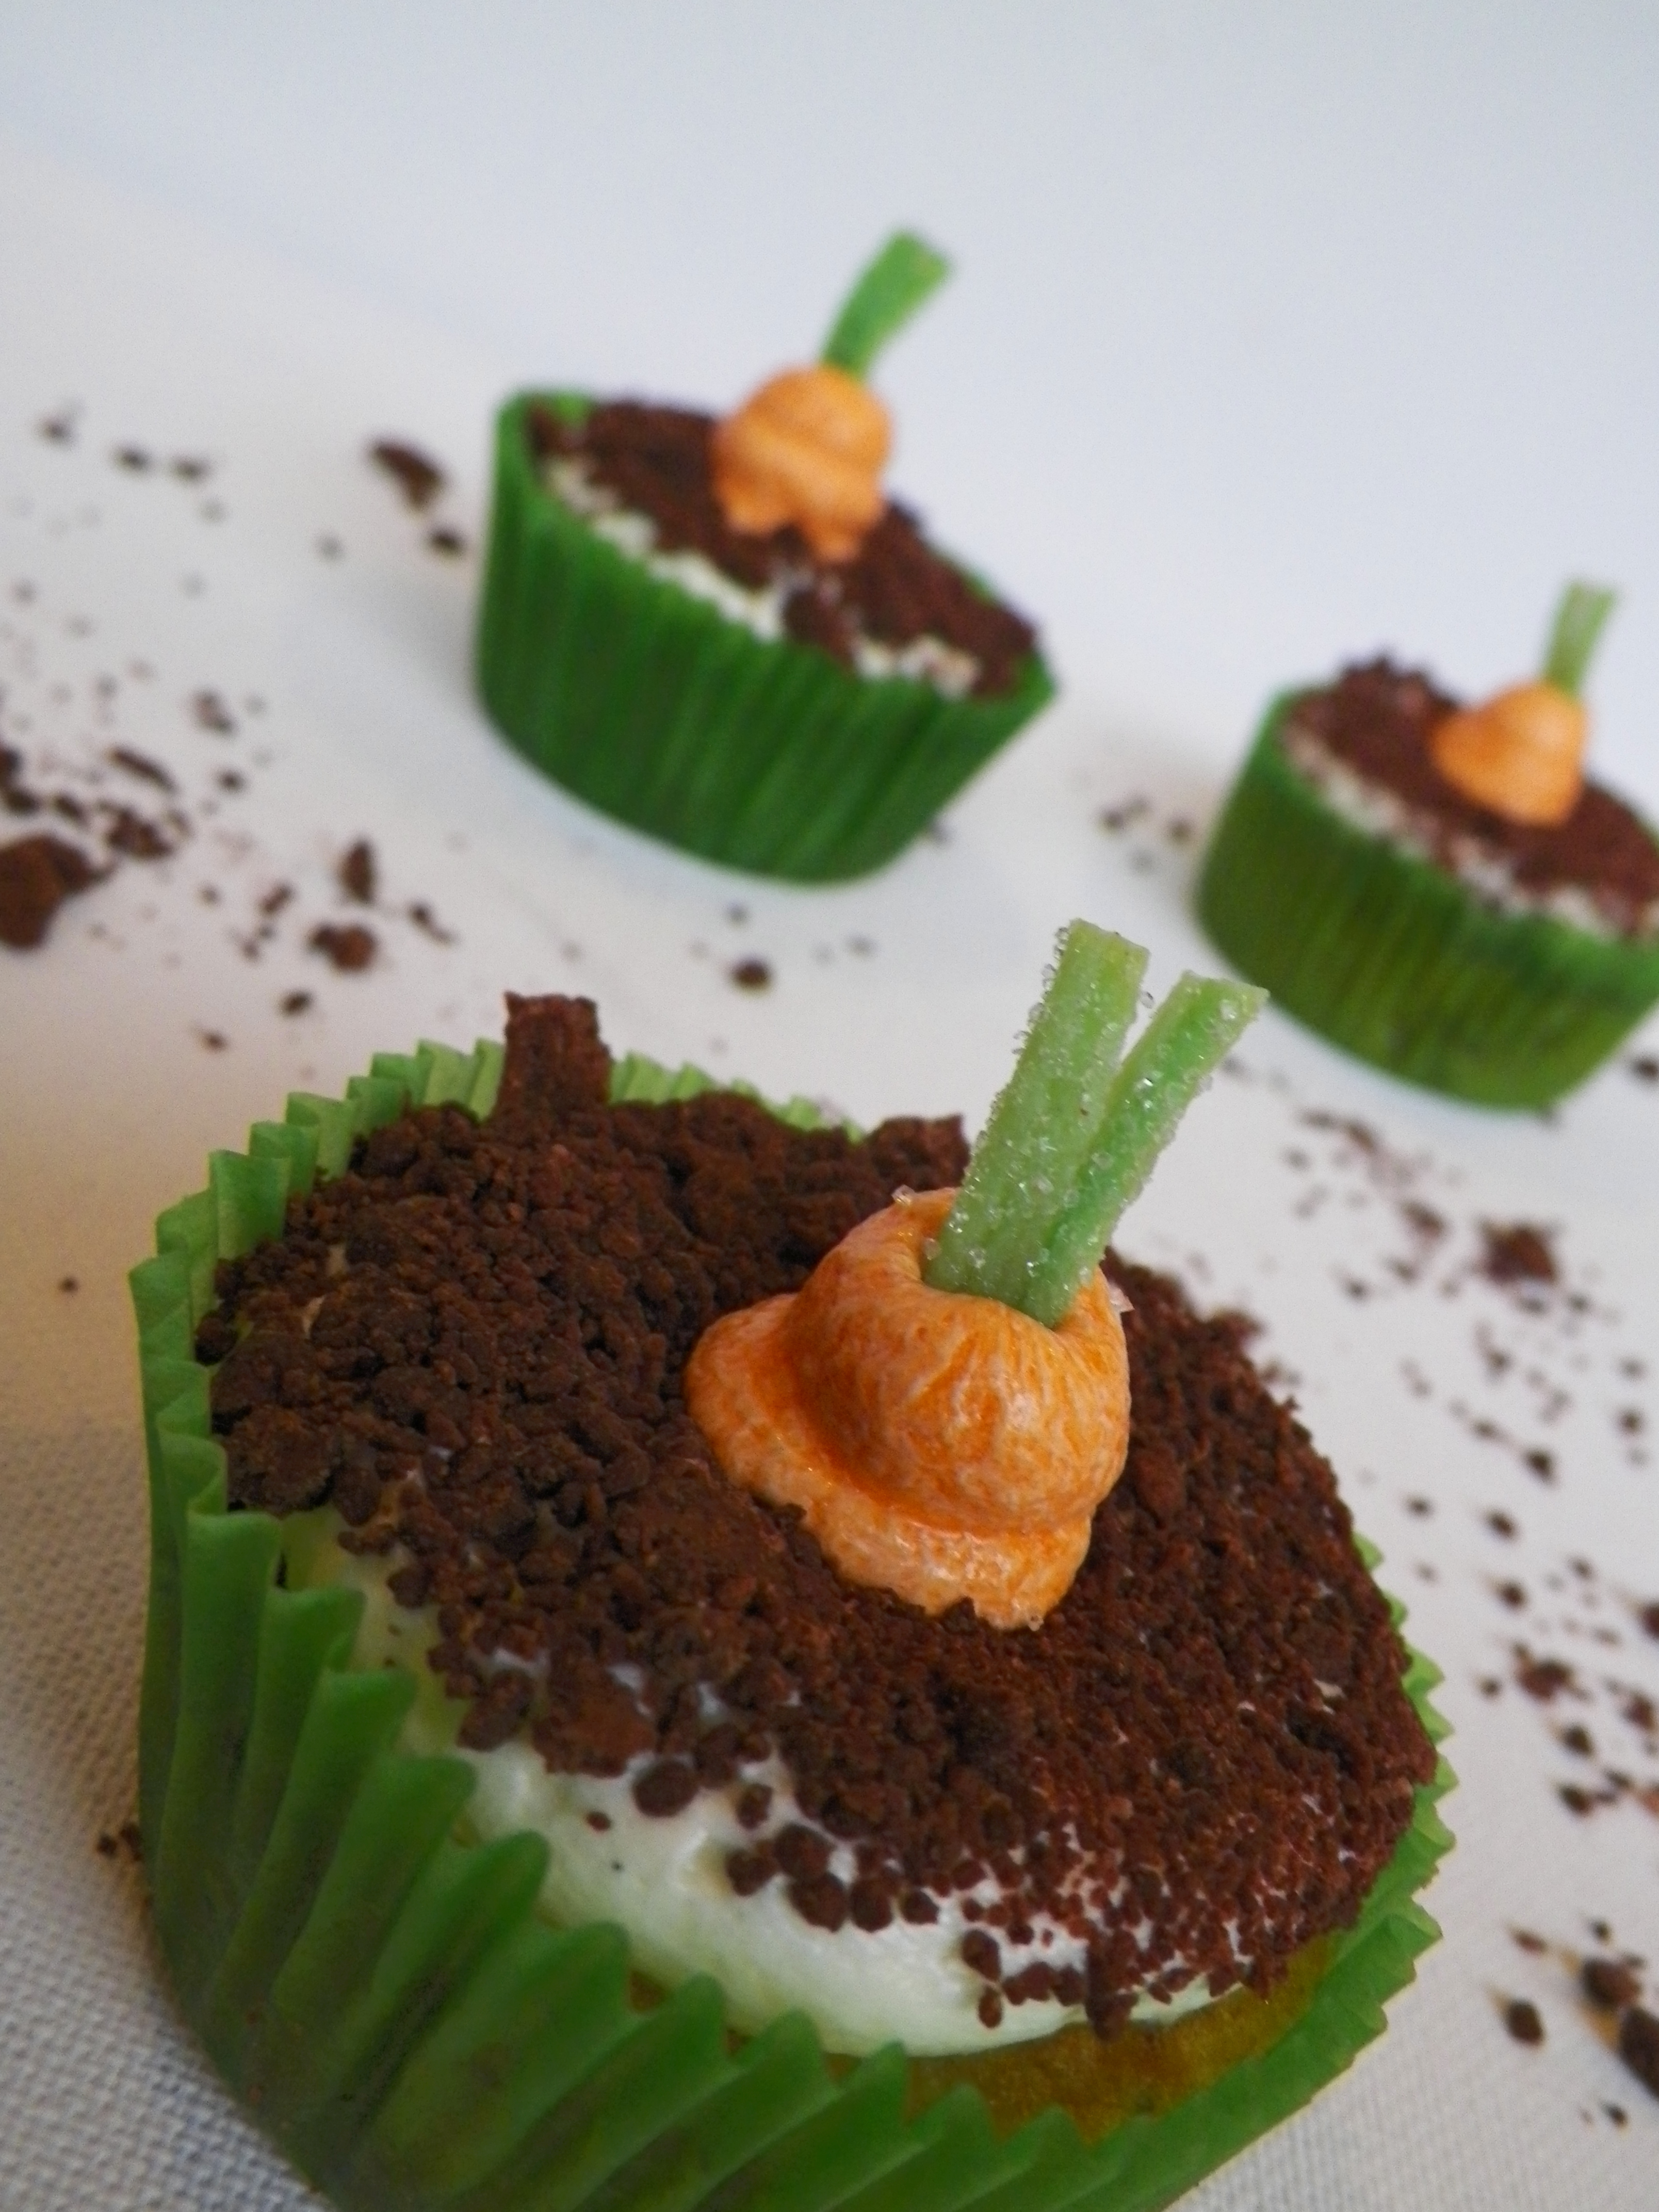
How is Easter almost here already?! It scares me how fast time flies these days, but hey, any excuse to bake, really. I found the idea for these awesome coming up carrot cupcakes on the ever-inspiring Pinterest. Unfortunately, I only saw them once and couldn’t find them again, so I don’t know whose idea they originally were, but they are pretty awesome.

 010

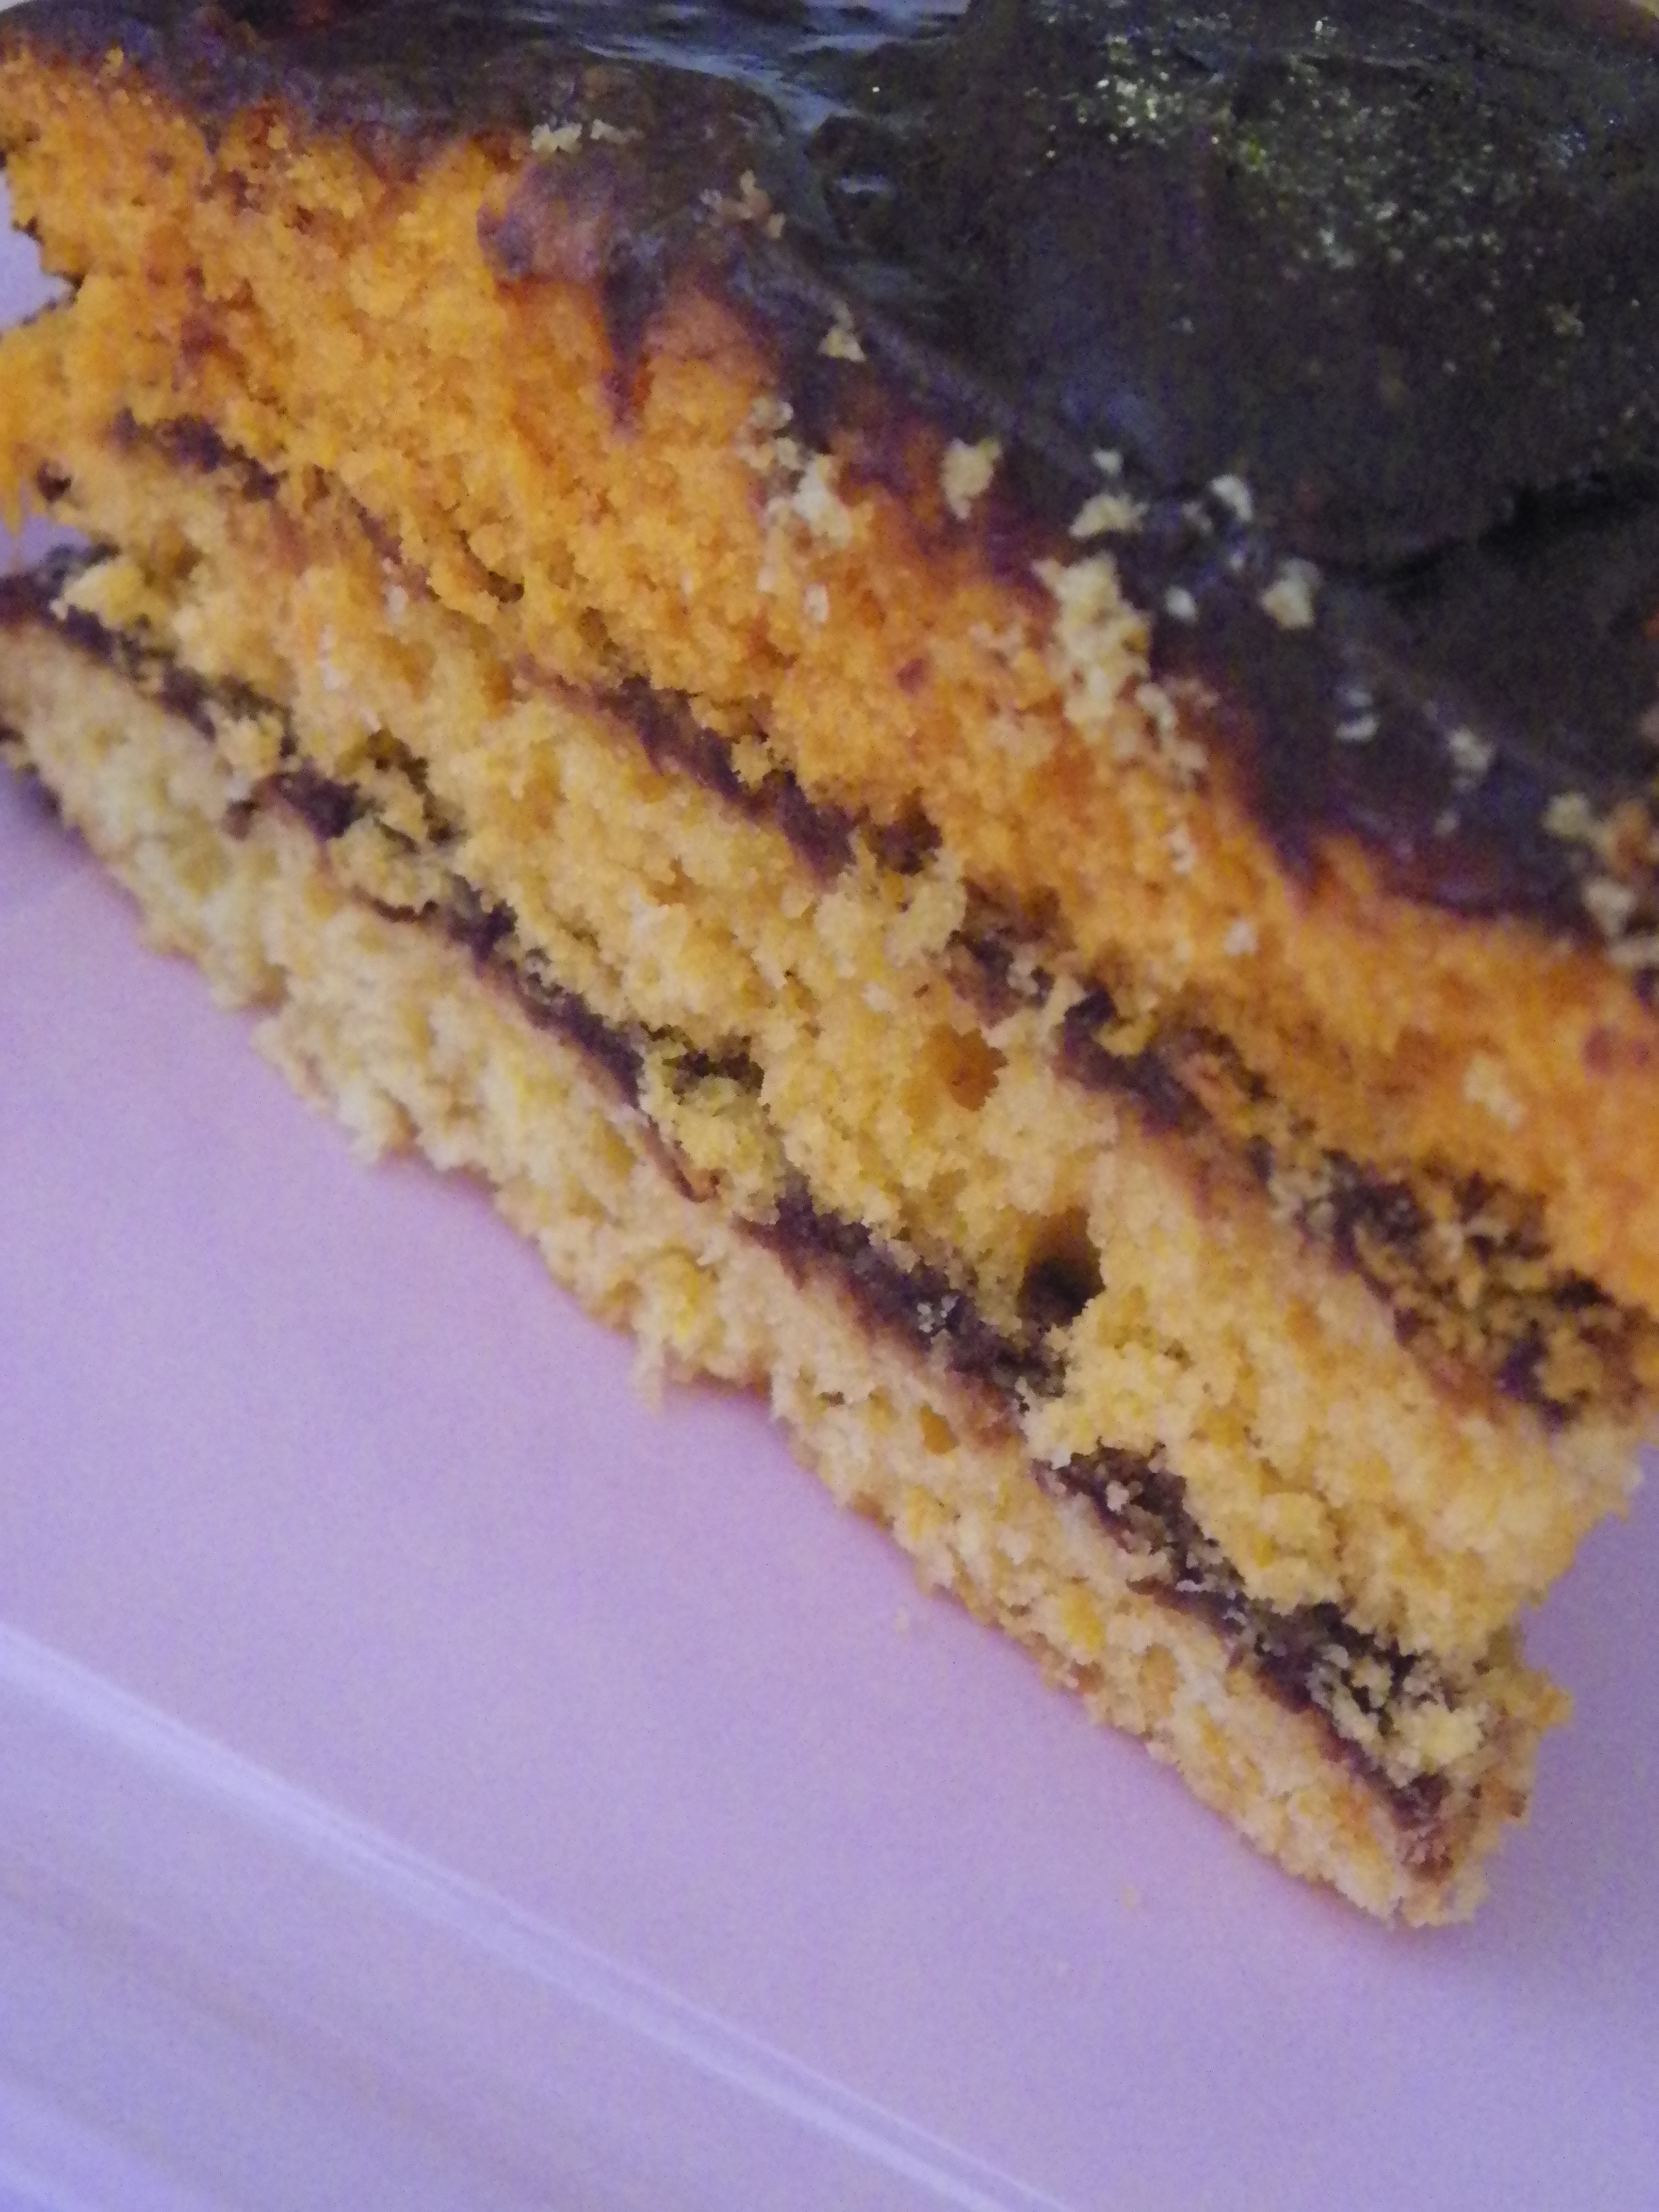
I first thought of crushing up dark chocolate biscuits for the soil, but I found this recipe to make your own by making a sugar syrup and adding dark chocolate. I was a little sceptical, but it worked really well, tasted great and added a nice crunchy texture to the cake. This was the first time I had ever make carrot cake, and I can’t really say I am a huge fan, but the cream cheese icing makes it all worthwhile!

 005

Carrot Cupcakes: (from Taste.com)

Makes approximately 20 cupcakes

  •  160g butter, softened, not melted
  • 2/3 cups firmly packed brown sugar
  • 1 tsp ground nutmeg
  • 2 eggs
  • 1 cup self-raising flour
  • 1 1/4 cups buttermilk
  • 1/2 cup plain (all purpose) flour
  • 1 cup grated carrot (I used 2 medium sized carrots)
  • 75g crushed pecans (original recipe calls for walnuts, but I am allergic, and I like pecans better anyway)

Preheat oven to 180c, and line cupcake tins. Beat the butter, sugar and nutmeg until pale and creamy. Add eggs, one at a time until well combined. Stir in self-raising flour until well combined, and then stir in the buttermilk until well combined, and then the plain flour until well combined. Stir in the carrot and the nuts. Spoon batter into cupcake cases, and bake for approximately 25 minutes, or until a skewer is inserted, and comes out clean. Leave in tins to cool for 5 minutes, and then turn out onto wire rack.

Chocolate Soil:

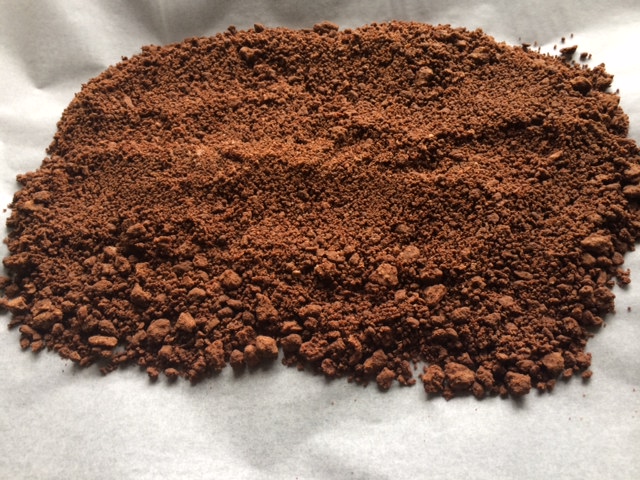
I really love this recipe. It’s so clever – I never even thought of this combination actually working. The recipe is from The Lone Baker, and I would really recommend you try it, especially if you are familiar with making sugar syrups. Chocolate soil is so versatile, and could be used for a variety of novelty cakes and desserts.

  • 100g caster (white) sugar
  • 75g 70% dark chocolate, chopped (ensure you use dark chocolate, because you need that little bit of bitterness when combined with all that sugar!)
  • – 1 tsp ground cinnamon

Line an oven tray with non-stick baking paper. Place sugar with 2 tbs cold water in a small-medium saucepan, and heat on low-medium until the sugar dissolves, and starts to go slightly yellow around the edges – this can take a while, it took me about  8 minutes to get to this point. Once the sugar begins to go yellow, take it straight off the heat and quickly whisk in the chocolate and cinnamon with a balloon whisk. The consistency of soil will appear very quickly, and some of the mixture will stick to the sides of the pan. You can just scrape this off with a butter knife. Pour soil out onto prepared oven tray.

Soil

Cream Cheese Icing: (see Parisian Red Velvet Cupcakes)

  • 225g butter, chopped and softened, not melted
  • 340g cream cheese, slightly softened
  • 1 tsp vanilla extract/paste
  • 2 cups icing (confectioner’s) sugar
  • Orange colouring gel/liquid

Beat butter, cream cheese and vanilla together until pale and creamy, approximately 3 minutes. Gradually add the icing sugar. I use 2 cups, as I think that is sweet enough, but you can add more or less if you want to. Place 5 tablespoons of icing in a separate bowl, and colour with orange colouring gel/liquid.

004

Assembly:

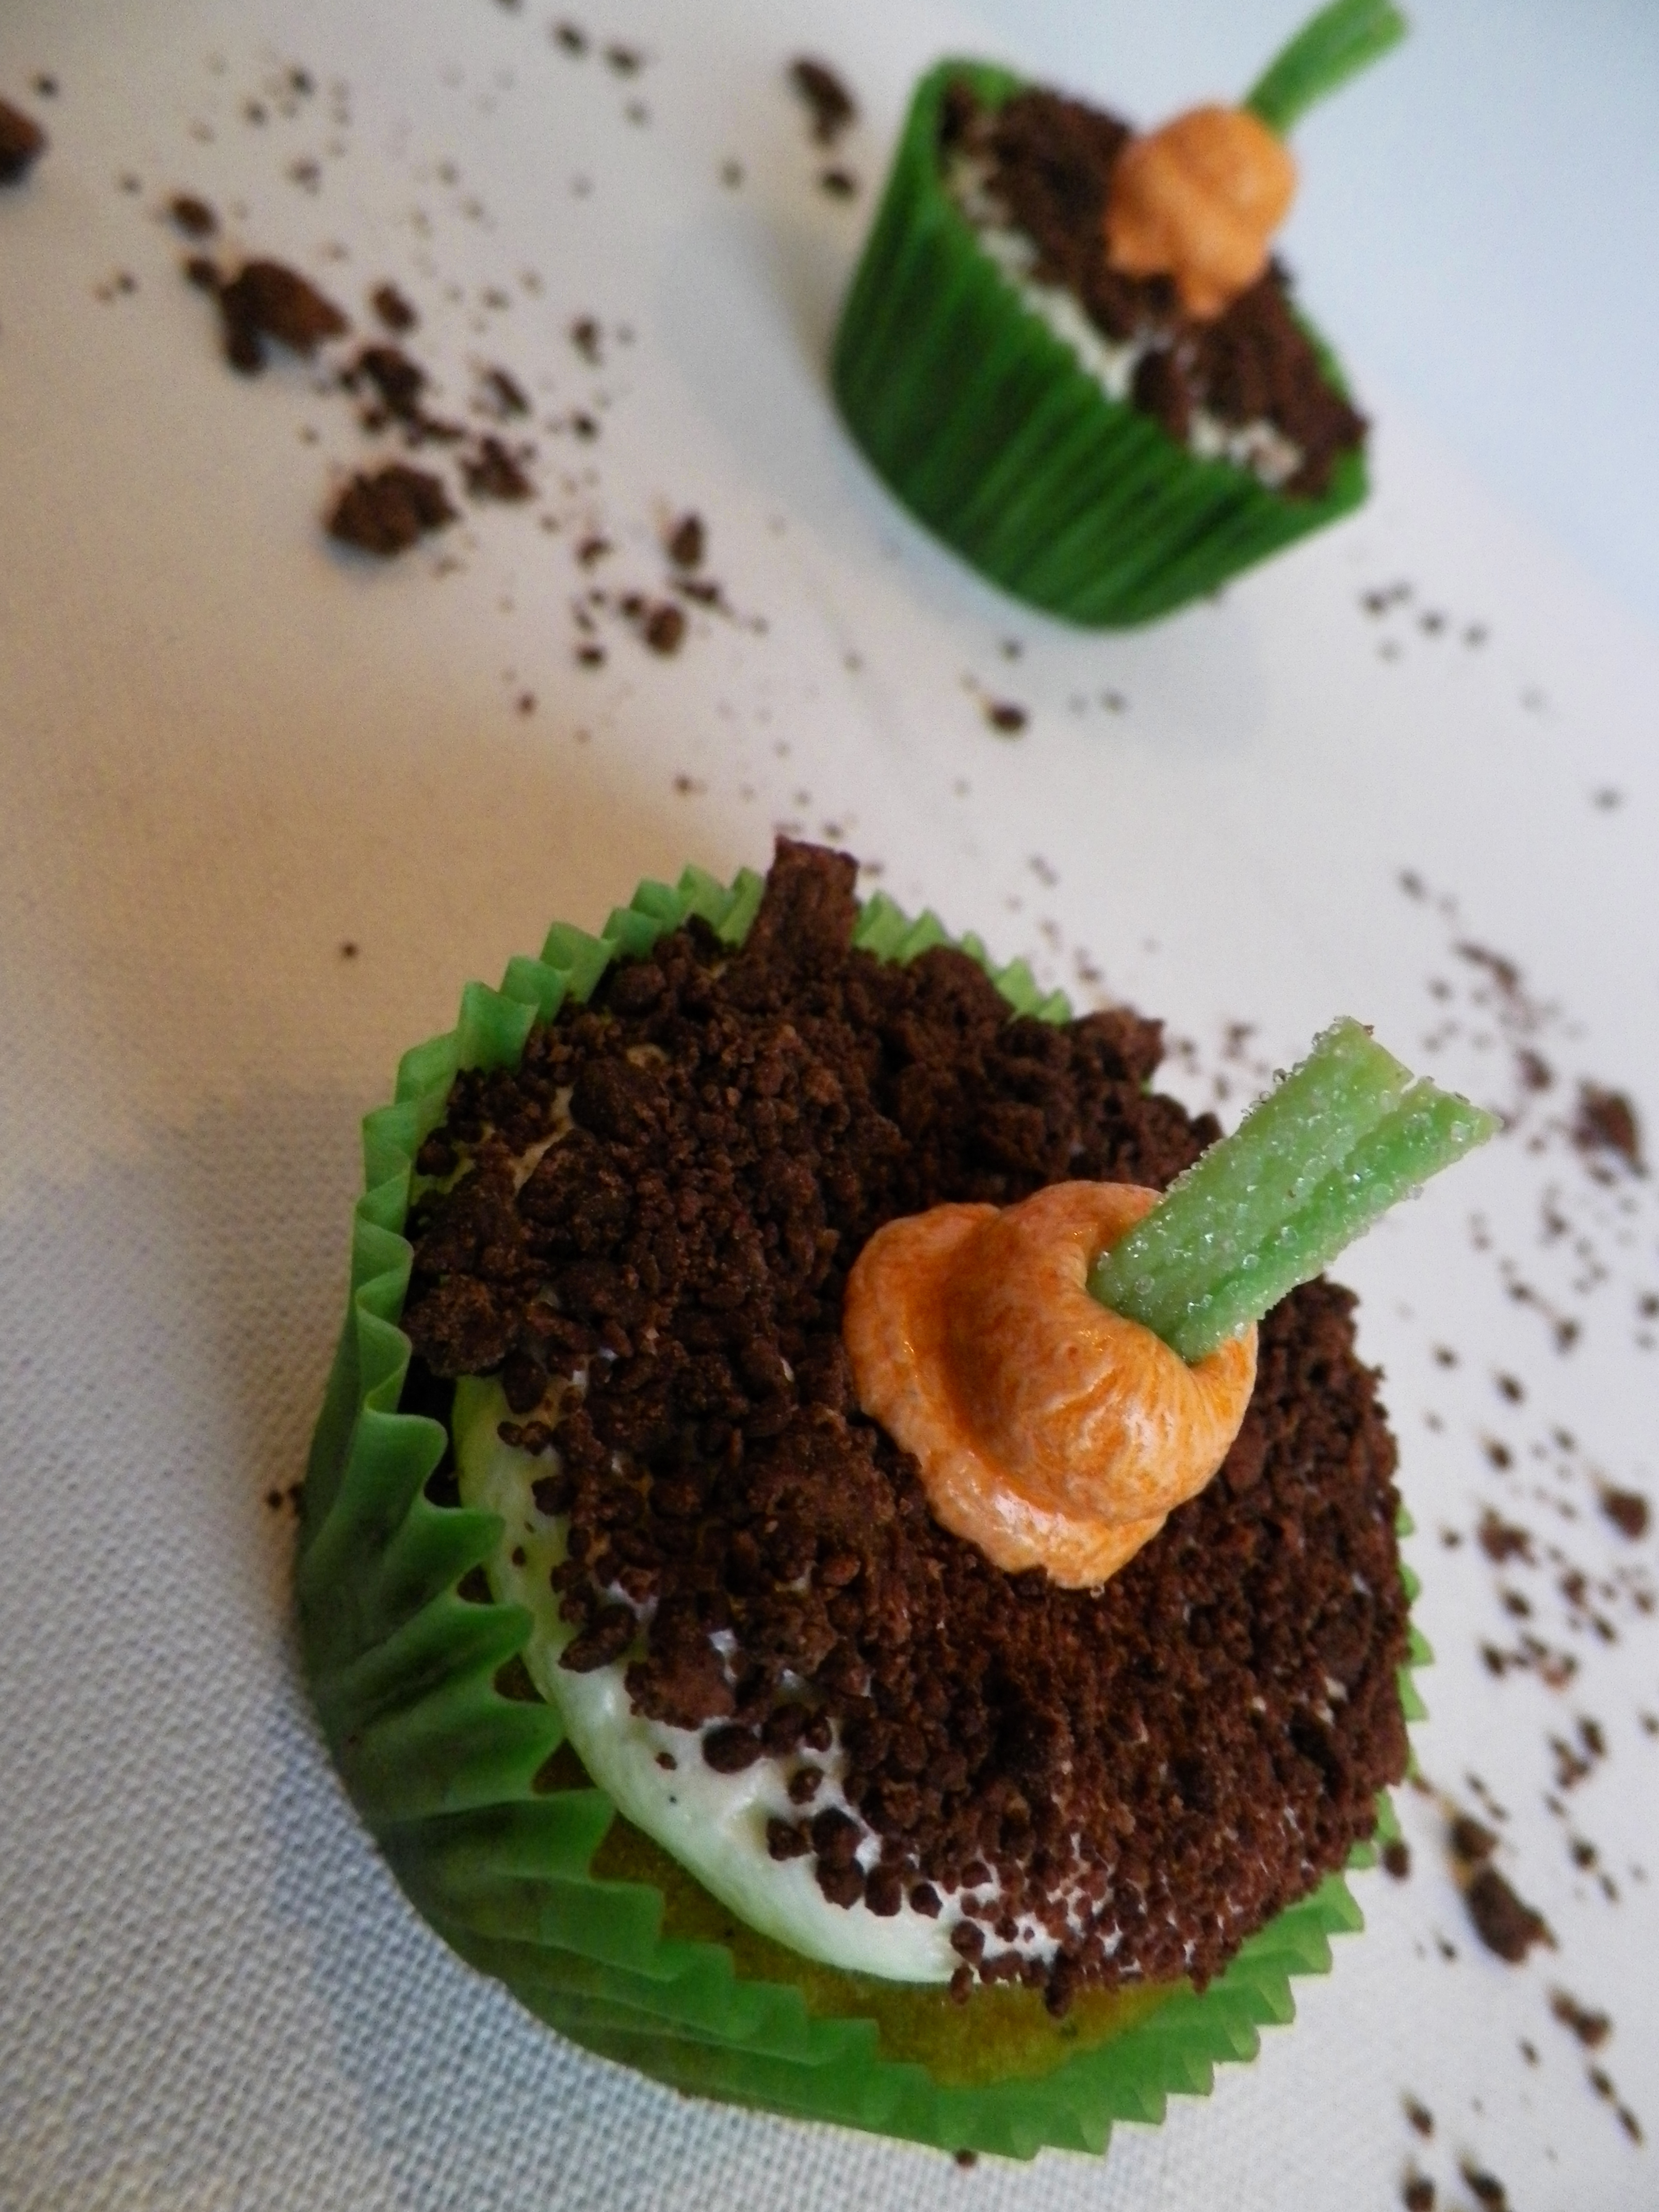
With a small sharp knife, carefully carve out a small circle in the top of the cupcakes, leaving a hole to pipe in the carrots. Place the icing in a piping bag fitted with a wide round nozzle, and pipe circles around the hole made in the cupcake. Dip iced cake in the chocolate soil. You can add more soil to the cupcake with your hands if dipping it doesn’t cover the icing enough. Once all the cupcakes have soil on them, place the orange icing in a piping bag fitted with a small round nozzle. Pipe ‘carrots’ into the holes in the cupcakes, piping up so that the icing is approximately 1-2cm above the top of the cupcake. For the tops of the carrots, I used the green part of a sour strap, cutting them with scissors, with an incision of the middle of the strap. Place it in the carrot, far enough that it will not fall over.

007

You can find my previous Easter posts here. Happy Baking!


Advertisement

Hazelnut Jaffa Melting Moments

I made these little gems for the Australia’s Biggest Morning Tea which was held at work to raise money for the Cancer Council (for those who are not aware!). I just didn’t have the time, or the energy to make macarons this week, but I must admit I was pretty happy with how these melting moments, aka Yoyo’s, turned out. Melting moments were one of my favourite biscuits as a child, only second to the humble Monte Carlo. I thought I would put a bit of a spin on the traditional version, and they went down quite well with my colleagues 🙂 Well enough for one of them to order some for the weekend! Also, my apologies for the crap photos, I had no choice but to take them at night.

IG

I found a great recipe for hazelnut melting moments that used nutella in the ganache, and I thought orange would go perfectly with that. The great thing about melting moments is that they are super easy, just beat the butter and add all the dry ingredients and you’re done. Plus, they kind of look pretty, too, a bit rustic, but pretty. And they melt in your mouth…..mmmmm 🙂
000_0027
Hazelnut Jaffa Melting Moments: (adapted from Taste.com – I doubled the original recipe)
For the biscuits:
  • 250g butter, chopped and softened – not melted
  • 230g plain flour
  • 90g icing sugar mixture
  • 4 tbs cornflour
  • 4 tbs cocoa powder
  • Zest of 1 orange
  • Cocoa powder, extra to dust
For the ganache:
  • 100g dark chocolate, chopped, or choc bit
  • 50g butter, chopped and softened – not melted
  • 5 tbs Nutella (or similar hazelnut spread)
  • Zest of 1/2 an orange
  • 1/2 tsp sea salt
Preheat the oven to 160c. Line 3 baking trays with baking paper, and set aside. Using a stand mixer or electic beater, beat butter until pale and creamy. Add the flour, icing sugar mixture, cornflour, cocoa powder, orange zest and a pinch of salt, and stir with a wooden spoon until well combined. Using clean hands, roll small teaspoons of the dough into balls, and place on the prepared trays (leave about 2cm in between each biscuit). With a fork dusted in cocoa powder, gently flatten the biscuit. Sprinkle each biscuit with a small amount of salt, and bake in preheated oven for 15 minutes. Remove from the oven and let cool for 15 minutes or until biscuits have hardened.
Biscuits
To make ganache, place chocolate in a microwavable bowl and microwave for 20-30 second increments. Each time the chocolate comes out of the microwave, stir as much as possible with a metal spoon to distribute the heat evenly – sometimes the chocolate looks as though it is not melted but will begin to melt when stirred. Doing this will prevent the chocolate burning and becoming gluggy. When chocolate is completely melted, set aside for 3 minutes. Add the 50g softened butter, nutella, orange zest and salt and mix until well combined.
Little poos
Assembly:
Pair up similar sized melting moment biscuits. To fill biscuits, you can use either a piping bag or a knife. To use a piping bag, spoon ganache into a piping bag fitted with a wide round nozzle. Sandwich together with remaining biscuit. Melting moments are best stored in an airtight container at room temperature, and are best consumed within 1-3 days. Yum!
000_0028

Jaffa Ombre Layer Cake

One thing is fairly obvious: I love cake. I try not to eat tooo much cake, but with this one, it was difficult to stay away. I was convinced this cake would be super-rich, but surprisingly, it was quite light. It was certainly still decadent, and I will definitely be making this one again. I know I say this with a lot of things, but I’ve had the idea of making this cake in my head for quite some time. My Mum’s birthday seemed like the perfect occasion – as she (and my Dad) both love the Jaffa Macarons, and I haven’t done ombre, or any type of layer cake really, for a while.

Follow me on Instragram - GemmaAsh

 The recipe I used for the orange cake is from the always amazing Raspberri Cupcakes. It is a beautfiul cake, not too buttery, and the zest from the oraange was intense, but in a great way. This particular post – Orange Cake with Fruit Tingles Icing, is one of my favourite posts from Raspberri Cupcakes, and was one of the recipes I was inspired by, to begin blogging myself (see Musk Layer Cake + Musky Macarons)!

000_0001
Orange Cake: (adapted from Raspberri Cupcakes)
  • 165g butter
  • 3/4 cup caster (white) sugar
  • 3 eggs
  • 2 cups self-raising flour
  • Zest and juice from 1 1/2 large oranges (I had about 1/3 cup of juice)
  • Wilton’s colouring gel, orange
Preheat the oven to 180c (170c) fan forced. Line a 22cm springform cake tin with baking paper and set aside. Beat butter until pale and fluffy. Gradually add sugar. Beat eggs in one at a time until well combined. Stir in the orange zest and juice and flour, until well combined. To divide cake into batches, weigh mixture and divide the number by 3. Pour into three separate, clean bowls. Add small amounts of colouring gel to mixtures, until you have 3 clearly different shades of orange. Pour one batch of mixture into cake tin, and spread with a spoon so it is nice and even. I had a little bit of trouble with this because the cakes were so small, but they were all fine in the end. If you have more than one cake tin, it is okay to put two on the top shelf of your oven, if they fit. Bake cakes for 10-15 mintutes, or until a skewer comes out clean. Begin checking the cakes from 10 minutes.
Let cakes cool in the tin for 10-15 minutes. If you are using the cakes straight away, let them cool completely on a wire rack, and then begin layering and decorating. If not, gently wrap cakes in cling wrap tightly – be very careful as the layers will be quite thin and fragile. Place in fridge overnight. It is best to bake cakes the day before, or on the day of use. You could probably freeze them if you were really time poor, however, sometimes I find that cakes can taste a bit strange when they have been frozen!
000_0006
Jaffa Ganache:
This is the same ganache I used for the Jaffa Swirl Macarons, however I just quadrupled it.
  • 400g good quality dark chocolate, chopped
  • 2 cups thickened cream
  • Zest of 2 1/2 oranges
Place all ingredients in a medium saucepan and stir over a low heat until smooth. If using the next day, cover and refrigerate, then take out an hour or two before use. If using on the same day, cover and refrigerate for about 30 mins, or until ganache has slightly set. I probably made my ganache a little too late for when I needed the cake, so you can see in the pictures that it was still quite runny. I tried to make the best of it though, and exposed the colours of the cake by letting the ganache drip around the side. I originally wanted to cover the cake completely in ganache, but I think it still looked nice.
JaffaCake
 
Assembly:
Place the bottom cake on a large cake stand or a cake board. With a round-edged knife, spread a layer of ganache on the top, and layer with the second cake. Repeat the process, and cover the cake completely with the ganache. If the ganache is too hard, dip the knife in warm water – it will make it a lot easier to spread out.
000_0010
You can decorate the cake however you like – you don’t even have to decorate it thought, if you don’t want to. You could use cachous, glitter, you could pipe swirls of ganche – anything you like! As you can see here, I went for choc-dipped orange segments with a tiny bit of gold glitter.
000_0003

Jaffa Swirl Macarons

I have made Jaffa macarons probably close to 10 times, but have somehow never managed to get them up on here! They are definitely a hit with young and old, hence why have made them countless times! This time, however, I wanted to do something a little different. I have seen the swirly effect on macarons before, and always thought it would be really difficult to pull off, but surprisingly, it wasn’t too bad 🙂 I was really, really happy with how the colour turned out, and will definitely be giving this technique a go again! Also, apologies for the lack of quality photos – I have been having some camera issues, so iPhone it is for now!

Follow me on Instagram - GemmaAsh

Macarons:

This recipe is Adriano Zumbo’s, and was published a couple of years ago in the Herald Sun. You will definitely need kitchen scales to make macarons.

  • 135g almond meal
  • 135g icing sugar
  • 125g caster sugar
  • 45g egg whites
  • 50g egg whites
  • 40g water
  • Wilton’s colouring gel, orange

Preheat oven to 170c (160c fan forced). Spray four oven trays with cooking oil spray baround the edges, and line with baking paper and set aside. Place almond meal and icing sugar in a large bowl, and sift together 3 times. Set aside, along with the 45g egg whites. Put 50g egg whites in a separate bowl. Heat caster sugar and water in a small saucepan, over a low-medium heat, until the sugar completely dissolves (if it slightly burns my tongue, it’s done!). If you do not want to burn your tongue, Zumbo suggests investing in a candy thermometer and heating the syrup until it reaches 118 degrees C (244 degrees F). If the syrup becomes thick and powdery in appearance, you will need to start again. This is because the sugar has been heated too much, too quickly, and instead of dissolving, it has cooked.

Begin beating the 50g egg whites with one hand, and with the other, stream the hot sugar syrup down the side of the bowl to create an italian meringue. Beat until stiff peaks form, the meringue should be thick and very glossy. If you want to add flavouring/colouring, now’s your moment. So add the cocoa now. Just lightly beat them into the meringue. Pour meringue into the almond meal, icing sugar and 45g egg whites mixture and mix roughly to combine. When combined, fold mixture together (one single stroke) until there are no air bubbles left. Make a spread across the top of the mixture, and it should disappear in about 20 seconds. Open your piping bag, and fold 1/4 of it down over itself. With a skewer or cake tester, spead 3 thick lines of orange colouring gel around the piping bag.

Colouring the piping bag

Let the swirls begin...

Spoon mixture into a piping bag fitted with a round nozzle. (If you don’t have a piping bag set, most supermarkets sell plastic ones, they are Multix brand, in an orange box and contain 5 piping bags with a few different nozzles, plus they’re only about $3. You should be able to find them in the baking aisle). Lock the bag by spinning the top around 4 times. Pipe 3-4cm rounds on the oven trays prepared earlier. Tap the bottom of the trays on the kitchen bench and let them sit for about half an hour, or until mixture is dry to the touch.

Swirly before...

Place in oven and bake for 8 minutes. Turn tray around in the oven and bake for another 7 minutes. To test, pull a macaron off the baking paper. If it is stuck, keep cooking and checking regularly. Cool on trays for 5 minutes, then peel off and place on a wire rack. The mixture should make about 12 -15 large macarons, and about 25 smaller macarons. Macarons keep really well (about 5 days in the fridge) and some say that the longer they are refrigerated, the more the flavour is likely to develop. Macarons taste best when they are stored in the fridge, then brought down to room temperature to eat.

Swirly after...

Jaffa Ganache:

  • 100g good quality dark chocolate, chopped
  • 1/2 cup thickened cream
  • Zest of 1 orange

Place chocolate, cream and zest in a medium saucepan. Cook over a medium heat until chocolate is melted. Place in a heatproof bowl and let it cool completely before refrigerating. If using that day, ensure ganache is firm enough to pipe. If not, ganache may need 5-10 seconds in the microwave before using.

To assemble, match up likely macaron shells. Place ganache in a piping bag fitted with a round nozzle, and pipe small rounds onto a shell. Sandwich with other shell.

The makings of ganache

Despite these macarons being one of the tastiest, they are also one of the easiest flavours to make! They are great for macaron beginners because you don’t need any complicated ingredients or equipment – the hardest part is probably melting the chocolate – easy 😉

Spiderweb Macarons with Pumpkin Buttercream

As usual, I am behind with these babies, so Happy belated Halloween to you all! I can’t say I’ve ever really gone all out to celebrate Halloween, as it’s not huge here in Australia, but I’ll take any excuse to bake and make something a little left of centre 🙂 For so long, I have wanted to try making something sweet with pumpkin, so I thought Halloween would be the perfect occasion, coupled with some spooky spiderwebs!

These were originally meant to be Pumpkin Pie Macarons, and I was going to make the filling of the pie for the centre, and place a layer of shortcrust pastry in the middle. Although, surprise, surprise, I struggled with time, and I had trouble finding a recipe with no egg (as I wouldn’t cook the centre), that wouldn’t be too runny. So, I decided on a buttercream. I really like this buttercream, as the pumpkin is really subtle, and you get a hint of cinnamon too.

Macarons:

This recipe is Adriano Zumbo’s, and was published a couple of years ago in the Herald Sun. You will definitely need kitchen scales to make macarons.

  • 135g almond meal
  • 135g icing sugar
  • 125g caster sugar
  • 45g egg whites
  • 50g egg whites
  • 40g water
  • ¼ tsp Wilton’s colouring gel, orange

Preheat oven to 170c (160c fan forced). Spray four oven trays with cooking oil spray baround the edges, and line with baking paper and set aside. Place almond meal and icing sugar in a large bowl, and sift together 3 times. Set aside, along with the 45g egg whites. Put 50g egg whites in a separate bowl. Heat caster sugar and water in a small saucepan, over a low-medium heat, until the sugar completely dissolves (if it slightly burns my tongue, it’s done!). If you do not want to burn your tongue, Zumbo suggests investing in a candy thermometer and heating the syrup until it reaches 118 degrees C (244 degrees F). If the syrup becomes thick and powdery in appearance, you will need to start again. This is because the sugar has been heated too much, too quickly, and instead of dissolving, it has cooked.

Begin beating the 50g egg whites with one hand, and with the other, stream the hot sugar syrup down the side of the bowl to create an italian meringue. Beat until stiff peaks form, the meringue should be thick and very glossy. If you want to add flavouring/colouring, now’s your moment. So add the colouring now. Just lightly beat them into the meringue. Pour meringue into the almond meal, icing sugar and 45g egg whites mixture and mix roughly to combine. When combined, fold mixture together (one single stroke) until there are no air bubbles left. Make a spread across the top of the mixture, and it should disappear in about 20 seconds. Spoon mixture into a piping bag fitted with a round nozzle. (If you don’t have a piping bag set, most supermarkets sell plastic ones, they are Multix brand, in an orange box and contain 5 piping bags with a few different nozzles, plus they’re only about $3. You should be able to find them in the baking aisle). Lock the bag by spinning the top around 4 times. Pipe 3-4cm rounds on the oven trays prepared earlier. Tap the bottom of the trays on the kitchen bench and let them sit for about half an hour, or until mixture is dry to the touch.

Place in oven and bake for 8 minutes. Turn tray around in the oven and bake for another 7 minutes. To test, pull a macaron off the baking paper. If it is stuck, keep cooking and checking regularly. Cool on trays for 5 minutes, then peel off and place on a wire rack. The mixture should make about 12 -15 large macarons, and about 25 smaller macarons. Macarons keep really well (about 5 days in the fridge) and some say that the longer they are refrigerated, the more the flavour is likely to develop. Macarons taste best when they are stored in the fridge, then brought down to room temperature to eat.

Pumpkin Buttercream:

  • 215g butter, chopped and softened
  • 1 1/2 – 2 cups icing sugar mixture
  • 1 cup chopped pumpkin
  • 1/2 tsp cinnamon
  • 1/2 tsp salt

Place chopped pumpkin in a small saucepan with 1/4 cup water. Cook over a medium heat until pumpkin is soft enough to mash with a fork. In the meantime, beat the butter until it is pale and creamy, about 5 minutes. Gradually add the sugar to taste (I used about 1 1/2 cups, but taste as you go, depends on how sweet you like your buttercream). Add the salt and cinnamon. Gradually add the cooled, mashed pumpkin to the buttercream. My pumpkin was still a little lumpy, and I was going to put it through a sieve, but I thought tiny flecks of orange would look good through the buttercream.

Spiderweb Icing:

  • 4-5 tbs icing sugar mixture
  • 1/2 tsp Wilton’s colouring gel, black
  • Splash of water

Mix all ingredients in a small bowl until a thick paste is formed, and icing is completely black. You may need to add a little more colouring.

Assembly:

Pair up likely macaron shells. To pipe the spiderwebs, place the black icing in a piping bag fitted with a very thin, round nozzle. I stupidly forgot to take photos as I was piping the spiderwebs :/ If you would like to know how, this video is a good tutorial. The way the video shows you is a little different to mine, but it will achieve a fairly similar result 🙂 The black icing dries very quickly. FYI – you could also use melted chocolate to make spiderwebs as well. To pipe the buttercream, fill a piping bag fitted with a round nozzle. Pipe about 2/3 tsp of buttercream on each macaron shell, and sandwich with another.

Hope you all had a Happy horrifying, hair-raising Halloween! X

Orange Meringue Macarons

The past week has been very busy and quite horrible, hence the lack of post. But macarons always make horrible weeks slightly better. I made these delish orange meringue macarons a few days ago, and they were awesome, if I say so myself. At first I wasn’t sure whether to fold the meringue in with the curd for the filling, or do a swirl of merinuge on top of the shell and toast it. I decided with the latter. I really like how the meringue gives the macaron a bit of height and makes it look kind of majestic. And extra yum.

Macarons:

This recipe is Adriano Zumbo’s, and was published a couple of years ago in the Herald Sun. You will definitely need kitchen scales to make macarons.

  • 135g almond meal
  • 135g icing sugar
  • 125g caster sugar
  • 45g egg whites
  • 50g egg whites
  • 40g water
  • 1/4 tsp Wilton’s food colouring gel in orange

Preheat oven to 170c (160c fan forced). Spray four oven trays with cooking oil spray baround the edges, and line with baking paper and set aside. Place almond meal and icing sugar in a large bowl, and sift together 3 times. Set aside, along with the 45g egg whites. Put 50g egg whites in a separate bowl. Heat caster sugar and water in a small saucepan, over a low-medium heat, until the sugar completely dissolves (if it slightly burns my tongue, it’s done!). If you do not want to burn your tongue, Zumbo suggests investing in a candy thermometer and heating the syrup until it reaches 118 degrees C (244 degrees F). If the syrup becomes thick and powdery in appearance, you will need to start again. This is because the sugar has been heated too much, too quickly, and instead of dissolving, it has cooked.

Begin beating the 50g egg whites with one hand, and with the other, stream the hot sugar syrup down the side of the bowl to create an italian meringue. Beat until stiff peaks form, the meringue should be thick and very glossy. If you want to add flavouring/colouring, now’s your moment. So add the colouring gel now. Just lightly beat them into the meringue. Pour meringue into the almond meal, icing sugar and 45g egg whites mixture and mix roughly to combine. When combined, fold mixture together (one single stroke) until there are no air bubbles left. Make a spread across the top of the mixture, and it should disappear in about 20 seconds. Spoon mixture into a piping bag fitted with a round nozzle. (If you don’t have a piping bag set, most supermarkets sell plastic ones, they are Multix brand, in an orange box and contain 5 piping bags with a few different nozzles, plus they’re only about $3. You should be able to find them in the baking aisle). Lock the bag by spinning the top around 4 times. Pipe 3-4cm rounds on the oven trays prepared earlier. Tap the bottom of the trays on the kitchen bench and let them sit for about half an hour, or until mixture is dry to the touch.

Place in oven and bake for 8 minutes. Turn tray around in the oven and bake for another 7 minutes. To test, pull a macaron off the baking paper. If it is stuck, keep cooking and checking regularly. Cool on trays for 5 minutes, then peel off and place on a wire rack. The mixture should make about 12 -15 large macarons, and about 25 smaller macarons. If you are not making the macarons with the meringue on top, they will keep really well (about 5 days in the fridge) and some say that the longer they are refrigerated, the more the flavour is likely to develop. However, if you do have the swirl of meringue on top of the shell, expect them to last about 2-3 days. This is because there is a lot of moisture in the meringue, and if left too long, will make the shell soggy and it will crumble to pieces when you go to pick it up. Macarons taste best when they are stored in the fridge, then brought down to room temperature to eat.


Orange Curd:

  • 2 whole eggs
  • 2 egg yolks
  • 3/4 cup (165g) caster sugar
  • 1/3 cup (80g) chilled, unsalted butter
  • Zest and juice of 2 oranges
  • 2 tsp lemon juice

Whisk the whole eggs, yolks and sugar in a saucepan until smooth, then place saucepan over a low heat. Add the butter, juice and zest and whisk continuously until thickened. You really need to be careful here, especially with the heat because it is so easy for the eggs to cook – then the curd will be lumpy. Don’t freak out if you have a little bit of cooked egg, just strain it through a fine sieve when it has thickened. Stir in the lemon juice – this is just to give it the acidity that curd needs and orange can’t always provide. Pour into a clean, airtight container (preferably do a quick sterilise with some boiling water first) and leave at room temperature until completely cooled. Place in the fridge until it is firm enough to pipe. Curd will keep for 2 weeks in the fridge.

Italian Meringue:

  • 1 egg white
  • 50g caster sugar
  • 2 tsp water

Place egg white in a clean, dry bowl. Place sugar and water in a saucepan, and over medium heat, stir with a metal spoon until sugar is completely dissolved and the mixture has formed a syrup. Begin beating the egg white, whilst slowly pouring the sugar syrup into the bowl. The mixture will become thick and very glossy. Beat until stiff peaks form.

Assembly:

Once you have matched up your macaron shells, you can start piping the orange curd. Fill a piping bag fitted with a round nozzle and pipe 1/4-1/2 tsp of curd onto each shell, and sandwich with another. Piping curd can be a bit more difficult than ganache or buttercream simply because it is runnier. If you find your curd needs to thicken, stir in a teaspoon or two of cornflour. The trick with piping curd is to only use a small amount, and to refrigerate them for as long as possible before serving.

To pipe the meringue, spoon the egg white mixture into a piping bag fitted with a small star nozzle (the Multix brand bags come with this if you don’t have your own). Pipe a small swirl on top of the macaron shell. If you have a blowtorch, lightly toast the meringue. It’s fine if you don’t, you can either place them under the grill really quickly (a bit risky considering the curd), but they still look great without the toasted-ness. Pop macarons in an airtight container and refrigerate straight away if you’re not serving them straight away.


Enjoy! X.

Cupcake Madness!

The vast majority of my time in the past week has been spent making over 100 cupcakes, and a heck of a lot of buttercream! 100 may not seem like much, but when you have never done that many before, it is certainly a challenge. But lots of fun too!

I had to make three different flavours for a 21st order – chocolate, vanilla bean and red velvet. The chocolate ones had the yellow buttercream, the red velvet ones had the bright orange buttercream and the vanilla bean ones had the bright red buttercream, and all cakes were sprinkled with gold glitter.

I was really happy with how all the cakes turned out, and the colours of the buttercream were really effective. The vanilla bean with the red icing was my favourite to look at because it was so bright and the gold  glitter looked great on it.

I’m not going to write out the recipes for this one, but here are the links for the Red Velvet and the Chocolate cupcakes. I used a different recipe for the vanilla bean, and I will post that up when I make them again soon 🙂

TIP –   when you want to make bright red buttercream, you need to use soooooooooo much colouring gel to make it intense. If you are doubling or tripling the recipe, colour it in batches and then mix them because it is a lot easier to control the colour that way. I tripled my recipe, and needed a good 3 1/2 tubs of Wilton’s gel (Rojo red I think it was). I was really unhappy with mine at first, but weirdly enough overnight in the fridge it brightened from a crimson red to an intense red! This is what it was like first:


And after:

And these were just some circusy-themed ones I made for my sister and her friends 🙂


Orange and Lemon Meringue Cupcakes

These cute little cupcakes were requested from my boyfriend for his birthday, as he loves lemon curd and this awesome orange cake – so why not combine the two and add some delish toasted meringue? Yum!

I made this orange cake in a large ring pan with some toffee syrup for Easter last month, and it was a really lovely dessert. Plus, it is so easy to make – just throw everything in the food processor and off you go! Definitely one to keep in the repertoire.

I used this great recipe from Taste.com for the orange cake. Obviously I did not make the toffee syrup this time around (however, it is great if you’re making one big cake!), and as these were cupcakes I simply spooned 1 1/2 tsp of mixture into each cupcake case, and baked for 15 minutes on 160c, fan forced. After they have been cooked, let cakes cool in the tins for 5 minutes, then place on wire rack to cool completely. This mixture made 26 medium sized cupcakes, but if you wanted more or less, it’s fairly easy to double or half. To toast the meringue tops, you will need a chef’s blowtorch. You can buy them for about AU$25-30 at most homeware stores.

Lemon Curd: (also from Taste.com)

  • 2 eggs
  • 2 egg yolks
  • 3/4 cup (165g) caster sugar
  • 1/3 cup (80g) chilled, chopped butter

In a small saucepan, whisk eggs, yolks and sugar until smooth. Place the saucepan over a low heat. Add the butter, juice and zest and whisk until thickened. Strain through a sieve, let curd cool, then refrigerate.

Italian Meringue:

  • 4 egg whites
  • 1 cup caster cugar
  • 50g water

Have egg whites ready in the bowl of a stand mixer, or in a bowl with the hand mixer ready to go. Over a low-medium heat, combine sugar and water in a saucepan to make a sugar syrup. Stir until sugar is dissolved and mixture is very hot. If thick, white bubbles begin to form, start again. Begin beating egg whites, and slowly pour the sugar syrup down the side of the bowl to create an italian meringue. Beat until stiff peaks form, and the mernigue is thick and glossy. Fill a piping bag fitted with a round or star nozzle – I used a star nozzle but the meringue was not thick enough to take the shape, but they still looked nice enough 🙂 (TIP – don’t make the meringue until you are ready to pipe it. If it is sitting for over 5 minutes, it will begin to deflate and will lose its glossiness).

Assembly:

When the cupcakes have cooled, gently hollow out a small circle at the top, about 3-4 cm deep. Fill the holes with lemon curd. Gently pipe a swirl of meringue on the top of each cupcake. Once you have completed the topping, gently wave the blowtorch over the meringue – leave about 10cm, otherwise it will burn. You only want to lightly toast the meringue 🙂 Store cupcakes in airtight containers, but do not refrigerate, otherwise they will lose their fluffiness. They will keep for 4-5 days. You can definitely freeze the cupcakes with the lemon curd inside, although only top with the meringue when you are ready to serve.

Citrus and meringue is a classic combination that always works beautifully. You could mix up this version with a lemon cake and lime or orange curd, or even a blood orange cake and curd. The possibilities are endless!

Enjoy! X