Cherry Ripe Layer Cake

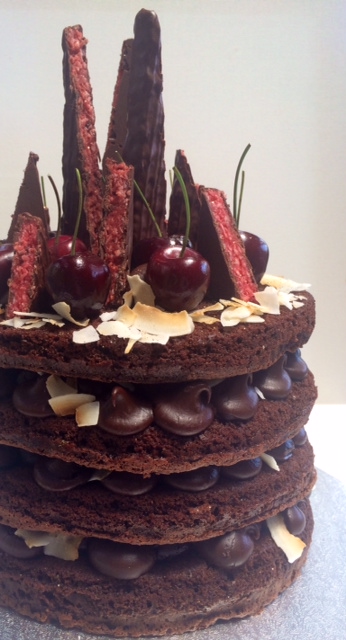
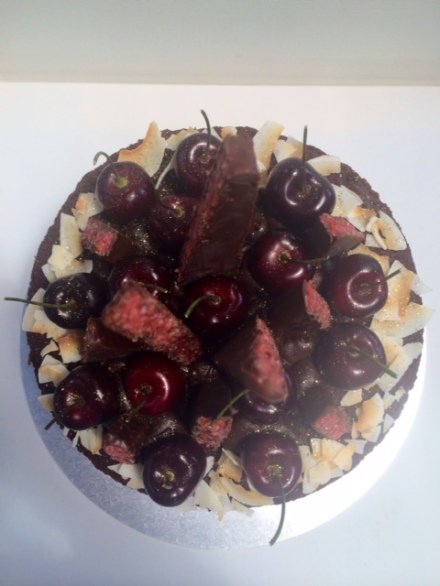
Happy New Year! I hope you all had a wonderful Christmas and New Year, and managed to relax over the holiday season. I can’t believe the best time of the year is over already, it always goes too quickly! Usually, for me, January is a busy month for cakes, with most of my families’ birthdays. This year, however, almost my whole family were sick, and celebrations kept getting put off! So, this beauty of a cake was made for three peoples’ birthday, and delicious it was. Excuse the crappy photos, my awesome proper camera broke, and my the photos from my phone just aren’t the same 😦
CherryRipeCake

This cake is quite similar to this one I made about the same time last year, with red wine ganache. However, I omitted the red wine this year, and added toasted coconut flakes and cherry ripe bars.
CherryRipeCake1

Chocolate Mud Cake Layers: (recipe by Janelle Bloom)

Makes 4 x 23cm layers

400g butter
200g good quality dark chocolate, chopped
1/2 cup water
1/2 cup good quality cocoa
2 tbs good quality drinking chocolate or instant coffee powder, or 1 tbs of each if you want
1 tsp vanilla bean paste/natural extract
2 cups caster (white) sugar
6 eggs, at room temperature
1 1/2 cups self-raising flour, sifted
Approximately 500g fresh cherries, stones removed and halved
Approximately 30 fresh cherries, with stems (I used a 695g bag altogether, and it was just enough)

Preheat oven to 160c. Line 23cm springform cake tins with baking paper. I had two tins, therefore had to repeat the process.

In a medium saucepan, combine butter, chocolate, water, cocoa, drinking chocolate and/or coffee powder and vanilla. Cook over a medium heat, stirring constantly, until melted and smooth. Remove from heat, and set aside for 10 minutes or until lukewarm.

In the meantime, beat eggs and sugar together in a stand mixer, on medium speed, until pale and creamy. Stream the chocolate mixture down the side of the stand mixer to incorporate into egg mixture. Beat until well combined. Stop the mixer, and add the flour. Beat again until well combined and smooth.

Weigh mixture into four even portions (I did this with digitial scales), to ensure even layers. Pour mixture into prepared tins. Bake for 25 minutes in preheated oven, or until a skewer is inserted, and comes out clean. Repeat process, depending on how many cake tins you have.

Cool cakes for 15-20 minutes in tins, and transfer to a wire rack. If not using immediately, wrap tightly with cling film once cakes are completely cool, and refrigerate. Bring down to room temperature to assemble and eat.
CherryRipeCake2

Dark chocolate ganache: (you will need to make the ganache the day before serving the cake)

· 300g good quality dark chocolate, chopped, or choc bits
· 300ml thickened cream

In a medium saucepan, combine the chocolate and cream, and place over a low-medium heat, constantly stirring until melted. Place in a large bowl and let cool at room temperature. When ganache has cooled, cover with cling wrap and leave overnight at room temperature.

Assembly:

· Toasted coconut flakes or dessicated coconut
· 900g cherries, pitted and halved
· 100g whole cherries

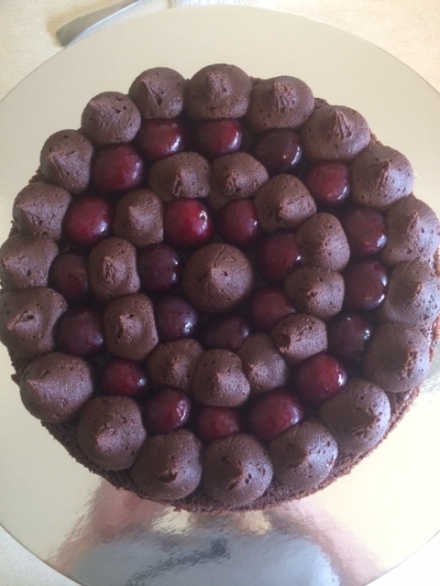
Place one layer of mud cake on the stand/base. Place ganache in a piping bag fitted with a large round nozzle. Pipe one small dob of ganache in the middle of the cake, and place halves of cherries around it. Repeat the process with ganache around the other side of the cherries, and repeat again. Sprinkle with coconut. The end result should look like this:
CherryRipeCake4

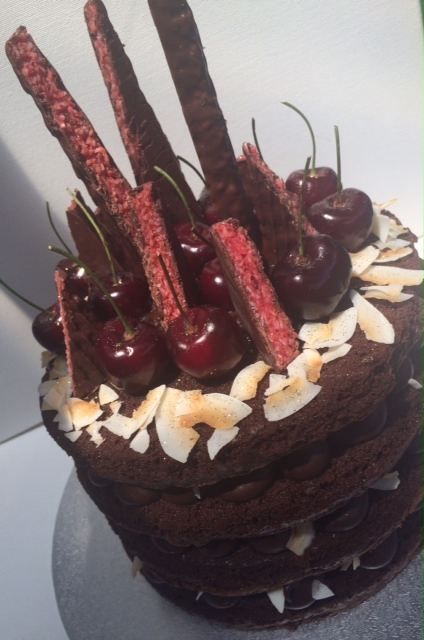
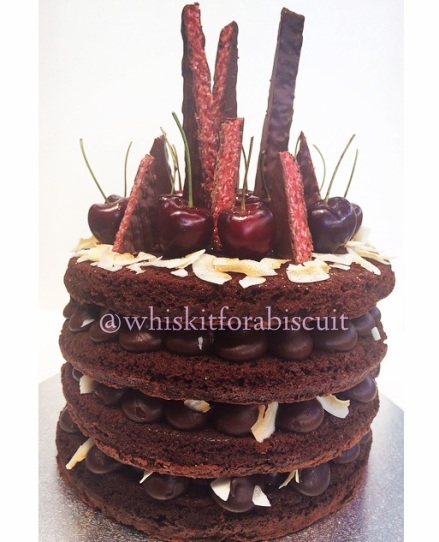
Repeat the process three times, until you reach the top layer. You can really decorate the top layer however you want. I used the ganache for the middle of the top layer, and as you can, sprinkled coconut around the edges. I stuck the whole cherries in with the ganache, to ensure they weren’t going to fall off. I sliced the cherry ripes into sharp triangles, to look effective on the cake.
CherryRipeCake3

Enjoy, and happy baking! X

Wedding Cakes, Sesame Street and more!

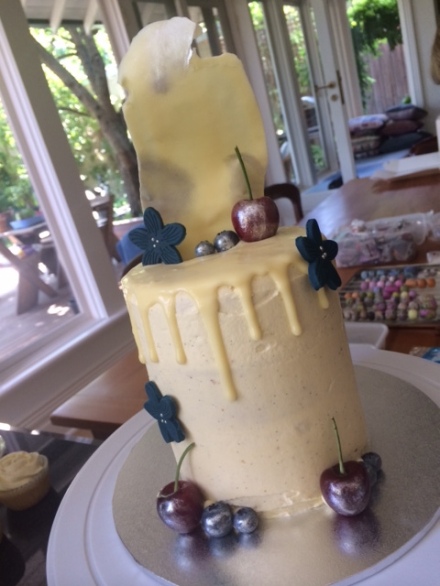
Well, I did say it could be a while. However, I am back, and back with lots of photos of cake! The last month has been absolutely flat out with cakes for me, and it doesn’t look like I’ll be slowing down any time soon! Which is not a bad thing, it is nice to busy making cake, than busy writing essays! Anyway, lets get to the important stuff – this cake below was made for a very special family wedding in late November, and I was super happy with how they turned out:

WeddingCake

WeddingCake1

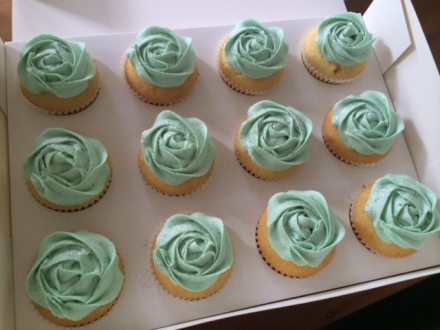
The top cake was a 4” vanilla bean layer cake, filled with lemon curd. All of the cupcakes were a nice simple vanilla bean, with fondant flowers to match the bride’s beautiful dress. I love making vanilla bean cake, because it’s so simple, but has such a lovely flavour (providing you use good quality paste or beans). I am definitely a chocolate girl at heart, but vanilla bean brings a nice change and is so underrated.

WeddingCake2

I used the trusty vanilla bean cupcake recipe by Taste.com, which I have been using for years, for both cakes. The recipe is so versatile – the result is always great with cupcakes, and small and large layer cakes.

WeddingCake3

These cupcakes below have to be the most fun I have ever had making cakes! I was a little nervous to make these because I have never done anything like it before, but I was very happy with the results! As you probably know from my previous work, I am not a fan of fondant at all, but I had to make a slight exception for these cuties 🙂

photo 1-2

It was only the second time I have attempted bright red buttercream, because the first time, it was a nightmare! Red is such a difficult colour to get right, because you have to use sooooo much colour for it to be deep enough. However, if you add too much gel to the buttercream, it splits due to the amount of liquid = disaster. It took me two times to get it right, and the trick for me was to start with a deep pink, and then add the red to deepen the colour. If anyone has any tips for red buttercream – please let me know!! 🙂

photo 2-2

Below are some other Birthday and Christmas cupcake orders I have been lucky enough to make 🙂

photo

photo 5-2

photo 4

photo 3-2

photo 1-3

photo 2-3

Happy Christmas baking to you all, stay tuned for a delicious festive dessert soon! x

P.S. For more regular photos and updates, follow me on Instagram – @whiskitforabiscuit


A deliciously Wonkarific Willy Wonka party!

So…it’s been a while. I apologise for the lack of posting so far this year, it has been a busy one. Anyway, last week was my sister’s birthday party, and there is always a fun theme for her parties. You may remember the Wonderful Wizard of Oz party, from two years ago. Being the lover of all things sweet, I was obviously very excited about this year’s theme!

photo-1

photo 2-1

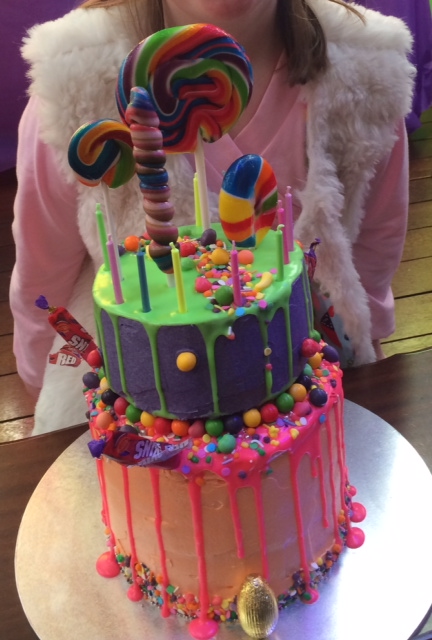
I had been planning the cake for quite some time, and I was really happy with how it came together. It was my first ever tiered cake, and it wasn’t as scary as I thought it would be! I had envisioned the bottom tier being squashed from the pressure and my lack of experience, but I was lucky. The cake was inspired by the work of the one and only Katherine Sabbath, who you should totally check out. The bottom tier was a 6 layer rainbow cake – similar to this one from a few years back, filled with nerds and popping candy, and covered in sour watermelon buttercream, with white chocolate pink neon ganache drip. The top tier was a chocolate raspberry mud cake filled with dark chocolate ganache, covered in vanilla bean buttercream, with a white chocolate neon green drip. I got my hands on everything Wonka I could find, and smattered it on the cakes as nicely as I could!

 photo 3

Other bits and pieces I created for the party included Redskin Macaron lollipops (you can find the recipe for these here), Chocolate covered Oreos with popping candy (these were the kids fave!), and chocolate sprinkle spoons with nerds.

photo 1

photo 1-1 photo 2-1


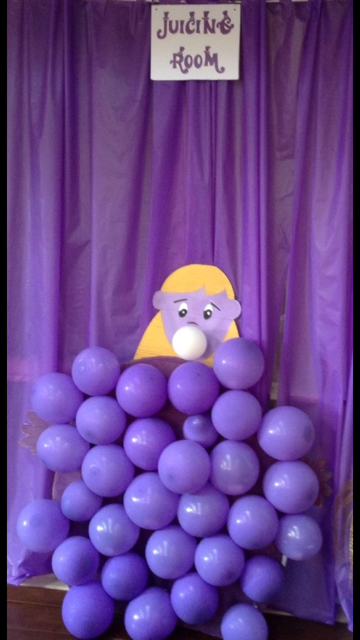
It was a really fun day, and such a great theme for a kid’s party. Shout out to my Mum who did such an amazing job setting up, and making all the decorations 🙂

photo 3

Fingers crossed for another post soon, but until then, follow me on Instagram – @whiskitforabiscuit

Cappuccino Naked Layer Cake with Chocolate Ganache

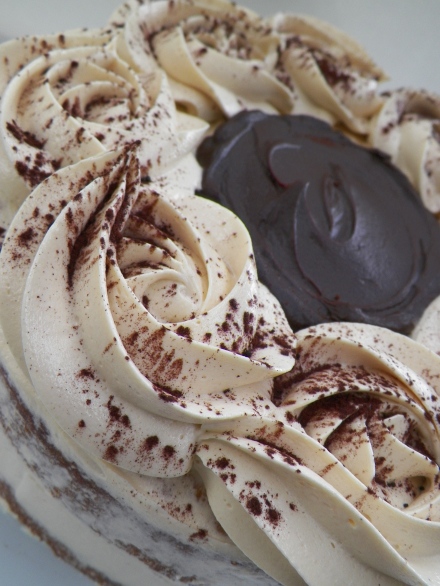
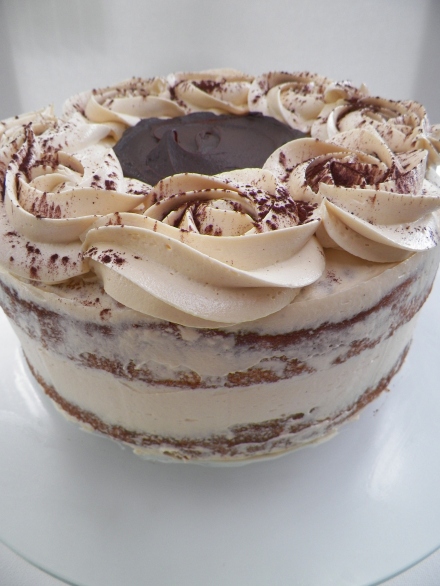
These naked cakes seem to be on trend at the moment! I really enjoyed making this cake, and I really like the combination of the rustic buttercream around the cake, and the rosettes and pool of chocolate ganache on top. This cake was made for my Mum’s birthday, as she loves coffee and chocolate. So, this flavour was a no-brainer!

000_0004

 I used the trusted vanilla cupcake recipe for this cake, as it converts quite well into a round cake, too. I tried to get a good quality coffee flavour into the buttercream by using real espresso shots, and this worked really well. I also used dark chocolate ganache in the middle of the layers as well as on the top. It was a nice addition and it cut through the creaminess of the buttercream, and really, who doesn’t love ganache?!

000_0008

 Vanilla Cakes:

  • 200g butter, chopped and softened
  • 1 1/2 cups caster (white) sugar
  • 2 tsp vanilla bean paste/natural extract
  • 4 eggs
  • 2 3/4 cups self-raising flour
  • 1 cup milk

Line two 22cm round springform cake tins with baking paper. Preheat oven to 180c. Beat butter, sugar and  vanilla bean paste until pale and creamy. Add the eggs, one at a time, until each is well combined. Add the flour and milk gradually, in alternating batches. Stir with a wooden spoon to combine after each addition. Ensure you begin and finish with flour. Divide mixture evenly between the two prepared cake tins. Bake in preheated oven for approximately 30-40 minutes, or until a skewer is inserted and comes out clean. I had a bit of a problem with my cakes taking a while to cook in the middle, and one of them sunk quite a bit after I had taken it out of the oven. If you find this starting to happen in the few minutes after you have taken the cake/s out, place them back in, and lower the oven temperature if the edges of the cake are cooked. You don’t want dry edges and a  raw middle. Yuk! Once cakes have cooked, leave them to cool completely in tins. Release gently from tins once cool. If you are not assembling the cakes immediately, wrap them tightly in cling wrap and place in the fridge until ready to assemble. I prefer to assemble cakes cold, especially this one, because you will need to carve the tops. Always bring cake down to room temperature to serve and eat. 🙂

Dark Chocolate Ganache:

  •  250g good quality chocolate chips, or dark chocolate, chopped
  • 1/3 cup thickened cream

Combine chocolate and cream together in a medium saucepan, and cook over a low-medium heat, stirring, until melted and smooth. Pour into a heatproof bowl, and leave until set. If you are not using ganache on the same day, refrigerate, and slightly warm in the microwave to use.

Espresso Buttercream:

  • 400g butter, chopped and softened (I prefer to use salted butter when making buttercream)
  • 3 1/2 cups icing sugar mixture
  • 1 tsp vanilla bean paste/natural extract
  • 30ml espresso coffee (try to use real espresso if you can. If it is not possible, use a good instant coffee powder with 30ml boiling water

Beat butter and vanilla until pale and creamy. Gradually add the sugar and coffee and beat until well combined. With the sugar and coffee, you don’t have to stick to these quantities if they are not to your taste. Taste as you go and add what you are happy with.

000_0001

Assembly:

Place one vanilla cake on the stand or board which you will present on. Using a serrated bread knife, gently cut the top of the cake, horizontally, until you have created an even top. Using a palette knife or a spatula, generously spread approximately 2/3 cup of buttercream over the top of the first cake. Then, using a tablespoon, spoon approximately 2-3 tablespoons of dark chocolate ganache on top of the buttercream and push out toward the edges of the cake, taking care not to mix the two – you want the ganache on top of the buttercream. Place the second cake on top of the first, and again, gently cut across it to create an even top, and spread with the buttercream only. After this, using your palette knife or spatula again, gently coat the outside of the cake with buttercream, taking care to gently scrape the edges, creating a smooth, naked cake appearance. Then, place approximately 2 1/2 cups of buttercream into a large piping bag fitted with a large, star nozzle. Pipe rosettes or swirls around the edges of the cake, and lightly dust with cocoa powder. Spoon 1/2 cup of dark chocolate ganache into the middle of the cake, and gently spread out to the rosettes if you need to. As mentioned earlier, always bring cake down to room temperature to eat. Serve, and enjoy!

000_0005

Happy Baking!

Chocolate Mudcake Layers, with Red Wine Ganache, Fresh Cherries and Hazelnut Praline

Happy New Year to you! I am back with a bang – with this bee-yoo-tiful chocolate mud cake with all the bells and whistles! I hope you all had a wonderful Christmas and New Year, and enjoyed the break with your loved ones. I know I certainly did, and am feeling refreshed and ready to attack 2015 head on!

000_0020
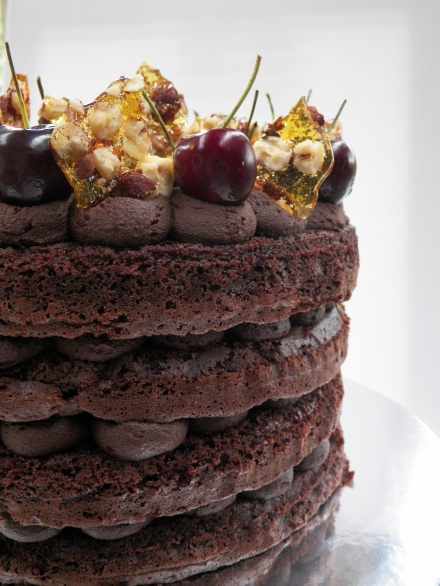
I must say, I am super proud of this cake. I knew exactly what I wanted it to look like, and I had all the flavours imagined in my mind. It turned out perfectly, and it was really delicious, if I say so myself. This cake was inspired by the fantastically awesome Katherine Sabbath. If you don’t know who she is, pretty please check out her Instagram – you will be amazed!
000_0014
The thing I loved most about this cake, apart from how it looked, was the combination of the dark chocolate red wine ganache, and the fresh cherries. The richness of the chocolate and the red wine together, with the hit of the juicy fresh cherries, full of flavour, was downright damned delicious. The cherries here in Australia at the moment are so yummy, and so cheap! Yay for Summer! If only it lasted all year long.
Chocolate Mud Cake Layers: (recipe by Janelle Bloom)
Makes 4 x 23cm layers
  • 400g butter
  • 200g good quality dark chocolate, chopped
  • 1/2 cup water
  • 1/2 cup good quality cocoa
  • 2 tbs good quality drinking chocolate or instant coffee powder, or 1 tbs of each if you want
  • 1 tsp vanilla bean paste/natural extract
  • 2 cups caster (white) sugar
  • 6 eggs, at room temperature
  • 1 1/2 cups self-raising flour, sifted
  • Approximately 500g fresh cherries, stones removed and halved
  • Approximately 30 fresh cherries, with stems (I used a 695g bag altogether, and it was just enough)

Preheat oven to 160c. Line 23cm springform cake tins with baking paper. I had two tins, therefore had to repeat the process.

In a medium saucepan, combine butter, chocolate, water, cocoa, drinking chocolate and/or coffee powder and vanilla. Cook over a medium heat, stirring constantly, until melted and smooth. Remove from heat, and set aside for 10 minutes or until lukewarm.

In the meantime, beat eggs and sugar together in a stand mixer, on medium speed, until pale and creamy. Stream the chocolate mixture down the side of the stand mixer to incorporate into egg mixture. Beat until well combined. Stop the mixer, and add the flour. Beat again until well combined and smooth.

Weigh mixture into four even portions (I did this with digitial scales), to ensure even layers. Pour mixture into prepared tins. Bake for 25 minutes in preheated oven, or until a skewer is inserted, and comes out clean. Repeat process, depending on how many cake tins you have.

Cool cakes for 15-20 minutes in tins, and transfer to a wire rack. If not using immediately, wrap tightly with cling film once cakes are completely cool, and refrigerate. Bring down to room temperature to assemble and eat.

Dark Chocolate and Red Wine Ganache:

  • 500g good quality dark chocolate, chopped
  • 2/3 cup thickened cream
  • 1/2 cup red wine, I used Shiraz

Place chocolate and cream in a medium saucepan, and cook, over a medium heat, stirring, until melted and smooth. Remove from heat, and slowly add red wine. Stir until well combined and mixture is thick (wine will hang at the top of the mixture, but keep stirring, as it may take a couple of minutes for it to be mixed in properly). Pour ganache into a heatproof bowl, cover in cling film, and refrigerate. If using ganache that day, you will need to wait until it is set to use it. It may be a good idea to make the ganache first. If using the next day, you will need to slightly warm ganache in the microwave, for 10 seconds only.

FYI – for best results, beat your ganache in the stand mixer before piping, especially if it has been in the fridge overnight and has been warmed in the microwave. It will make the ganache nice and fluffy, and will be much easier to pipe.

Hazelnut Praline:

  • 1 cup caster (white) sugar
  • 3 tbs water
  • 1/2 cup hazelnuts, roughly chopped

Line an oven tray with non-stick baking paper. Arrange hazelnuts neatly on the tray. Place sugar and water in a medium saucepan, and cook, on a low-medium heat, until sugar has completely dissolved. Then, turn heat up to high, and cook, stirring occasionally, until sugar mixture turns a deep golden colour. Pour sugar mixture over the hazelnuts, and leave to set and cool, which will take approximately 30 minutes. If not using praline immediately, break into pieces and store in an air-tight container, in the freezer. This will prevent the praline from becoming sticky.


000_0022

Assembly:

Spoon mixed ganache into a piping bag with a wide, round nozzle. Place one mud cake on a stand, board or plate. Pipe one round of ganache in the centre of the cake. Place cherries, cut side down, around ganache. Repeat process around the cherries with the ganache, and repeat again. It should go: ganache, cherries, ganache, cherries, ganache (see photo below). Repeat with the second and third layers of mud cake. For the final layer, the top of the cake, do the exact same thing with the ganache, but instead, place the whole cherries on this layer. In addition, place whole cherries on top of the ganache rounds on the edge, just to give the cake a bit more height. Trim the ends of the cherry stems if they are brown, with a pair of kitchen scissors. Arrange praline as desired. ENJOY! 🙂

Layer

This cake was made for my Dad and Nanna’s birthdays, and to see their faces light up when they saw this cake was wonderful, and then again when they tasted it. It really was a labour of love. I hope I get the opportunity to make this special cake again soon.

000_0016

Until next time…x

Follow @whiskitforabiscuit on Instagram here.

Top Deck Mini Cupcakes

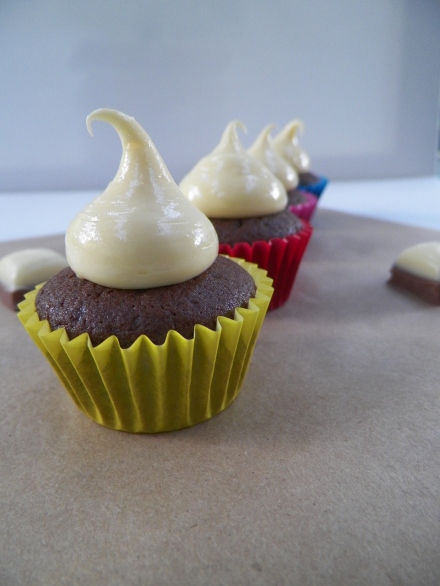
It’s been a busy few weeks. I have been popping cupcakes out of my kitchen like no tomorrow! So, here, I present to you, Top Deck Mini Cupcakes. White Chocolate, and Dark Chocolate. It’s that simple.

000_0006

 These cupcakes are super easy to make, and are very delicious. I used the extremely trustworthy chocolate cupcake recipe that never lets me down, and my own white chocolate ganache to top them with. White Chocolate ganache is something I have always struggled to make. I find it is always runny, and I usually have to add a truckload of butter before it becomes somewhat of a pipe-able consistency. Nevertheless, it was yum!

000_0010

Chocolate Cupcakes:  (from Taste.com.au) 

Makes approx. 55 mini cupcakes

  • 100g good quality dark chocolate, chopped
  • 1 cup water
  • 125g butter, chopped and softened, not melted
  • 1 1/4 cups brown sugar
  • 3 eggs
  • 1 1/2 cups self raising flour
  • 1/2 cup plain flour
  • 1/4 cup cocoa

Line trays with cupcake cases, and preheat oven to 160c, fan forced (170c regular). Place the chocolate and water together in a small saucepan, and place over a low heat, stirring with a metal spoon until chocolate is melted and mixture is smooth. Set aside. Beat butter and sugar together until pale and creamy, approximately 3-4 minutes. Add eggs, one at a time, and mix until each is well combined. Place flours and cocoa in a separate bowl, and stir to combine. Add the flour mixture to the butter, sugar and egg mixture and stir with a wooden spoon. Once combined, add the melted chocolate mixture and continue to stir with a wooden spoon until mixed. If the mixture is a little runny, leave it to settle for 10 minutes or so. Spoon mixture into cupcake cases, and bake for 15-18 minutes in preheated oven until cooked, or until a skewer comes out of the cake clean. Leave in trays to cool for 5 minutes, and transfer to a wire rack.

000_0013

 White Chocolate Ganache:

As I mentioned earlier, this is certainly not a perfect recipe. It took a lot of trial and error before I was happy with the taste and consistency. I would recommend making the white chocolate and cream mixture at least a few hours before, or even the day before.


  • 300g good quality white chocolate, chopped
  • 1/3 cup thickened cream
  • 300g butter, softened, not melted

Place the white chocolate and the cream into a small saucepan, and stir with a metal spoon, over a low heat, until melted and smooth. Pour mixture into a heat proof bowl, and place in refrigerator. Beat butter until pale and creamy. Depending on the consistency, you may need to put the white chocolate and cream mixture in the microwave for 10-15 seconds. Gradually add the mixture to the butter, and beat until combined.

000_0008

Spoon the ganache into a piping bag fitted with a small nozzle of your choice. Pipe ganache onto mini cupcakes. To store, place cupcakes in an airtight container, in a cool, dry place. Cupcakes will last approximately 2-3 days. Enjoy!

Triple Salted Caramel Mini Cupcakes

I made these super delicious morsels for the RSPCA Cupcake Day at work, and I believe they were quite the hit. Well, I’m guessing they were, as there were none left at the end! If you follow my blog, you will know I am the number one lover of all things salted caramel, and these cupcakes did nothing to change my opinion. They were yum. Really yum.

000_0007

I’m happy I made the wise decision to make them minis, though. They were the perfect size. Not too big, and not too small. Just enough to pop them in your mouth all at once, to close your eyes and go to heaven for a few seconds. If I could have, I would have popped and definitely not stopped. I really am a shocker. As I sit here, I have a fresh tub of the biggest Nutella (one of my many other loves) you can get at the supermarket, right next to me, and a spoon clumsily hanging from my mouth. I may have slightly freaked out about the prospect of a worldwide Nutella shortage. Anyway, back on track…

000_0015

Salted Caramel Cupcakes: (from Gourmet Getaways) Makes approx. 60 mini cupcakes

  • 190g butter, chopped and softened
  • 150g white chocolate, chopped
  • 1 cup brown sugar
  • 1/3 cup golden syrup
  • 1 cup milk
  • 2 1/2 cups plain (all-purpose) flour
  • 1 1/2 tsp baking powder
  • 2 eggs

Preheat oven to 170c. Line cupcakes trays with cases. In a large saucepan, combine butter, white chocolate, brown sugar and golden syrup, and place over a medium heat, stirring with a metal spoon until combined and melted, and the sugar is dissolved.

000_0002


Remove from the heat, add the milk, and let cool for 10 minutes. Stir through the flour and baking powder until combined. Add eggs, one at a time and stir until combined. Fill cupcakes evenly, and bake for approximately 18 minutes, or until a skewer comes out of the cakes clean. Cool in tins for 5-10 minutes, and let cool on wire racks.

000_0005

Caramel Maison: (this recipe is on page 245 of Adriano Zumbo’s cookbook)

  • 220g pouring (whipping) cream
  • 1 vanilla bean, split and seeds scraped (I used 1 tsp vanilla bean paste)
  • 120g water (this is just under 1 cup)
  • 300g caster (white) sugar
  • 60g liquid glucose (available at most supermarkets)

Place the cream and vanilla in a small saucepan over a medium heat and bring to the boil. Remove from the heat, and remove the vanilla bean if you are using one. In the meantime, place the water, sugar and glucose in a larger saucepan over a low-medium heat and cook until the glucose and sugar are fully dissolved, stirring occasionally. Zumbo says to use a clean pastry brush dipped in water to clean the sides of the saucepan in order to avoid crystalisation, however you can also just place the saucepan in really hot water with suds just after use and the sugar will melt off really easily. Increase the heat to medium, and cook the sugar mixture until it reaches a dark amber colour. This does take quite a while, and I was getting worried that mine would not work, but persistence is key here, it will eventually darken after 10-12 minutes. Very carefully stir the cream mixture into the sugar mixture slowly – be very careful because it spits and releases lot of heat. I found the best way to do this was with a spoon with a very long handle, as you want to keep your face as far away from the saucepan whilst it is spitting. If you don’t have a spoon with a super long handle, just add the cream really slowly and try to stir as best you can! Keep stirring as much as you can until the caramel settles down, then stir until completely smooth. Transfer to a bowl, let it cool to room temperature, cover with plastic wrap and place in the fridge.

Caramel Buttercream: (this recipe is on page 42 of Zumbo’s cookbook)

  • 150g unsalted butter, chopped and softened
  • caramel maison (prepared earlier. Leave 2 tbs for the sauce to drizzle on top of cupcakes)
  • approx. 2 tsp sea salt

Place the butter in a bowl, and beat until light and fluffy. Warm the caramel maison in the microwave until it reaches a pouring consistency (mine needed 1 min, 20 seconds on high as it was in the fridge overnight), however, just warm it in stages to prevent burning the caramel. With the beater running slowly, add the caramel maison to the butter and continue mixing until thick. Once I had added about half of my caramel, I got a bit worried because it looked like it was curdling, however as I kept adding the caramel, it began to thicken up. Once you have added all of the caramel, fold in the salt. I did not measure my salt, as I used a shaker. So if you too are using a shaker, you can salt to taste.

000_0014

Assembly:

Place your preferred piping nozzle in your piping bag, and fill with caramel buttercream. Pipe swirls/rounds onto cupcakes. For the sauce, take the 2 tbs of caramel maison left, warm in microwave until it is an almost liquid like consistency. Pour into a sauce bottle or similar, and drizzle over each cupcake. To store, place cupcakes in airtight containers, and leave at room temperature, in a dry area.

000_0018


Oreo and Milk Cupcakes

I am a very big fan of Oreos, and always have been. I remember watching The Parent Trap when I was little and was very intrigued when the twins were talking about how they both loved dipping them in peanut butter. I tried it, and was hooked. There was no turning back! I made these cupcakes for the Australian Cancer Council’s Biggest Morning Tea, which was held at my workplace.

000_0005

I really wanted to put little milk bottles on top of the cupcakes, as well as the mini Oreo, but they were just too big, and they ruined the look a little. The taste of these babies was quite amazeballs, I must say. It was definitely a good idea putting a whole Oreo cookie at the bottom of the cake 🙂 Winner!

000_0009

Vanilla Cupcakes with Oreos: (adapted from the usual Vanilla Cupcakes recipe) Makes approximately 36 cupcakes.

  • 200g butter, chopped and softened, not melted
  • 1 1/3 cups caster (white) sugar
  • 1 tsp vanilla bean paste/extract
  • 4 eggs
  • 2 3/4 cups self-raising flour
  • 1 cup milk
  • 1 packet Oreos (I used some weird ‘Grab and Go’ packs as they were the only ones at the store. I would suggest using one whole long packet of Oreos!)
  • 36 extra Oreos (for the bottom of the cupcakes), crushed

Preheat the oven to 180c. Line cupcake tins with cases and place one whole Oreo biscuit at the bottom of each case. Beat butter, caster sugar and vanilla until pale and creamy. Add eggs, one at a time, and beat until each one is well combined. Add the flour and the milk in batches, starting and finishing with flour. Stir after each addition until well combined. Either in a food processor or with a rolling pin (or any other alternate way), crush one packet of Oreos. If you are using the food processor, just be careful as you don’t want the biscuits to be just crumbs. You want them to be chunky, so you get nice big bits when you’re eating the cake. Stir crushed Oreos into cake mixture. Spoon cake mixture into cakes with the whole Oreos at the bottom. Bake for 12-15 minutes, or until a skewer is inserted into the cake and comes out clean. Leave cakes to cool in tin for 5 minutes before transferring them to a wire rack to cool completely.

PicFrame

Condensed Milk Buttercream: (adapted from the awesome Raspberri Cupcakes)

  • 350g butter, chopped and softened, not melted
  • 2 cups icing (confectioner’s) sugar
  • 200g tube sweetened condensed milk
  • 1 tsp vanilla bean paste/extract
  • To decorate, mini Oreos

Beat butter until pale and creamy, approximately 4 minutes. Gradually add the icing sugar. Add the condensed milk and vanilla and beat until well combined and fluffy. I let mine go for about 4 minutes. To assemble, spoon buttercream into a piping bag fitted with a wide, round nozzle. Pipe large dollops onto cooled cupcakes, and top with a mini Oreo. Store at room temperature in an airtight container, in a cool place. I’m a big advocate of not putting cakes in the fridge. It just dries them out, plus cold cake is not pleasant. It’s as simple as that, in my opinion!

000_0004

This cupcake has been one of my favourites, to make and to eat. I always like to make my cupcakes a little bit different and I try to make them memorable. The Oreo at the bottom of the cake and that delicious condensed milk buttercream was a winner for me! Also, I am off overseas next week, and won’t be back until the end of July. I hope to have an interesting travel post for the blog. Until then, Happy Baking!

000_0010

Pear and Chocolate Layer Cake with Salted Caramel Buttercream

My friend asked me to make a special cake for a very special occasion, and she gave me complete freedom to choose the flavours and look of this special cake. I was a bit worried, because I wanted it to not only be creative and interesting, but also a crowd pleaser. It took me a while to come up with the idea that eventuated into the pretty little thing below,and I kept umm-ing and ahh-ing about every last detail. I’m pretty happy with the result.

000_0019

This is the first ‘naked’ cake I’ve made, and I must say I really like the look of the naked cake. It first worried me a little because covering a cake in icing kind of gives you a security blanket in that you can cover up all the flaws on the cake itself, but I love the rustic look, and also the autumn colours this cake has.

000_0017

I have used the combination of pear and caramel before, and really, adding chocolate to this magnificent duo, is certainly not going to do any harm! While it may seem a little rich, the pear is a nice fresh hit when paired peared with the creamy caramel and breaks the decadence up nicely, even though I would be so much more than happy to down a bowl of that caramel buttercream on its own.

000_0016


The recipes used here are nothing I haven’t made before, I’ve just adapted them a little differently.  You can find the caramel buttercream recipe on this post for Caramel au buerre sale macarons, and you can find the chocolate cake recipe here – I have just made it into three round cakes instead of cupcakes. As for the pear, there is one pear, chopped, in each layer, plus the whole baked pear in the middle of the top layer. Enjoy!

000_0014

Lamington Cake with Balsamic Strawberry Jam

Happy Australia Day to all you Aussies! I hope everyone is having a relaxing long weekend 🙂 As a country, Australia does not really have a defined cuisine of its own. I guess it has something to do with being derived from Britain, and not really having a whole lot of history of our own. However, there is one sweet that we do claim do be our own (aside from the humble Pav, of course!). It is the delicious Lamington. If you do not know what a Lamington is, you are missing out, big time! They are slices of sponge-y cake, filled with jam, and covered in chocolate icing and coconut. Yum! I had actually never made a Lamington before, so I wasn’t sure how it would go, but I decided on a cake version for my Mum’s birthday, and I must say, it was delicious, and a big hit.

000_0008

I was going to use the recipe from the ‘BAKE’ book, from the Australian’s Women’s Weekly (AWW are the go-to’s for great recipes for many Aussies), for normal Lamington’s. However, I just had to look on my favourite site, Taste, of course, to see if they may have had a recipe for a cake. Luckily, I found the perfect one with great reviews, so I went with that, with a few of my own additions. I guess I could be more sure of the measurements this way, instead of having to adapt a slice into a cake. Anyhoo, the recipe was great – easy to follow and not ridiculously time consuming, either. Winner 🙂

000_0004

Lamington Cake: (recipe from Taste.com)

  • Cooking oil spray, to grease
  • 1/2 cup self-raising flour
  • 1/4 cup plain (all-purpose) flour
  • 1/4 cup cornflour
  • 4 eggs, at room temperature
  • 3/4 cup caster (white) sugar
  • 2 cups coconut
  • 250ml thickened cream
  • 1/3 cup icing (confectioner’s) sugar
  • 1 tsp vanilla bean paste/natural extract

Preheat your oven to 180c/356f. Grease two 20cm round springform baking tins with cooking oil spray, and line with non-stick baking paper. Set aside.

Sift all three flours into one bowl. In a separate bowl, beat all of the eggs, and the sugar, for approximately ten minutes, or until the mixture is thick, pale and creamy. Then, sift half of the flour mixture into egg mixture, and  gently fold it in with a metal spoon until well combined. Repeat with the remaining flour. Make sure the flour is all combined as it can be difficult to see in a large bowl – the flour will just sink to the bottom. And remember to be gentle as you don’t want to knock too much air out of the sponge.

Divide the mixture evenly into the 2 prepared tins. Smooth the surfaces with a metal spoon to ensure the mixture is even. Bake for 12-15 minutes (mine took 14, but ensure you check at 12). Insert a skewer to ensure cake is cooked – the skewer will come out clean. Leave in tins to cool, then place on a wire rack.

Chocolate Icing:

  • 2 cups icing (confectioner’s) sugar
  • 1/3 cup good quality cocoa powder
  • 1/2 cup water

Sift the icing sugar and cocoa into a bowl together, and add the water. Mix well until combined and smooth. Pour the icing into a large, shallow dish. Pour the coconut out onto a large baking tray.

Place one side of the sponge cake into the icing, cover the sides, then dip the other side of the sponge in the icing. Cover in coconut and place on a large cake stand. Repeat with remaining sponge cake, except place this one on a plate or another baking tray. I found this process super messy and it took me a while, but I got there in the end!

000_0001

Balsamic Strawberry Jam:

  • 1 medium punnet of strawberries, hulled and quartered
  • 1 tsp vanilla bean paste/natural extract
  • 1 cup caster (white) sugar
  • 1/3 cup balsamic vinegar
  • Splash of water

Place strawberries and water (I literally used a splash, just to moisten the strawberries) in a medium sized saucepan. Cook on a medium heat until the berries begin to soften (about 2 minutes). Add the vanilla and sugar, and cook over a low heat for about 10 minutes, or until strawberries have broken down. Add balsamic vinegar, and continue cooking on low until mixture becomes a sticky, jam like consistency. Pour into a bowl, and leave to cool. If you are not using the jam on the day of making it, cover with cling wrap and place it in the fridge. I made my jam two days beforehand.

Lamington Cake

Assembly:

Whip up 250ml thickened cream, with 1/3 cup icing (confectioner’s) sugar, and 1 tsp of vanilla bean paste/natural extract. With one sponge cake already on the cake stand, cover with whipped cream, ensuring you spread the cream right to the edges of the cake (if you want to decorate it like my cake, leave a little bit of cream behind to pipe on top). Then, spread over the strawberry jam – although this time don’t spread it right to the edges, leave about 1cm. Place the other sponge on top of the cream and jam. Decorate as desired 🙂 EAT!

Messy goodness

HAPPY AUSTRALIA DAY! (check out my past Australia Day posts here.)

000_0011