Wedding Cakes, Sesame Street and more!

Well, I did say it could be a while. However, I am back, and back with lots of photos of cake! The last month has been absolutely flat out with cakes for me, and it doesn’t look like I’ll be slowing down any time soon! Which is not a bad thing, it is nice to busy making cake, than busy writing essays! Anyway, lets get to the important stuff – this cake below was made for a very special family wedding in late November, and I was super happy with how they turned out:

WeddingCake

WeddingCake1

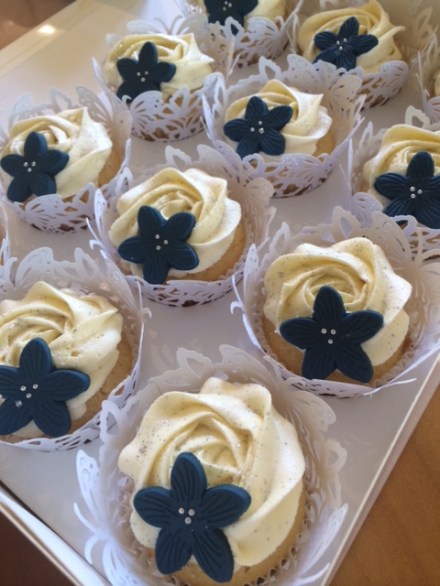
The top cake was a 4” vanilla bean layer cake, filled with lemon curd. All of the cupcakes were a nice simple vanilla bean, with fondant flowers to match the bride’s beautiful dress. I love making vanilla bean cake, because it’s so simple, but has such a lovely flavour (providing you use good quality paste or beans). I am definitely a chocolate girl at heart, but vanilla bean brings a nice change and is so underrated.

WeddingCake2

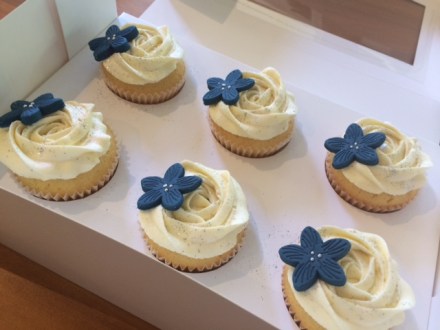
I used the trusty vanilla bean cupcake recipe by Taste.com, which I have been using for years, for both cakes. The recipe is so versatile – the result is always great with cupcakes, and small and large layer cakes.

WeddingCake3

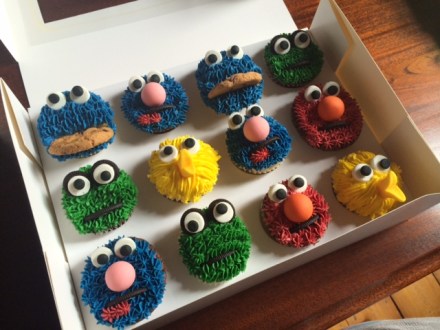
These cupcakes below have to be the most fun I have ever had making cakes! I was a little nervous to make these because I have never done anything like it before, but I was very happy with the results! As you probably know from my previous work, I am not a fan of fondant at all, but I had to make a slight exception for these cuties 🙂

photo 1-2

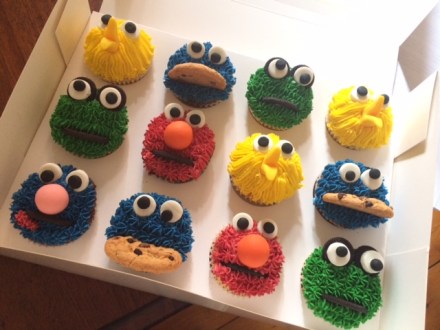
It was only the second time I have attempted bright red buttercream, because the first time, it was a nightmare! Red is such a difficult colour to get right, because you have to use sooooo much colour for it to be deep enough. However, if you add too much gel to the buttercream, it splits due to the amount of liquid = disaster. It took me two times to get it right, and the trick for me was to start with a deep pink, and then add the red to deepen the colour. If anyone has any tips for red buttercream – please let me know!! 🙂

photo 2-2

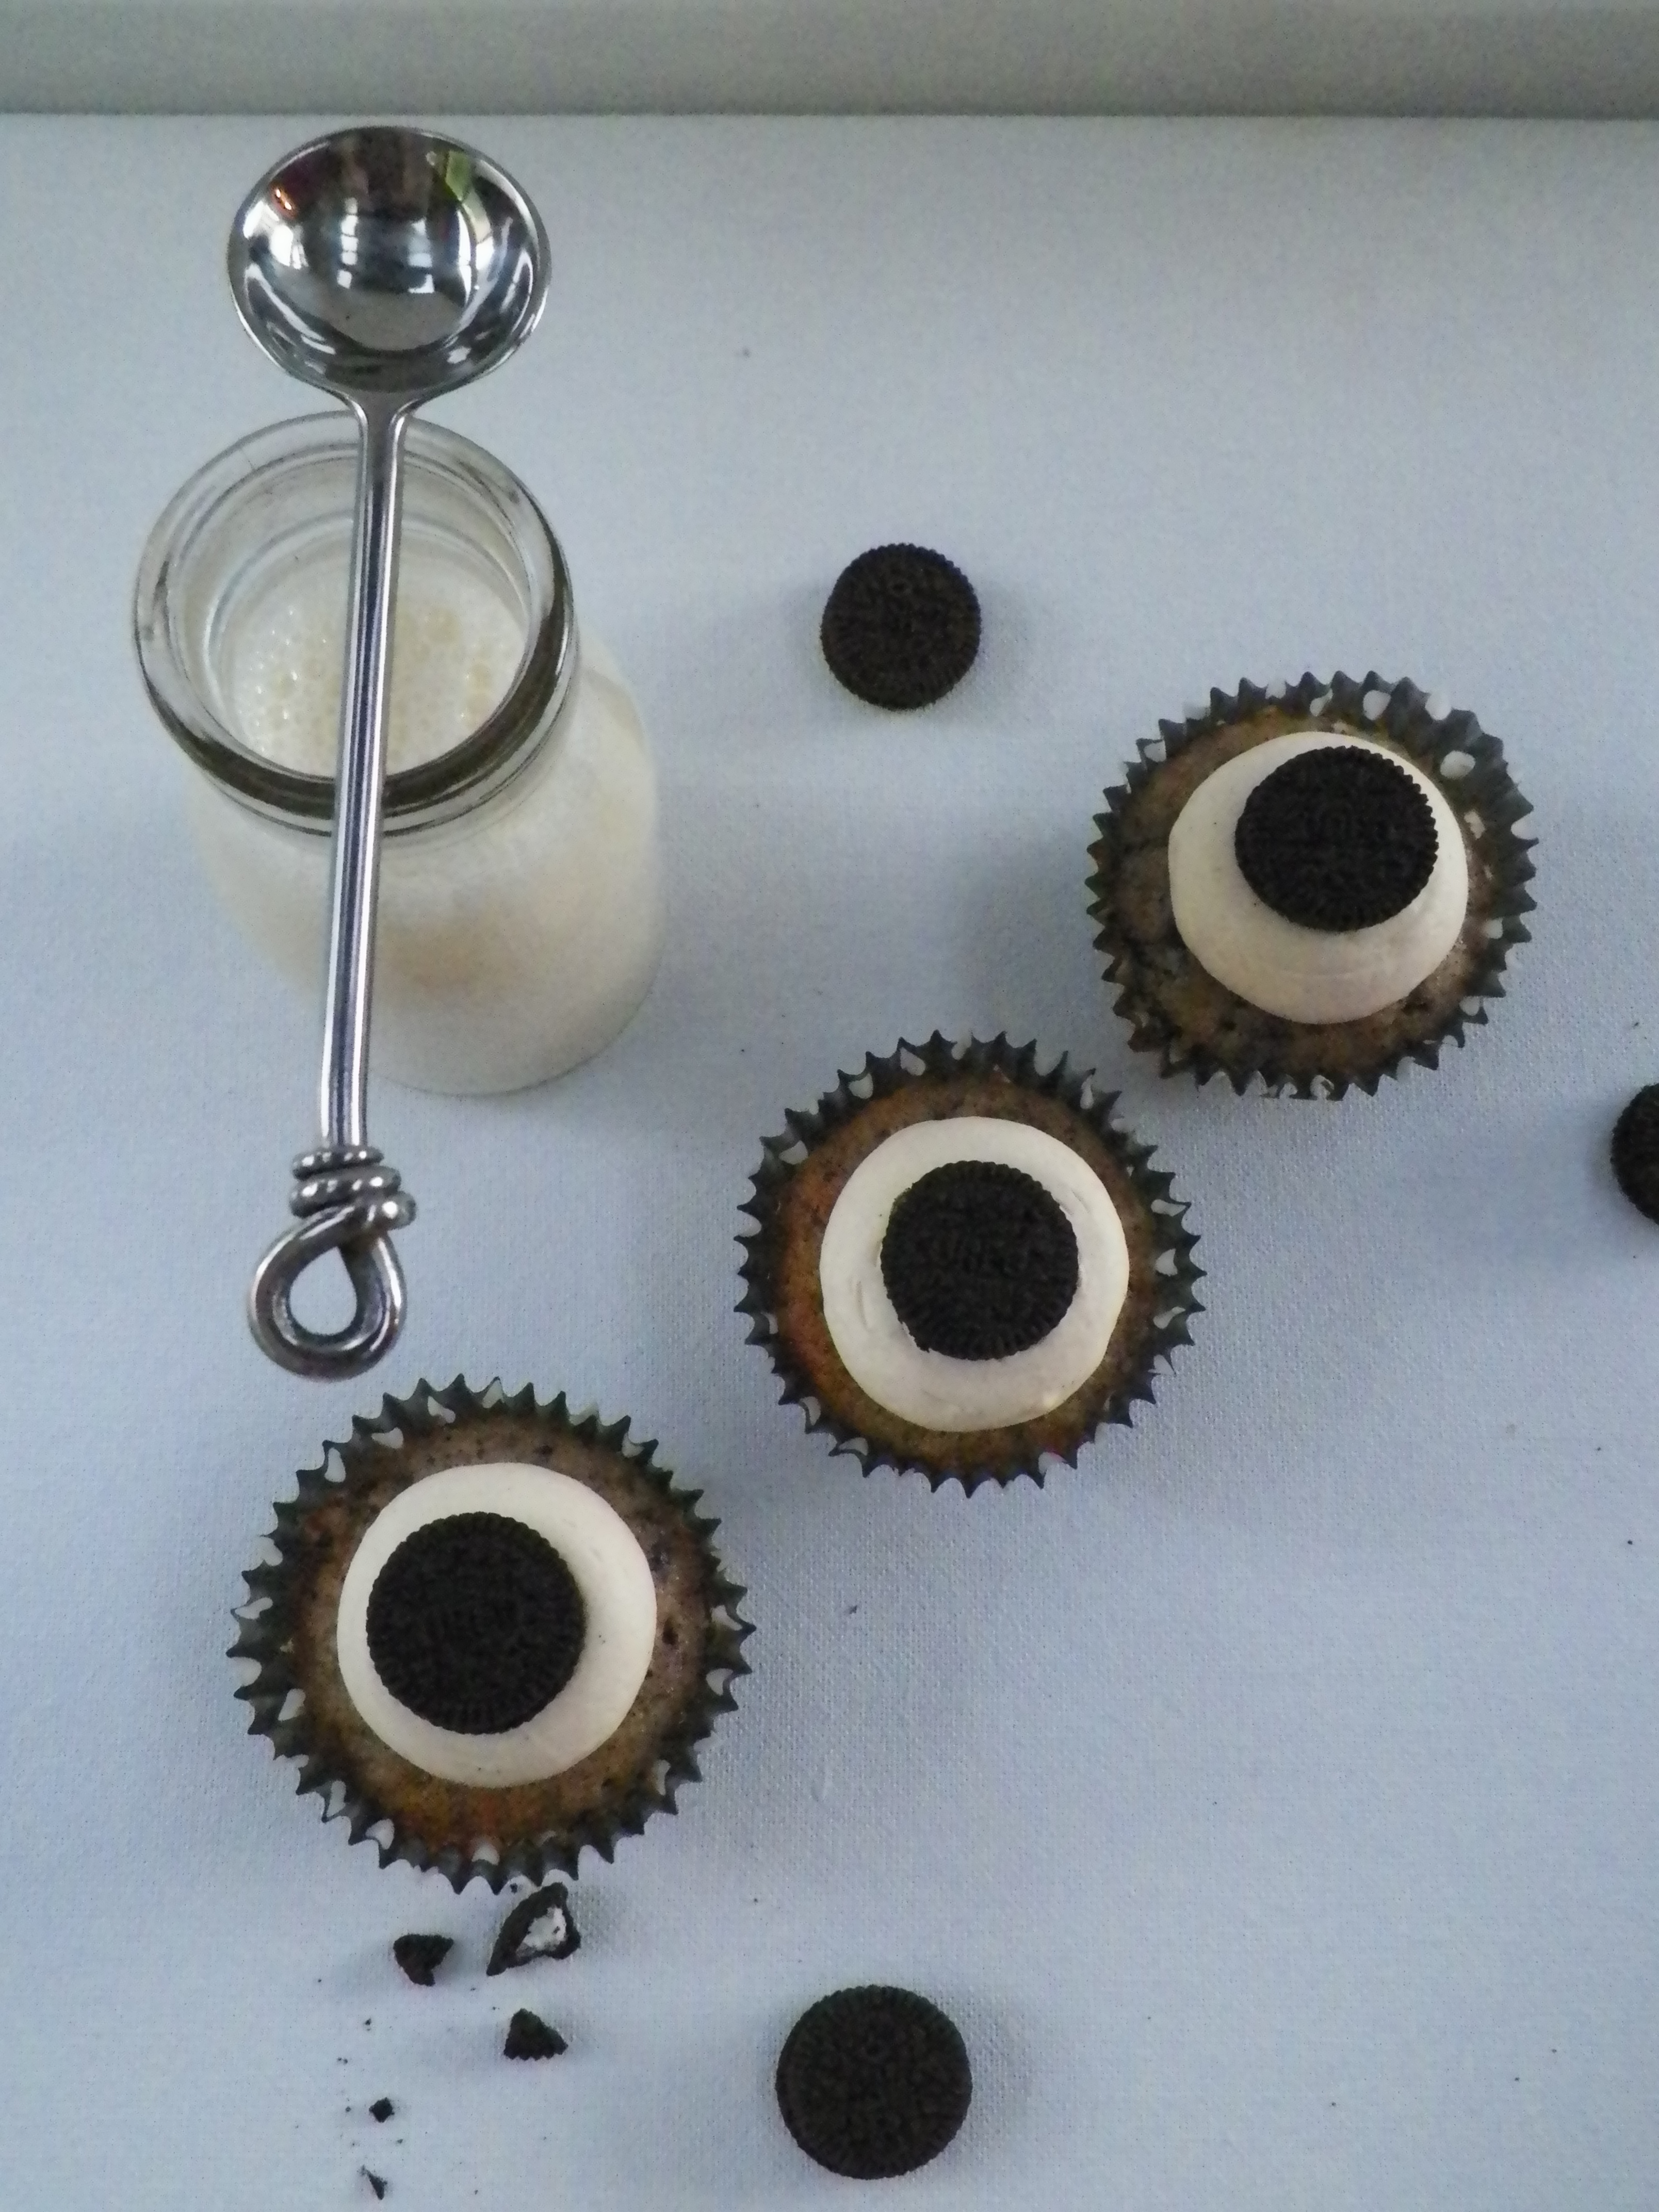
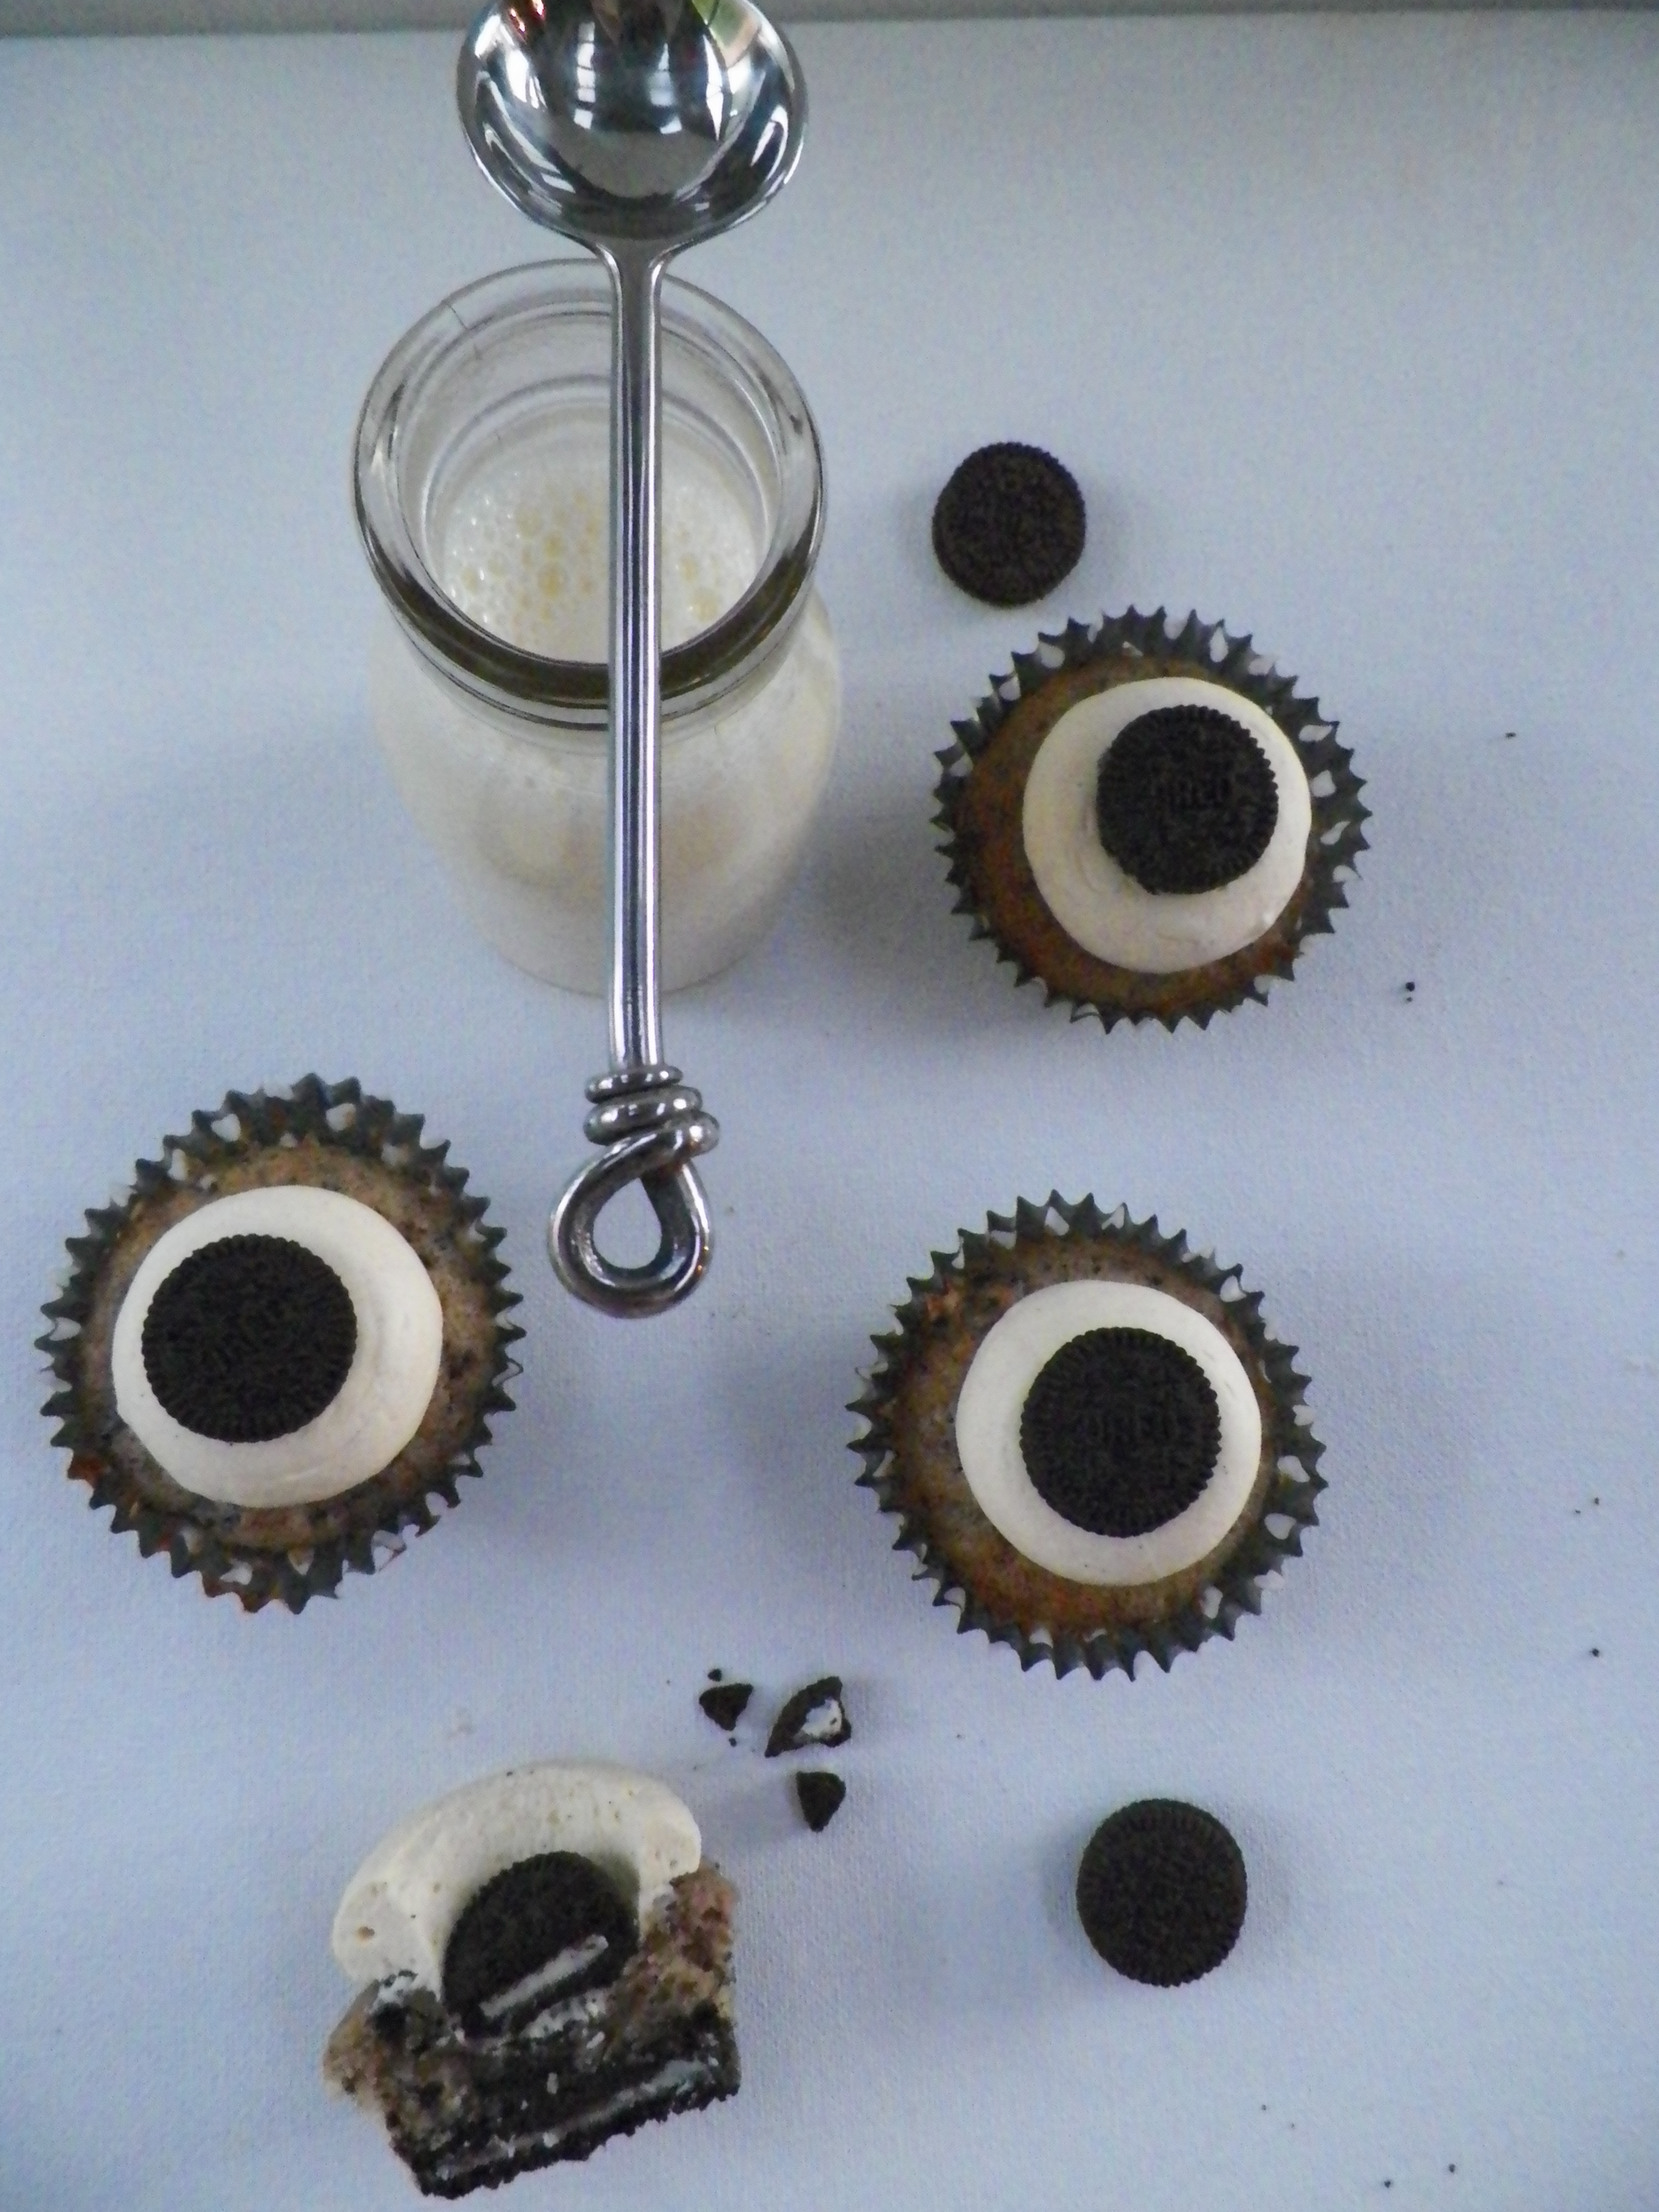
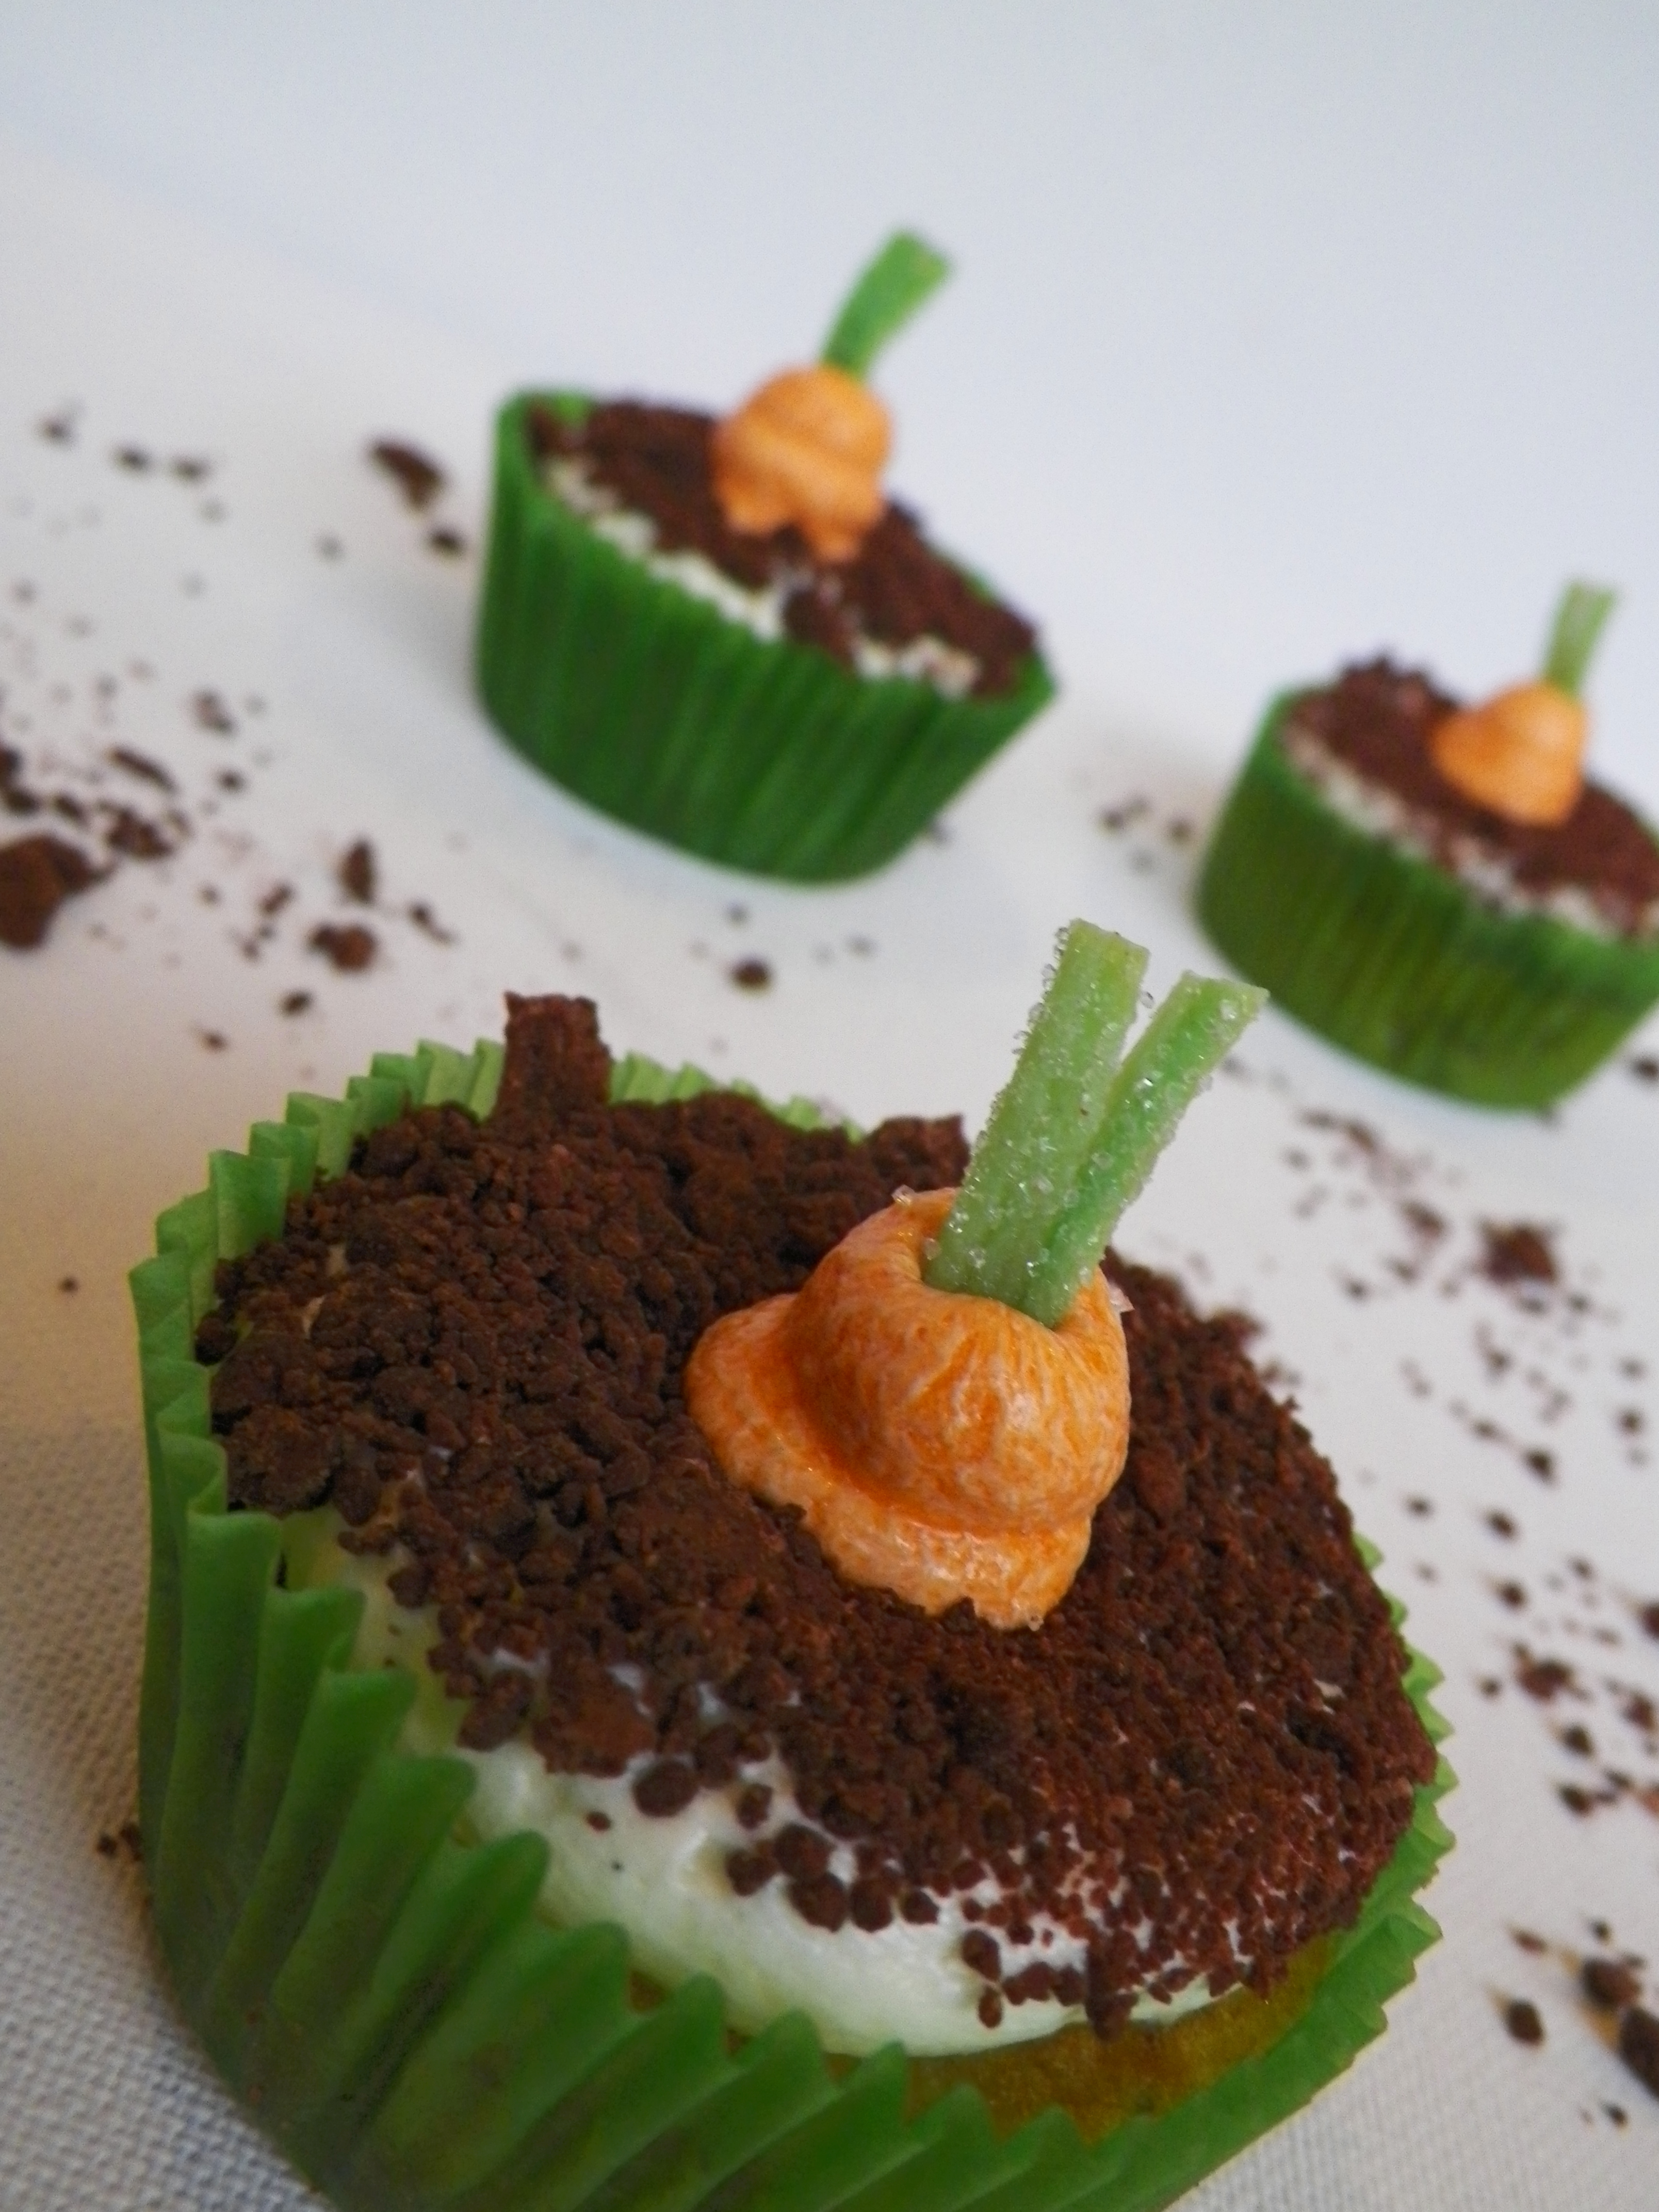
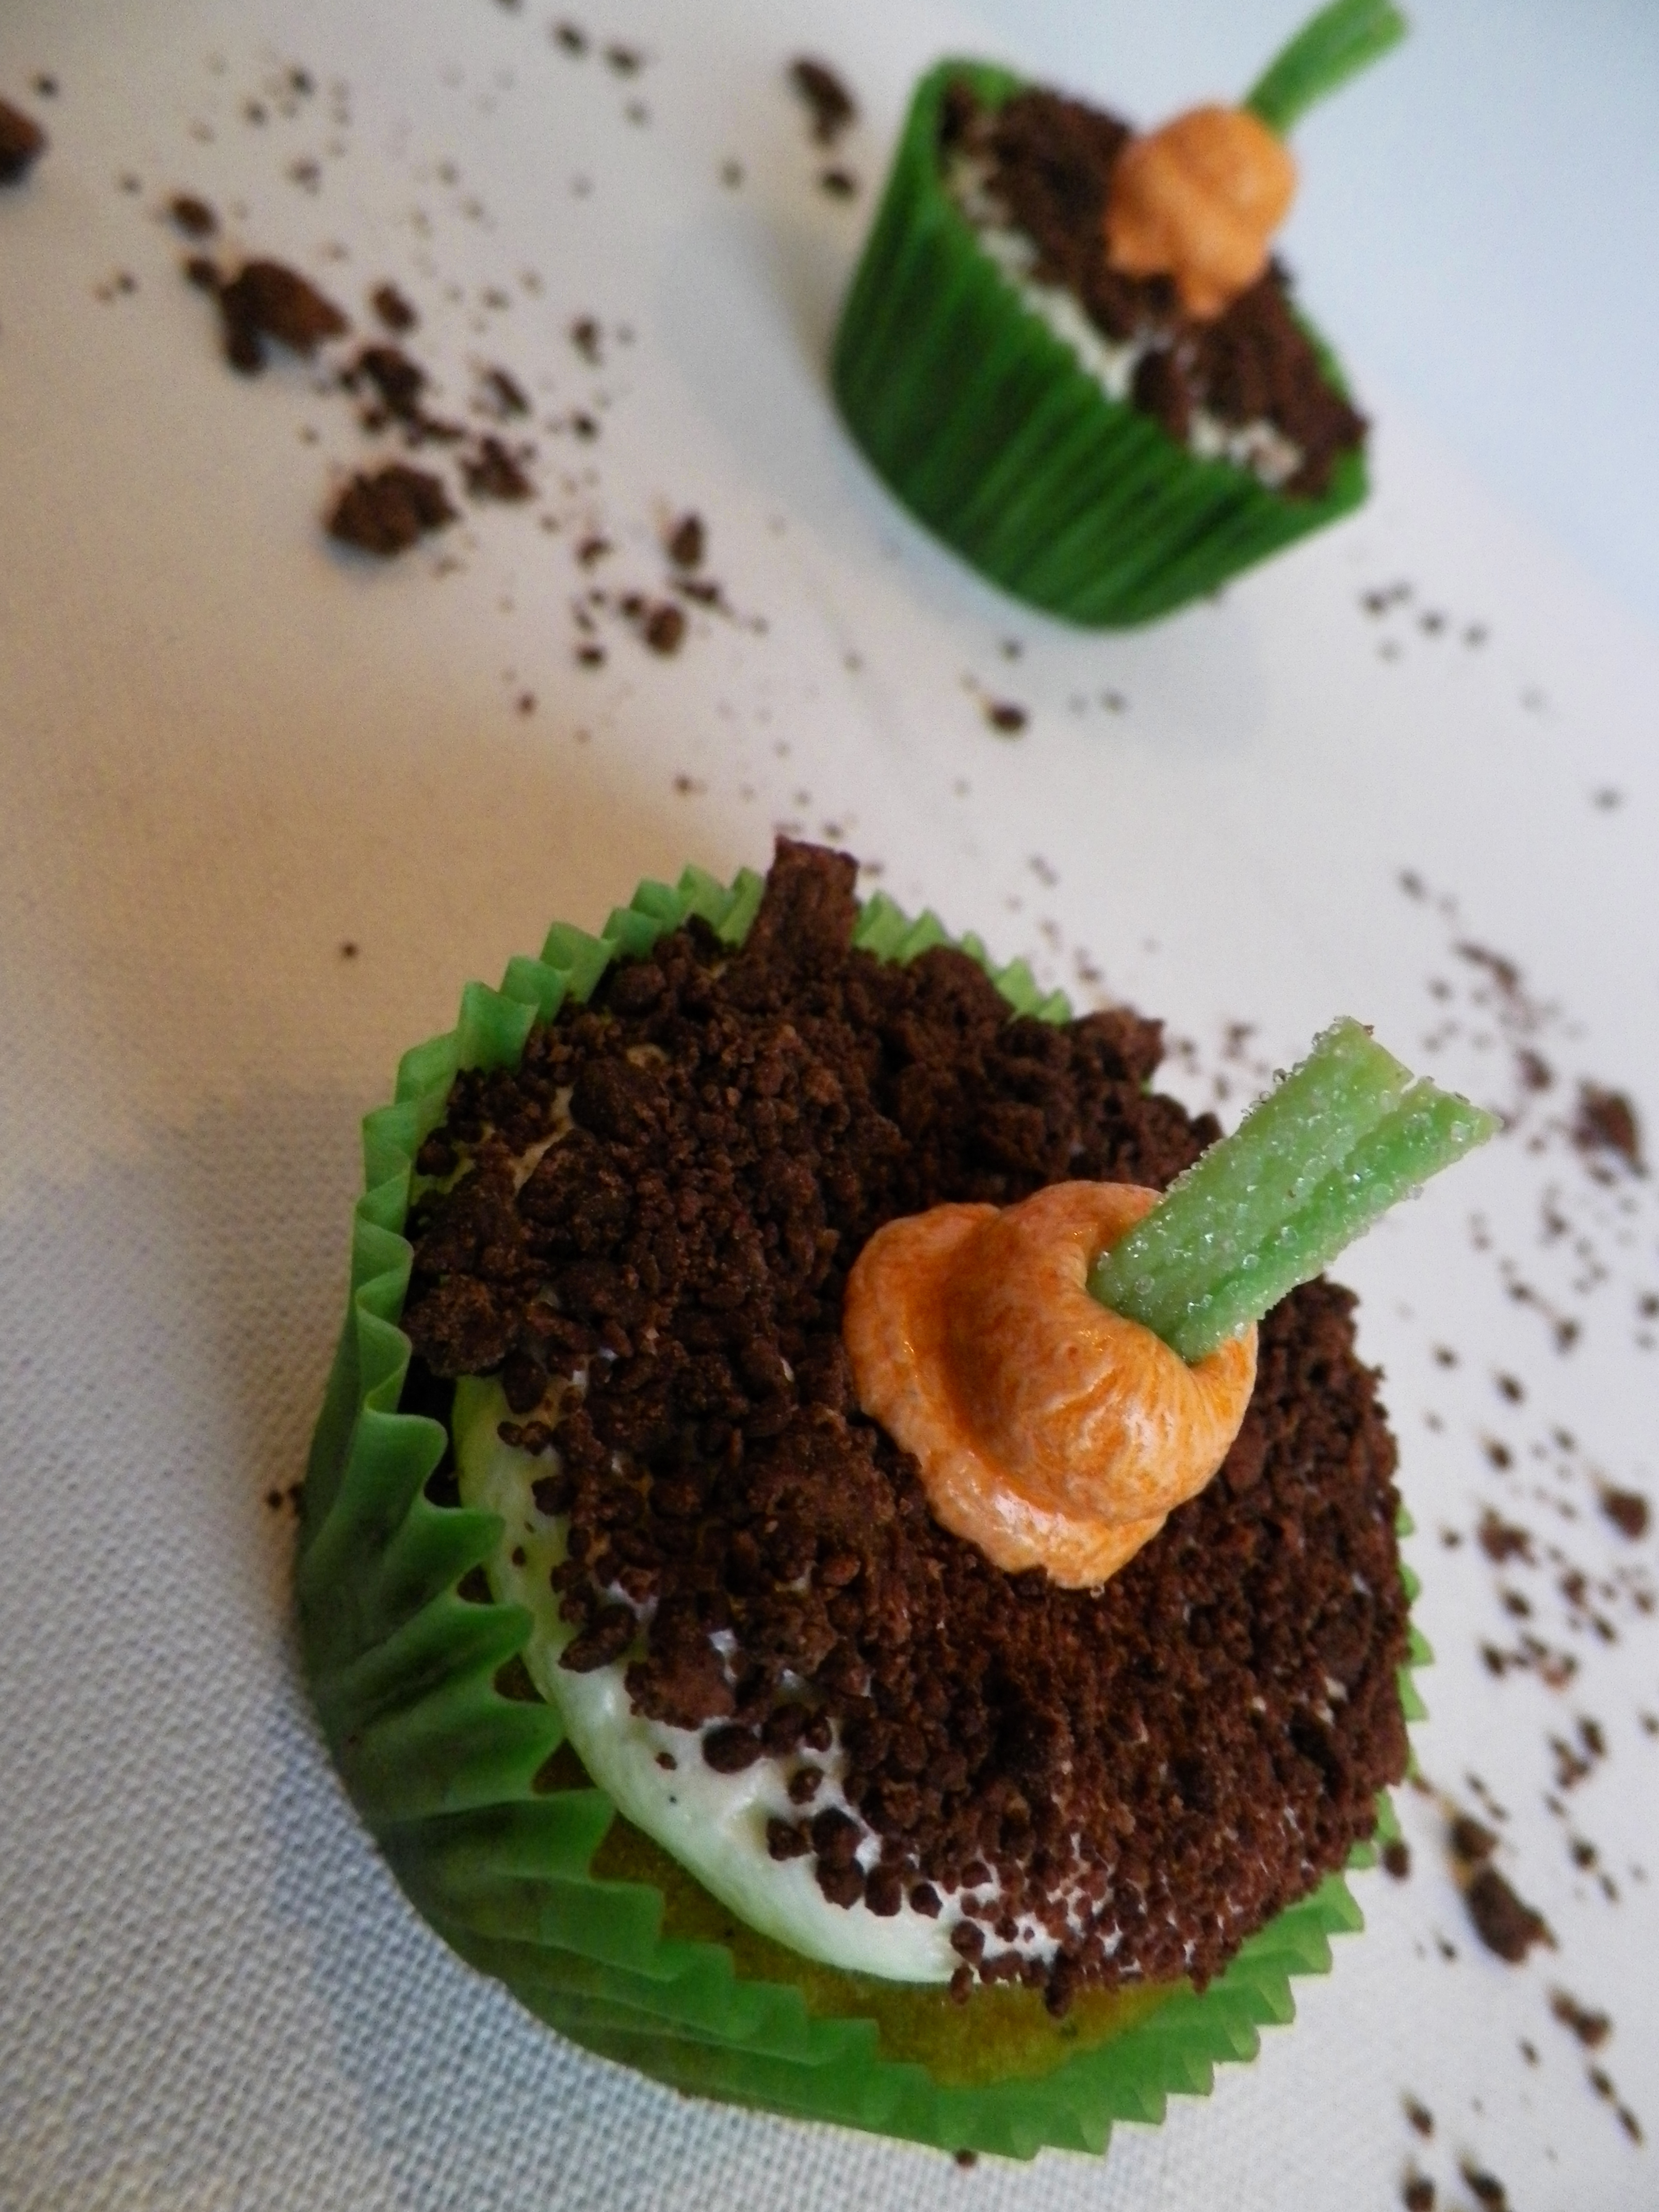
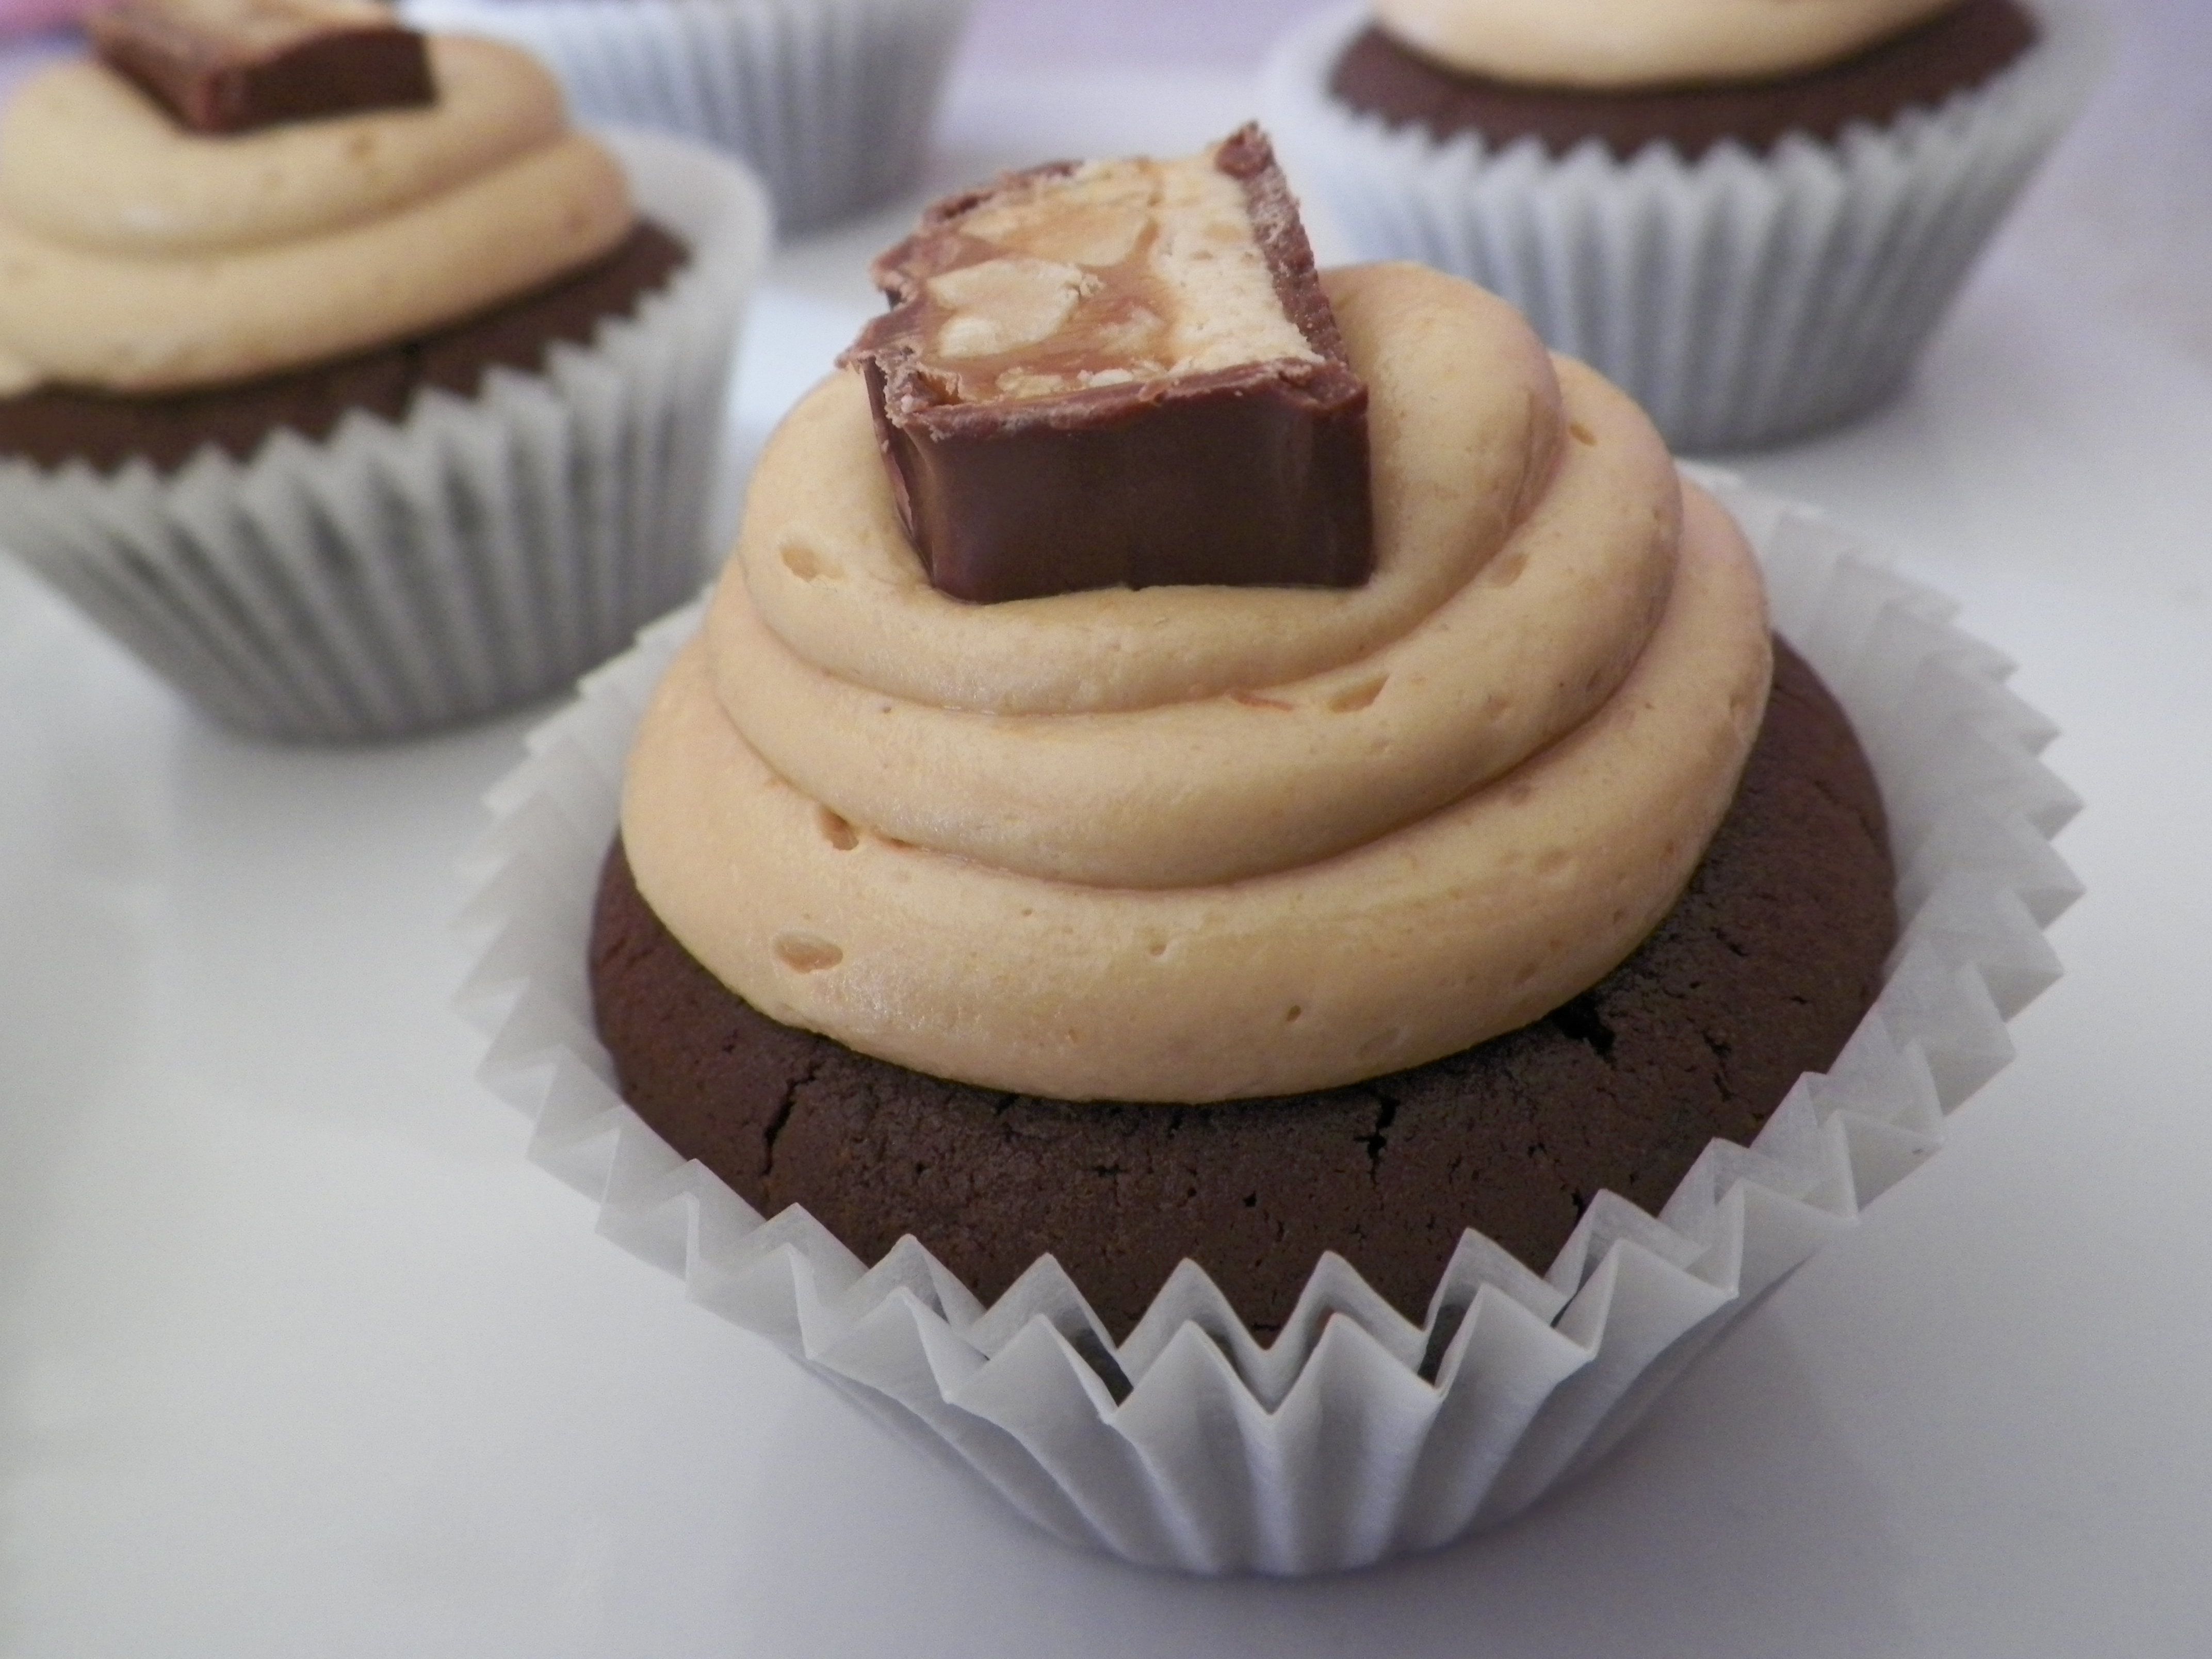
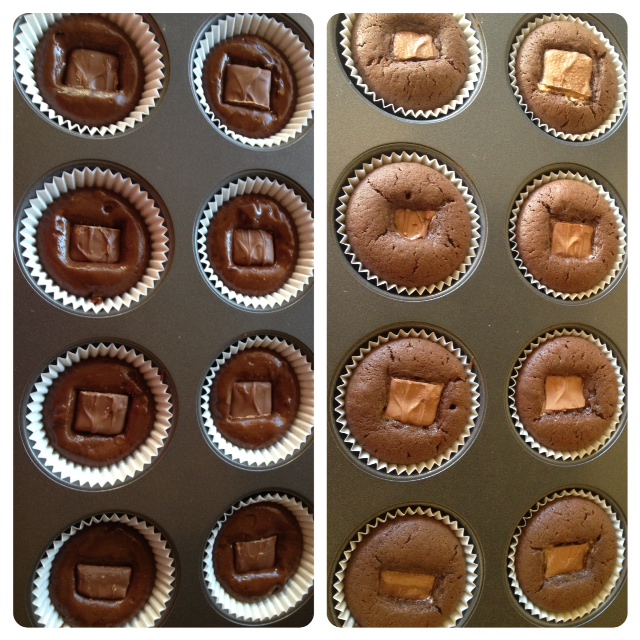
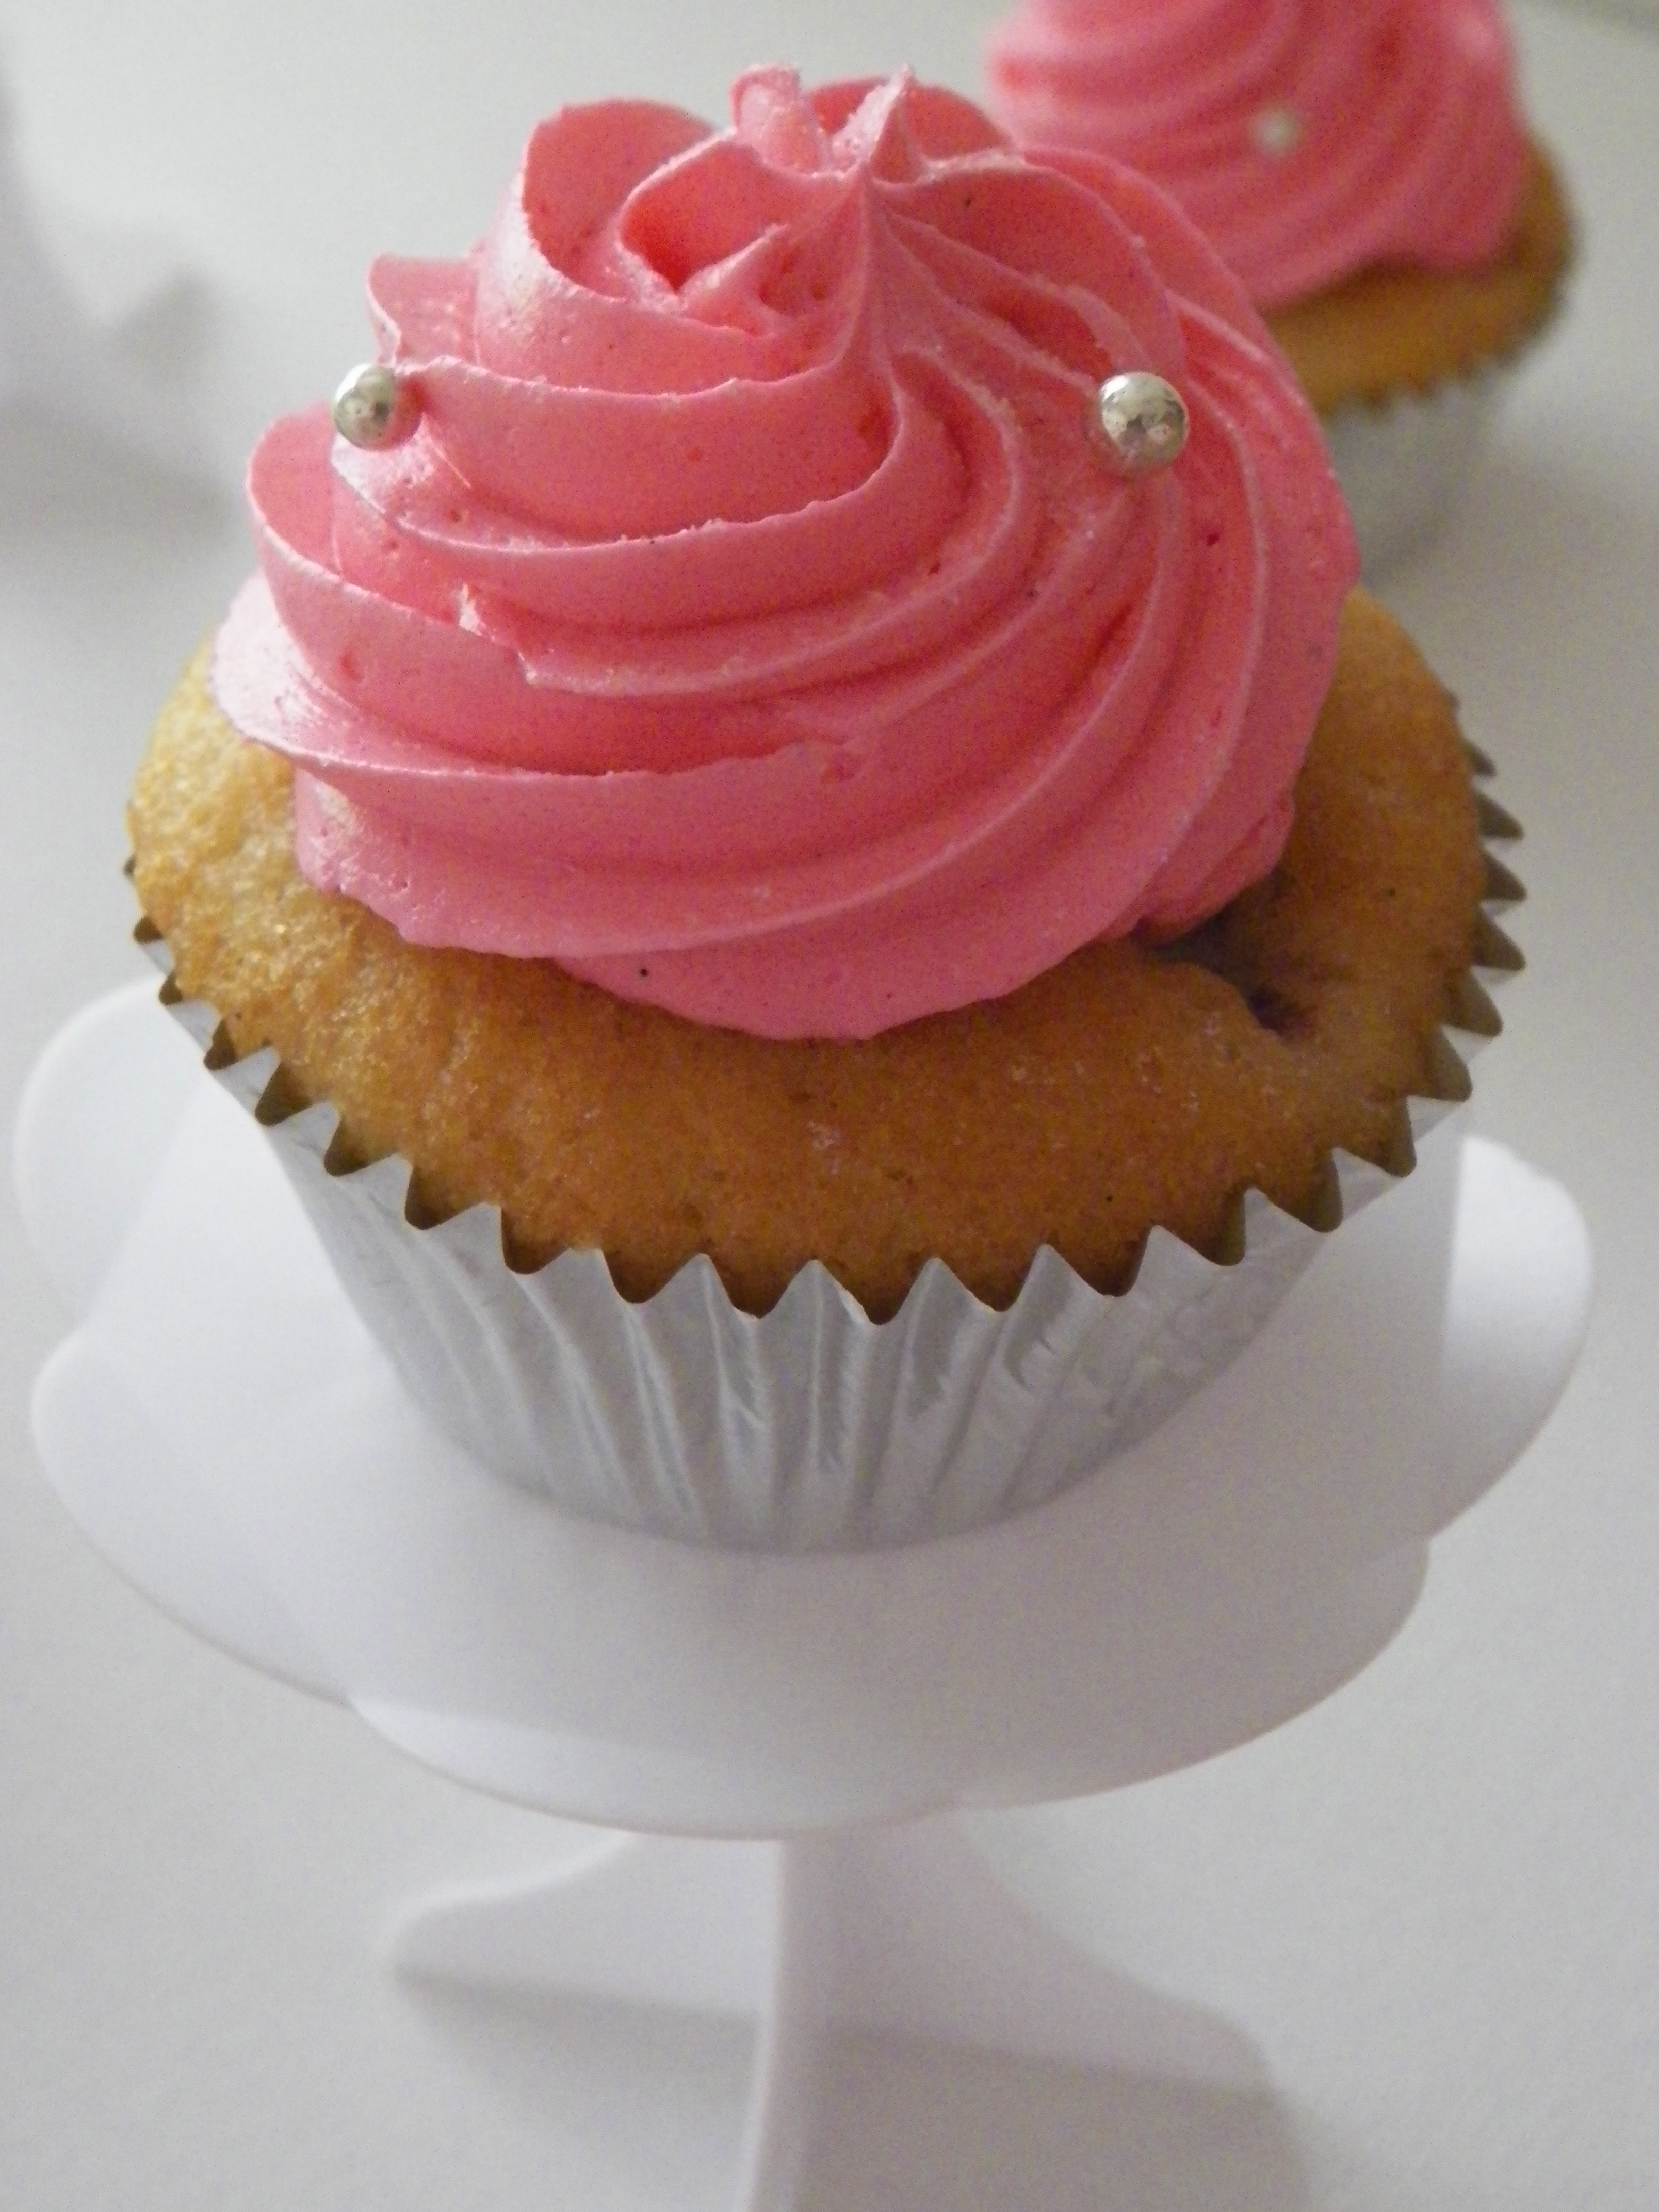
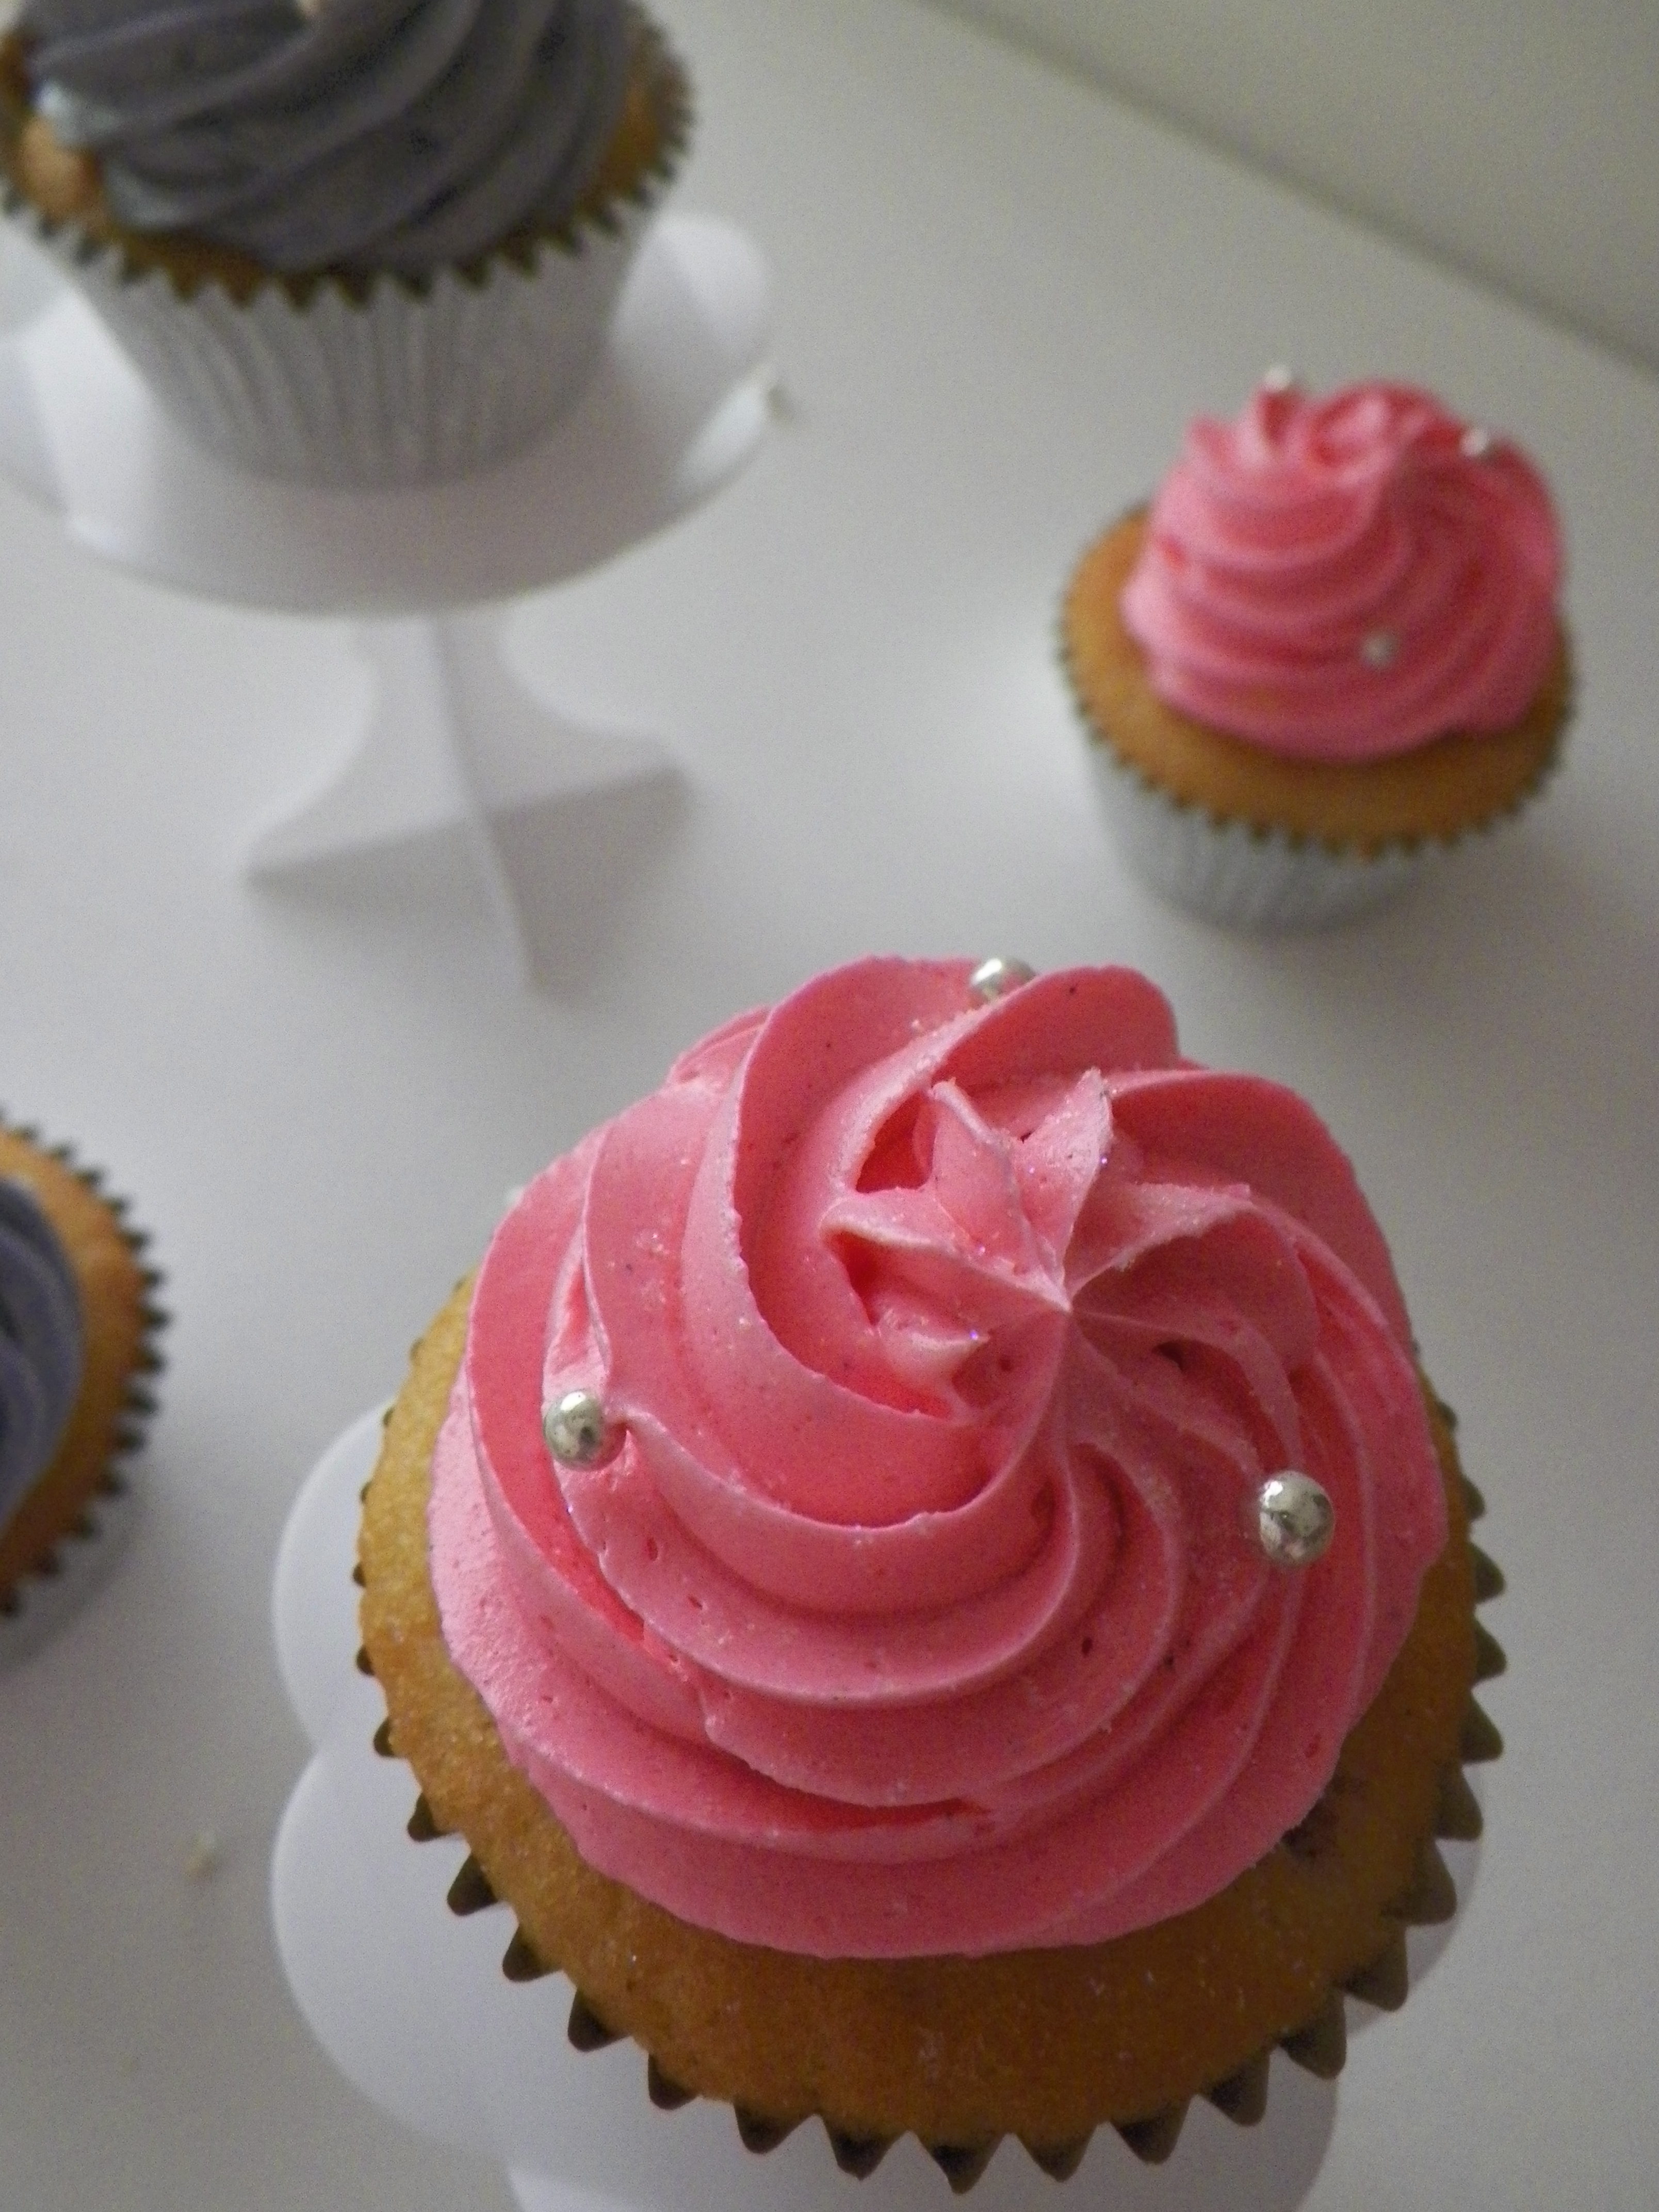
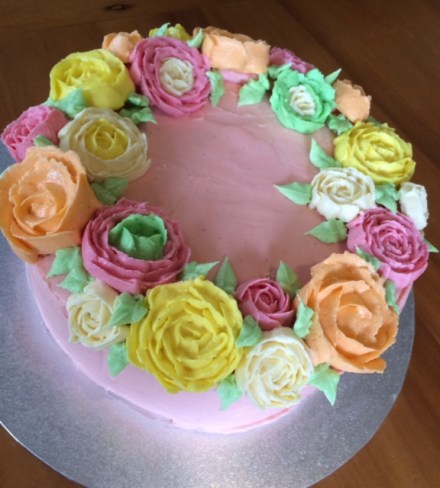
Below are some other Birthday and Christmas cupcake orders I have been lucky enough to make 🙂

photo

photo 5-2

photo 4

photo 3-2

photo 1-3

photo 2-3

Happy Christmas baking to you all, stay tuned for a delicious festive dessert soon! x

P.S. For more regular photos and updates, follow me on Instagram – @whiskitforabiscuit


Oreo and Milk Cupcakes

I am a very big fan of Oreos, and always have been. I remember watching The Parent Trap when I was little and was very intrigued when the twins were talking about how they both loved dipping them in peanut butter. I tried it, and was hooked. There was no turning back! I made these cupcakes for the Australian Cancer Council’s Biggest Morning Tea, which was held at my workplace.

000_0005

I really wanted to put little milk bottles on top of the cupcakes, as well as the mini Oreo, but they were just too big, and they ruined the look a little. The taste of these babies was quite amazeballs, I must say. It was definitely a good idea putting a whole Oreo cookie at the bottom of the cake 🙂 Winner!

000_0009

Vanilla Cupcakes with Oreos: (adapted from the usual Vanilla Cupcakes recipe) Makes approximately 36 cupcakes.

  • 200g butter, chopped and softened, not melted
  • 1 1/3 cups caster (white) sugar
  • 1 tsp vanilla bean paste/extract
  • 4 eggs
  • 2 3/4 cups self-raising flour
  • 1 cup milk
  • 1 packet Oreos (I used some weird ‘Grab and Go’ packs as they were the only ones at the store. I would suggest using one whole long packet of Oreos!)
  • 36 extra Oreos (for the bottom of the cupcakes), crushed

Preheat the oven to 180c. Line cupcake tins with cases and place one whole Oreo biscuit at the bottom of each case. Beat butter, caster sugar and vanilla until pale and creamy. Add eggs, one at a time, and beat until each one is well combined. Add the flour and the milk in batches, starting and finishing with flour. Stir after each addition until well combined. Either in a food processor or with a rolling pin (or any other alternate way), crush one packet of Oreos. If you are using the food processor, just be careful as you don’t want the biscuits to be just crumbs. You want them to be chunky, so you get nice big bits when you’re eating the cake. Stir crushed Oreos into cake mixture. Spoon cake mixture into cakes with the whole Oreos at the bottom. Bake for 12-15 minutes, or until a skewer is inserted into the cake and comes out clean. Leave cakes to cool in tin for 5 minutes before transferring them to a wire rack to cool completely.

PicFrame

Condensed Milk Buttercream: (adapted from the awesome Raspberri Cupcakes)

  • 350g butter, chopped and softened, not melted
  • 2 cups icing (confectioner’s) sugar
  • 200g tube sweetened condensed milk
  • 1 tsp vanilla bean paste/extract
  • To decorate, mini Oreos

Beat butter until pale and creamy, approximately 4 minutes. Gradually add the icing sugar. Add the condensed milk and vanilla and beat until well combined and fluffy. I let mine go for about 4 minutes. To assemble, spoon buttercream into a piping bag fitted with a wide, round nozzle. Pipe large dollops onto cooled cupcakes, and top with a mini Oreo. Store at room temperature in an airtight container, in a cool place. I’m a big advocate of not putting cakes in the fridge. It just dries them out, plus cold cake is not pleasant. It’s as simple as that, in my opinion!

000_0004

This cupcake has been one of my favourites, to make and to eat. I always like to make my cupcakes a little bit different and I try to make them memorable. The Oreo at the bottom of the cake and that delicious condensed milk buttercream was a winner for me! Also, I am off overseas next week, and won’t be back until the end of July. I hope to have an interesting travel post for the blog. Until then, Happy Baking!

000_0010

Coming Up Carrot Cupcakes with Chocolate Cinnamon Soil

How is Easter almost here already?! It scares me how fast time flies these days, but hey, any excuse to bake, really. I found the idea for these awesome coming up carrot cupcakes on the ever-inspiring Pinterest. Unfortunately, I only saw them once and couldn’t find them again, so I don’t know whose idea they originally were, but they are pretty awesome.

 010

I first thought of crushing up dark chocolate biscuits for the soil, but I found this recipe to make your own by making a sugar syrup and adding dark chocolate. I was a little sceptical, but it worked really well, tasted great and added a nice crunchy texture to the cake. This was the first time I had ever make carrot cake, and I can’t really say I am a huge fan, but the cream cheese icing makes it all worthwhile!

 005

Carrot Cupcakes: (from Taste.com)

Makes approximately 20 cupcakes

  •  160g butter, softened, not melted
  • 2/3 cups firmly packed brown sugar
  • 1 tsp ground nutmeg
  • 2 eggs
  • 1 cup self-raising flour
  • 1 1/4 cups buttermilk
  • 1/2 cup plain (all purpose) flour
  • 1 cup grated carrot (I used 2 medium sized carrots)
  • 75g crushed pecans (original recipe calls for walnuts, but I am allergic, and I like pecans better anyway)

Preheat oven to 180c, and line cupcake tins. Beat the butter, sugar and nutmeg until pale and creamy. Add eggs, one at a time until well combined. Stir in self-raising flour until well combined, and then stir in the buttermilk until well combined, and then the plain flour until well combined. Stir in the carrot and the nuts. Spoon batter into cupcake cases, and bake for approximately 25 minutes, or until a skewer is inserted, and comes out clean. Leave in tins to cool for 5 minutes, and then turn out onto wire rack.

Chocolate Soil:

I really love this recipe. It’s so clever – I never even thought of this combination actually working. The recipe is from The Lone Baker, and I would really recommend you try it, especially if you are familiar with making sugar syrups. Chocolate soil is so versatile, and could be used for a variety of novelty cakes and desserts.

  • 100g caster (white) sugar
  • 75g 70% dark chocolate, chopped (ensure you use dark chocolate, because you need that little bit of bitterness when combined with all that sugar!)
  • – 1 tsp ground cinnamon

Line an oven tray with non-stick baking paper. Place sugar with 2 tbs cold water in a small-medium saucepan, and heat on low-medium until the sugar dissolves, and starts to go slightly yellow around the edges – this can take a while, it took me about  8 minutes to get to this point. Once the sugar begins to go yellow, take it straight off the heat and quickly whisk in the chocolate and cinnamon with a balloon whisk. The consistency of soil will appear very quickly, and some of the mixture will stick to the sides of the pan. You can just scrape this off with a butter knife. Pour soil out onto prepared oven tray.

Soil

Cream Cheese Icing: (see Parisian Red Velvet Cupcakes)

  • 225g butter, chopped and softened, not melted
  • 340g cream cheese, slightly softened
  • 1 tsp vanilla extract/paste
  • 2 cups icing (confectioner’s) sugar
  • Orange colouring gel/liquid

Beat butter, cream cheese and vanilla together until pale and creamy, approximately 3 minutes. Gradually add the icing sugar. I use 2 cups, as I think that is sweet enough, but you can add more or less if you want to. Place 5 tablespoons of icing in a separate bowl, and colour with orange colouring gel/liquid.

004

Assembly:

With a small sharp knife, carefully carve out a small circle in the top of the cupcakes, leaving a hole to pipe in the carrots. Place the icing in a piping bag fitted with a wide round nozzle, and pipe circles around the hole made in the cupcake. Dip iced cake in the chocolate soil. You can add more soil to the cupcake with your hands if dipping it doesn’t cover the icing enough. Once all the cupcakes have soil on them, place the orange icing in a piping bag fitted with a small round nozzle. Pipe ‘carrots’ into the holes in the cupcakes, piping up so that the icing is approximately 1-2cm above the top of the cupcake. For the tops of the carrots, I used the green part of a sour strap, cutting them with scissors, with an incision of the middle of the strap. Place it in the carrot, far enough that it will not fall over.

007

You can find my previous Easter posts here. Happy Baking!


London: High Tea heaven and Market madness!

Ahhh…it´s been a while! I apologise for my severe lack of posting while abroad, I really didn´t fancy writing a post and adding photos on my tiny iPhone with shaky wi-fi, so I figured it would be best until I got to a proper, civilised computer! In addition to that, there hasn´t really been a whole lot to post about anyway, as we have been in the UK most of the time so far, and whilst the food is great, it´s fairly westernised and not really that different to Australia, well, from what we experienced anyway. However, there were two places we went in London that were fairly touristy but still quite amazing 🙂

I´m sure that most people who have been to London have experienced the epic craziness that is Harrods. Wow. That place is insane. The only things I wanted to see were the Toy Kingdom (I had an amazing time when I was 8 years old and was feeling nostalgic) and of course, the heavenly food hall! It was insaaaaaane. There were so many people there that you could hardly catch a glimpse of the cupcakes, let alone to buy one, which would require a hefty bank loan anyway! Obviously the patisserie and the bakery were my favourite sections to look at, but they also had other areas such as a butcher, a fishmarket, a salami/cold meats sections and soups, sandwiches and salads, etc. Everything looked delicious. I settled on a brie and caramelised onion panini, and an amazing brownie – a bit boring I know but most brownies have walnuts in them, which I am allergic to, so it was a rare and beautiful moment!

The other amazing foodie experience in London was the awesome Borough Market. It´s not huge, but is very well known amongst the locals, and many top restaurants come to the Borough Market to pick up their fresh ingredients. The range on offer at the market was huge, and consisted of items such as cheeses, salami, truffles, seafood, pastries, artisan chocolate, goat´s milk ice cream, spanish paella, fresh fruit and veg, meats, juices, preserves, baklava, BBQs, Jamaican soul food, coffee, and my favourite, fresh pasta! I had, obviously, some pasta, which was the most delicious pumpkin tortellini with olive oil and pecorino. I would have taken more with me if I could have. I also had a fresh juice with pear and mint, and my boyfriend had a fresh falafel and the most amazing, and the biggest apple strudel I have ever seen – and I forgot to take a photo of it! We will definitely be returning to the Borough Market when we head back to London in November.

Another place I loved was M&M World! It´s a bit of a novelty, but the place is crazy – 3 stories full of M&M everything – clothes, PJs, homewares, souvenirs, and of course, every M&M colour you could ever dream of! I loved M&M World, so much I went twice and bought PJs! Wish they had one in Melbourne 😦

Snickers Peanut Butter Cupcakes

This, for me, is indulgent cupcake heaven. You may have noticed that I am quite an avid peanut butter fan, and combined with chocolate and peanut caramel, well…what can I say? Obviously, these morsels of pure deliciousness are extremely rich and decadent, so I tried to make them a bit smaller than a standard sized cupcake!
000_0027
I was thinking of making a salted peanut caramel to fIll the cupcake, but I thought with the peanut butter ganache it would just be a little too difficult to stomach, but delicious nonetheless. So, I opted for a small piece of Snickers in the middle. This surprise went down very well with my colleagues 🙂
000_0022
The cupcakes I used are my usual trusted chocolate cupcake recipe which I have used in posts such as the Easter Egg Nest Chocolate Cupcakes, and you can find it here. This time, I halved the recipe, and it made about 15 medium sized cupcakes.
The peanut butter ganache is a Donna Hay recipe which I have used a number of times, and I could go on and on forever and ever about how amazing it is 😉 You can find the recipe in the Peanut Butter Macarons post.
  Image (1)
To make the cupcakes, you will need a 12 piece fun size packet of Snickers. After spooning the cupcake mixture into the cases, place half a small Snickers bar into the mixture and push it down into the batter. To top the cupcakes, fill a piping bag with a wide round nozzle and pipe swirls on top of the cupcakes. Slice the remaining Snickers bars into small pieces, and place a piece on the top of each cupcake. To store, place in an airtight container and leave at room temperature – don’t put them in the fridge! They will last a good 3 days in the container, although I have a sneaking suspicion not many of these babies will be around for 3 days 🙂
photo (2)

Summer Strawberry & Vanilla Cupcakes

I made these cute little cupcakes for two of my friends joint birthday this week, and am quite satisfied with how they turned out! My friend suggested the idea of putting strawberry into the plain vanilla bean cupcake, and it worked really well. They added a nice touch of summer and broke up the sweetness of the vanilla and rich creaminess of the buttercream. Yum!

Cupcakes!

Cupcakes1

I know it sounds a bit lame, but I LOVE piping cupcakes. I find it strangely therapeutic, but only when the buttercream swirls exactly the way I want it to :p Which definitely doesn’t always happen!

000_0005

I used my trusted vanilla bean cupcake recipe that I have used countless times. The great thing about this recipe is that you can double it, halve it, add anything you want to it (ie. Strawberries!), and the cakes will still be super moist and fluffy 🙂 Unlike macarons, where you can make the slightest of adjustments and every single shell will crack!

000_0019

Tower!

Cupcakes always look so pretty in photos, especially when they’re cute girly pastel colours like these ones. I love adding ribbon and cachous and other colour co-ordinated bits and pieces to the photos to brighten them up and to try and make a bit more of a story out of my food. I’m not sure if I’m any good at it, as I know next to nothing about photography, but it’s definitely fun to play around 🙂

000_0023

Best of 2012!

Here is a collection of photos that sums up the best foodie moments of 2012. I have loved every minute of delving into the blogging world, and cannot wait to continue next year 🙂 HNY!

Macarons:

Macarons

Macarons1

Macarons2

Macarons3

Cakes:


Cakes1

Cakes2

Cakes3

Cakes4


Bits and Pieces:


Pizza making class, High Tea with Zumbo, myself with Gary Mehigan

Pizza making class, High Tea with Zumbo, myself with Gary Mehigan


Homemade Ravioli and Gnocchi, Curries cooking class on a boat, Sipping cocktails at Sea Links Resort in Mui Ne, Vietnam.

Homemade Ravioli and Gnocchi, Curries cooking class on a boat, Sipping cocktails at Sea Links Resort in Mui Ne, Vietnam.


Treats from Little Cupcakes and La Belle Miette, Pasta and Black Risotto at Grossi Florentino, Homemade dumplings

Treats from Little Cupcakes and La Belle Miette, Pasta and Black Risotto at Grossi Florentino, Homemade dumplings


Homemade Caramel Ice Cream, Homemade Apple Pie, Sipping sparking in the Yarra Valley, making Neil Perry's Mac and Cheese.

Homemade Caramel Ice Cream, Homemade Apple Pie, Sipping sparking in the Yarra Valley, making Neil Perry’s Mac and Cheese.


Chocolate Dumplings and Custard Buns at Yum Cha @ David's, Prahran.

Chocolate Dumplings and Custard Buns at Yum Cha @ David’s, Prahran.


Melted Snowmen Shortbread, Candy Cane Macarons, Dessert @ Malvern Hotel, Salted Caramel Profiteroles.

Melted Snowmen Shortbread, Candy Cane Macarons, Dessert @ Malvern Hotel, Salted Caramel Profiteroles.


Happy New Year! 🙂 Xo


Pink Champagne & Strawberry Layer Cake + Mini Cupcakes

I had always wondered what Pink Champagne would taste like in a dessert, as I had heard many stories and seen many recipes, but still wasn’t one hundred per cent convinced. As was it was my Nanna’s 81st Birthday coming up, I thought it would be the perfect time to try something Pink Champagney-cakey, because my Nanna lovvvvvvvvvvvvvvvvvvves Champagne, more than anyone else I know. I began my search for an inspiring recipe and stumbled across a Pink Champagne Cake Pop number from the ever-amazing Sweetapolita. I knew then I had to make it, because when it comes to cake, Sweetapolita is up there with the best and I knew it would be fantastic!

Unfortunately, when I made the cake I was running quite low on time (nothing ever changes!), and it wasn’t as pretty as I hoped it would be. So, it was definitely a rustic looking cake. The photos don’t do the cake justice either, I literally finished icing it and had to run out the door in my ten-inch heels, so the fact that the cake survived the journey to the restaurant is a miracle in itself! Lucky it did though, because it was really, really yummy. There was just enough booze to counteract the amount of butter and sugar in the icing, and the tang of the soaked strawberries in the middle certainly made it one delightful biteful!

My favourite part of the cake was definitely the Pink Champagne soaked strawberries in the middle. I cooked them down with some vanilla and a bit of sugar, and they were soooooo good! I could have happily eaten them all there and then.

Pink Champagne & Strawberry Layer Cake: (adapted from Sweetapolita)

  • 3 cups cake flour (if you don’t know what Cake Flour is – read this)
  • 1 ½ tsp baking powder
  • ¾ tsp baking soda
  • ¾ tsp salt
  • 170g butter, chopped and softened – not melted
  • 2 cups caster sugar
  • 6 egg whites
  • 1 tsp vanilla bean paste/vanilla extract
  • 2 cups Pink Champagne
  • 1 cup chopped strawberries

Preheat a fan forced oven to 175c (350F), and grease and line two 22cm spring form pans. Beat the butter and sugar together until pale and creamy, about 5 minutes. Sift the dry ingredients (flour, baking powder, baking soda and salt) together and set aside. To the butter and sugar mixture, gradually add the egg whites, followed by the vanilla. Add and alternate the dry ingredients and the champagne – make sure you begin and end with dry (3 dry, 2 wet). Stir in chopped strawberries. Mix until fully combined, but ensure you do not over mix. Evenly distribute the cake batter (use scales to ensure they are exact) into the two prepared tins. Place in preheated oven, and cook for 35 minutes, or until a skewer comes out clean. The cakes should spring back slightly when done. Do not open the oven until the cakes have been cooking for 25 minutes. Leave cakes in pan to cool for 10 minutes, then turn out onto a wire rack.

 Pink Champagne Buttercream: (this can be made a few days in advance and stored in the fridge)

  • 350g salted butter, chopped and softened, not melted
  • 2 cups icing sugar mixture
  • 1/3 cup Pink Champagne
  • ½ tsp vanilla bean paste/vanilla extract

Beat butter until pale and fluffy, about 5 minutes. Add the vanilla. Gradually add the Pink Champagne and sugar. After buttercream is fully incorporated, beat for another 5-8 minutes.

Pink Champagne soaked Strawberries:

  • 1 small punnet strawberries, roughly chopped
  • 1/3 cup Pink Champagne
  • 1 tsp vanilla bean paste/vanilla extract
  • 3 tsp caster sugar

Place all ingredients in a small bowl and leave to soak for up to an hour (you could leave it longer if you wanted to). Pour ingredients into a small saucepan and cook over a medium heat until mixture is boiling. When it starts to boil, turn the heat down to low and simmer for 45 minutes, or until mixture is thick and syrupy. Let strawberries cool before you put them on the cake.

Assembly:

Place one layer of cake on a stand or board, or whatever you’re using. Spread a very thin layer of buttercream over the first cake, and evenly pour the soaked strawberries, and sandwich with the second layer of cake. Cover the entire cake with a layer of buttercream, using a round edged knife. I find the easiest way to do this is to get a cup of warm water, and to regularly dip – it just goes on smoother and won’t break the cake. Top the cake with a handful of strawberries for decoration and freshness 😉

I also made some mini cupcakes with the leftover Pink Champagne buttercream I had. I managed to get some better photos of these ones…

I used the foolproof recipe I always use for Vanilla Cupcakes, they work perfectly every time and are so easy!


Cupcake Madness!

The vast majority of my time in the past week has been spent making over 100 cupcakes, and a heck of a lot of buttercream! 100 may not seem like much, but when you have never done that many before, it is certainly a challenge. But lots of fun too!

I had to make three different flavours for a 21st order – chocolate, vanilla bean and red velvet. The chocolate ones had the yellow buttercream, the red velvet ones had the bright orange buttercream and the vanilla bean ones had the bright red buttercream, and all cakes were sprinkled with gold glitter.

I was really happy with how all the cakes turned out, and the colours of the buttercream were really effective. The vanilla bean with the red icing was my favourite to look at because it was so bright and the gold  glitter looked great on it.

I’m not going to write out the recipes for this one, but here are the links for the Red Velvet and the Chocolate cupcakes. I used a different recipe for the vanilla bean, and I will post that up when I make them again soon 🙂

TIP –   when you want to make bright red buttercream, you need to use soooooooooo much colouring gel to make it intense. If you are doubling or tripling the recipe, colour it in batches and then mix them because it is a lot easier to control the colour that way. I tripled my recipe, and needed a good 3 1/2 tubs of Wilton’s gel (Rojo red I think it was). I was really unhappy with mine at first, but weirdly enough overnight in the fridge it brightened from a crimson red to an intense red! This is what it was like first:


And after:

And these were just some circusy-themed ones I made for my sister and her friends 🙂


Orange and Lemon Meringue Cupcakes

These cute little cupcakes were requested from my boyfriend for his birthday, as he loves lemon curd and this awesome orange cake – so why not combine the two and add some delish toasted meringue? Yum!

I made this orange cake in a large ring pan with some toffee syrup for Easter last month, and it was a really lovely dessert. Plus, it is so easy to make – just throw everything in the food processor and off you go! Definitely one to keep in the repertoire.

I used this great recipe from Taste.com for the orange cake. Obviously I did not make the toffee syrup this time around (however, it is great if you’re making one big cake!), and as these were cupcakes I simply spooned 1 1/2 tsp of mixture into each cupcake case, and baked for 15 minutes on 160c, fan forced. After they have been cooked, let cakes cool in the tins for 5 minutes, then place on wire rack to cool completely. This mixture made 26 medium sized cupcakes, but if you wanted more or less, it’s fairly easy to double or half. To toast the meringue tops, you will need a chef’s blowtorch. You can buy them for about AU$25-30 at most homeware stores.

Lemon Curd: (also from Taste.com)

  • 2 eggs
  • 2 egg yolks
  • 3/4 cup (165g) caster sugar
  • 1/3 cup (80g) chilled, chopped butter

In a small saucepan, whisk eggs, yolks and sugar until smooth. Place the saucepan over a low heat. Add the butter, juice and zest and whisk until thickened. Strain through a sieve, let curd cool, then refrigerate.

Italian Meringue:

  • 4 egg whites
  • 1 cup caster cugar
  • 50g water

Have egg whites ready in the bowl of a stand mixer, or in a bowl with the hand mixer ready to go. Over a low-medium heat, combine sugar and water in a saucepan to make a sugar syrup. Stir until sugar is dissolved and mixture is very hot. If thick, white bubbles begin to form, start again. Begin beating egg whites, and slowly pour the sugar syrup down the side of the bowl to create an italian meringue. Beat until stiff peaks form, and the mernigue is thick and glossy. Fill a piping bag fitted with a round or star nozzle – I used a star nozzle but the meringue was not thick enough to take the shape, but they still looked nice enough 🙂 (TIP – don’t make the meringue until you are ready to pipe it. If it is sitting for over 5 minutes, it will begin to deflate and will lose its glossiness).

Assembly:

When the cupcakes have cooled, gently hollow out a small circle at the top, about 3-4 cm deep. Fill the holes with lemon curd. Gently pipe a swirl of meringue on the top of each cupcake. Once you have completed the topping, gently wave the blowtorch over the meringue – leave about 10cm, otherwise it will burn. You only want to lightly toast the meringue 🙂 Store cupcakes in airtight containers, but do not refrigerate, otherwise they will lose their fluffiness. They will keep for 4-5 days. You can definitely freeze the cupcakes with the lemon curd inside, although only top with the meringue when you are ready to serve.

Citrus and meringue is a classic combination that always works beautifully. You could mix up this version with a lemon cake and lime or orange curd, or even a blood orange cake and curd. The possibilities are endless!

Enjoy! X