Raspberry Bubblegum Macarons

Macarons have been few and far between as of late. As much as I love making them, and more importantly, eating them, they can be very finicky and temperamental, especially in the heat and humidity of the summer. However, I thought, before I go back into Uni hibernation, I should probably make some, even just to know that I am still capable (and this I am now unsure of!).

IMG_8360

 I had been on the hunt for a delicious bubblegum flavour, as I love baking with fun and nostalgic flavours. With fresh raspberries in abundance, I thought, what better than raspberry bubblegum macarons. Whilst my shells failed to comply, they were still tasty, and the intense bubblegum flavour coupled nicely with the burst of the fresh raspberry.

 Macarons:

Recipe by Adriano Zumbo. You will definitely need kitchen scales to make macarons.

  • 135g almond meal
  • 135g icing sugar
  • 125g caster sugar
  • 45g egg whites
  • 50g egg whites
  • 40g water
  • Colouring gel, purple (Wilton and Americolour are best)
  • 100s & 1000s, any sort you like (I use CK Brand – Jimmies)

Spray four oven trays with cooking oil spray around the edges, and line with baking paper and set aside. Place almond meal and icing sugar in a large bowl, and sift together 3 times. Set aside, along with the 45g egg whites. Put 50g egg whites in a separate bowl. Heat caster sugar and water in a small saucepan, over a low-medium heat, until the sugar completely dissolves and begins to bubble slightly. You can also use a candy thermometer, and heat the syrup until it reaches 118 degrees C (244 degrees F). If the syrup becomes thick and powdery in appearance, you will need to start again. This is because the sugar has been heated too much, too quickly, and instead of dissolving, it has cooked and hardened.

Begin beating the 50g egg whites with one hand, and with the other, stream the hot sugar syrup down the side of the bowl to create an italian meringue. Beat until stiff peaks form, the meringue should be thick and very glossy. Add the colouring gel now, taking care to only add very small amounts until your desired colour is achieved. Pour meringue into the almond meal, icing sugar and 45g egg whites mixture and mix roughly to combine. When combined, fold mixture together (one single stroke) until there are no air bubbles left. Make a spread across the top of the mixture, and it should disappear in about 20 seconds. Spoon mixture into a piping bag fitted with a round nozzle. If you don’t have a piping set, most supermarkets sell plastic disposable ones with a few different nozzles. You should be able to find them in the baking aisle. Lock the bag by spinning the top around 4 times. Pipe 3-4cm rounds on the oven trays prepared earlier. Sprinkles macaron shells with 100s & 1000s. Tap the bottom of the trays on the kitchen bench and let them sit for about half an hour, or until mixture is dry to the touch. Don’t rush this process – you want the shells to be completely dry. Otherwise, it is unlikely that the ‘foot’ of the macaron will be formed.  Preheat your oven to 135c, or 125c fan forced.

IMG_8349

Place in oven and bake for 8 minutes. Turn trays around, and bake for another 9 minutes. To check if shells are cooked, gently lift one off the baking paper. If it peels of easily, they are done, if not, keep checking at 2 minute intervals. Furthermore, if you notice the tops have a slightly crumpled look after you take them out of the oven, put them back in for another couple of minutes. In my experience, this means that they are slightly undercooked and/or haven’t dried out enough before cooking. Cool on trays for 10 minutes, then peel off and place on a wire rack. The mixture should make about 12 -15 large macarons, and about 25 smaller macarons. Macarons keep really well (about 5 days in the fridge).

IMG_8351

 Raspberry bubblegum buttercream:

  •  Approximately 10 fresh or frozen raspberries, chopped finely
  • 200g butter, chopped and softened (not melted)
  • 2-3 cups icing sugar mixture
  • Colouring gel, turquoise (Wilton and Americolour are best)
  • Bubblegum flavouring (available at specialty cake supply stores)

With a beater, or in a mixer, beat butter until pale and creamy (usually 4-5 minutes). Gradually add in the icing sugar, mixing each addition until well combined. Add approx. ¼ teaspoon of colouring gel. You can always add more if you would like a deeper colour. Very carefully, add a couple of drops of bubblegum flavouring. Mine is extremely strong, so I only needed a tiny amount to achieve enough flavour. Remember, you can always put more in, but you cannot take it back out! Gently fold through the fresh raspberries through the buttercream.

Assembly:

Pair up similar sized macaron shells. Fill a piping bag, fitted with a large round nozzle (it must be large, as you do not want the pieces of raspberry to get stuck behind the nozzle), with buttercream. Pipe rounds of buttercream onto one macaron shell, and gently sandwich with the other. Place in an airtight container, and store in the fridge. Macarons always taste better the day after you have made them, as the flavour has had time to develop. Always serve macarons at room temperature.

IMG_8357

 Enjoy! X

A deliciously Wonkarific Willy Wonka party!

So…it’s been a while. I apologise for the lack of posting so far this year, it has been a busy one. Anyway, last week was my sister’s birthday party, and there is always a fun theme for her parties. You may remember the Wonderful Wizard of Oz party, from two years ago. Being the lover of all things sweet, I was obviously very excited about this year’s theme!

photo-1

photo 2-1

I had been planning the cake for quite some time, and I was really happy with how it came together. It was my first ever tiered cake, and it wasn’t as scary as I thought it would be! I had envisioned the bottom tier being squashed from the pressure and my lack of experience, but I was lucky. The cake was inspired by the work of the one and only Katherine Sabbath, who you should totally check out. The bottom tier was a 6 layer rainbow cake – similar to this one from a few years back, filled with nerds and popping candy, and covered in sour watermelon buttercream, with white chocolate pink neon ganache drip. The top tier was a chocolate raspberry mud cake filled with dark chocolate ganache, covered in vanilla bean buttercream, with a white chocolate neon green drip. I got my hands on everything Wonka I could find, and smattered it on the cakes as nicely as I could!

 photo 3

Other bits and pieces I created for the party included Redskin Macaron lollipops (you can find the recipe for these here), Chocolate covered Oreos with popping candy (these were the kids fave!), and chocolate sprinkle spoons with nerds.

photo 1

photo 1-1 photo 2-1


It was a really fun day, and such a great theme for a kid’s party. Shout out to my Mum who did such an amazing job setting up, and making all the decorations 🙂

photo 3

Fingers crossed for another post soon, but until then, follow me on Instagram – @whiskitforabiscuit

Cappuccino Choc-Dip Macarons

Trust me to make macarons more difficult than they already are! I didn’t think the choc dip component of these special delights would be that tricky, but they turned out to be quite fiddly, and very messy. It was worth it though, as they were quite delicious. It’s been forever since I have made anything remotely coffee, and I tend to forget how yummy coffee flavoured desserts and sweets can be. This flavour went down really well with my family and colleagues, and even my boyfriend who loathes coffee quite enjoyed it, too. Winner! Also, apologies for the photos. I’ve been having issues with my good camera, so my iPhone had to do the job this time around.

Cappuccino Macarons

 The filling was super easy to make. It’s a basic buttercream with a bit of coffee thrown in. You just have to make sure to get the balance just right – not too much coffee, not too little. The flavour worked really well with the salted butter, and the dark chocolate dip. Even though it was messy, I’d totally do the choc dip again. It makes them just that little bit extra indulgent – perfect in the throes of Winter!

Macarons:

This recipe is Adriano Zumbo’s, and was published a couple of years ago in the Herald Sun. You will definitely need kitchen scales to make macarons.

  • 135g almond meal
  • 135g icing sugar
  • 125g caster sugar
  • 45g egg whites
  • 50g egg whites
  • 40g water

Spray four oven trays with cooking oil spray around the edges, and line with baking paper and set aside. Place almond meal and icing sugar in a large bowl, and sift together 3 times. Set aside, along with the 45g egg whites. Put 50g egg whites in a separate bowl. Heat caster sugar and water in a small saucepan, over a low-medium heat, until the sugar completely dissolves (if it slightly burns my tongue, it’s done!). If you do not want to burn your tongue, Zumbo suggests investing in a candy thermometer and heating the syrup until it reaches 118 degrees C (244 degrees F). If the syrup becomes thick and powdery in appearance, you will need to start again. This is because the sugar has been heated too much, too quickly, and instead of dissolving, it has cooked.

Begin beating the 50g egg whites with one hand, and with the other, stream the hot sugar syrup down the side of the bowl to create an italian meringue. Beat until stiff peaks form, the meringue should be thick and very glossy. Pour meringue into the almond meal, icing sugar and 45g egg whites mixture and mix roughly to combine. When combined, fold mixture together (one single stroke) until there are no air bubbles left. Make a spread across the top of the mixture, and it should disappear in about 20 seconds. Spoon mixture into a piping bag fitted with a round nozzle. If you don’t have a piping set, most supermarkets sell plastic disposable ones with a few different nozzles. You should be able to find them in the baking aisle. Lock the bag by spinning the top around 4 times. Pipe 3-4cm rounds on the oven trays prepared earlier. Tap the bottom of the trays on the kitchen bench and let them sit for about half an hour, or until mixture is dry to the touch. Don’t rush this process – you want the shells to be completely dry. Otherwise, it is unlikely that the ‘foot’ of the macaron will be formed.  Preheat your oven to 125c or 135c, fan forced.

Macarons

Place in oven and bake for 8 minutes. Turn trays around, and bake for another 9 minutes. To check if shells are cooked, gently lift one off the baking paper. If it peels of easily, they are done, if not, keep checking at 2 minute intervals. Furthermore, if you notice the tops have a slightly crumpled look after you take them out of the oven, put them back in for another couple of minutes. In my experience, this means that they are slightly undercooked and/or haven’t dried out enough before cooking. Cool on trays for 5 minutes, then peel off and place on a wire rack. The mixture should make about 12 -15 large macarons, and about 25 smaller macarons. Macarons keep really well (about 5 days in the fridge) and some say that the longer they are refrigerated, the more the flavour is likely to develop. Macarons taste best when they are stored in the fridge, then brought down to room temperature to eat.

Cappuccino Buttercream:

  • 200g salted butter, chopped and softened
  • Approx. 1 cup icing (confectioner’s) sugar
  • 1 tsp vanilla bean paste
  • Approx. 30ml espresso (you can use coffee bags or instant powdered/granule coffee as well, just make sure it’s not too watered down)

Beat butter until pale and creamy. Add vanilla bean paste and beat until combined. Gradually add sugar and coffee to butter mixture. Please be careful with adding the coffee, as you don’t want to add too much liquid at once, otherwise the butter may split and curdle. Add it slowly and keep tasting until happy with the strength and flavour.

Cappuccino Macarons1

For the choc dip, melt good quality dark chocolate in a small glass bowl/ramekin. Don’t use anything too deep because it will make it harder to dip the macaron in and out of the chocolate. I melted the chocolate gradually, as I needed it, as I didn’t want it to harden, because the dipping process did take a while. Overall, I ended up using about 200g of melts (small chocolate bits). Melt chocolate in 20 second increments in the microwave, and use a metal spoon to stir. Melting the chocolate in short  increments will keep it from burning and turning into that horrible lumpy, grainy consistency. Once chocolate is smooth and glossy, gently dip each macaron half way into the chocolate, using a teaspoon to remove the excess, and place on an oven tray lined with a fresh sheet of baking paper. Once chocolate has hardened, dust macarons with cocoa. Place in an airtight container in the refrigerator, and bring to room temperature to eat.

Cappuccino Macarons2

 Whilst the weather here in Melbourne is pretty horrible at the moment, like, ice-all-over-your-car-in-the-morning kind of horrible (Aussie’s are not used to this!), the upside is that it’s perfect macaron making weather! No humidity, no air conditioning. Take advantage of it if you can!


Have a great weekend, and Happy Baking! 🙂

Chocolate Passionfruit Macarons

It seems I’m developing a bit of habit of combining chocolate and fruit lately. This macaron flavour was inspired, or recreated, I should say, from my visit to Paris last year, where I had the most amazing macarons, unsurprisingly. Pierre Herme had an amazing Chocolate Passionfruit macaron, and the middle was the yummiest combination of creamy and bitter chocolate combined with that zingy and sweet hit of passionfruit, it was delicious. I did my best to try and recreate this wonderful moment, and I think I did quite well, but of course, nothing will ever compare to Pierre Herme!

000_0007

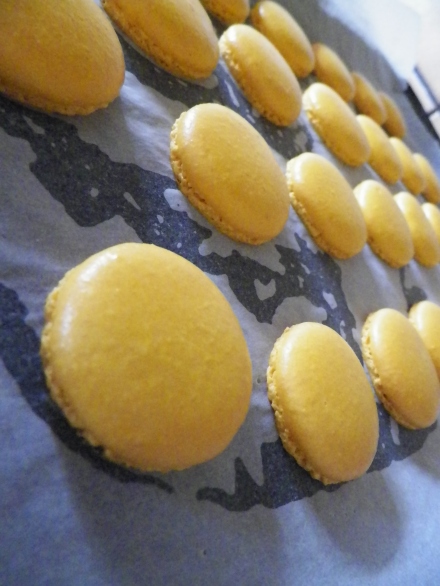
The ganache didn’t go quite as I hoped it would, as I think I made it too late. Ganache can take a long time to set properly. Next time I would probably leave it overnight. Then, I put too much liquid into the butter, and it split. Luckily, that was easily fixed, with more butter. But there’s not much that butter can’t fix. The flavour of the ganache was very full on when I made it. It was very sour and the chocolate was very bitter – I used 75% cocoa, next time I would probably use really good quality milk or a regular dark chocolate. You couldn’t really distinguish the chocolate from the passionfruit, it was too strong. However, as macarons tend to do, the flavour did develop, and they were much nicer the next day. Also, I’m super happy with these shells! One giant positive of colder weather = less humidity, prettier macs 🙂 Oh, and FYI, I have slightly changed my macaron recipe. It’s only the cooking times, but I’ve found the shells to be sturdier and chubbier since I’ve made the change.

000_0010

Macarons:

This recipe is Adriano Zumbo’s, and was published a couple of years ago in the Herald Sun. You will definitely need kitchen scales to make macarons.

  • 135g almond meal
  • 135g icing sugar
  • 125g caster sugar
  • 45g egg whites
  • 50g egg whites
  • 40g water
  • 1/4 tsp colouring gel, yellow
  • 1/4 tsp colouring gel, orange

Spray four oven trays with cooking oil spray around the edges, and line with baking paper and set aside. Place almond meal and icing sugar in a large bowl, and sift together 3 times. Set aside, along with the 45g egg whites. Put 50g egg whites in a separate bowl. Heat caster sugar and water in a small saucepan, over a low-medium heat, until the sugar completely dissolves (if it slightly burns my tongue, it’s done!). If you do not want to burn your tongue, Zumbo suggests investing in a candy thermometer and heating the syrup until it reaches 118 degrees C (244 degrees F). If the syrup becomes thick and powdery in appearance, you will need to start again. This is because the sugar has been heated too much, too quickly, and instead of dissolving, it has cooked.

Begin beating the 50g egg whites with one hand, and with the other, stream the hot sugar syrup down the side of the bowl to create an italian meringue. Beat until stiff peaks form, the meringue should be thick and very glossy. If you want to add flavouring/colouring, now’s your moment. So add the colouring now. Just lightly beat it into the meringue. Pour meringue into the almond meal, icing sugar and 45g egg whites mixture and mix roughly to combine. When combined, fold mixture together (one single stroke) until there are no air bubbles left. Make a spread across the top of the mixture, and it should disappear in about 20 seconds. Spoon mixture into a piping bag fitted with a round nozzle. (If you don’t have a piping bag set, most supermarkets sell plastic ones, they are Multix brand, in an orange box and contain 5 piping bags with a few different nozzles, plus they’re only about $3. You should be able to find them in the baking aisle). Lock the bag by spinning the top around 4 times. Pipe 3-4cm rounds on the oven trays prepared earlier. Tap the bottom of the trays on the kitchen bench and let them sit for about half an hour, or until mixture is dry to the touch. Meanwhile, preheat the oven to 135c, fan forced.

000_0002

Place in oven and bake for 8 minutes. Turn trays around, and bake for another 9 minutes. To check if shells are cooked, gently lift one off the baking paper. If it peels of easily, they are done, if not, keep checking at 2 minute intervals. Cool on trays for 5 minutes, then peel off and place on a wire rack. The mixture should make about 12 -15 large macarons, and about 25 smaller macarons. Macarons keep really well (about 5 days in the fridge) and some say that the longer they are refrigerated, the more the flavour is likely to develop. Macarons taste best when they are stored in the fridge, then brought down to room temperature to eat.

000_0004

Chocolate Passionfruit Ganache:

  • 100g good quality chocolate, dark or milk, depends how strong you like your chocolate
  • 170ml thickened cream
  • 170g can passionfruit pulp, strained from seeds OR depending on size, 4-5 passionfruits, strained of seeds

Place all ingredients in a medium saucepan, and stir over a low-medium heat until smooth. Pour into bowl and refrigerate. For best results, make ganache the day before serving. Ganache should be of a pipe-able consistency. OPTIONAL – if you like your ganache quite creamy, feel free to beat up 70g butter and add to ganache.

000_0011

Assembly:

Pair up likely macaron shells. Spoon ganache into a piping bag fitted with a wide round nozzle. Pipe rounds onto shells, and sandwich with another. You can dust with cocoa, if you like. Store macarons in an airtight container, in the fridge, and bring down to room temperature to eat.

Happy Baking! 🙂


Lavender and Blueberry Macarons

I came across this flavour combination flicking through Zumbo’s ‘Zumbarons’ book, and at first, I wasn’t really sold. I can’t say I’ve ever really been a fan of the smell of lavender, and the thought of eating it, ergh. However, I first thought the same thing about the Vegemite Macarons, another genius brainchild of Zumbo’s, and I really loved them. So, I thought I would give them a go, and it turns out, they aren’t so bad after all!

Lavender and Blueberry Macarons

Zumbo’s ganache recipe calls for white chocolate, however, I boldly decided to change things up a little! I decided to make a buttercream instead of a ganache, I’m not entirely sure why I decided to do this, but it worked, I think. I put as little sugar as possible into the blueberry jam, to counteract the sweetness of the buttercream, and with  little bit of salt with the butter, it was nice. I literally used like three drops of lavender oil because I was so worried it would be too strong. The idea of eating flowers doesn’t really excite me. Three drops was definitely enough. Enough to get the aroma of the lavender, with the hit of blueberry and sweetness of the macaron shell. Would I make them again? Maybe, if they were requested, but other than that, probably not. It would be interesting to taste the white chocolate ganache version, though. And, yay! For awesome shells.

000_0004

Macarons:

This recipe is Adriano Zumbo’s, and was published a couple of years ago in the Herald Sun. You will definitely need kitchen scales to make macarons.

  • 135g almond meal
  • 135g icing sugar
  • 125g caster sugar
  • 45g egg whites
  • 50g egg whites
  • 40g water
  • 1/4 tsp colouring gel, violet
  • Food colouring liquid, blue

Spray four oven trays with cooking oil spray around the edges, and line with baking paper and set aside. Place almond meal and icing sugar in a large bowl, and sift together 3 times. Set aside, along with the 45g egg whites. Put 50g egg whites in a separate bowl. Heat caster sugar and water in a small saucepan, over a low-medium heat, until the sugar completely dissolves (if it slightly burns my tongue, it’s done!). If you do not want to burn your tongue, Zumbo suggests investing in a candy thermometer and heating the syrup until it reaches 118 degrees C (244 degrees F). If the syrup becomes thick and powdery in appearance, you will need to start again. This is because the sugar has been heated too much, too quickly, and instead of dissolving, it has cooked.

Begin beating the 50g egg whites with one hand, and with the other, stream the hot sugar syrup down the side of the bowl to create an italian meringue. Beat until stiff peaks form, the meringue should be thick and very glossy. If you want to add flavouring/colouring, now’s your moment. So add the colouring now. Just lightly beat them into the meringue. Pour meringue into the almond meal, icing sugar and 45g egg whites mixture and mix roughly to combine. When combined, fold mixture together (one single stroke) until there are no air bubbles left. Make a spread across the top of the mixture, and it should disappear in about 20 seconds. Spoon mixture into a piping bag fitted with a round nozzle. (If you don’t have a piping bag set, most supermarkets sell plastic ones, they are Multix brand, in an orange box and contain 5 piping bags with a few different nozzles, plus they’re only about $3. You should be able to find them in the baking aisle). Lock the bag by spinning the top around 4 times. Pipe 3-4cm rounds on the oven trays prepared earlier. Tap the bottom of the trays on the kitchen bench and let them sit for about half an hour, or until mixture is dry to the touch. Meanwhile, preheat the oven to 145c (135c fan forced).

Place in oven and bake for 16-20 minutes. Check macarons at 16 minutes, and to test if they are cooked, pull a macaron off the baking paper. If it is stuck, keep cooking and checking regularly. Cool on trays for 5 minutes, then peel off and place on a wire rack. The mixture should make about 12 -15 large macarons, and about 25 smaller macarons.

Macarons

Place all of the macaron shells on wire racks. My needed two. Place paper towel underneath, so your kitchen bench does not come into contact with the blue colouring. Place approximately 15 drops of the blue liquid colouring in small dish. Gently dip a pastry brush in the colouring and lightly flick the macaron shells, resulting in the blue dots like my shells have. Leave shells to dry – this won’t take long.

Splashed


Macarons keep really well (about 5 days in the fridge) and some say that the longer they are refrigerated, the more the flavour is likely to develop. Macarons taste best when they are stored in the fridge, then brought down to room temperature to eat.

000_0006

Lavender Buttercream:

  • 100g salted butter, softened, not melted
  • 3 drops lavender oil (edible, of course – FYI, I bought mine from http://www.bakingpleasures.com.au)
  • 1 cup icing (confectioner’s) sugar

Beat the butter until pale and creamy (about 5 minutes). Gradually add the icing sugar and beat until well combined. You can add as much sugar as you like, really. It depends on how sweet you like your buttercream. Add the lavender oil – you can always add more to taste.

Blueberry Jam:

  • 1/2 cup blueberries, fresh or frozen
  • 1/4 cup caster (white, granulated) sugar
  • 2 tbs water

Place all the ingredients in a small saucepan. Heat on medium until mixture begins to boil. Turn down heat to low and simmer until thick. Pour into a bowl, and let it cool completely. If you are not using immediately, store jam in the fridge once it has cooled.

Assembly:

Pair up likely macaron shells. Place lavender buttercream in a piping bag fitted with a round nozzle. Pipe round onto one shell, and spoon a very small amount of blueberry jam on top of the buttercream. Sandwich together. Store in airtight container in the fridge. Bring down to room temperature to eat.

I really wanted some fresh lavender sprigs in my photos, but unfortunately it was not to be. I was desperately trying to find some, madly roaming my local neighbourhood at 10km/ph on the hunt for lavender! Tis’ not the season.

Happy Baking! And…please come and follow me on Instagam – @gemmaash 🙂

000_0007


Poached Pear and Salted Caramel Macarons

After four months of no baking, it feels good to be back! I can’t believe it’s been THAT long, nearly half a year of no butter and sugar action, which is a just a bit wrong, really. When I stepped back into the kitchen and begun measuring my ingredients out, it all came flooding back. It was reassuring to know that I hadn’t completely lost my touch, and the macaron recipe I use has remained engraved in my brain – it’s the only recipe I know off by heart, no surprise. I had been planning  these macarons for about a week to mark the beginning of my Christmas baking schedule, which is very hectic – again, no surprise, as I always become over ambitious with these things, trying to do waaaaay too much in so little time. Whilst this flavour is not quintessentially Christmass-y, it is extremely delicious. Anything involving salted caramel is. I poached the pears in vanilla and cinnamon, so I guess that means I can claim it as a Christmas flavour?

 IG

I loved the fresh hit of the pear in the midst of the creamy caramel, however I think it made the shells  bit soggy unfortunately. Next time, I would maybe try making my own pear jelly and have little cubes in the middle. They were delicious nonetheless. The green Christmas trees on the shells were incidental actually. I just thought it would be nice to add a little green touch to represent the pear, but I’m happy with the result!

 000_0006

Macarons:

This recipe is Adriano Zumbo’s, and was published a couple of years ago in the Herald Sun. You will definitely need kitchen scales to make macarons.

  • 135g almond meal
  • 135g icing sugar
  • 125g caster sugar
  • 45g egg whites
  • 50g egg whites
  • 40g water
  • Colouring gel, green

Spray four oven trays with cooking oil spray around the edges, and line with baking paper and set aside. Place almond meal and icing sugar in a large bowl, and sift together 3 times. Set aside, along with the 45g egg whites. Put 50g egg whites in a separate bowl. Heat caster sugar and water in a small saucepan, over a low-medium heat, until the sugar completely dissolves (if it slightly burns my tongue, it’s done!). If you do not want to burn your tongue, Zumbo suggests investing in a candy thermometer and heating the syrup until it reaches 118 degrees C (244 degrees F). If the syrup becomes thick and powdery in appearance, you will need to start again. This is because the sugar has been heated too much, too quickly, and instead of dissolving, it has cooked.

Begin beating the 50g egg whites with one hand, and with the other, stream the hot sugar syrup down the side of the bowl to create an italian meringue. Beat until stiff peaks form, the meringue should be thick and very glossy. If you want to add flavouring/colouring, now’s your moment. So add the colouring now. Just lightly beat them into the meringue. Pour meringue into the almond meal, icing sugar and 45g egg whites mixture and mix roughly to combine. When combined, fold mixture together (one single stroke) until there are no air bubbles left. Make a spread across the top of the mixture, and it should disappear in about 20 seconds. Spoon mixture into a piping bag fitted with a round nozzle. (If you don’t have a piping bag set, most supermarkets sell plastic ones, they are Multix brand, in an orange box and contain 5 piping bags with a few different nozzles, plus they’re only about $3. You should be able to find them in the baking aisle). Dip a skewer into green colouring gel, and wipe up one side of the piping bag, creating a straight line. Lock the bag by spinning the top around 4 times. Pipe 3-4cm rounds on the oven trays prepared earlier. Tap the bottom of the trays on the kitchen bench and let them sit for about half an hour, or until mixture is dry to the touch. Meanwhile, preheat the oven to 145c (135c fan forced).

Place in oven and bake for 16-20 minutes. Check macarons at 16 minutes, and to test if they are cooked, pull a macaron off the baking paper. If it is stuck, keep cooking and checking regularly. Cool on trays for 5 minutes, then peel off and place on a wire rack. The mixture should make about 12 -15 large macarons, and about 25 smaller macarons. Macarons keep really well (about 5 days in the fridge) and some say that the longer they are refrigerated, the more the flavour is likely to develop. Macarons taste best when they are stored in the fridge, then brought down to room temperature to eat.

 PicFrame

Caramel Maison: (from p. 242 of Adriano Zumbo’s book, Zumbo):

•220g pouring (whipping) cream (35% fat)
•1 vanilla bean, split and seeds scraped (I used 1 tsp vanilla bean paste)
•120g water (this is just under 1 cup)
•300g caster (white) sugar
•60g liquid glucose (available at most supermarkets)

Place the cream and vanilla in a small saucepan over a medium heat and bring to the boil. Then, remove from the heat, and remove the vanilla bean if you are using one. In the meantime, place the water, sugar and glucose in a larger saucepan over a low-medium heat and cook until the glucose and sugar are fully dissolved, stirring occasionally. Zumbo’s says to use a clean pastry brush dipped in water to clean the sides of the saucepan in order to avoid crystalisation, however you can also just place the saucepan in really hot water with suds just after use and the sugar will melt off really easily. Increase the heat to medium, and cook the sugar mixture until it reaches a dark amber colour. This does take quite a while, and I was getting worried that mine would not work, but persistence is key here, it will eventually darken after 6-7 minutes. Very carefully stir the cream mixture into the sugar mixture slowly – be very careful because it spits and releases lot of heat. I found the best way to do this was with a spoon with a very long handle, as you want to keep your face as far away from the saucepan whilst it is spitting. If you don’t have a spoon with a super long handle, just add the cream really slowly and try to stir as best you can! Keep stirring as much as you can until the caramel settles down, then stir until completely smooth. Transfer to a bowl, let it cool to room temperature, cover with plastic wrap and place in the fridge.

Caramel Buttercream: (this recipe is on page 42 of Zumbo’s cookbook)

•150g unsalted butter, chopped and softened
•300g caramel maison
•4.5g sea salt flakes

Place the butter in a bowl, and beat until light and fluffy. Warm the caramel maison in the microwave until it reaches a pouring consistency (mine needed 1 min, 20 seconds on high as it was in the fridge overnight), however, just warm it in stages to prevent burning the caramel. With the beater running slowly, add the caramel maison to the butter and continue mixing until thick. Once I had added about half of my caramel, I got a bit worried because it looked like it was curdling, however as I kept adding the caramel, it began to thicken up. So don’t freak out until you have added all of the caramel to the butter. Once you have added all of the caramel, fold in the salt. I did not measure my salt, as I used a shaker. So if you too are using a shaker, just salt to taste.

 000_0015

Poached Pears: (recipe adapted from Taste.com.au)

  •         2 packham pears
  •        3 cups cold water
  •        1 cup caster (white) sugar
  •         ½ teaspoon vanilla bean paste or ½ vanilla bean with seeds scraped
  •        1 cinnamon stick
  •        Lemon juice

Peel pears from the stem down, and coat in lemon juice. Place all ingredients in a medium sized saucepan and simmer over a medium heat for around 20 minutes, or until pear is soft. You can test the pear with a fork, however do not make too many holes as they can become waterlogged. Once pear is cooked through, place in fridge for approximately 30 minutes to cool completely. Once cooled, cut into small bite sized pieces.

Assembly:

Pair up likely macaron shells. Scoop caramel into a piping bag fitted with a round nozzle. Pipe a small circle on one shell, place a piece of pear on the caramel, and pipe another small circle over the top of the pear. Sandwich together, and place in an airtight container in the fridge. When ready to eat, bring macarons down to room temperature.

000_0012

Paris: my foodie heaven

I have recently floated off cloud 9 which consisted of a week in pastry paradise. It was hands down, one of the best weeks of my life so far. For a very long time, I have been almost obsessed with Paris, for reasons fairly obvious, even having never been there. So, to actually be there and see the sights right in front of my eyes was pretty amazing for me. I had a little bit of a heart attack the first time I saw the Eiffel Tower!
Eiffel tower
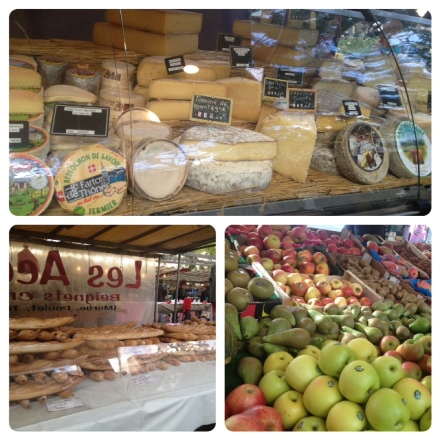
Now, to the food. We were really lucky to have snatched up a great little studio apartment in the bustling neighbourhood of Bastille (for Melbourne people, this would probably be the equivalent of Fitzroy/Brunswick), which was just to the east of the city. We could not believe our luck when we realised the Bastille Market – one of the biggest foodie markets in Paris, was literally at the end of our street. Winner! We headed down on a sunny Sunday morning to find delights such as crêpes, baguettes, cheeses, fresh fruit and veg, fresh seafood, curries and souvenirs.
Bastille market
The great thing about Bastille is that it is out of the main toursity area of Paris. This means great local restaurants, bakeries/patisseries on nearly every corner, and super-friendly French people – something we were not expecting. We had been told by so many people that the French did not like tourists at all and were quite unwelcoming. These people obviously stayed in super touristy areas in the city that are overcrowded and full of horrible, overpriced restaurants. Out of every country we have visited so far (6), we found the French to be the friendliest, which was fantastic. Our local bakery, Maison Laudemaine Voltaire, was our go to each day. It had the best baguettes we had ever tasted, and some pretty amazing desserts and pastries, too.
4 cakes
Baguettes
Two places I just had to try in Paris were, of course, Pierre Herme and Laduree. If you are not familar, they are both extremely well known around the world for their macarons and pastries (Pierre Herme also has amazing chocolates). I can safely say that I had the best macarons in Paris, which really is not a surprise at all. For me, Pierre Herme won by a mile. We bought a box of 7 macarons (we couldn’t afford any more!), and we were both in heaven. The flavours we chose included Salted Butter Caramel, Chocolate Passionfruit, Citron Praline, Rose, Violet Yoghurt and Giandjua Chocolate. My favourite flavour was Violet Yoghurt, and I think it was because I was not expecting it – it was such an interesting flavour, but so delicious. I will definitely try to create this flavour when I get home!
Pierre Herme
Pierre Herme shop
In comparison to Pierre Herme, Laduree’s macarons were unfortunately a bit disappointing. The flavours were pretty standard, but the fillings were quite runny – they just didn’t have the same finesse (sounds wanky I know, lol) as Pierre Herme. The pastries on the other hand, were amazing. We got a Saint-Honore Pomme Facon Tatin – which was a bit of take on an apple tarte tatin. It had this amazing caramelised puff pastry with tiny choux filled with salted caramel, caramelised apples and caramel chatilly whipped cream. Wow! I also had something I had been wanting to try for a long time – Ispahan. Ispahan is a big macaron filled with rose cream, lychees and raspberries. It was delicious.
Laduree collage
Finally, I also had my first French onion soup experience. It was definitely as magical as I imagined it to be!! It was so yummy, and was complete with gruyere croutons. Another one to try when I come home!
Onion soup
So, that ends our foodie adventures in Paris. There is still so much I want to see and do, and so much more food I want to try. Lucky I’m going back next year 😀 Follow me on Instagram for more travel photos – GemmaAsh

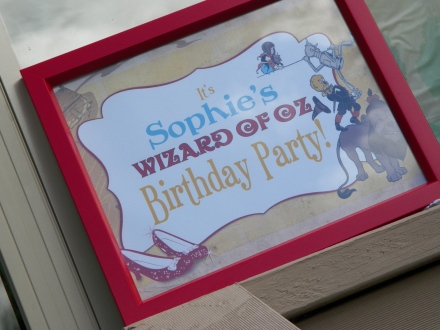
A Wonderful Wizard of Oz Party!

Last Sunday, it was my little sister’s wonderful Wizard of Oz party. Well, it was more of a production actually, as our house was temporarily taken over by Oz paraphernalia and resembled quite the tornado. It was a lot of fun, and the amount of work my parents put into making the place look like it was straight out of the movie set was astronomical. As was the amount of time I spent in the kitchen! I made so many little bits and pieces I thought I would dedicate a whole blog post to it 🙂

100_0067

000_0049

100_0063

My ‘Emerald City Macarons’ – Redskin flavoured, with edible gold glitter. This flavour was SO delicious!

000_0036

100_0062

‘Yellow Bricks’ – aka Salted Caramel Rice Bubble Slice

100_0057

000_0048

100_0061

Unfortunately, I did not make these. I had never tried a cake pop before, I have heard they are very difficult to make. These ones not only look amazing, but tasted it, too. Inside were gooey, chocolatey, fudgey balls of cake. YUM!

100_0072

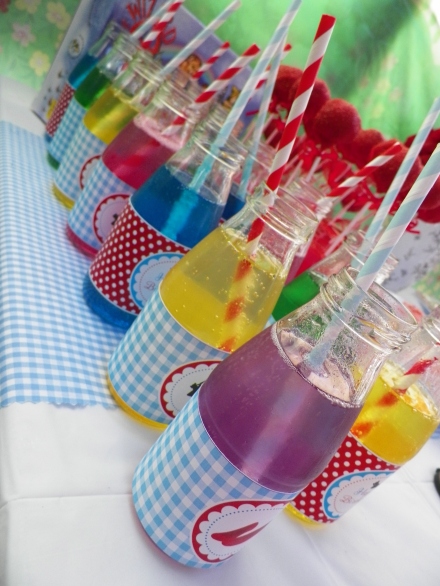
Rainbow lemonade for the kiddies 🙂

100_0052

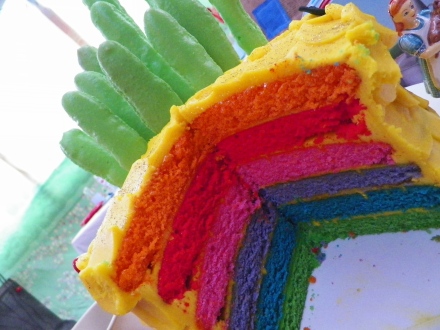
The cake I made – Somewhere Over The Rainbow Layer Cake, with Yellow Brick Buttercream and a Macaron Emerald City.

100_0074

100_0075

This was the same recipe I used to create last year’s Rainbow Cake. It’s not at all difficult, it just takes a lot of time. The end result is well worth it, though. Especially when kids are involved!

100_0066

Follow the Yellow Brick Road…

Popping Fruit Tingle Macarons

I LOVE a fruit tingle. Both the cocktail, and the lolly. But the fizzy sherbet lolly especially. Fruit Tingle’s (which are similar to Bottle Caps/SweeTarts/Refreshers) have been one of my favourite lollies since I can remember – I love the sourness and the sweetness together, and would often chuck a whole small packet in my mouth at once, quite happily. Fruit Tingles are nostalgic for me – I remember I used to have competitions with my friends to see how many multi-coloured lollies we would get, and we would make a wish with each multi-coloured fruit tingle we got in our packet. A few years ago, thanks to Raspberri Cupcake’s Orange Cake with Fruit Tingles Icing, I discovered the joy of fruit tingles and butter combined. It was pretty magical and life changing. And so, I present Fruit Tingle Macarons with Popping Candy.

 009

I threw in another favourite candy of mine from the 90s – Wizz Fizz. I’m sure it was a worldwide phenomenon possibly under other names in other countries, but if you have been completely deprived, and have not been introduced to Wizz Fizz, it is just sherbet in a small bag with a little coloured spoon. Well, I shouldn’t say it’s just sherbet. It’s amazing tingle soury goodness that everybody should experience at least once, it’s good fun. And I guarantee once you have finished the bag you will be covered in a white powder. The good type of white power – Wizz Fizz 😉

013

Macarons:

This recipe is Adriano Zumbo’s, and was published a couple of years ago in the Herald Sun. You will definitely need kitchen scales to make macarons.

  • 135g almond meal
  • 135g icing sugar
  • 125g caster sugar
  • 45g egg whites
  • 50g egg whites
  • 40g water
  • 1/4 tsp colouring  gel, orange

Spray four oven trays with cooking oil spray around the edges, and line with baking paper and set aside. Place almond meal and icing sugar in a large bowl, and sift together 3 times. Set aside, along with the 45g egg whites. Put 50g egg whites in a separate bowl. Heat caster sugar and water in a small saucepan, over a low-medium heat, until the sugar completely dissolves (if it slightly burns my tongue, it’s done!). If you do not want to burn your tongue, Zumbo suggests investing in a candy thermometer and heating the syrup until it reaches 118 degrees C (244 degrees F). If the syrup becomes thick and powdery in appearance, you will need to start again. This is because the sugar has been heated too much, too quickly, and instead of dissolving, it has cooked.

Begin beating the 50g egg whites with one hand, and with the other, stream the hot sugar syrup down the side of the bowl to create an italian meringue. Beat until stiff peaks form, the meringue should be thick and very glossy. If you want to add flavouring/colouring, now’s your moment. So add the colouring now. Just lightly beat them into the meringue. Pour meringue into the almond meal, icing sugar and 45g egg whites mixture and mix roughly to combine. When combined, fold mixture together (one single stroke) until there are no air bubbles left. Make a spread across the top of the mixture, and it should disappear in about 20 seconds. Spoon mixture into a piping bag fitted with a round nozzle. (If you don’t have a piping bag set, most supermarkets sell plastic ones, they are Multix brand, in an orange box and contain 5 piping bags with a few different nozzles, plus they’re only about $3. You should be able to find them in the baking aisle). Lock the bag by spinning the top around 4 times. Pipe 3-4cm rounds on the oven trays prepared earlier. Tap the bottom of the trays on the kitchen bench and let them sit for about half an hour, or until mixture is dry to the touch. Meanwhile, preheat the oven to 145c (135c fan forced).

Place in oven and bake for 16-20 minutes. Check macarons at 16 minutes, and to test if they are cooked, pull a macaron off the baking paper. If it is stuck, keep cooking and checking regularly. Cool on trays for 5 minutes, then peel off and place on a wire rack. The mixture should make about 12 -15 large macarons, and about 25 smaller macarons. Macarons keep really well (about 5 days in the fridge) and some say that the longer they are refrigerated, the more the flavour is likely to develop. Macarons taste best when they are stored in the fridge, then brought down to room temperature to eat.

Lollies

Sugar Syrup topping:

  • 1/2 cup caster sugar
  • 1/4 cup water
  • 1/2 stick crushed fruit tingles

Melt the caster sugar and water in a small saucepan until completely dissolved. With a pastry brush, gently brush the macaron shells (about 5 at a time because they will dry) and place a small amount of fruit tingles on top of each shell. Leave on wire rack to dry.

007

Fruit Tingle Buttercream:

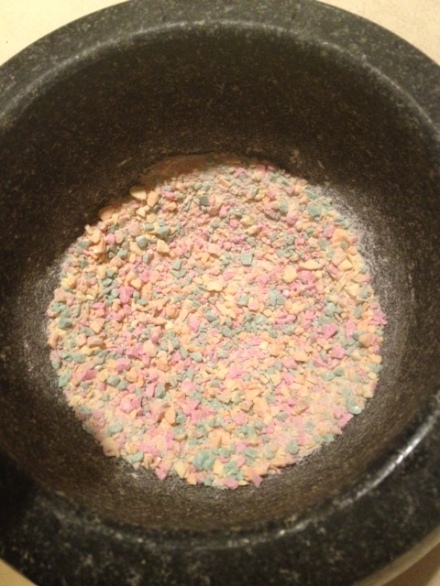
  • 1 stick (34g) Fruit Tingle lollies, crushed down to a rough powder (I used a mortar and pestle, you could also use a food processor)
  • 250g salted butter, softened – not melted
  • 1 cup icing sugar mixture
  • 1 multi pack of Wizz Fizz (8 small packets)
  • 2 packets popping candy (I can’t remember the size of the packet, but they were quite small and were Strawberry/Cola flavoured. In Australia, you can buy them at Woolworths)
  • Food colouring gel, green (you could use pink or yellow if you wanted as well)

photo (2)

Beat butter until pale and creamy. Gradually add icing sugar mixture. Beat in Wizz Fizz and Fruit Tingles until well combined. Beat in colouring gel. You can store buttercream overnight at room temperature, but it is best used immediately. To fill the macarons, spoon buttercream into a piping bag fitted with a large, round nozzle (make sure it is extra large so the chunks of fruit tingles won’t get stuck). Pipe 3/4 teaspoon of buttercream on shell, sprinkle with popping candy, and sandwich with another shell. Store macarons in the fridge, but bring them down to room temperature to eat. Enjoy!

015

Cinnamon Donut Macarons

I had been wanting to try this flavour for some time, but I was just trying to figure out the best way of making the filling, and incorporating as much donutty flavour as I possibly could into the it, instead of say, just making a buttercream and flavouring it will a crapload of cinnamon. This time, I went all out Zumbo-style, and creeped a little bit out of the box, and my comfort zone. Thankfully, it kind of paid off. This flavour was quite delicious.

000_0024

 I’m not going to write out a recipe for the filling, because I did so many things and added so many little bits and pieces that I cannot remember it to the tee! I will try to explain it as best as possible 🙂 I was extremely lucky with my shells this time, they were a particularly good batch and I didn’t have to throw ANY out – this never happens! Totally wish it was like that everytime! Again, apologies for the shadow-y night time photos.
000_0021
Macarons:

This recipe is Adriano Zumbo’s, and was published a couple of years ago in the Herald Sun. You will definitely need kitchen scales to make macarons.

  • 135g almond meal
  • 135g icing sugar
  • 125g caster sugar
  • 45g egg whites
  • 50g egg whites
  • 40g water
  • 1/4 tsp colouring      gel, brown

Spray four oven trays with cooking oil spray around the edges, and line with baking paper and set aside. Place almond meal and icing sugar in a large bowl, and sift together 3 times. Set aside, along with the 45g egg whites. Put 50g egg whites in a separate bowl. Heat caster sugar and water in a small saucepan, over a low-medium heat, until the sugar completely dissolves (if it slightly burns my tongue, it’s done!). If you do not want to burn your tongue, Zumbo suggests investing in a candy thermometer and heating the syrup until it reaches 118 degrees C (244 degrees F). If the syrup becomes thick and powdery in appearance, you will need to start again. This is because the sugar has been heated too much, too quickly, and instead of dissolving, it has cooked.

Begin beating the 50g egg whites with one hand, and with the other, stream the hot sugar syrup down the side of the bowl to create an italian meringue. Beat until stiff peaks form, the meringue should be thick and very glossy. If you want to add flavouring/colouring, now’s your moment. So add the colouring now. Just lightly beat them into the meringue. Pour meringue into the almond meal, icing sugar and 45g egg whites mixture and mix roughly to combine. When combined, fold mixture together (one single stroke) until there are no air bubbles left. Make a spread across the top of the mixture, and it should disappear in about 20 seconds. Spoon mixture into a piping bag fitted with a round nozzle. (If you don’t have a piping bag set, most supermarkets sell plastic ones, they are Multix brand, in an orange box and contain 5 piping bags with a few different nozzles, plus they’re only about $3. You should be able to find them in the baking aisle). Lock the bag by spinning the top around 4 times. Pipe 3-4cm rounds on the oven trays prepared earlier. Tap the bottom of the trays on the kitchen bench and let them sit for about half an hour, or until mixture is dry to the touch. Meanwhile, preheat the oven to 145c (135c fan forced).

Place in oven and bake for 16-20 minutes. Check macarons at 16 minutes, and to test if they are cooked, pull a macaron off the baking paper. If it is stuck, keep cooking and checking regularly. Cool on trays for 5 minutes, then peel off and place on a wire rack. The mixture should make about 12 -15 large macarons, and about 25 smaller macarons. Macarons keep really well (about 5 days in the fridge) and some say that the longer they are refrigerated, the more the flavour is likely to develop. Macarons taste best when they are stored in the fridge, then brought down to room temperature to eat.

Macarons

Cinnamon Donut filling:

As I mentioned earlier, I am not going to write out a recipe for this filling. I’ll briefly go through what I can remember 🙂
Donuts
So, firstly, I placed the donuts in the container with the cream, and left it from about 12 midday to 3 or 4pm the next day. I pulled all of the donuts out, except for 2, and in hindsight, I think I really should have left 3 to give it a little bit more of a donutty flavour. The cream was not as flavoursome as I hoped for, so with the remaining 2 donuts in the cream, I blitzed it all up together, to make a cinnamon donut whipped cream like thing. After this, the mixture was still a little lumpy, so I put it through a fine sieve which made it separate – which was actually not a bad thing. I then whipped up about 3/4 cup thickened cream, and added some icing sugar and cinnamon sugar (you can buy this in a glass jar at the supermarket or just add cinnamon and sugar separarely), and folded it into the donut and cream mixture. It was very runny after this, so I stirred in about 1/3 cup cornflour, and left it overnight to thicken. I then just placed the filling in a piping bag fitted with a round nozzle and filled the shells. Due to the amount of cream in the filling, it was a bit more runny than usual, which made the shells a bit fragile. They still tasted pretty awesome, though 🙂
 IG
Follow me on Instagram – GemmaAsh 🙂 x