Raspberry Bubblegum Macarons

Macarons have been few and far between as of late. As much as I love making them, and more importantly, eating them, they can be very finicky and temperamental, especially in the heat and humidity of the summer. However, I thought, before I go back into Uni hibernation, I should probably make some, even just to know that I am still capable (and this I am now unsure of!).

IMG_8360

 I had been on the hunt for a delicious bubblegum flavour, as I love baking with fun and nostalgic flavours. With fresh raspberries in abundance, I thought, what better than raspberry bubblegum macarons. Whilst my shells failed to comply, they were still tasty, and the intense bubblegum flavour coupled nicely with the burst of the fresh raspberry.

 Macarons:

Recipe by Adriano Zumbo. You will definitely need kitchen scales to make macarons.

  • 135g almond meal
  • 135g icing sugar
  • 125g caster sugar
  • 45g egg whites
  • 50g egg whites
  • 40g water
  • Colouring gel, purple (Wilton and Americolour are best)
  • 100s & 1000s, any sort you like (I use CK Brand – Jimmies)

Spray four oven trays with cooking oil spray around the edges, and line with baking paper and set aside. Place almond meal and icing sugar in a large bowl, and sift together 3 times. Set aside, along with the 45g egg whites. Put 50g egg whites in a separate bowl. Heat caster sugar and water in a small saucepan, over a low-medium heat, until the sugar completely dissolves and begins to bubble slightly. You can also use a candy thermometer, and heat the syrup until it reaches 118 degrees C (244 degrees F). If the syrup becomes thick and powdery in appearance, you will need to start again. This is because the sugar has been heated too much, too quickly, and instead of dissolving, it has cooked and hardened.

Begin beating the 50g egg whites with one hand, and with the other, stream the hot sugar syrup down the side of the bowl to create an italian meringue. Beat until stiff peaks form, the meringue should be thick and very glossy. Add the colouring gel now, taking care to only add very small amounts until your desired colour is achieved. Pour meringue into the almond meal, icing sugar and 45g egg whites mixture and mix roughly to combine. When combined, fold mixture together (one single stroke) until there are no air bubbles left. Make a spread across the top of the mixture, and it should disappear in about 20 seconds. Spoon mixture into a piping bag fitted with a round nozzle. If you don’t have a piping set, most supermarkets sell plastic disposable ones with a few different nozzles. You should be able to find them in the baking aisle. Lock the bag by spinning the top around 4 times. Pipe 3-4cm rounds on the oven trays prepared earlier. Sprinkles macaron shells with 100s & 1000s. Tap the bottom of the trays on the kitchen bench and let them sit for about half an hour, or until mixture is dry to the touch. Don’t rush this process – you want the shells to be completely dry. Otherwise, it is unlikely that the ‘foot’ of the macaron will be formed.  Preheat your oven to 135c, or 125c fan forced.

IMG_8349

Place in oven and bake for 8 minutes. Turn trays around, and bake for another 9 minutes. To check if shells are cooked, gently lift one off the baking paper. If it peels of easily, they are done, if not, keep checking at 2 minute intervals. Furthermore, if you notice the tops have a slightly crumpled look after you take them out of the oven, put them back in for another couple of minutes. In my experience, this means that they are slightly undercooked and/or haven’t dried out enough before cooking. Cool on trays for 10 minutes, then peel off and place on a wire rack. The mixture should make about 12 -15 large macarons, and about 25 smaller macarons. Macarons keep really well (about 5 days in the fridge).

IMG_8351

 Raspberry bubblegum buttercream:

  •  Approximately 10 fresh or frozen raspberries, chopped finely
  • 200g butter, chopped and softened (not melted)
  • 2-3 cups icing sugar mixture
  • Colouring gel, turquoise (Wilton and Americolour are best)
  • Bubblegum flavouring (available at specialty cake supply stores)

With a beater, or in a mixer, beat butter until pale and creamy (usually 4-5 minutes). Gradually add in the icing sugar, mixing each addition until well combined. Add approx. ¼ teaspoon of colouring gel. You can always add more if you would like a deeper colour. Very carefully, add a couple of drops of bubblegum flavouring. Mine is extremely strong, so I only needed a tiny amount to achieve enough flavour. Remember, you can always put more in, but you cannot take it back out! Gently fold through the fresh raspberries through the buttercream.

Assembly:

Pair up similar sized macaron shells. Fill a piping bag, fitted with a large round nozzle (it must be large, as you do not want the pieces of raspberry to get stuck behind the nozzle), with buttercream. Pipe rounds of buttercream onto one macaron shell, and gently sandwich with the other. Place in an airtight container, and store in the fridge. Macarons always taste better the day after you have made them, as the flavour has had time to develop. Always serve macarons at room temperature.

IMG_8357

 Enjoy! X

Vanilla Bean and Raspberry Melting Moments

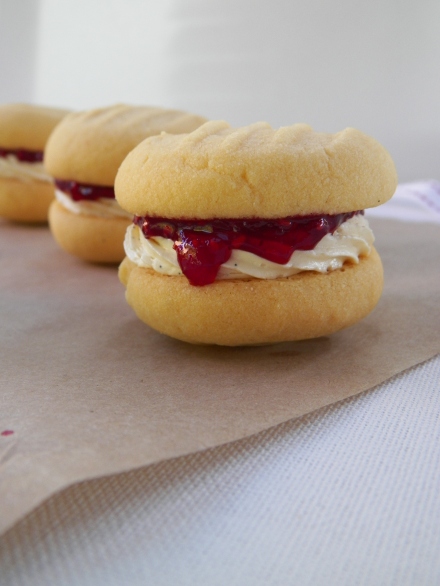
Melting moments are one of my favourite biscuits to make, and one of my favourite doughs to eat! (Let’s face it, there aren’t many doughs that I wouldn’t eat!) They are so yummy, and this version takes the usual melting moments up a notch, with delicious homemade raspberry jam and vanilla buttercream.

000_0004

This recipe was featured on Masterchef Australia 2 years ago (I think?!), and won contestant Julia a challenge. I have been wanting to make these for a long time, like many others things, but I am very glad I finally did. They really are delicious and were certainly worth the wait! Yum! I will most definitely be making these little gems again.

000_0002

Vanilla Bean and Raspberry Melting Moments: (recipe by Julia Taylor on Masterchef Australia)

I doubled the original recipe, as it said it would only make 5 sandwiched biscuits. I ended up with about 25 with a double batch, although I did try and make them small.

Biscuits:

  • 360g unsalted butter, chopped and softened
  • 120g icing (confectioner’s) sugar
  • 120g custard powder
  • 1 tbs baking powder
  • 360g plain (all-purpose) flour

Preheat a fan forced oven to 180c. Line 2 oven trays with non-stick baking paper. Beat the butter until pale and creamy, about 2-4 minutes. Add the sugar and custard powder, and stir with wooden spoon until well combined. Add the flour and the baking powder to the dough, and stir with a wooden spoon until mixed well. Roll small ball of dough, and place them on the pre-lined oven trays. Press fork lightly onto dough, to leave an indent. Bake for approximately 12 minutes or until very slightly golden. Let biscuits cool on trays, then transfer to wire racks.

Raspberry Jam:

  • 200g fresh or frozen raspberries
  • 150g caster (white) sugar
  • Juice of 1/2 lemon
  • Tbs cold water
  • 1/2 tsp powdered gelatin

Place raspberries, sugar and lemon juice in a medium saucepan, and cook on low-medium heat for about 20-30 minutes, or until thickened. Remove from heat. Place water and gelatin together in a small bowl, and mix until combined. Stir into jam, and place in heatproof bowl, in the fridge, to cool.

Vanilla Bean Buttercream:

  • 250g butter, chopped and softened
  • 1 cup icing (confectioner’s) sugar
  • 2 tsp vanilla bean paste/natural extract

Beat butter until pale and creamy, 2-4 minutes. Beat in vanilla bean paste. Gradually add the icing sugar and beat until all well combined. Spoon buttercream into a piping bag fitted with a medium star nozzle.

000_0005

To assemble:

Place likely pairs of biscuits, facing upwards, next to each other. On one biscuit spoon a small amount of the raspberry jam, and on the other biscuit, pipe a swirl of buttercream. Gently sandwich together. Be sure not to use too much jam as it will just drip out when you press the biscuits together. Biscuits are stored best in an airtight container, in a cool, dry place. FYI – they are also best made the day before, as both the jam and buttercream will set, and the flavour will develop also.

000_0008

Happy Baking! 🙂

Raspberry Marshmallow Lovehearts + Fenix

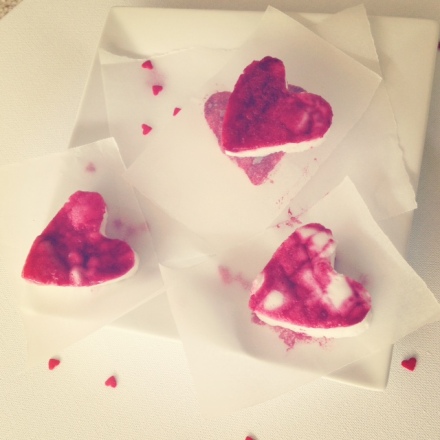
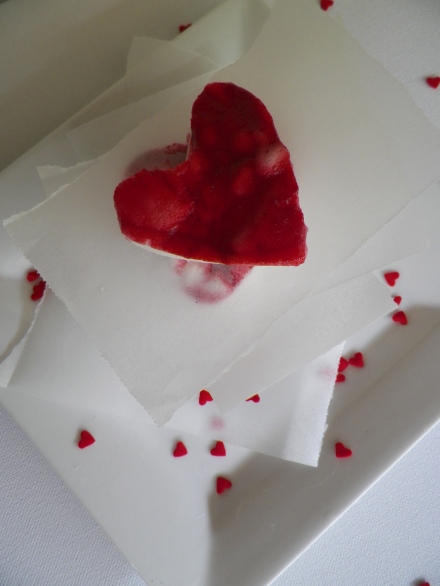
I must admit, I’m not really a huge fan of Valentine’s Day. The worst part is everything becomes so expensive just for one day! Anyhow, I took it as an excuse to make something yummy and heart-shaped, and so here are my first ever homemade marshmallows. The raspberry on top gave them quite a tangy hit, as they were so, so sweet on their own. I am trying really hard to avoid sugar during the week at the moment – has anyone else ever tried to do this? It’s really difficult, as it is hidden in the most random things, like gluten free twisties :/ Anyway, the hearts were the perfect size – if they were any bigger they just would have been too sickly for one person. I would suggest if you were to make homemade marshmallow, to use small cookie cutters or cut them in very small squares (hey, at least they go further!).

photo

I wanted to create more of a raspberry swirl, like Mowielicious, instead of a raspberry layer. I tipped too much of the raspberry mixture on top of the marshmallow, so when I used the skewer to create the swirl, it got a bit messy. Next time, I will either add it slowly and swirl, and use maybe half the sugar in the marshmallow, or make a proper raspberry layer to really give a balance between the sweet and the sour. Oooh, another idea could be making lemon curd and swirling it through the marshmallow. Or, using the lemon curd and the raspberry. Or maybe even orange and a chocolate layer to make Jaffa? Oh, the possibilities!
006
Raspberry Swirl/Layer: (recipe from Mowielicious)
 
  • 200g raspberries, fresh or frozen
  • 50g icing sugar (you could leave this out if you wanted to)
Place raspberries and sugar in a small saucepan, over a medium heat. Keep stirring until raspberries break down and become a syrup. Push mixture thought a sieve to get rid of the seeds. Discard the seeds, and set bowl aside to cool.
003
Homemade Marshmallow: (recipe from Raspberri Cupcakes)
 
  • 1 cup caster (white) sugar
  • 2 tsp liquid glucose (available in most supermarkets)
  • 1 tbs gelatin powder
  • 1 large egg white
  • 1/2 tsp vanilla bean paste
  • 1/4 cup icing sugar
  • 1/4 cup cornflour
Line a lamington style baking tray with olive oil spray and baking paper (the tray needs to be a couple of inches deep – my tray would have been about 20-30 cms long). Place caster sugar, 100ml cold water and glucose in a medium sized saucepan. Place on a low heat and stir until sugar has dissolved. In the meantime, place another 100ml of cold water and the gelatine in a small bowl to soften, and set aside. After you have done this, turn the heat up on the sugar syrup, and insert a sugar thermometer (I use my Dad’s milk one that he uses for coffee, but you can buy them from $2 shops and homeware’s stores also). When the syrup reaches 120c, which for me took about 40 seconds, add the gelatin mixture, and whisk until there are no lumps. Place an egg white in a clean mixing bowl and beat until soft peaks form. Very slowly add the hot sugar and gelatin mixture to the egg white and beat until thick and glossy (5-10 minutes). Pour marshmallow mixture into prepared tray and smooth with spatula until evenly spread. Spoon a little of the raspberry topping onto the marshmallow and swirl with a skewer, or pour all of the raspberry topping onto the marshmallow to make an even top layer. Leave marshmallow to set overnight at room temperature.
Image
Combine icing sugar and cornflour in a small bowl. If using a cookie cutter, dip in hot water then coat in sugar and cornflour mixture, and begin pressing shapes in the marshmallow. If using a knife, simply dip in hot water and cut squares. Once you have shapes and/or squares, roll them in the sugar and cornflour mixture so they are no longer super sticky. It was a bit difficult to this with the raspberry topping as I didn’t want to coat the bright red. Instead I just made sure the bottom and sides had been coated. Serve immediately, or store in refrigerator in an airtight container.
013
I also wanted to share some photos from a restaurant my boyfriend and I went to recently. Fenix is owned by Gary Mehigan, who is a judge on Masterchef Australia, and I must say, it was pretty awesome. I had heard mixed reviews about Fenix, but they had a fantastic deal going throughout January, so we decided to give it a go, and lucky we did! We shared three entrees between us, which, in hindsight, was probably a bit too much. My boyfriend had crab crostini with aioli, avocado mousse and smoked tomato, and I had the braised pork belly with scallops, and we also shared gruyere and sweetcorn cigars. I really liked all three of the entree’s, but the pork belly was absolutely fantastic! I actually dreamt about the crackling that night 😛
photo(1)

For our mains, I had the sticky beef short ribs with mustard mash and watercress, and it was sooooo good. The meat just fell apart and I could have happily drank the gravy! My other half had a whole snapper which was also fairly delish. By this time, I was really struggling! For dessert, I had the coconut creme caramel with roasted pineapple and pina colada sorbet. It was really yummy, but just too big! The best part was the pina colada sorbet because it was so cold and refreshing after such a big meal! The boy had a chocolate fondant, which I was a bit jealous of- it was amazing. I will definitely be having that one when I go back! I believe they have a similar deal for February as well, so head to their website to check it out if you’re in Melbourne.

photo(2)

Follow me on Instagram – GemmaAsh 🙂 Happy Valentine’s Day to you all!

Raspberry Buttercream Macarons

My love for raspberry is certainly well documented, and this addition is no exception!

I thought it would be nice to do something non chocolate or caramel for a change! I made a simple buttercream, and just added some raspberries that I cooked down and it worked really well. The flavour was great and I love the natural pink colour it gives. I also put half a raspberry in the middle of each macaron because I thought it would break up the buttercream and add a nice tang 😉

Macarons:

This recipe is Adriano Zumbo’s, and was published a couple of years ago in the Herald Sun. You will definitely need kitchen scales to make macarons.

  • 135g almond meal
  • 135g icing sugar
  • 125g caster sugar
  • 45g egg whites
  • 50g egg whites
  • 40g water
  • 1/4 tsp Wilton’s pink colouring gel

Preheat oven to 170c (160c fan forced). Spray four oven trays with cooking oil spray baround the edges, and line with baking paper and set aside. Place almond meal and icing sugar in a large bowl, and sift together 3 times. Set aside, along with the 45g egg whites. Put 50g egg whites in a separate bowl. Heat caster sugar and water in a small saucepan, over a low-medium heat, until the sugar completely dissolves (if it slightly burns my tongue, it’s done!). If you do not want to burn your tongue, Zumbo suggests investing in a candy thermometer and heating the syrup until it reaches 118 degrees C (244 degrees F). If the syrup becomes thick and powdery in appearance, you will need to start again. This is because the sugar has been heated too much, too quickly, and instead of dissolving, it has cooked.

Begin beating the 50g egg whites with one hand, and with the other, stream the hot sugar syrup down the side of the bowl to create an italian meringue. Beat until stiff peaks form, the meringue should be thick and very glossy. If you want to add flavouring/colouring, now’s your moment. So add the colouring now. Just lightly beat them into the meringue. Pour meringue into the almond meal, icing sugar and 45g egg whites mixture and mix roughly to combine. When combined, fold mixture together (one single stroke) until there are no air bubbles left. Make a spread across the top of the mixture, and it should disappear in about 20 seconds. Spoon mixture into a piping bag fitted with a round nozzle. (If you don’t have a piping bag set, most supermarkets sell plastic ones, they are Multix brand, in an orange box and contain 5 piping bags with a few different nozzles, plus they’re only about $3. You should be able to find them in the baking aisle). Lock the bag by spinning the top around 4 times. Pipe 3-4cm rounds on the oven trays prepared earlier. Tap the bottom of the trays on the kitchen bench and let them sit for about half an hour, or until mixture is dry to the touch.

Place in oven and bake for 8 minutes. Turn tray around in the oven and bake for another 7 minutes. To test, pull a macaron off the baking paper. If it is stuck, keep cooking and checking regularly. Cool on trays for 5 minutes, then peel off and place on a wire rack. The mixture should make about 12 -15 large macarons, and about 25 smaller macarons. Macarons keep really well (about 5 days in the fridge) and some say that the longer they are refrigerated, the more the flavour is likely to develop. Macarons taste best when they are stored in the fridge, then brought down to room temperature to eat.


Raspberry Buttercream:

  • 2/3 cup raspberries, fresh or frozen
  • 175g butter, chopped and softened
  • 1 1/4 cups icing sugar mixture

Place raspberries in medium saucepan with a splash of water. Cook over a low heat for about 10 minutes until raspberries are cooked down enough to pass through a sieve. Push raspberries through a fine sieve to get rid of the seeds. Let mixture cool completely.

Beat butter on high until pale and creamy. Gradually add the icing sugar and raspberry mixture. If not using immediately, refrigerate.

Assembly:

Match likely pairs of macaron shells. Fill a piping bag fitted with a star nozzle, and pipe a small round on a shell. With the left over raspberries, cut each berry in half and place on top of the buttercream. Pipe another small swirl on top, and sandwich with the other shell.

These macarons are also a part of this month’s Mactweets Challenge which are showcasing seasonal fruit. Seeing as raspberries are one of my favourite fruits and they are slowly coming into season in Australia, I thought they would be my best bet!

Lamington Macarons

This is my second attempt at Lamington macarons. If you are unfamiliar with lamingtons, they are a delicious Australian treat – a vanilla cake that often has rapberry jam in the middle, and is rolled in chocolate sauce and covered in coconut. Sounds pretty good hey?! Thankfully this time, they actually do look like macarons, instead of pancakes (see Vegemite macarons)! I love the idea of using a flavour or a product that is completely non-macaron related, and making a macaron with these flavours and products in mind. That is the great thing about macarons – they are a blank canvas. You can colour them however you like and you can fill them with whatever flavour you like whether it be fruity, creamy or rich and chocolatey like this one.

I love the dark chocolate and raspberry combination, and with the addition of coconut, these macarons were so rich, hence why they are teeny tiny! This is also the first time I have made proper chocolate shells, and with a little tweaking with the recipe, they mostly turned out well. The chocolate shells were like mini mud-cakes with a meringue crust – so good. They were a lot denser than a normal shell, but were still airy and carried the chocolate flavour really well.

Chocolate Macarons: (this recipe is adapted from Adriano Zumbo’s book and is a bit different to the recipe I usually use)

You definitely need kitchen scales (preferably digital) to make macarons.

  • 135g almond meal
  • 135g icing sugar
  • 30g cocoa
  • 55g egg whites, x2
  • 150g caster sugar
  • 45g water

Grease and line 4 oven trays with baking paper, and preheat the oven to 160c. Place one lot of 55g egg whites in a large, dry and clean bowl and set aside. Sift together the almond meal, icing sugar and cocoa four times, and set aside, along with the other lot of 55g egg whites (I usually place egg whites in a ramekin, on top of a paper towel in the bowl with the dry ingredients – otherwise I tend to forget them :P). Combine the caster sugar and water in a small saucepan over a low heat. Stir until sugar is dissolved and syrup is hot – keep testing with your tongue until sugar is dissolved. Begin beating 55g egg whites in the large bowl, and slowly pour the sugar syrup down the side of the bowl. This will create an Italian meringue. Beat until soft peaks form – you do not want to overbeat your egg whites. The mixture should be thick and very glossy.

Pour the 55g egg whites in the ramekin into the dry ingredients. Carefully spoon the Italian meringue mixture into the dry ingredients bowl and stir to combine. Once combined, fold mixture (one single stroke) until there are no air bubbles left – this will usually take 30-40 seconds if you are folding non-stop. Make a spread with the spoon on top of the mixture, and it should subside in 15-20 seconds.

Using a piping bag fitted with a round nozzle, fill the bag 2/3 way with the macaron mixture (TIP – if you do not have a piping bag set, never fear. In the baking aisle of most Australian supermarkets you will find a small orange box – they are ‘Multix’ brand and have 5 piping bags and 5 piping tips. I am sure most supermarkets in the USA would have a very similar product). To lock the bag, spin the top around 4 times. Gently pipe small circles onto prepared baking trays. When you have a finished a tray, tap it hard against the bench – this will get rid of the air bubbles. Leave trays for about half an hour, or until they are dry to the touch and a crust is formed. You need this crust for the macarons to rise properly so that they form their little feet.

I had a bit of trouble with this next part. I’m not sure if it was my oven or the difference of having the cocoa in the shell mixture, but quite a lot of my shells cracked, especially around the edges of the tray. I found that these chocolate shells cook a lot quicker than regular shells, so this is what I did and most of them turned out pretty well. Only cook one tray at a time. Place tray in preheated oven for 7 minutes. Turn tray around and bake for 3 minutes. You may need to check early on in the cooking process whether you shells are forming properly or they are cracking. If they are cracking, I would recommend removing them from the oven and cooling them down, as they may already be cooked. If not, follow the times I have suggested. Let shells cool on trays for 5-10 minutes, then remove and place on a wire rack. Repeat process with remaining trays.

Chocolate Ganache:

This is a basic chocolate ganache. I have doubled the recipe I usually use.

  • 200g chocolate (I used half milk, half dark), chopped
  • 1 cup cream (doesn’t really matter which type but I use thickened or lite thickened)

Place chocolate and cream in a saucepan over a low-medium heat. Constantly stir with a metal spoon until completely melted. Pour into container/bowl/whatever and refrigerate until firm enough to pipe. I often make this ganache the day before and take it out of the fridge in the morning. Sometimes it may need 5-10 seconds in the microwave.

Assembly:

Match up likely pairs of macaron shells. Fill one piping bag with chocolate ganache and another piping bag with raspberry jam – I didn’t make mine this time, but if you want to, check out this awesome recipe by Matt Preston. Pipe a small dollop of ganache on the shell, pipe an even smaller dollop of jam on top, and then another dollop of ganache to encase the jam. Sandwich with another shell and gently sprinkle around the edges of the macaron with dessicated coconut.