Pomegranate, Salted Caramel and White Chocolate Pan Cookie

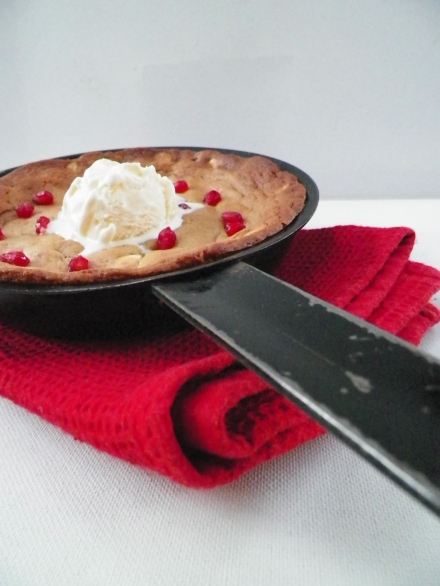
Delicious. Is just what this delightful pan cookie was. I have been wanting to make one of these for a while now, and it certainly did not disappoint. Crispy on the outside, soft and gooey on the inside, plus the addition of creamy salted caramel = YUM!

000_0005

 The combination of the sweet white chocolate, salty caramel, and the fresh little pops of the pomegranate seeds were a really great mix together. However, I also made smaller cookies on their own, which were delicious, but very, very soft, due to the amount of salted caramel I added! This combination is perfect for a pan cookie, topped with more pomegranate and some ice cream. Plus, these are so easy to make, and are a great dessert to share, or not to share 😉

000_0006

 Pomegranate, Salted Caramel and White Chocolate Pan Cookie: 

Makes 1 pan cookie, and approximately 12 smaller cookies. You could halve this recipe for the pan cookie only.

  • 125g butter, chopped and softened, not melted
  • 1/2 cup brown sugar, tightly packed
  • 1/2 cup castor (white) sugar
  • ½ tsp vanilla bean paste/natural extract
  • 1 egg
  • 1 3/4  cup self-raising flour
  • Pinch of sea salt
  • 250g good quality white choc chips
  • 2 tbs salted caramel (I used a homemade one, but you could also use Dulce de Leche, Nestle Top ‘N’ Fill Caramel)
  • Seeds of ½ a pomegranate

Preheat the oven to 160c. Grease a small non-stick pan (I used a 17cm pan) with butter, and set aside. Beat the butter and sugar together until pale and creamy, approximately 3-4 minutes. Add the vanilla, and the eggs, one at a time until well combined. Stir in the flour with a wooden spoon, until completely mixed. Add the chocolate, salted caramel and pomegranate seeds, and mix well. Spoon mixture into prepared pan, filling it to the top, and smooth over mixture with a spoon. Place in pre-heated oven, and bake for 15-20 minutes, or until golden. Let cool for 5 minutes, and top with more pomegranate seeds and ice cream. Enjoy!

000_0004

FYI – you could easily use a bigger or smaller pan for this recipe, you would just need to adjust the cooking time, and keep an eye out for when the cookie is golden, or to your liking 🙂 Also, sorry for the crappy photos. I had to quickly snap away before the sun went down!

000_0008

Halloween Spooky Spider Chocolate Oreos

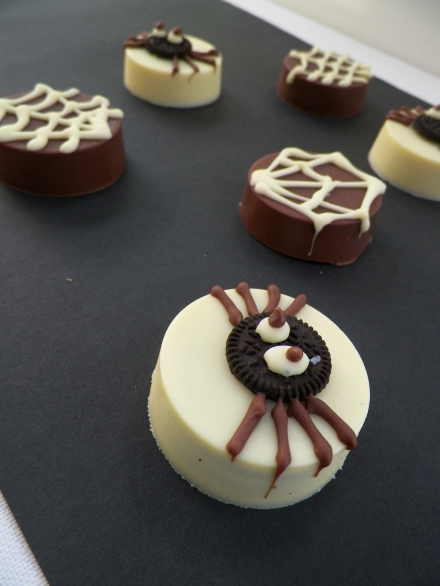
Can you believe it’s Halloween already?! I’m a little bit excited about this, as it means it’s getting nice and close to the best time of year – Christmas! Halloween is not really a huge deal in Australia, although it seems to have become more popular in recent years. This is only the second post I’ve ever done on Halloween, and I’m definitely looking forward to doing more. There are some pretty cool baking ideas I found on Pinterest for Halloween. People are so creative. These Oreos, however, are probably not the most creative. They are, in fact, very easy to make and insanely delicious.


000_0005

I am a little bit obsessed with chocolate covered Oreos at the moment. I see stacks of them on Instagram, and some people make them look  like the most amazing little morsels of sparkly treasure, and you would never know that a humble Oreo biscuit was nestled inside. I have officially been inspired. Yum.

000_0002

So, why not cover an Oreo with a totally justifiable amount of chocolate, and then whack another Oreo on top? Just as well I could turn them into spiders, and that it’s coincidentally the week of Halloween!

000_0004

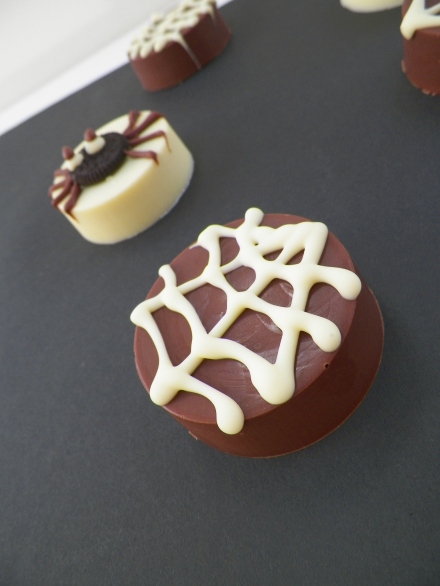
My chocolate piping skills are very obviously flawed! I can’t say I have really ever piped melted chocolate before, and it’s really not the easiest thing to do. The designs on these Oreos definitely could have been cleaner, but I don’t mind too much as the taste totally makes up for it! There is no recipe for these Oreos, it’s pretty self explanatory. A little bit of chocolate in the mould, the Oreo, and more chocolate. You just have to have the right moulds (I got mine from Baking Pleasures).

These Oreos are awesome. They are quick and easy to make, a great idea for cooking with kids and super versatiile – you can make them any colour and design them however you wish, and best of all, they are super delicious.

Happy Halloweeeeeeeeeeen!

000_0006

Vanilla Bean and Raspberry Melting Moments

Melting moments are one of my favourite biscuits to make, and one of my favourite doughs to eat! (Let’s face it, there aren’t many doughs that I wouldn’t eat!) They are so yummy, and this version takes the usual melting moments up a notch, with delicious homemade raspberry jam and vanilla buttercream.

000_0004

This recipe was featured on Masterchef Australia 2 years ago (I think?!), and won contestant Julia a challenge. I have been wanting to make these for a long time, like many others things, but I am very glad I finally did. They really are delicious and were certainly worth the wait! Yum! I will most definitely be making these little gems again.

000_0002

Vanilla Bean and Raspberry Melting Moments: (recipe by Julia Taylor on Masterchef Australia)

I doubled the original recipe, as it said it would only make 5 sandwiched biscuits. I ended up with about 25 with a double batch, although I did try and make them small.

Biscuits:

  • 360g unsalted butter, chopped and softened
  • 120g icing (confectioner’s) sugar
  • 120g custard powder
  • 1 tbs baking powder
  • 360g plain (all-purpose) flour

Preheat a fan forced oven to 180c. Line 2 oven trays with non-stick baking paper. Beat the butter until pale and creamy, about 2-4 minutes. Add the sugar and custard powder, and stir with wooden spoon until well combined. Add the flour and the baking powder to the dough, and stir with a wooden spoon until mixed well. Roll small ball of dough, and place them on the pre-lined oven trays. Press fork lightly onto dough, to leave an indent. Bake for approximately 12 minutes or until very slightly golden. Let biscuits cool on trays, then transfer to wire racks.

Raspberry Jam:

  • 200g fresh or frozen raspberries
  • 150g caster (white) sugar
  • Juice of 1/2 lemon
  • Tbs cold water
  • 1/2 tsp powdered gelatin

Place raspberries, sugar and lemon juice in a medium saucepan, and cook on low-medium heat for about 20-30 minutes, or until thickened. Remove from heat. Place water and gelatin together in a small bowl, and mix until combined. Stir into jam, and place in heatproof bowl, in the fridge, to cool.

Vanilla Bean Buttercream:

  • 250g butter, chopped and softened
  • 1 cup icing (confectioner’s) sugar
  • 2 tsp vanilla bean paste/natural extract

Beat butter until pale and creamy, 2-4 minutes. Beat in vanilla bean paste. Gradually add the icing sugar and beat until all well combined. Spoon buttercream into a piping bag fitted with a medium star nozzle.

000_0005

To assemble:

Place likely pairs of biscuits, facing upwards, next to each other. On one biscuit spoon a small amount of the raspberry jam, and on the other biscuit, pipe a swirl of buttercream. Gently sandwich together. Be sure not to use too much jam as it will just drip out when you press the biscuits together. Biscuits are stored best in an airtight container, in a cool, dry place. FYI – they are also best made the day before, as both the jam and buttercream will set, and the flavour will develop also.

000_0008

Happy Baking! 🙂