Pomegranate, Salted Caramel and White Chocolate Pan Cookie

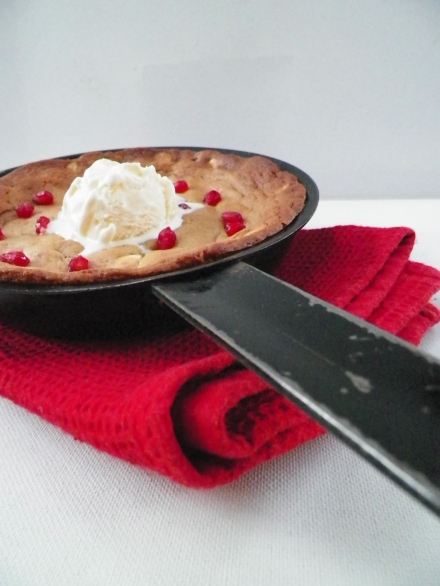
Delicious. Is just what this delightful pan cookie was. I have been wanting to make one of these for a while now, and it certainly did not disappoint. Crispy on the outside, soft and gooey on the inside, plus the addition of creamy salted caramel = YUM!

000_0005

 The combination of the sweet white chocolate, salty caramel, and the fresh little pops of the pomegranate seeds were a really great mix together. However, I also made smaller cookies on their own, which were delicious, but very, very soft, due to the amount of salted caramel I added! This combination is perfect for a pan cookie, topped with more pomegranate and some ice cream. Plus, these are so easy to make, and are a great dessert to share, or not to share 😉

000_0006

 Pomegranate, Salted Caramel and White Chocolate Pan Cookie: 

Makes 1 pan cookie, and approximately 12 smaller cookies. You could halve this recipe for the pan cookie only.

  • 125g butter, chopped and softened, not melted
  • 1/2 cup brown sugar, tightly packed
  • 1/2 cup castor (white) sugar
  • ½ tsp vanilla bean paste/natural extract
  • 1 egg
  • 1 3/4  cup self-raising flour
  • Pinch of sea salt
  • 250g good quality white choc chips
  • 2 tbs salted caramel (I used a homemade one, but you could also use Dulce de Leche, Nestle Top ‘N’ Fill Caramel)
  • Seeds of ½ a pomegranate

Preheat the oven to 160c. Grease a small non-stick pan (I used a 17cm pan) with butter, and set aside. Beat the butter and sugar together until pale and creamy, approximately 3-4 minutes. Add the vanilla, and the eggs, one at a time until well combined. Stir in the flour with a wooden spoon, until completely mixed. Add the chocolate, salted caramel and pomegranate seeds, and mix well. Spoon mixture into prepared pan, filling it to the top, and smooth over mixture with a spoon. Place in pre-heated oven, and bake for 15-20 minutes, or until golden. Let cool for 5 minutes, and top with more pomegranate seeds and ice cream. Enjoy!

000_0004

FYI – you could easily use a bigger or smaller pan for this recipe, you would just need to adjust the cooking time, and keep an eye out for when the cookie is golden, or to your liking 🙂 Also, sorry for the crappy photos. I had to quickly snap away before the sun went down!

000_0008

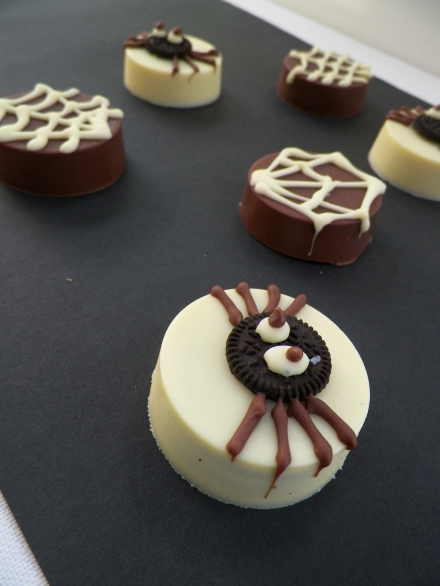
Halloween Spooky Spider Chocolate Oreos

Can you believe it’s Halloween already?! I’m a little bit excited about this, as it means it’s getting nice and close to the best time of year – Christmas! Halloween is not really a huge deal in Australia, although it seems to have become more popular in recent years. This is only the second post I’ve ever done on Halloween, and I’m definitely looking forward to doing more. There are some pretty cool baking ideas I found on Pinterest for Halloween. People are so creative. These Oreos, however, are probably not the most creative. They are, in fact, very easy to make and insanely delicious.


000_0005

I am a little bit obsessed with chocolate covered Oreos at the moment. I see stacks of them on Instagram, and some people make them look  like the most amazing little morsels of sparkly treasure, and you would never know that a humble Oreo biscuit was nestled inside. I have officially been inspired. Yum.

000_0002

So, why not cover an Oreo with a totally justifiable amount of chocolate, and then whack another Oreo on top? Just as well I could turn them into spiders, and that it’s coincidentally the week of Halloween!

000_0004

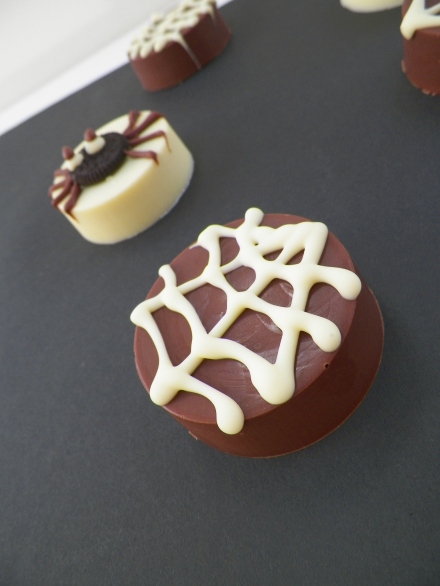
My chocolate piping skills are very obviously flawed! I can’t say I have really ever piped melted chocolate before, and it’s really not the easiest thing to do. The designs on these Oreos definitely could have been cleaner, but I don’t mind too much as the taste totally makes up for it! There is no recipe for these Oreos, it’s pretty self explanatory. A little bit of chocolate in the mould, the Oreo, and more chocolate. You just have to have the right moulds (I got mine from Baking Pleasures).

These Oreos are awesome. They are quick and easy to make, a great idea for cooking with kids and super versatiile – you can make them any colour and design them however you wish, and best of all, they are super delicious.

Happy Halloweeeeeeeeeeen!

000_0006

Dark Chocolate Sugar Cookies with Gingerbread Buttercream

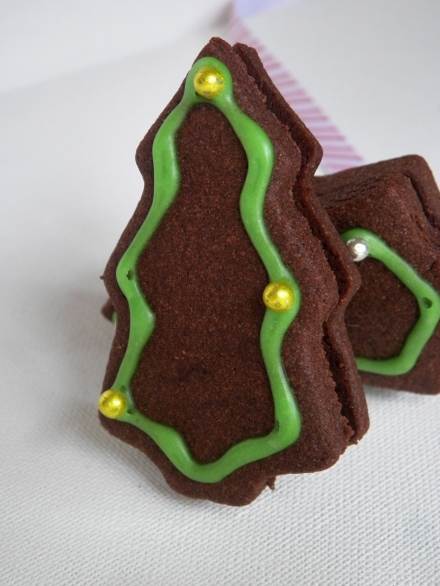
I have seen a couple of fellow bloggers make these super-cute cookies lately, and I have really wanted to try making them myself too, especially since the recipe is from the wonderful Sweetapolita! These cookies most definitely lived up to my expectation. Not only were they soooooo yummy, but they were really easy to make and even with halving the recipe, I still had 40 sandwiched cookies!
000_0014
Another thing I love about these cookies is that you can do anything with them. You can leave them plain, just decorate them or fill them. I decided on the previous two. My blogging buddy Sugabuttacream filled hers with espresso buttercream, which would be great to try as well. Gingerbread buttercream is definitely one of my favourites around Christmas time, it is so yummy and easy to make, plus it keeps really well and the flavour tends to develop over a couple of days.
000_0012
Dark Chocolate Sugar Cookies: (recipe adapted from Sweetapolita – makes 40 sandwiched cookies, 80 single cookies)
  • 3 cups plain flour
  • 3/4 cup good quality cocoa
  • 1/2 tsp salt
  • 225g butter, chopped and softened – not melted
  • 1 cup caster sugar
  • 1/2 cup brown sugar
  • 1 large egg
  • 1 tsp vanilla bean paste/vanilla extract
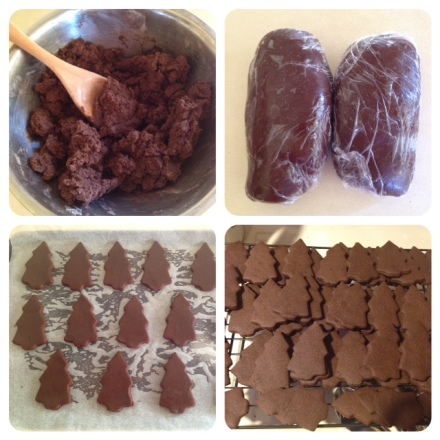
Sift flour, salt and cocoa into a bowl and set aside. Place butter and sugars in bowl, and beat until pale and creamy. Add egg and vanilla, and beat well until combined. Stir in dry ingredients until mixure forms a dough.
On a floured surface, knead half of the dough until it becomes smooth. Shape into a ball. If you want to use dough straight away, refrigerate for 30 minutes. If you are using it in a few days time, freeze the dough. Remove from freezer 2-3 before use and leave it to thaw at room temperature. Repeat kneading with other half of mixture.
Preheat oven to 160c, and line 4-5 oven trays with baking paper. Place one ball of dough between 2 sheets of baking paper. With a rolling pin, roll dough out until it is about 1cm thick. With a cookie cutter, cut shapes out from the dough and carefully place them on baking paper. When tray is filled place in the oven for 10 minutes, or until the cookies are just slightly soft. Let them cool on trays, then place on a wire rack.
Choc Sugar Cookies
Sugar Icing (for decorating):
  • Icing sugar, about 1 1/2 cups
  • Water
  • Wilton’s colouring gel, green
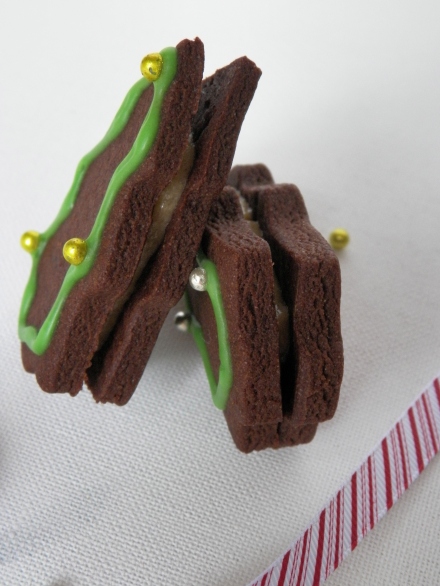
As per the icing I used for the Melted Snowmen, I didn’t really use exact measurements. I combined icing sugar and water until it became a thick paste, then added the green colouring. With a piping bag fitted with a very thin round nozzle, I piped around the edges of the trees, and added a few gold and silver cachous as the decorations. The icing dries really quickly, so add the cachous as you go.
000_0016
Gingerbread Buttercream:
  • 350g salted butter, chopped and softened – not melted
  • 1 1/2-2 cups icing sugar
  • 1 1/2 tsp ground ginger
  • 1 tsp ground cinnamon
  • 1 tsp mixed spice
Beat butter until pale and creamy. Gradually add the icing sugar and other spices. If you only want a hint of the spices, you could add bit less, and if you want a strong hit of ginger, you can add more. You can just keep tasting, but these quantities, for me, are just the right balance 🙂 If you are not using the buttercream until the following the day or after, refrigerate, then take out of the fridge an hour before use. As mentioned earlier, I personally like to make it a couple of days in advance because the flavour of the spices tend to develop. Place the buttercream in a piping bag fitted with a round nozzle. Pipe 2 lines of buttercream down the middle of the tree biscuit, then sandwich with another. You can either refrigerate the cookies, or leave them in a cool, dry place.
Piping...
I hope you all had a lovely Christmas, I can’t believe it’s all over for another year! It’s sad but also kind of a relief at the same time. Here are some of the yummy things my family had on Christmas Day (minus the oysters – ew!!).
Christmas Day
January the 1st also marks whiskitforabiscuit’s first birthday – so thank you to everybody who has supported my baking endeavours throughout the past year by coming to visit my site! It is slowly growing in terms of views and followers, which is really exciting to see, so please feel free to comment, like and follow – it would be greatly appreciated! So thank you all so much, and I sincerely hope you come back to say hi in the new year 🙂 Xx
000_0011