A deliciously Wonkarific Willy Wonka party!

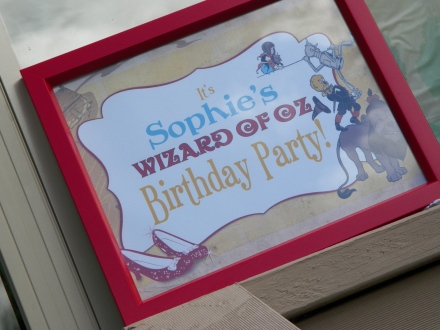
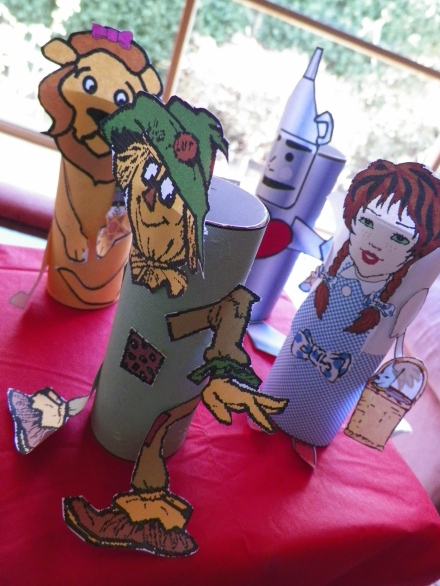
So…it’s been a while. I apologise for the lack of posting so far this year, it has been a busy one. Anyway, last week was my sister’s birthday party, and there is always a fun theme for her parties. You may remember the Wonderful Wizard of Oz party, from two years ago. Being the lover of all things sweet, I was obviously very excited about this year’s theme!

photo-1

photo 2-1

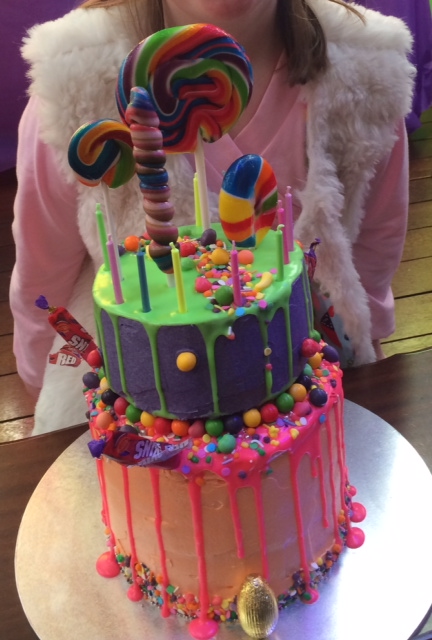
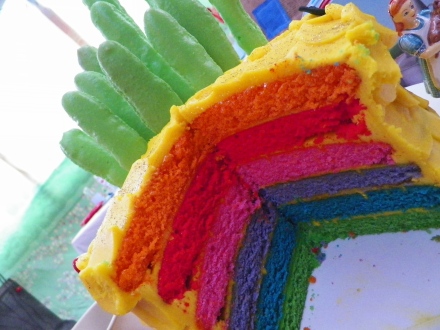
I had been planning the cake for quite some time, and I was really happy with how it came together. It was my first ever tiered cake, and it wasn’t as scary as I thought it would be! I had envisioned the bottom tier being squashed from the pressure and my lack of experience, but I was lucky. The cake was inspired by the work of the one and only Katherine Sabbath, who you should totally check out. The bottom tier was a 6 layer rainbow cake – similar to this one from a few years back, filled with nerds and popping candy, and covered in sour watermelon buttercream, with white chocolate pink neon ganache drip. The top tier was a chocolate raspberry mud cake filled with dark chocolate ganache, covered in vanilla bean buttercream, with a white chocolate neon green drip. I got my hands on everything Wonka I could find, and smattered it on the cakes as nicely as I could!

 photo 3

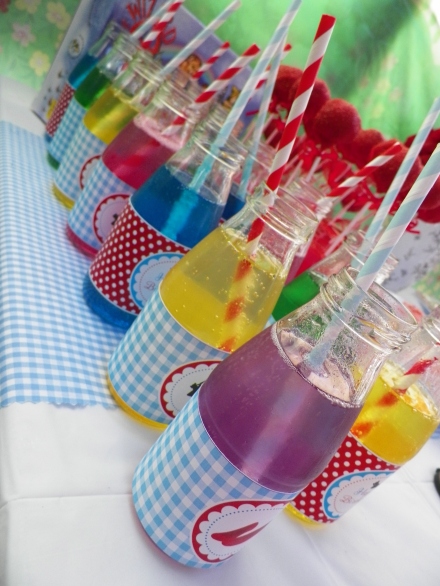
Other bits and pieces I created for the party included Redskin Macaron lollipops (you can find the recipe for these here), Chocolate covered Oreos with popping candy (these were the kids fave!), and chocolate sprinkle spoons with nerds.

photo 1

photo 1-1 photo 2-1


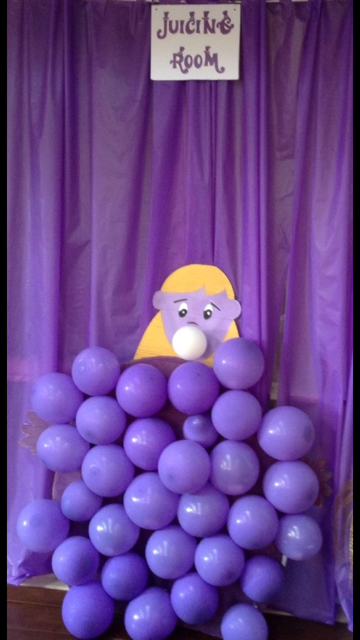
It was a really fun day, and such a great theme for a kid’s party. Shout out to my Mum who did such an amazing job setting up, and making all the decorations 🙂

photo 3

Fingers crossed for another post soon, but until then, follow me on Instagram – @whiskitforabiscuit

A Wonderful Wizard of Oz Party!

Last Sunday, it was my little sister’s wonderful Wizard of Oz party. Well, it was more of a production actually, as our house was temporarily taken over by Oz paraphernalia and resembled quite the tornado. It was a lot of fun, and the amount of work my parents put into making the place look like it was straight out of the movie set was astronomical. As was the amount of time I spent in the kitchen! I made so many little bits and pieces I thought I would dedicate a whole blog post to it 🙂

100_0067

000_0049

100_0063

My ‘Emerald City Macarons’ – Redskin flavoured, with edible gold glitter. This flavour was SO delicious!

000_0036

100_0062

‘Yellow Bricks’ – aka Salted Caramel Rice Bubble Slice

100_0057

000_0048

100_0061

Unfortunately, I did not make these. I had never tried a cake pop before, I have heard they are very difficult to make. These ones not only look amazing, but tasted it, too. Inside were gooey, chocolatey, fudgey balls of cake. YUM!

100_0072

Rainbow lemonade for the kiddies 🙂

100_0052

The cake I made – Somewhere Over The Rainbow Layer Cake, with Yellow Brick Buttercream and a Macaron Emerald City.

100_0074

100_0075

This was the same recipe I used to create last year’s Rainbow Cake. It’s not at all difficult, it just takes a lot of time. The end result is well worth it, though. Especially when kids are involved!

100_0066

Follow the Yellow Brick Road…

Popping Fruit Tingle Macarons

I LOVE a fruit tingle. Both the cocktail, and the lolly. But the fizzy sherbet lolly especially. Fruit Tingle’s (which are similar to Bottle Caps/SweeTarts/Refreshers) have been one of my favourite lollies since I can remember – I love the sourness and the sweetness together, and would often chuck a whole small packet in my mouth at once, quite happily. Fruit Tingles are nostalgic for me – I remember I used to have competitions with my friends to see how many multi-coloured lollies we would get, and we would make a wish with each multi-coloured fruit tingle we got in our packet. A few years ago, thanks to Raspberri Cupcake’s Orange Cake with Fruit Tingles Icing, I discovered the joy of fruit tingles and butter combined. It was pretty magical and life changing. And so, I present Fruit Tingle Macarons with Popping Candy.

 009

I threw in another favourite candy of mine from the 90s – Wizz Fizz. I’m sure it was a worldwide phenomenon possibly under other names in other countries, but if you have been completely deprived, and have not been introduced to Wizz Fizz, it is just sherbet in a small bag with a little coloured spoon. Well, I shouldn’t say it’s just sherbet. It’s amazing tingle soury goodness that everybody should experience at least once, it’s good fun. And I guarantee once you have finished the bag you will be covered in a white powder. The good type of white power – Wizz Fizz 😉

013

Macarons:

This recipe is Adriano Zumbo’s, and was published a couple of years ago in the Herald Sun. You will definitely need kitchen scales to make macarons.

  • 135g almond meal
  • 135g icing sugar
  • 125g caster sugar
  • 45g egg whites
  • 50g egg whites
  • 40g water
  • 1/4 tsp colouring  gel, orange

Spray four oven trays with cooking oil spray around the edges, and line with baking paper and set aside. Place almond meal and icing sugar in a large bowl, and sift together 3 times. Set aside, along with the 45g egg whites. Put 50g egg whites in a separate bowl. Heat caster sugar and water in a small saucepan, over a low-medium heat, until the sugar completely dissolves (if it slightly burns my tongue, it’s done!). If you do not want to burn your tongue, Zumbo suggests investing in a candy thermometer and heating the syrup until it reaches 118 degrees C (244 degrees F). If the syrup becomes thick and powdery in appearance, you will need to start again. This is because the sugar has been heated too much, too quickly, and instead of dissolving, it has cooked.

Begin beating the 50g egg whites with one hand, and with the other, stream the hot sugar syrup down the side of the bowl to create an italian meringue. Beat until stiff peaks form, the meringue should be thick and very glossy. If you want to add flavouring/colouring, now’s your moment. So add the colouring now. Just lightly beat them into the meringue. Pour meringue into the almond meal, icing sugar and 45g egg whites mixture and mix roughly to combine. When combined, fold mixture together (one single stroke) until there are no air bubbles left. Make a spread across the top of the mixture, and it should disappear in about 20 seconds. Spoon mixture into a piping bag fitted with a round nozzle. (If you don’t have a piping bag set, most supermarkets sell plastic ones, they are Multix brand, in an orange box and contain 5 piping bags with a few different nozzles, plus they’re only about $3. You should be able to find them in the baking aisle). Lock the bag by spinning the top around 4 times. Pipe 3-4cm rounds on the oven trays prepared earlier. Tap the bottom of the trays on the kitchen bench and let them sit for about half an hour, or until mixture is dry to the touch. Meanwhile, preheat the oven to 145c (135c fan forced).

Place in oven and bake for 16-20 minutes. Check macarons at 16 minutes, and to test if they are cooked, pull a macaron off the baking paper. If it is stuck, keep cooking and checking regularly. Cool on trays for 5 minutes, then peel off and place on a wire rack. The mixture should make about 12 -15 large macarons, and about 25 smaller macarons. Macarons keep really well (about 5 days in the fridge) and some say that the longer they are refrigerated, the more the flavour is likely to develop. Macarons taste best when they are stored in the fridge, then brought down to room temperature to eat.

Lollies

Sugar Syrup topping:

  • 1/2 cup caster sugar
  • 1/4 cup water
  • 1/2 stick crushed fruit tingles

Melt the caster sugar and water in a small saucepan until completely dissolved. With a pastry brush, gently brush the macaron shells (about 5 at a time because they will dry) and place a small amount of fruit tingles on top of each shell. Leave on wire rack to dry.

007

Fruit Tingle Buttercream:

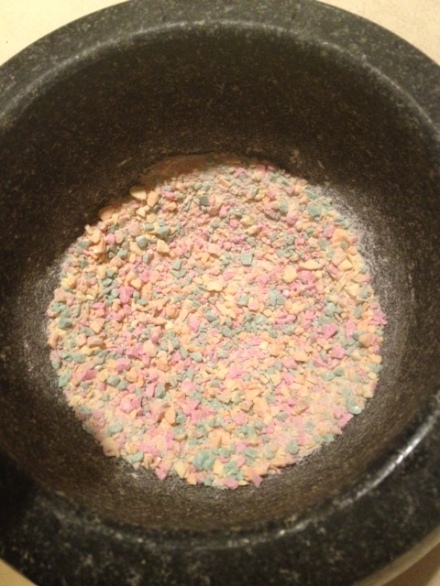
  • 1 stick (34g) Fruit Tingle lollies, crushed down to a rough powder (I used a mortar and pestle, you could also use a food processor)
  • 250g salted butter, softened – not melted
  • 1 cup icing sugar mixture
  • 1 multi pack of Wizz Fizz (8 small packets)
  • 2 packets popping candy (I can’t remember the size of the packet, but they were quite small and were Strawberry/Cola flavoured. In Australia, you can buy them at Woolworths)
  • Food colouring gel, green (you could use pink or yellow if you wanted as well)

photo (2)

Beat butter until pale and creamy. Gradually add icing sugar mixture. Beat in Wizz Fizz and Fruit Tingles until well combined. Beat in colouring gel. You can store buttercream overnight at room temperature, but it is best used immediately. To fill the macarons, spoon buttercream into a piping bag fitted with a large, round nozzle (make sure it is extra large so the chunks of fruit tingles won’t get stuck). Pipe 3/4 teaspoon of buttercream on shell, sprinkle with popping candy, and sandwich with another shell. Store macarons in the fridge, but bring them down to room temperature to eat. Enjoy!

015

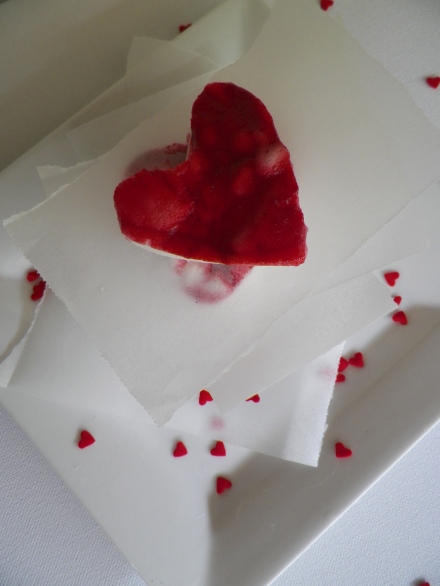
Raspberry Marshmallow Lovehearts + Fenix

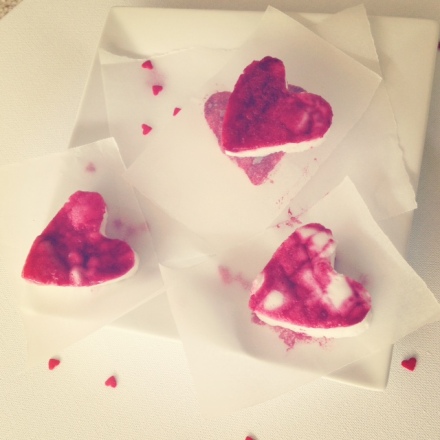
I must admit, I’m not really a huge fan of Valentine’s Day. The worst part is everything becomes so expensive just for one day! Anyhow, I took it as an excuse to make something yummy and heart-shaped, and so here are my first ever homemade marshmallows. The raspberry on top gave them quite a tangy hit, as they were so, so sweet on their own. I am trying really hard to avoid sugar during the week at the moment – has anyone else ever tried to do this? It’s really difficult, as it is hidden in the most random things, like gluten free twisties :/ Anyway, the hearts were the perfect size – if they were any bigger they just would have been too sickly for one person. I would suggest if you were to make homemade marshmallow, to use small cookie cutters or cut them in very small squares (hey, at least they go further!).

photo

I wanted to create more of a raspberry swirl, like Mowielicious, instead of a raspberry layer. I tipped too much of the raspberry mixture on top of the marshmallow, so when I used the skewer to create the swirl, it got a bit messy. Next time, I will either add it slowly and swirl, and use maybe half the sugar in the marshmallow, or make a proper raspberry layer to really give a balance between the sweet and the sour. Oooh, another idea could be making lemon curd and swirling it through the marshmallow. Or, using the lemon curd and the raspberry. Or maybe even orange and a chocolate layer to make Jaffa? Oh, the possibilities!
006
Raspberry Swirl/Layer: (recipe from Mowielicious)
 
  • 200g raspberries, fresh or frozen
  • 50g icing sugar (you could leave this out if you wanted to)
Place raspberries and sugar in a small saucepan, over a medium heat. Keep stirring until raspberries break down and become a syrup. Push mixture thought a sieve to get rid of the seeds. Discard the seeds, and set bowl aside to cool.
003
Homemade Marshmallow: (recipe from Raspberri Cupcakes)
 
  • 1 cup caster (white) sugar
  • 2 tsp liquid glucose (available in most supermarkets)
  • 1 tbs gelatin powder
  • 1 large egg white
  • 1/2 tsp vanilla bean paste
  • 1/4 cup icing sugar
  • 1/4 cup cornflour
Line a lamington style baking tray with olive oil spray and baking paper (the tray needs to be a couple of inches deep – my tray would have been about 20-30 cms long). Place caster sugar, 100ml cold water and glucose in a medium sized saucepan. Place on a low heat and stir until sugar has dissolved. In the meantime, place another 100ml of cold water and the gelatine in a small bowl to soften, and set aside. After you have done this, turn the heat up on the sugar syrup, and insert a sugar thermometer (I use my Dad’s milk one that he uses for coffee, but you can buy them from $2 shops and homeware’s stores also). When the syrup reaches 120c, which for me took about 40 seconds, add the gelatin mixture, and whisk until there are no lumps. Place an egg white in a clean mixing bowl and beat until soft peaks form. Very slowly add the hot sugar and gelatin mixture to the egg white and beat until thick and glossy (5-10 minutes). Pour marshmallow mixture into prepared tray and smooth with spatula until evenly spread. Spoon a little of the raspberry topping onto the marshmallow and swirl with a skewer, or pour all of the raspberry topping onto the marshmallow to make an even top layer. Leave marshmallow to set overnight at room temperature.
Image
Combine icing sugar and cornflour in a small bowl. If using a cookie cutter, dip in hot water then coat in sugar and cornflour mixture, and begin pressing shapes in the marshmallow. If using a knife, simply dip in hot water and cut squares. Once you have shapes and/or squares, roll them in the sugar and cornflour mixture so they are no longer super sticky. It was a bit difficult to this with the raspberry topping as I didn’t want to coat the bright red. Instead I just made sure the bottom and sides had been coated. Serve immediately, or store in refrigerator in an airtight container.
013
I also wanted to share some photos from a restaurant my boyfriend and I went to recently. Fenix is owned by Gary Mehigan, who is a judge on Masterchef Australia, and I must say, it was pretty awesome. I had heard mixed reviews about Fenix, but they had a fantastic deal going throughout January, so we decided to give it a go, and lucky we did! We shared three entrees between us, which, in hindsight, was probably a bit too much. My boyfriend had crab crostini with aioli, avocado mousse and smoked tomato, and I had the braised pork belly with scallops, and we also shared gruyere and sweetcorn cigars. I really liked all three of the entree’s, but the pork belly was absolutely fantastic! I actually dreamt about the crackling that night 😛
photo(1)

For our mains, I had the sticky beef short ribs with mustard mash and watercress, and it was sooooo good. The meat just fell apart and I could have happily drank the gravy! My other half had a whole snapper which was also fairly delish. By this time, I was really struggling! For dessert, I had the coconut creme caramel with roasted pineapple and pina colada sorbet. It was really yummy, but just too big! The best part was the pina colada sorbet because it was so cold and refreshing after such a big meal! The boy had a chocolate fondant, which I was a bit jealous of- it was amazing. I will definitely be having that one when I go back! I believe they have a similar deal for February as well, so head to their website to check it out if you’re in Melbourne.

photo(2)

Follow me on Instagram – GemmaAsh 🙂 Happy Valentine’s Day to you all!

Best of 2012!

Here is a collection of photos that sums up the best foodie moments of 2012. I have loved every minute of delving into the blogging world, and cannot wait to continue next year 🙂 HNY!

Macarons:

Macarons

Macarons1

Macarons2

Macarons3

Cakes:


Cakes1

Cakes2

Cakes3

Cakes4


Bits and Pieces:


Pizza making class, High Tea with Zumbo, myself with Gary Mehigan

Pizza making class, High Tea with Zumbo, myself with Gary Mehigan


Homemade Ravioli and Gnocchi, Curries cooking class on a boat, Sipping cocktails at Sea Links Resort in Mui Ne, Vietnam.

Homemade Ravioli and Gnocchi, Curries cooking class on a boat, Sipping cocktails at Sea Links Resort in Mui Ne, Vietnam.


Treats from Little Cupcakes and La Belle Miette, Pasta and Black Risotto at Grossi Florentino, Homemade dumplings

Treats from Little Cupcakes and La Belle Miette, Pasta and Black Risotto at Grossi Florentino, Homemade dumplings


Homemade Caramel Ice Cream, Homemade Apple Pie, Sipping sparking in the Yarra Valley, making Neil Perry's Mac and Cheese.

Homemade Caramel Ice Cream, Homemade Apple Pie, Sipping sparking in the Yarra Valley, making Neil Perry’s Mac and Cheese.


Chocolate Dumplings and Custard Buns at Yum Cha @ David's, Prahran.

Chocolate Dumplings and Custard Buns at Yum Cha @ David’s, Prahran.


Melted Snowmen Shortbread, Candy Cane Macarons, Dessert @ Malvern Hotel, Salted Caramel Profiteroles.

Melted Snowmen Shortbread, Candy Cane Macarons, Dessert @ Malvern Hotel, Salted Caramel Profiteroles.


Happy New Year! 🙂 Xo


M&M Cookie Dough Macarons

Ever since I’d laid eyes on this cookie dough buttercream recipe from Raspberri Cupcakes and Annie’s Eats, I’ve wanted to make something a little out of the ordinary with it and I’ve had quite a few ideas. Due to of the colour of the buttercream, I really wanted to make something super bright. I thought a bright blue macaron shell and M&M’s would do the trick. So, here we are.

Often when I make bright macaron shells, the colour can bake out a little, but these babies stayed nice and blue, albeit a slight green tinge. It worked really well though, because of all the different colours of the M&Ms.

I used my usual macaron shell recipe, and added about half a teaspoon of Wilton’s colouring gel. I was careful not to go too crazy with the colouring – I wanted to avoid what happened with the Salt and Vinegar Macarons. As the blue gel is so concentrated, it was perfect 🙂

I lovvvvvvvvvvved the cookie dough buttercream! It is really easy to make, is so versatile (can’t wait to make cookie dough cupcakes!), and it doesn’t have scary raw egg (which is a bonus for me because I’m allergic!).

I totally recommend making this buttercream, because it is sooo easy! The list is endless with what you can make (think filled cupcakes, cookie sandwiches, layer cakes or even ice cream – or just eat it out of the bowl?), and you can a million types of chocolate and/or lollies 🙂 Yum!

Excuse the small post, but stay tuned for a nice big one for next week! 🙂

Strawberry Milk Fudge Shots

I LOVE fudge! It has always been one of my favourite sweets, and I always bought a piece at the various craft markets I went to when a was younger (and still do today!). This time, I decided to combine the goodness of fudge with some nostalgia – Strawberry Nesquik!

We had these cute little white and pink straws left over from my little sister’s Mary Poppins party last year, so they were the beginning of my idea. I firstly was going to put the fudge in mini cupcake cases with the straws, but when I got to the shops and saw the mini shot cups, I just thought they would look gorgeous with a mini pink straw and pink fudge. Whilst they do look pretty cute in the photos, unfortunately I burnt the fudge and it split 😦 I was SO close to getting it perfect, but left it for that moment too long 😦 Boo. BUT, on the plus, the flavour was pretty awesome (if you are a fan of strawberry Quik), so I thought I would still post it. Amongst the many triumphs in the kitchen one may have, there will always be a failure (for some it’s the other way around :P). So, I guess this is (one of) my failure(s)!

I’m looking forward to trying this recipe again one day, because it really did taste great and it is very strawberry-y. I adapted the recipe from this natural strawberry website, here, where you can find some other great recipes using fresh strawberries.

Strawberry Milk Fudge Shots: (you will need a thermometer to make fudge)

  • 1 1/2 cups castor (white) sugar
  • 2 tablespoons unsalted butter
  • 3/4 cup Strawberry Nesquik
  • 1 can (185ml) evaporated milk (I used the light version)
  • 2 tablespoons lemon juice
  • 1/2 tsp vanilla bean paste
  • 6 straws, cut into thirds (I’m not sure where we got ours from, but I would suggest looking at boutique party shops and websites)
  • 20 shot cups/glasses

Place straws in shot glasses. Place sugar, Nesquik, butter and evaporated milk in a medium saucepan. Boil over a low-medium heat, and whilst at the boil, add the lemon juice and vanilla bean paste. Stirring constantly, heat the mixture to 112c (235f). You can use the soft ball method here – when the mixture is heated, drop a little into a glass of water and if it flattens in your fingers or on a flat surface when you remove it from the water, it’s ready. Quickly pour fudge mixture into a glass or bowl with a spout. Fill each shot cup. Place each shot cup on an oven tray and let set in the fridge. Yum!

By the way, if you do not know what Stawberry Nesquik is, it is basically a strawberry flavoured powder which you put into milk to flavour and colour it. It also comes in Chocolate and Banana, most kids love it. I am sure there is something similar, if not the same in the United States, and probably the UK, too. And probably the rest of the world, too!

Have a great weekend, and Happy Baking! X

Grape and Strawberry Nerds Multicoloured Macarons

Who doesn’t love the sweet, soury candy that is the famous Wonka Nerd! I have been thinking about doing some candy flavoured macarons for a while, and Nerds are definitely one of my favourites! Since I had never made multicoloured shells before, I decided to stick to just two colours, the classic pink/purple grape and strawberry Nerds combo.

I was a bit worried about the two colours mixing together, and also having two quality batches! Luckily, the macaron gods were on my side today. However, the gorgeous pastel colours that I had before I put them in the oven did cook out a little bit 😦 I should know this by now…!

For the filling, I made a half buttercream, half ganache. I melted the Nerds down with some cream, made a basic buttercream, and then combined the two. It was insanely glossy and smooth, and had a subtle soury tang from the nerds. I’m surprised that there was any left to actually fill the shells with 😛 Fatty.

Macarons:

This recipe is Adriano Zumbo’s, and was published a couple of years ago in the Herald Sun. You will definitely need kitchen scales to make macarons.

Obviously, I made two batches for these macarons. Once you have made the first batch, leave it in a bowl, and give it a stir every 5 minutes or so.

  • 135g almond meal
  • 135g icing sugar
  • 125g caster sugar
  • 45g egg whites
  • 50g egg whites
  • 40g water
  • 1/2 tsp Wilton’s Violet food colouring
  • 1/2 tsp Wilton’s Pink food colouring (if you don’t think there is enough, just add more. The colour in mine did cook out a little as you can see).

Preheat oven to 170c (160c fan forced). Spray four oven trays with cooking oil spray around the edges, and line with baking paper and set aside. Place almond meal and icing sugar in a large bowl, and sift together 3 times. Set aside, along with the 45g egg whites. Put 50g egg whites in a separate bowl. Heat caster sugar and water in a small saucepan until it is hot and syrupy (if it slightly burns my tongue, it’s done!). If syrup becomes white and thick, start again!

Begin beating the 50g egg whites with one hand, and with the other, stream the hot sugar syrup down the side of the bowl to create an italian meringue. Beat until stiff peaks form, the meringue should be thick and very glossy. If you want to add flavouring/colouring, now’s your moment. So add the colouring now. Just lightly beat them into the meringue. Pour meringue into the almond meal, icing sugar and 45g egg whites mixture and mix roughly to combine. When combined, fold mixture together (one single stroke) until there are no air bubbles left. Make a spread across the top of the mixture, and it should disappear in about 20 seconds. Spoon alternate colours into a piping bag (one spoon pink, one spoon purple) fitted with a round nozzle. (If you don’t have a piping bag set, most supermarkets sell plastic ones, they are Multix brand, in an orange box and contain 5 piping bags with a few different nozzles, plus they’re only about $3. You should be able to find them in the baking aisle). Lock the bag by spinning the top around 4 times. Pipe 3-4cm rounds on the oven trays prepared earlier. Gently tap the bottom of the trays and let them sit for about half an hour, or until mixture is dry to the touch.

Place in oven and bake for 8 minutes. Turn tray around in the oven and bake for another 7 minutes. To test, pull a macaron off the baking paper. If it is stuck, keep cooking and checking regularly. Cool on trays for 5 minutes, then peel off and place on a wire rack. The mixture should make about 24 large macarons, and about 50 smaller macarons. Store in the fridge, and bring down to room temperature to serve. Macarons keep really well (about 5 days in the fridge) and some say that the longer they are refrigerated, the more the flavour is likely to develop.

Nerds Buttercream:

  • 175g salted butter – softened, not melted
  • 2 cups icing sugar mixture (I kept 1/2 cup for after I had added the cream, because I didn’t want it to become too watery)
  • 300ml thickened cream
  • 1 1/2 boxes grape and strawberry Nerds (I had a bit of a problem and couldn’t find the regular sized boxed, only the multi packs. If you have the same problem, grab 2 packs, and use three small boxes of each flavour to melt down into the cream).
  • 1 extra box grape and strawberry Nerds

Combine cream and 1 1/2 (3 small boxes of each colour) Nerds in a small saucepan, over a low to medium heat until the nerds melt and the cream slightly thickens. Pour into a bowl and refrigerate. Beat butter until pale and fluffy. Gradually add the icing sugar, but keep 1/2 cup for after the cream has been added. Once 1 1/2 cups icing sugar has been added, slowly add the Nerds infused cream.

Assembly:

Match the macaron shells with likely pairs. Spoon Nerds buttercream into a piping bag fitted with a round nozzle. Pipe half a teaspoon of buttercream onto a shell, and sprinkle with Nerds. Pipe another half teaspoon on top of the Nerds, and sandwich with the other shell. Bon Appetit!

The April Mactweets monthly Mac Attack Challenge was the main reason for these macarons – this month’s theme is ‘Colour My World.’ This meant that you needed to have at least 2 colours in your shells, or a different colour for the top and bottom shells. Check out Mactweets here to see what other macaron obessionists have been whisking up, there are some amazing creations out there!

If you love sour lollies and flavours, this is the macaron for you. The smooth buttercream combined with pings of tangy nerds are seriously a match made in macaron heaven! Enjoy 🙂