Chai & White Chocolate Hot Cross Buns with Cranberry Butter

Wow. It’s so hard to believe that Easter is upon us already! Even though I have been eating the occasional hot cross bun in secret since January 1st when they are available at the supermarket, I guess the week before Easter is finally the socially acceptable time to eat one, two or twenty hot cross buns. So, here we are. And they’re not too bad even if I say so myself. I made a couple of batches of original and choc-chip buns a few years back and I promised myself I would try to make them each year for Easter as they were just so damn good! Although, last year, I substituted the real things for something almost as good, Hot Cross Macs. This year, I wanted to try making the buns again, with a bit of a different flavour 🙂
IG
I found some really good chai tea from T2 in the cupboard, bursting with cardamom pods, cinnamon sticks and broken star anise. I knew then, I had to make my buns with this awesome chai. Mmm, and what to go with it? I didn’t want them to be too traditional, and since I was little, I have always been a loyal fan of the choc-chip variety (what kid hasn’t?!). White chocolate it was. I thought it would give the chai a bit of sweetness and provide the same great chunkiness as the choc-chip bun, and the white chocolate wouldn’t overpower the flavour of the chai like milk or dark chocolate would (I’m trying so hard not to sound like a wanker when I describe the flavour, lol).
000_0003
Chai and White Chocolate Hot Cross Buns (adapted from Sasko flour):
For the chai tea:
  • 2 x teabags, or T2 sachets or teaspoons of chai (if you are using sachets or teaspoons, you will need to strain before adding the honey, milk and vanilla)
  • 500 ml water
  • 1/2 tsp vanilla bean paste or extract
  • 30ml honey
  • 125ml milk
Place the tea in a saucepan, with the water. Simmer on a low heat until the water colours, and the flavours are prominent (about 8 mins). If you need to, strain the tea, and place back in the saucepan once strained. Stir in vanilla, honey and milk, and set aside to cool slightly.
MakingDough
For the dough:
  • 540g plain flour
  • 30g butter, at room temperature
  • 35g caster sugar
  • 1/2 tsp salt
  • 1 tsp cinnamon
  • 7g yeast
  • 1 egg, lightly beaten
  • 1 1/3 cups white chocolate chips
  • 100g plain flour
  • Water
Sift flour into a bowl, rub in the butter with your fingers, and stir in the cinnamon, salt and sugar. Measure out 280ml of the chai tea mixture, and lightly mix in the yeast. When it begins to foam (you only need a few bubbles, don’t freak out if it doesn’t look like a bubble bath – I have made this mistake before), add to the flour mixture, along with the lightly beaten egg. Mix with hands until a dough if formed. If the dough is too crumbly, add a tiny bit of water. Oil a large bowl, and place dough inside. Put a tea towel over the top of the bowl, and put in a warm place for about an hour, or until the dough has doubled in size. I put my dough in a sunroom and it was perfect. You could also put it beside a window which is getting some sunshine.
MakingDough1
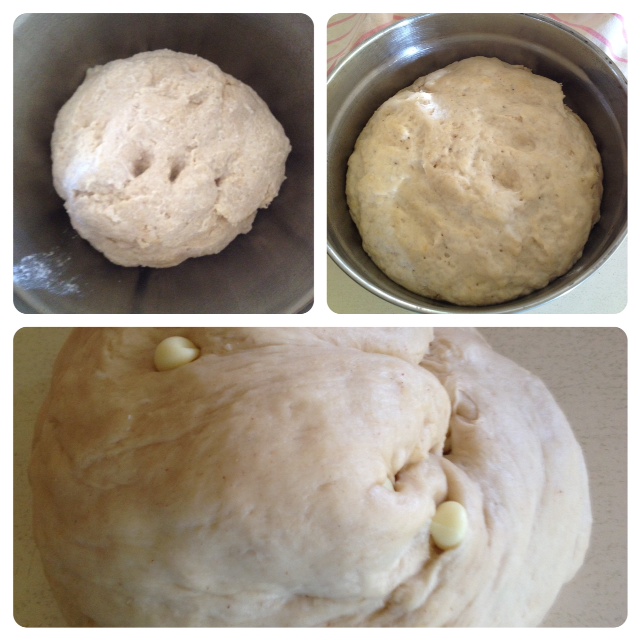
Preheat the oven to 200c. Once the dough has doubled, remove from the bowl and knead with hands on a clean surface until soft and springy. Add white chocolate in 2 batches and knead well. Shape the dough into 12 even balls, and place in an oiled or greased tray. Leave in a warm place to double in size once again, for about 30-45 minutes. Use the 100g of flour and some water to make a paste. Keep adding small amounts of water until desired consistency is reached. Remember you can put more water in, but you can’t take it out! You want the paste to be rough but not stodgy. Place flour paste in a piping bag fitted with a medium sized round nozzle (the ones you get with the Multix ones are perfect). Pipe crosses on the buns, and place in preheated oven for 12-15 minutes. Remove from oven and let cool in tray.
Bunsintheoven
To make the glaze, use 100ml of chai tea mixture and 1/2 cup caster sugar, and place in a saucepan. Simmer on a medium heat until it comes to the boil. Remove from heat, and brush buns with a pastry brush. I needed 2 coats on mine for them to be glossy enough.
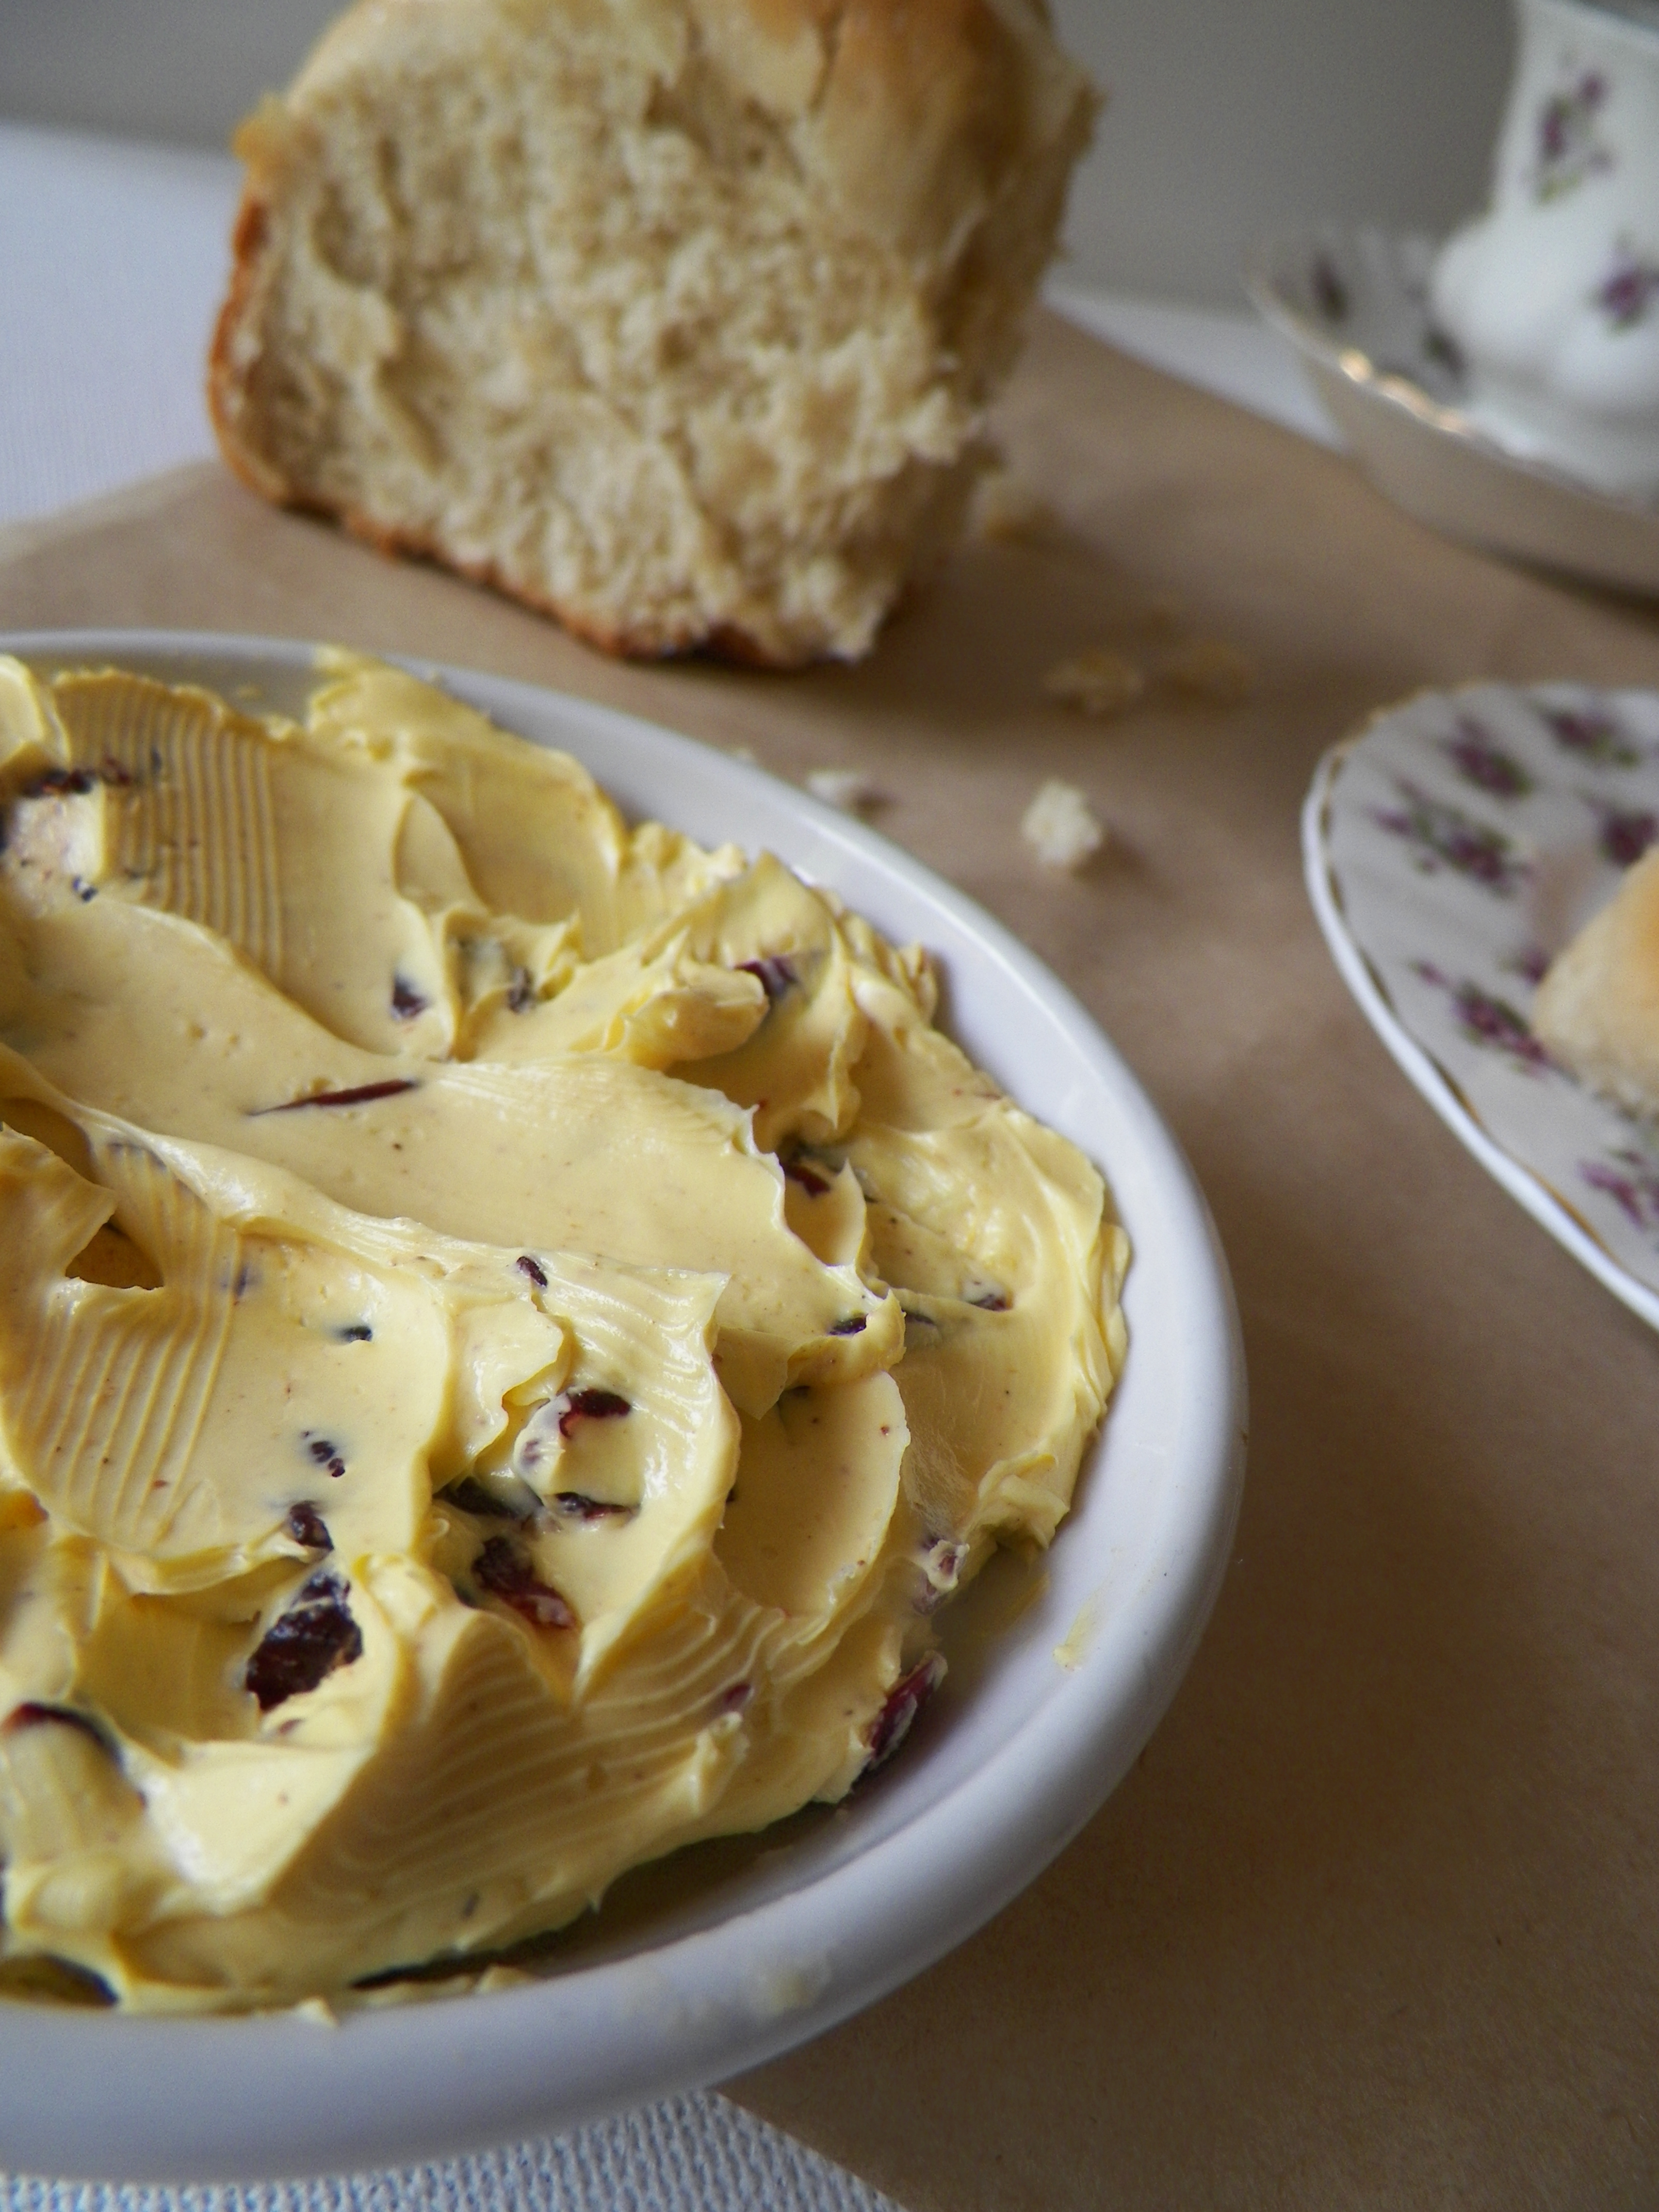
000_0006
Cranberry Butter:
  • 1/3 cup dried cranberries (craisins), roughly chopped
  • 1/2 cup butter
  • 1/2 tsp cinnamon
Place all ingredients in a small bowl and stir until combined. Spread on warm hot cross buns.
000_0008
Hot cross buns are heaps of fun to make. They are not difficult, but you definitely need to read the recipe beforehand. The only other thing is, you do need a bit of time, but I promise they are worth it! Don’t feel confined to making buns with the original flavours if you don’t wish to, mix it up with different fruits such as berries and citrus, and sweets such as different types of chocolates, caramel, nutella or jam.
000_0002
Enjoy! X
Advertisement

Raspberry Marshmallow Lovehearts + Fenix

I must admit, I’m not really a huge fan of Valentine’s Day. The worst part is everything becomes so expensive just for one day! Anyhow, I took it as an excuse to make something yummy and heart-shaped, and so here are my first ever homemade marshmallows. The raspberry on top gave them quite a tangy hit, as they were so, so sweet on their own. I am trying really hard to avoid sugar during the week at the moment – has anyone else ever tried to do this? It’s really difficult, as it is hidden in the most random things, like gluten free twisties :/ Anyway, the hearts were the perfect size – if they were any bigger they just would have been too sickly for one person. I would suggest if you were to make homemade marshmallow, to use small cookie cutters or cut them in very small squares (hey, at least they go further!).

photo

I wanted to create more of a raspberry swirl, like Mowielicious, instead of a raspberry layer. I tipped too much of the raspberry mixture on top of the marshmallow, so when I used the skewer to create the swirl, it got a bit messy. Next time, I will either add it slowly and swirl, and use maybe half the sugar in the marshmallow, or make a proper raspberry layer to really give a balance between the sweet and the sour. Oooh, another idea could be making lemon curd and swirling it through the marshmallow. Or, using the lemon curd and the raspberry. Or maybe even orange and a chocolate layer to make Jaffa? Oh, the possibilities!
006
Raspberry Swirl/Layer: (recipe from Mowielicious)
 
  • 200g raspberries, fresh or frozen
  • 50g icing sugar (you could leave this out if you wanted to)
Place raspberries and sugar in a small saucepan, over a medium heat. Keep stirring until raspberries break down and become a syrup. Push mixture thought a sieve to get rid of the seeds. Discard the seeds, and set bowl aside to cool.
003
Homemade Marshmallow: (recipe from Raspberri Cupcakes)
 
  • 1 cup caster (white) sugar
  • 2 tsp liquid glucose (available in most supermarkets)
  • 1 tbs gelatin powder
  • 1 large egg white
  • 1/2 tsp vanilla bean paste
  • 1/4 cup icing sugar
  • 1/4 cup cornflour
Line a lamington style baking tray with olive oil spray and baking paper (the tray needs to be a couple of inches deep – my tray would have been about 20-30 cms long). Place caster sugar, 100ml cold water and glucose in a medium sized saucepan. Place on a low heat and stir until sugar has dissolved. In the meantime, place another 100ml of cold water and the gelatine in a small bowl to soften, and set aside. After you have done this, turn the heat up on the sugar syrup, and insert a sugar thermometer (I use my Dad’s milk one that he uses for coffee, but you can buy them from $2 shops and homeware’s stores also). When the syrup reaches 120c, which for me took about 40 seconds, add the gelatin mixture, and whisk until there are no lumps. Place an egg white in a clean mixing bowl and beat until soft peaks form. Very slowly add the hot sugar and gelatin mixture to the egg white and beat until thick and glossy (5-10 minutes). Pour marshmallow mixture into prepared tray and smooth with spatula until evenly spread. Spoon a little of the raspberry topping onto the marshmallow and swirl with a skewer, or pour all of the raspberry topping onto the marshmallow to make an even top layer. Leave marshmallow to set overnight at room temperature.
Image
Combine icing sugar and cornflour in a small bowl. If using a cookie cutter, dip in hot water then coat in sugar and cornflour mixture, and begin pressing shapes in the marshmallow. If using a knife, simply dip in hot water and cut squares. Once you have shapes and/or squares, roll them in the sugar and cornflour mixture so they are no longer super sticky. It was a bit difficult to this with the raspberry topping as I didn’t want to coat the bright red. Instead I just made sure the bottom and sides had been coated. Serve immediately, or store in refrigerator in an airtight container.
013
I also wanted to share some photos from a restaurant my boyfriend and I went to recently. Fenix is owned by Gary Mehigan, who is a judge on Masterchef Australia, and I must say, it was pretty awesome. I had heard mixed reviews about Fenix, but they had a fantastic deal going throughout January, so we decided to give it a go, and lucky we did! We shared three entrees between us, which, in hindsight, was probably a bit too much. My boyfriend had crab crostini with aioli, avocado mousse and smoked tomato, and I had the braised pork belly with scallops, and we also shared gruyere and sweetcorn cigars. I really liked all three of the entree’s, but the pork belly was absolutely fantastic! I actually dreamt about the crackling that night 😛
photo(1)

For our mains, I had the sticky beef short ribs with mustard mash and watercress, and it was sooooo good. The meat just fell apart and I could have happily drank the gravy! My other half had a whole snapper which was also fairly delish. By this time, I was really struggling! For dessert, I had the coconut creme caramel with roasted pineapple and pina colada sorbet. It was really yummy, but just too big! The best part was the pina colada sorbet because it was so cold and refreshing after such a big meal! The boy had a chocolate fondant, which I was a bit jealous of- it was amazing. I will definitely be having that one when I go back! I believe they have a similar deal for February as well, so head to their website to check it out if you’re in Melbourne.

photo(2)

Follow me on Instagram – GemmaAsh 🙂 Happy Valentine’s Day to you all!