Wedding Cakes, Sesame Street and more!

Well, I did say it could be a while. However, I am back, and back with lots of photos of cake! The last month has been absolutely flat out with cakes for me, and it doesn’t look like I’ll be slowing down any time soon! Which is not a bad thing, it is nice to busy making cake, than busy writing essays! Anyway, lets get to the important stuff – this cake below was made for a very special family wedding in late November, and I was super happy with how they turned out:

WeddingCake

WeddingCake1

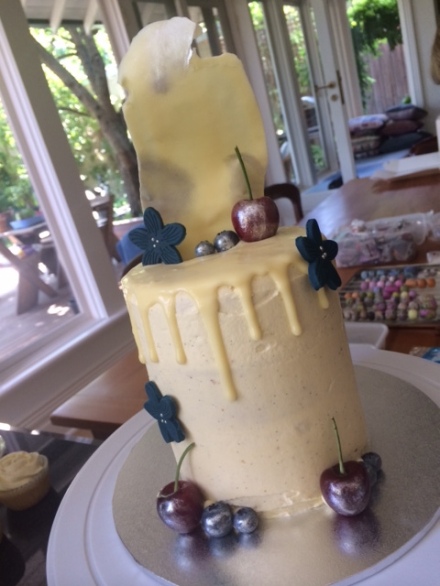
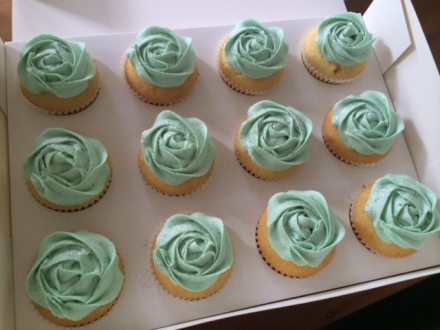
The top cake was a 4” vanilla bean layer cake, filled with lemon curd. All of the cupcakes were a nice simple vanilla bean, with fondant flowers to match the bride’s beautiful dress. I love making vanilla bean cake, because it’s so simple, but has such a lovely flavour (providing you use good quality paste or beans). I am definitely a chocolate girl at heart, but vanilla bean brings a nice change and is so underrated.

WeddingCake2

I used the trusty vanilla bean cupcake recipe by Taste.com, which I have been using for years, for both cakes. The recipe is so versatile – the result is always great with cupcakes, and small and large layer cakes.

WeddingCake3

These cupcakes below have to be the most fun I have ever had making cakes! I was a little nervous to make these because I have never done anything like it before, but I was very happy with the results! As you probably know from my previous work, I am not a fan of fondant at all, but I had to make a slight exception for these cuties 🙂

photo 1-2

It was only the second time I have attempted bright red buttercream, because the first time, it was a nightmare! Red is such a difficult colour to get right, because you have to use sooooo much colour for it to be deep enough. However, if you add too much gel to the buttercream, it splits due to the amount of liquid = disaster. It took me two times to get it right, and the trick for me was to start with a deep pink, and then add the red to deepen the colour. If anyone has any tips for red buttercream – please let me know!! 🙂

photo 2-2

Below are some other Birthday and Christmas cupcake orders I have been lucky enough to make 🙂

photo

photo 5-2

photo 4

photo 3-2

photo 1-3

photo 2-3

Happy Christmas baking to you all, stay tuned for a delicious festive dessert soon! x

P.S. For more regular photos and updates, follow me on Instagram – @whiskitforabiscuit


Cappuccino Naked Layer Cake with Chocolate Ganache

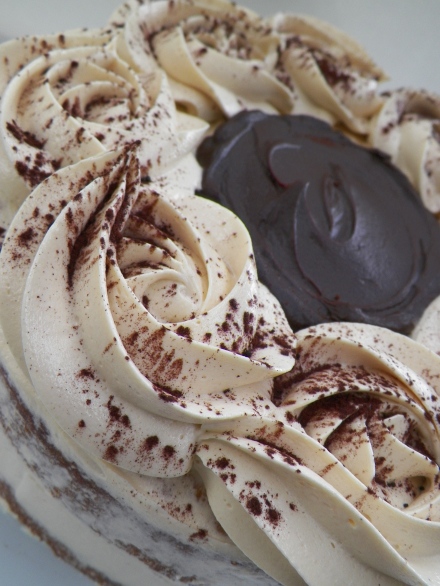
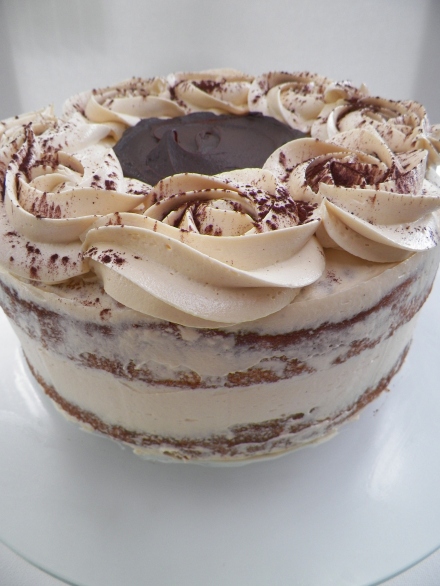
These naked cakes seem to be on trend at the moment! I really enjoyed making this cake, and I really like the combination of the rustic buttercream around the cake, and the rosettes and pool of chocolate ganache on top. This cake was made for my Mum’s birthday, as she loves coffee and chocolate. So, this flavour was a no-brainer!

000_0004

 I used the trusted vanilla cupcake recipe for this cake, as it converts quite well into a round cake, too. I tried to get a good quality coffee flavour into the buttercream by using real espresso shots, and this worked really well. I also used dark chocolate ganache in the middle of the layers as well as on the top. It was a nice addition and it cut through the creaminess of the buttercream, and really, who doesn’t love ganache?!

000_0008

 Vanilla Cakes:

  • 200g butter, chopped and softened
  • 1 1/2 cups caster (white) sugar
  • 2 tsp vanilla bean paste/natural extract
  • 4 eggs
  • 2 3/4 cups self-raising flour
  • 1 cup milk

Line two 22cm round springform cake tins with baking paper. Preheat oven to 180c. Beat butter, sugar and  vanilla bean paste until pale and creamy. Add the eggs, one at a time, until each is well combined. Add the flour and milk gradually, in alternating batches. Stir with a wooden spoon to combine after each addition. Ensure you begin and finish with flour. Divide mixture evenly between the two prepared cake tins. Bake in preheated oven for approximately 30-40 minutes, or until a skewer is inserted and comes out clean. I had a bit of a problem with my cakes taking a while to cook in the middle, and one of them sunk quite a bit after I had taken it out of the oven. If you find this starting to happen in the few minutes after you have taken the cake/s out, place them back in, and lower the oven temperature if the edges of the cake are cooked. You don’t want dry edges and a  raw middle. Yuk! Once cakes have cooked, leave them to cool completely in tins. Release gently from tins once cool. If you are not assembling the cakes immediately, wrap them tightly in cling wrap and place in the fridge until ready to assemble. I prefer to assemble cakes cold, especially this one, because you will need to carve the tops. Always bring cake down to room temperature to serve and eat. 🙂

Dark Chocolate Ganache:

  •  250g good quality chocolate chips, or dark chocolate, chopped
  • 1/3 cup thickened cream

Combine chocolate and cream together in a medium saucepan, and cook over a low-medium heat, stirring, until melted and smooth. Pour into a heatproof bowl, and leave until set. If you are not using ganache on the same day, refrigerate, and slightly warm in the microwave to use.

Espresso Buttercream:

  • 400g butter, chopped and softened (I prefer to use salted butter when making buttercream)
  • 3 1/2 cups icing sugar mixture
  • 1 tsp vanilla bean paste/natural extract
  • 30ml espresso coffee (try to use real espresso if you can. If it is not possible, use a good instant coffee powder with 30ml boiling water

Beat butter and vanilla until pale and creamy. Gradually add the sugar and coffee and beat until well combined. With the sugar and coffee, you don’t have to stick to these quantities if they are not to your taste. Taste as you go and add what you are happy with.

000_0001

Assembly:

Place one vanilla cake on the stand or board which you will present on. Using a serrated bread knife, gently cut the top of the cake, horizontally, until you have created an even top. Using a palette knife or a spatula, generously spread approximately 2/3 cup of buttercream over the top of the first cake. Then, using a tablespoon, spoon approximately 2-3 tablespoons of dark chocolate ganache on top of the buttercream and push out toward the edges of the cake, taking care not to mix the two – you want the ganache on top of the buttercream. Place the second cake on top of the first, and again, gently cut across it to create an even top, and spread with the buttercream only. After this, using your palette knife or spatula again, gently coat the outside of the cake with buttercream, taking care to gently scrape the edges, creating a smooth, naked cake appearance. Then, place approximately 2 1/2 cups of buttercream into a large piping bag fitted with a large, star nozzle. Pipe rosettes or swirls around the edges of the cake, and lightly dust with cocoa powder. Spoon 1/2 cup of dark chocolate ganache into the middle of the cake, and gently spread out to the rosettes if you need to. As mentioned earlier, always bring cake down to room temperature to eat. Serve, and enjoy!

000_0005

Happy Baking!

Vanilla Bean and Raspberry Melting Moments

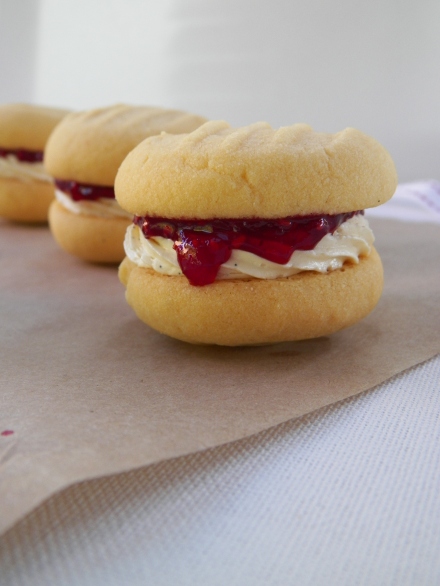
Melting moments are one of my favourite biscuits to make, and one of my favourite doughs to eat! (Let’s face it, there aren’t many doughs that I wouldn’t eat!) They are so yummy, and this version takes the usual melting moments up a notch, with delicious homemade raspberry jam and vanilla buttercream.

000_0004

This recipe was featured on Masterchef Australia 2 years ago (I think?!), and won contestant Julia a challenge. I have been wanting to make these for a long time, like many others things, but I am very glad I finally did. They really are delicious and were certainly worth the wait! Yum! I will most definitely be making these little gems again.

000_0002

Vanilla Bean and Raspberry Melting Moments: (recipe by Julia Taylor on Masterchef Australia)

I doubled the original recipe, as it said it would only make 5 sandwiched biscuits. I ended up with about 25 with a double batch, although I did try and make them small.

Biscuits:

  • 360g unsalted butter, chopped and softened
  • 120g icing (confectioner’s) sugar
  • 120g custard powder
  • 1 tbs baking powder
  • 360g plain (all-purpose) flour

Preheat a fan forced oven to 180c. Line 2 oven trays with non-stick baking paper. Beat the butter until pale and creamy, about 2-4 minutes. Add the sugar and custard powder, and stir with wooden spoon until well combined. Add the flour and the baking powder to the dough, and stir with a wooden spoon until mixed well. Roll small ball of dough, and place them on the pre-lined oven trays. Press fork lightly onto dough, to leave an indent. Bake for approximately 12 minutes or until very slightly golden. Let biscuits cool on trays, then transfer to wire racks.

Raspberry Jam:

  • 200g fresh or frozen raspberries
  • 150g caster (white) sugar
  • Juice of 1/2 lemon
  • Tbs cold water
  • 1/2 tsp powdered gelatin

Place raspberries, sugar and lemon juice in a medium saucepan, and cook on low-medium heat for about 20-30 minutes, or until thickened. Remove from heat. Place water and gelatin together in a small bowl, and mix until combined. Stir into jam, and place in heatproof bowl, in the fridge, to cool.

Vanilla Bean Buttercream:

  • 250g butter, chopped and softened
  • 1 cup icing (confectioner’s) sugar
  • 2 tsp vanilla bean paste/natural extract

Beat butter until pale and creamy, 2-4 minutes. Beat in vanilla bean paste. Gradually add the icing sugar and beat until all well combined. Spoon buttercream into a piping bag fitted with a medium star nozzle.

000_0005

To assemble:

Place likely pairs of biscuits, facing upwards, next to each other. On one biscuit spoon a small amount of the raspberry jam, and on the other biscuit, pipe a swirl of buttercream. Gently sandwich together. Be sure not to use too much jam as it will just drip out when you press the biscuits together. Biscuits are stored best in an airtight container, in a cool, dry place. FYI – they are also best made the day before, as both the jam and buttercream will set, and the flavour will develop also.

000_0008

Happy Baking! 🙂

Toasted Marshmallow Macarons

One thing I can say about these: yum, yum, yum! I was a bit down in the dumps this week, so the best thing to do when you’re feeling like crap – bake 🙂 These macarons were just delicious, and tasted just like a marshmallow that had been freshly toasted in a fire. The creme patissiere was such a great base for the filling, and added a nice custardy creaminess to the slight charcoal flavour from the toasted marshmallows. Definitely onto a winner with these!
000_0017
The past few times I’ve made creme pat, it has not turned out well at all. Both times I had lumpy custard with bits of cooked egg and a thick skin, sounds delicious, hey?! This time I used Zumbo’s recipe in the trusty Zumbarons: A Fantasy Land of Macarons, and once again, Zumbo’s recipe worked perfectly. The custard was smooth and vanilla-ey and I could have eaten the whole thing then and there. But that’s not anything out of the ordinary. I got to whip out my blowtorch again this week, it seems to be getting quite a workout at the moment 😉 It took me a while to blowtorch the marshmallows because you have to make sure you cook every side and end so they’re all nice and melted, and I was stupid enough to put baking paper underneath them, and burnt half the paper off in the process. Silly me. Don’t do that at home!
000_0019
Macarons:

This recipe is Adriano Zumbo’s, and was published a couple of years ago in the Herald Sun. You will definitely need kitchen scales to make macarons.

  • 135g almond meal
  • 135g icing sugar
  • 125g caster sugar
  • 45g egg whites
  • 50g egg whites
  • 40g water
  • 1/4 tsp colouring gel, pink

Spray four oven trays with cooking oil spray around the edges, and line with baking paper and set aside. Place almond meal and icing sugar in a large bowl, and sift together 3 times. Set aside, along with the 45g egg whites. Put 50g egg whites in a separate bowl. Heat caster sugar and water in a small saucepan, over a low-medium heat, until the sugar completely dissolves (if it slightly burns my tongue, it’s done!). If you do not want to burn your tongue, Zumbo suggests investing in a candy thermometer and heating the syrup until it reaches 118 degrees C (244 degrees F). If the syrup becomes thick and powdery in appearance, you will need to start again. This is because the sugar has been heated too much, too quickly, and instead of dissolving, it has cooked.

Begin beating the 50g egg whites with one hand, and with the other, stream the hot sugar syrup down the side of the bowl to create an italian meringue. Beat until stiff peaks form, the meringue should be thick and very glossy. If you want to add flavouring/colouring, now’s your moment. So add the colouring now. Just lightly beat them into the meringue. Pour meringue into the almond meal, icing sugar and 45g egg whites mixture and mix roughly to combine. When combined, fold mixture together (one single stroke) until there are no air bubbles left. Make a spread across the top of the mixture, and it should disappear in about 20 seconds. Spoon mixture into a piping bag fitted with a round nozzle. (If you don’t have a piping bag set, most supermarkets sell plastic ones, they are Multix brand, in an orange box and contain 5 piping bags with a few different nozzles, plus they’re only about $3. You should be able to find them in the baking aisle). Lock the bag by spinning the top around 4 times. Pipe 3-4cm rounds on the oven trays prepared earlier. Tap the bottom of the trays on the kitchen bench and let them sit for about half an hour, or until mixture is dry to the touch. Meanwhile, preheat the oven to 145c (135c fan forced).

Place in oven and bake for 16-20 minutes. Check macarons at 16 minutes, and to test if they are cooked, pull a macaron off the baking paper. If it is stuck, keep cooking and checking regularly. Cool on trays for 5 minutes, then peel off and place on a wire rack. The mixture should make about 12 -15 large macarons, and about 25 smaller macarons. Macarons keep really well (about 5 days in the fridge) and some say that the longer they are refrigerated, the more the flavour is likely to develop. Macarons taste best when they are stored in the fridge, then brought down to room temperature to eat.

 000_0006

 Crème Patissiere: (recipe from p. 104 of Zumbarons: A Fantasy Land of Macarons)
  • 1 cup (250ml) milk
  • 1 tsp vanilla bean paste/extract/seeds
  • 60g egg yolks
  • 60g caster (superfine) sugar
  • 25g cornflour
  • 100g butter, chopped and softened

In a medium saucepan, heat the milk and vanilla over a medium-low heat until almost boiling. Remove from the heat. Whisk in the egg yolks, sugar and cornflour in a bowl until it is thick and pale. Gradually whisk in the hot milk, and return mixture to saucepan. Return to medium heat until custard comes to boil (it will be very foamy at this stage, but don’t worry as it will go down and turn into a thick custard). Boil for 1 minute. Transfer to a clean bowl and cover with plastic wrap, pressing the plastic wrap onto the custard to prevent a skin from forming. Cool mixture to 50c – this will take about 15-20 minutes. When crème pat is 50c beat in the butter until smooth. Refrigerate if not using immediately.

 Creme pat
Toasted Marshmallow filling: (I used the full quantity of this recipe as I will use the rest of the filling for something else. If you are using the macaron recipe I use, you could certainly halve it. Adapted from p. 61 of Zumbarons: A Fantasy Land of Macarons)
  • 150g marshmallows
  • 170g butter, chopped and softened (make sure it’s salted butter)
  • Crème patissiere

Marshmallows

Place the marshmallows on a baking tray (NOT with baking paper!), and use a blowtorch to toast on all sides. Place the butter in a large bowl and beat until pale and creamy. Add the crème patissiere and mix with a spoon until smooth. Add the freshly toasted marshmallows (ensure they are very melted) and mix well.

 000_0009
Assembly:
Match up likely pairs of macaron shells. Spoon marshmallow filling into a piping bag fitted with a wide round nozzle. Pipe filling onto the shell and sandwich with the other.
Macarons
Place in an airtight container and refrigerate overnight. Take macarons out of the fridge and consume at room temperature. I don’t need to ask you to enjoy, because I already know the answer to that 😛
000_0013

Raspberry Marshmallow Lovehearts + Fenix

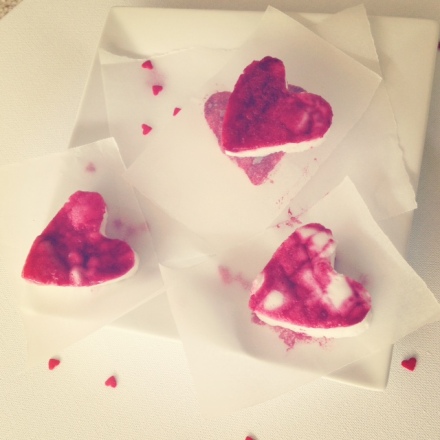
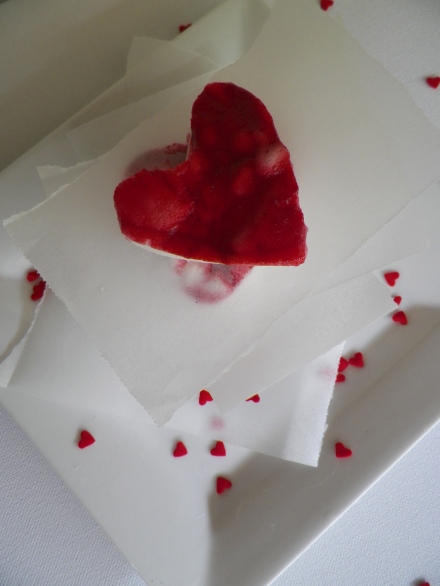
I must admit, I’m not really a huge fan of Valentine’s Day. The worst part is everything becomes so expensive just for one day! Anyhow, I took it as an excuse to make something yummy and heart-shaped, and so here are my first ever homemade marshmallows. The raspberry on top gave them quite a tangy hit, as they were so, so sweet on their own. I am trying really hard to avoid sugar during the week at the moment – has anyone else ever tried to do this? It’s really difficult, as it is hidden in the most random things, like gluten free twisties :/ Anyway, the hearts were the perfect size – if they were any bigger they just would have been too sickly for one person. I would suggest if you were to make homemade marshmallow, to use small cookie cutters or cut them in very small squares (hey, at least they go further!).

photo

I wanted to create more of a raspberry swirl, like Mowielicious, instead of a raspberry layer. I tipped too much of the raspberry mixture on top of the marshmallow, so when I used the skewer to create the swirl, it got a bit messy. Next time, I will either add it slowly and swirl, and use maybe half the sugar in the marshmallow, or make a proper raspberry layer to really give a balance between the sweet and the sour. Oooh, another idea could be making lemon curd and swirling it through the marshmallow. Or, using the lemon curd and the raspberry. Or maybe even orange and a chocolate layer to make Jaffa? Oh, the possibilities!
006
Raspberry Swirl/Layer: (recipe from Mowielicious)
 
  • 200g raspberries, fresh or frozen
  • 50g icing sugar (you could leave this out if you wanted to)
Place raspberries and sugar in a small saucepan, over a medium heat. Keep stirring until raspberries break down and become a syrup. Push mixture thought a sieve to get rid of the seeds. Discard the seeds, and set bowl aside to cool.
003
Homemade Marshmallow: (recipe from Raspberri Cupcakes)
 
  • 1 cup caster (white) sugar
  • 2 tsp liquid glucose (available in most supermarkets)
  • 1 tbs gelatin powder
  • 1 large egg white
  • 1/2 tsp vanilla bean paste
  • 1/4 cup icing sugar
  • 1/4 cup cornflour
Line a lamington style baking tray with olive oil spray and baking paper (the tray needs to be a couple of inches deep – my tray would have been about 20-30 cms long). Place caster sugar, 100ml cold water and glucose in a medium sized saucepan. Place on a low heat and stir until sugar has dissolved. In the meantime, place another 100ml of cold water and the gelatine in a small bowl to soften, and set aside. After you have done this, turn the heat up on the sugar syrup, and insert a sugar thermometer (I use my Dad’s milk one that he uses for coffee, but you can buy them from $2 shops and homeware’s stores also). When the syrup reaches 120c, which for me took about 40 seconds, add the gelatin mixture, and whisk until there are no lumps. Place an egg white in a clean mixing bowl and beat until soft peaks form. Very slowly add the hot sugar and gelatin mixture to the egg white and beat until thick and glossy (5-10 minutes). Pour marshmallow mixture into prepared tray and smooth with spatula until evenly spread. Spoon a little of the raspberry topping onto the marshmallow and swirl with a skewer, or pour all of the raspberry topping onto the marshmallow to make an even top layer. Leave marshmallow to set overnight at room temperature.
Image
Combine icing sugar and cornflour in a small bowl. If using a cookie cutter, dip in hot water then coat in sugar and cornflour mixture, and begin pressing shapes in the marshmallow. If using a knife, simply dip in hot water and cut squares. Once you have shapes and/or squares, roll them in the sugar and cornflour mixture so they are no longer super sticky. It was a bit difficult to this with the raspberry topping as I didn’t want to coat the bright red. Instead I just made sure the bottom and sides had been coated. Serve immediately, or store in refrigerator in an airtight container.
013
I also wanted to share some photos from a restaurant my boyfriend and I went to recently. Fenix is owned by Gary Mehigan, who is a judge on Masterchef Australia, and I must say, it was pretty awesome. I had heard mixed reviews about Fenix, but they had a fantastic deal going throughout January, so we decided to give it a go, and lucky we did! We shared three entrees between us, which, in hindsight, was probably a bit too much. My boyfriend had crab crostini with aioli, avocado mousse and smoked tomato, and I had the braised pork belly with scallops, and we also shared gruyere and sweetcorn cigars. I really liked all three of the entree’s, but the pork belly was absolutely fantastic! I actually dreamt about the crackling that night 😛
photo(1)

For our mains, I had the sticky beef short ribs with mustard mash and watercress, and it was sooooo good. The meat just fell apart and I could have happily drank the gravy! My other half had a whole snapper which was also fairly delish. By this time, I was really struggling! For dessert, I had the coconut creme caramel with roasted pineapple and pina colada sorbet. It was really yummy, but just too big! The best part was the pina colada sorbet because it was so cold and refreshing after such a big meal! The boy had a chocolate fondant, which I was a bit jealous of- it was amazing. I will definitely be having that one when I go back! I believe they have a similar deal for February as well, so head to their website to check it out if you’re in Melbourne.

photo(2)

Follow me on Instagram – GemmaAsh 🙂 Happy Valentine’s Day to you all!

Aussie Beach Bum Cookies

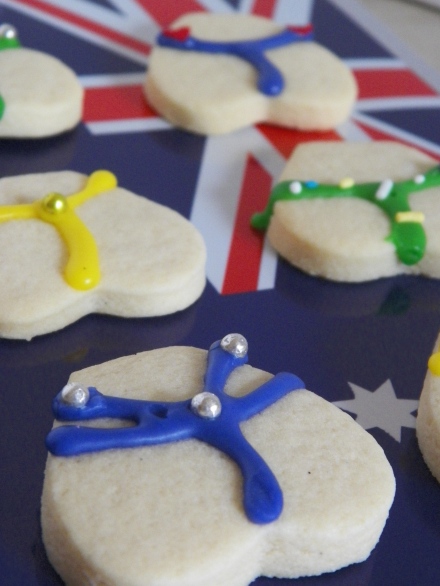
Happy (belated) Australia Day! I hope all you Aussies had a great long weekend and celebrated with some snags on the barbie, a meat pie and a pav! If you are not an Aussie, you should definitely still celebrate with some snags on the barbie, a meat pie and a pav – or make some of these super cute and cheeky beach bum cookies to embrance your inner Australian! I saw these cookies on Pinterest a while ago, and just had to make them – they are too cute! They are really easy to make and decorate too.
000_0004
This recipe is once again from the fantastic Sweetapolita – they are basically the vanilla version of the Dark Chocolate Sugar Cookies with Gingerbread Buttercream that I made for Christmas. I halved the recipe, and I still had close to 50 cookies, so if you do not want that many, you could simply halve it again. You can put any flavour you like in the cookies as well. I was loyal to the recipe and kept the vanilla bean with a touch of lemon, but you could use any type of extract or oil really, such as Strawberry, Orange, or even Musk.
000_0002
Vanilla Sugar Cookies: (adapted from Sweetapolita – this post has a great tutorial on making sugar cookies, too!)
  • 1 cup butter – softened, not melted
  • 1 cup caster (white) sugar
  • 1 large egg
  • 3 cups plain (all-purpose) flour
  • 1/2 tsp vanilla bean paste
  • Juice of 1/2 lemon
  • 1/2 tsp salt
  • 3 cups (approx.) icing sugar mixture
  • Water
  • Cachous and sprinkles, to decorate
  • Colouring gels

Preheat the oven to 160c fan forced, 170c non fan forced. Line 4 oven trays with baking paper, and set aside. Beat the butter and sugar in a large bowl until pale and fluffy. Beat in the egg until well combined. Sift flour and salt in a separate bowl, and gradually stir, with a wooden spoon, into the butter and sugar mixture. Knead the dough on a floured surface until smooth – keep adding flour in very small amounts if dough is still sticky. Divide dough into two batches, wrap tightly in cling wrap, and refrigerate for 45 minutes. Once dough is chilled, roll it out with a rolling pin, between two sheets of baking paper, until the dough is just under 1cm thick. With a heart shaped cookie cutter, carefully cut the shapes from the dough and place on the baking paper. When you have a full tray, gently and quickly cut the bottoms of the hearts off with a sharp, non-cerated knife. You don’t want to use a cerated bread and butter knife because it’s not sharp enough, and will cut a rough edge, rather than a clean edge. The only thing I would do differently when I make these again, would be to get a larger cookie cutter and cut off more from the bottom of the heart, so that they look like bigger, rounder bums!! Bake cookies in preheated oven for 12-15 minutes – make sure you check at 10 minutes! TIP – Don’t wait until the cookies begin to go brown – once the edges a even a tiny bit brown, the biscuits will be that overcooked you could nearly break your teeth on them! Make sure all the cookies are still completely ‘blonde.’ Let the cookies cool completely on the trays or wire racks until completely cool – you don’t want the icing to melt off!

 Cookies

To make the icing, combine icing sugar mixture with a tiny amount of water to make a paste. You can make as many or as little colours as you like – three was enough for me. Add a little of the colouring gel and a small amount of vanilla and stir until combined. Place icing in a piping bag fitted with a realllllllly small round nozzle. If you don’t have one, never fear! You can use a snap lock bag and cut the corner off. Decorate the cookies by piping different shapes and colours of underwear! G-Strings are the easiest to do 😛 The icing dries really quickly, so decorate the cookies as you go.

000_0005

I can’t believe it is the end of January already, it seemed like only yesterday it was Christmas! Happy belated Australia Day, and I’ll see you in February 🙂 Also, check out my music player on the side of the page, I will putting up some of my favourite songs for you to listen to when you come and visit!

Summer Strawberry & Vanilla Cupcakes

I made these cute little cupcakes for two of my friends joint birthday this week, and am quite satisfied with how they turned out! My friend suggested the idea of putting strawberry into the plain vanilla bean cupcake, and it worked really well. They added a nice touch of summer and broke up the sweetness of the vanilla and rich creaminess of the buttercream. Yum!

Cupcakes!

Cupcakes1

I know it sounds a bit lame, but I LOVE piping cupcakes. I find it strangely therapeutic, but only when the buttercream swirls exactly the way I want it to :p Which definitely doesn’t always happen!

000_0005

I used my trusted vanilla bean cupcake recipe that I have used countless times. The great thing about this recipe is that you can double it, halve it, add anything you want to it (ie. Strawberries!), and the cakes will still be super moist and fluffy 🙂 Unlike macarons, where you can make the slightest of adjustments and every single shell will crack!

000_0019

Tower!

Cupcakes always look so pretty in photos, especially when they’re cute girly pastel colours like these ones. I love adding ribbon and cachous and other colour co-ordinated bits and pieces to the photos to brighten them up and to try and make a bit more of a story out of my food. I’m not sure if I’m any good at it, as I know next to nothing about photography, but it’s definitely fun to play around 🙂

000_0023

The Rainbow Cake

make a gif at gickr.com

Well, what can I say about this cake?! 7 layers of delicious vanilla bean cake and buttercream, it probably could of fed about 100 people, no joke. This mountain was made for my beautiful little sister’s 8th birthday, and it certainly got the reaction I was after! The gasp from my sister and her little friends (and the adults too!) was priceless, and it’s what makes the hours of slaving away in the kitchen well worth it! I hope you enjoy the gif too, it’s not the best, but I think this epic cake deserves it.

Whilst this cake took a long time to finish, it wasn’t very difficult at all. The cake is quite a basic vanilla butter cake, and the recipe I used was huge, and on it’s own made 4 and 1/2 layers. I must say, I am quite proud of this creation 🙂

Vanilla Butter Cake: (I made this quantity, which made 4 1/2 layers, and another half quantity, which finished the layers and also made 8 medium sized cupcakes too)

I found this recipe from my bible website, Taste.com.au. Even though I have posted the link, I am going to write out this recipe as well because I have a few notes and helpful hints that will make life a little easier.

  • 3 cups self-raising flour
  • 1 cup plain flour
  • 2 cups caster (white, superfine) sugar
  • 300g butter, chopped, at room temperature
  • 1 ¼ cups milk
  • 6 eggs, at room temperature
  • 3 tsp vanilla extract (I used 2 tsp vanilla bean paste)
  • Food colouring gel – I used Wilton’s as they are very concentrated and achieve an amazingly bright colour. I buy mine from West’s.

Note: I know the recipe on Taste says to combine everything in the one bowl, then beat, but I found this quite difficult. My bowl was so full I was worried it would topple over, and it took me forever to get the little buttery lumps out. Here is my method:

Preheat the oven to 140C. Grease and line two 22cm springform tins with baking paper (obviously, if you only have 1 tin, it will take you a lot longer to make the cake. For this recipe, the more tins, the better! I had 2 and that worked perfectly. You can usually pick them up from Coles for under $10). Place butter and sugar in a large bowl, or in the bowl of a stand mixer, and cream until pale and fluffy. Add the vanilla and the eggs, one a time, beating well after each addition. Once combined add the flour and the milk, and mix with a wooden spoon until a smooth batter forms. Carefully weigh the batter into batches of 300g. Stir in the colouring gel until you achieve the desired shade, and pour into cake tin. Smooth mixture with the back of a spoon until mixture is evenly spread throughout the tin. Place in preheated oven, and bake for 30 minutes, or until a skewer comes out clean. Leave in tin for 10 minutes or until cooled. Remove from tin and wrap individual layers tightly, in cling wrap. Repeat process with 6 other layers. Until you have this…

If you are not icing the cake straight away, refrigerate them. I made my cakes 2 days in advance and it was perfect. Just make sure to remove cakes from fridge 1-2 hours before decorating.

Vanilla Bean Buttercream:

  • 700g salted butter, chopped, at room temperature
  • 3-4 cups icing sugar (I prefer to use icing sugar mixture, a plus is that you do not have to sift it)
  • 2 tsp vanilla bean paste/vanilla extract – NO imitation vanilla allowed!! It is full of chemicals and artifical flavours.

In the bowl of a stand mixer, or if you don’t have a stand mixer, a very large bowl, beat butter until pale and creamy, about 5-7 minutes. Gradually add the icing sugar and vanilla to taste (I used between 3-4 cups – I actually can’t remember the exact amount! Although you want it to be nice and sweet, you also still want that slightly salty hit that comes from the butter). Beat on high for about 8-10 minutes.

If you are not  icing the cake straight away, place buttercream into an airtight container, in the fridge. Buttercream keeps really well, up to 2 weeks in the fridge, and 6 months in the freezer. Just make sure that you take the buttercream out of the fridge or freezer the night before you ice the cake, so it can come down to room temperature. I had mine in the fridge, and the next morning it still needed 10 seconds in the microwave. TIP – when putting buttercream in microwave, do it in small bursts as you do not want it to become runny. You want it to be pliable, but still have its thickness and creamy texture.

Assembly:

Once cakes have come down to room temperature, you can start building. You will need a round-edged knife, and a small bowl of hot water to smooth the icing. Unfortunately, our round-edged knife is broken, so I had to use really small cheese knives! Place the bottom layer of cake on the stand, and top with about 2 tablespoons of buttercream. With the knife dipped in hot water, smooth out the icing until it covers the circumference of the cake, and is about 1-2cm thick. Repeat the process with the remaining 6 cakes.

To ice the outside, make sure you keep dipping the knife in hot water, to cover the whole cake with buttercream. For now, don’t worry about smoothing out the icing, you just want to get the cake covered first.

To clean up the icing, ensure the knife is dipped in the hot water regularly. Carefully smooth the icing with the round-edged knife.

As the cake was so colourful and intense in the middle, I wanted to keep the decoration on the outside to a minimum. I had bought these brightly coloured sprinkles from Baking Pleasures, and they had every colour I wanted to have in the layers, so I decided I would completely cover the top of the cake in these sprinkles, and leave the rest of the cake. I was pretty happy with how it looked.

There are many ways you could decorate a cake such as this. I love these gorgeous Rainbow Cakes from Sweetapolita and Whisk Kid.

My First Order – Choc and Vanilla Cupcake Tower + Layered Musk Cake

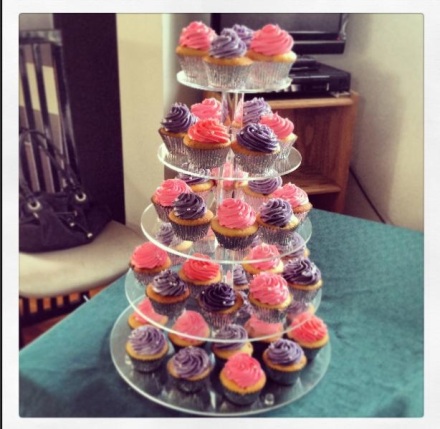
I was a bit nervous about doing this! It was my friend Nikki’s 21st Birthday Party, so even more reason not to stuff up. My time management skills are close to non-existant, so it took a lot of careful planning and timing over 3 days for this to eventuate. Anyhow, we got there. And I was so happy with the end result, as was Nikki. I can’t believe I actually produced this!

Nikki wanted 70 cupcakes, half chocolate and half vanilla bean with pink and purple icing and white fondant hearts. It was also decided that I would make the Musk Layered Cake for the top layer, too. I was excited and up for the challenge! This is the first time I’ve ever properly done a cake for a party, and I really enjoyed it. Everything came together nicely and ran smoothly, with minimal disasters (there were still a couple!). The one thing I really wanted to nail were the cakes themselves. So many times at parties, the cakes, in particular cupcakes, whilst looking amazing, are often horribly dry, tasteless  and crumbly to eat. I desperately wanted to achieve a tasty and fluffy cupcake as well as perfectly swirled buttercream icing. I was lucky I found 2 fantastic recipes that worked beautifully, and the cupcakes were so delish!

I used recipes from Taste.com (best website ever!) for both the vanilla cupcakes, and the chocolate cupcakes. I made another half of the vanilla cupcake recipe, and doubled the chocolate one, and they both made around 38 cupcakes each. A tip for the vanilla cupcakes – don’t substitute vanilla bean paste for extract or essence, or god forbid imitation essence!! I think the paste really made the cupcakes, plus I love the little flecks of vanilla bean, too.

For the fondant hearts, I simply used a small heart cutter from West’s, an amazing cake supplier in Burwood, Victoria. All you have to do is roll the fondant with a rolling pin between two sheets of baking paper until it is about 1cm thick, then cut away. I brushed a tiny amount of edible glitter on each heart, which I also got from West’s. Oh, and my fondant supplier, who also made the ’21’ on top of the Musk Cake, is amazing, check out her awesome cakes here!

For the buttercream, I just beat 350g of softened, salted butter until pale and creamy, and slowly added 5 cups of icing sugar mixture. Once all that is combined, then add your colouring/flavouring. I ended up making 2 batches of pink buttercream for the vanilla cakes, and another half of the recipe for the purple icing for the chocolate cakes. For the musk buttercream, I just added 3 drops of musk essence, and 4 rolls of crushed Musk Lifesavers. If you leave the buttercream in the fridge overnight like I did, make sure you take it out for it to come down to room temp about 2-3 hours before. Although, you can always buzz it in the microwave for 20 seconds.

I really enjoyed piping the cupcakes, and they weren’t as difficult as I expected them to be. Because I was SO over washing dishes, this time I just used the Multix disposable piping bags, which are available at most supermarkets, and come in a bright orange box in the baking aisle. However, I used a  good quality large star nozzle, which worked perfectly. When you are piping a swirl, the key is to overlap the previous layer by about half, otherwise you will end up with big gaps and it will be uneven 😦

I can’t wait to make these cupcakes again, and if you ever want/need to make them, PLEASE use these Taste recipes. You won’t regret it I promise!!

Happy Birthday Nikki!