Cherry Ripe Layer Cake

Happy New Year! I hope you all had a wonderful Christmas and New Year, and managed to relax over the holiday season. I can’t believe the best time of the year is over already, it always goes too quickly! Usually, for me, January is a busy month for cakes, with most of my families’ birthdays. This year, however, almost my whole family were sick, and celebrations kept getting put off! So, this beauty of a cake was made for three peoples’ birthday, and delicious it was. Excuse the crappy photos, my awesome proper camera broke, and my the photos from my phone just aren’t the same 😦
CherryRipeCake

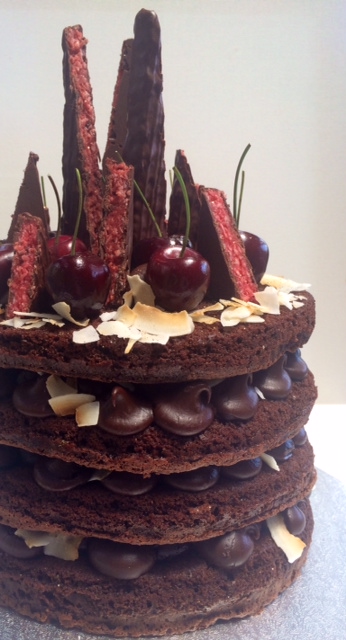
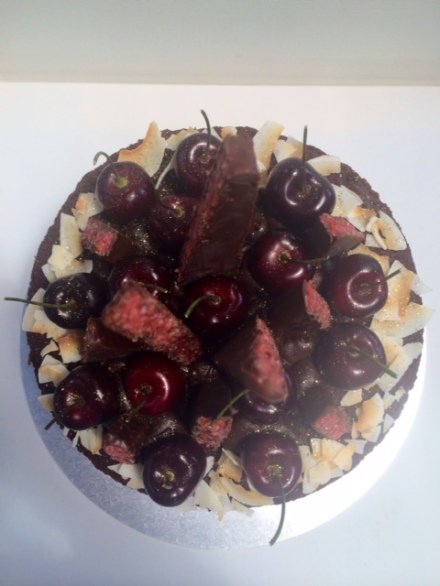
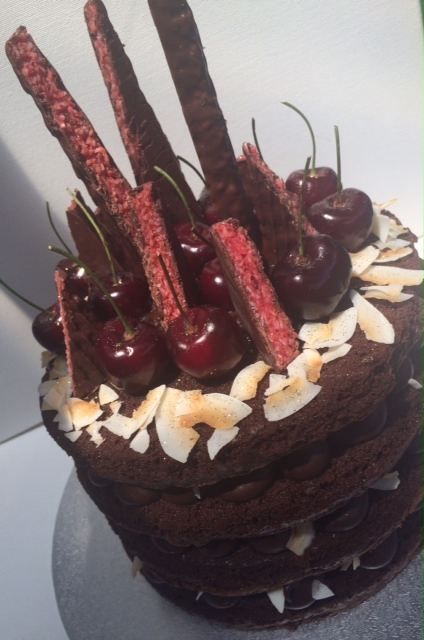
This cake is quite similar to this one I made about the same time last year, with red wine ganache. However, I omitted the red wine this year, and added toasted coconut flakes and cherry ripe bars.
CherryRipeCake1

Chocolate Mud Cake Layers: (recipe by Janelle Bloom)

Makes 4 x 23cm layers

400g butter
200g good quality dark chocolate, chopped
1/2 cup water
1/2 cup good quality cocoa
2 tbs good quality drinking chocolate or instant coffee powder, or 1 tbs of each if you want
1 tsp vanilla bean paste/natural extract
2 cups caster (white) sugar
6 eggs, at room temperature
1 1/2 cups self-raising flour, sifted
Approximately 500g fresh cherries, stones removed and halved
Approximately 30 fresh cherries, with stems (I used a 695g bag altogether, and it was just enough)

Preheat oven to 160c. Line 23cm springform cake tins with baking paper. I had two tins, therefore had to repeat the process.

In a medium saucepan, combine butter, chocolate, water, cocoa, drinking chocolate and/or coffee powder and vanilla. Cook over a medium heat, stirring constantly, until melted and smooth. Remove from heat, and set aside for 10 minutes or until lukewarm.

In the meantime, beat eggs and sugar together in a stand mixer, on medium speed, until pale and creamy. Stream the chocolate mixture down the side of the stand mixer to incorporate into egg mixture. Beat until well combined. Stop the mixer, and add the flour. Beat again until well combined and smooth.

Weigh mixture into four even portions (I did this with digitial scales), to ensure even layers. Pour mixture into prepared tins. Bake for 25 minutes in preheated oven, or until a skewer is inserted, and comes out clean. Repeat process, depending on how many cake tins you have.

Cool cakes for 15-20 minutes in tins, and transfer to a wire rack. If not using immediately, wrap tightly with cling film once cakes are completely cool, and refrigerate. Bring down to room temperature to assemble and eat.
CherryRipeCake2

Dark chocolate ganache: (you will need to make the ganache the day before serving the cake)

· 300g good quality dark chocolate, chopped, or choc bits
· 300ml thickened cream

In a medium saucepan, combine the chocolate and cream, and place over a low-medium heat, constantly stirring until melted. Place in a large bowl and let cool at room temperature. When ganache has cooled, cover with cling wrap and leave overnight at room temperature.

Assembly:

· Toasted coconut flakes or dessicated coconut
· 900g cherries, pitted and halved
· 100g whole cherries

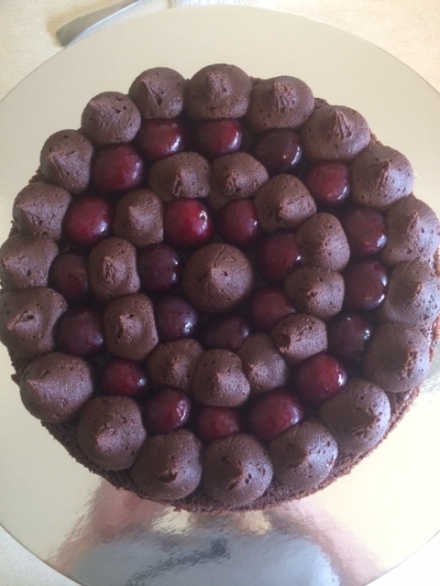
Place one layer of mud cake on the stand/base. Place ganache in a piping bag fitted with a large round nozzle. Pipe one small dob of ganache in the middle of the cake, and place halves of cherries around it. Repeat the process with ganache around the other side of the cherries, and repeat again. Sprinkle with coconut. The end result should look like this:
CherryRipeCake4

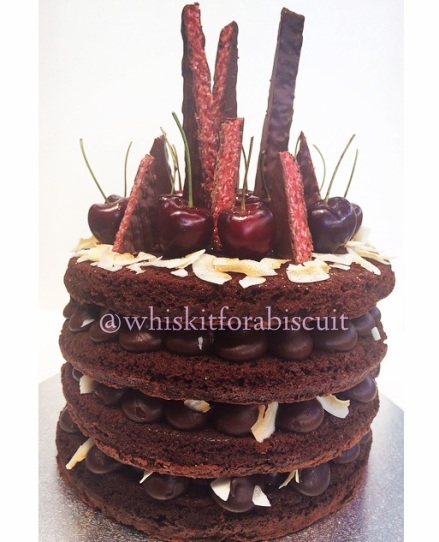
Repeat the process three times, until you reach the top layer. You can really decorate the top layer however you want. I used the ganache for the middle of the top layer, and as you can, sprinkled coconut around the edges. I stuck the whole cherries in with the ganache, to ensure they weren’t going to fall off. I sliced the cherry ripes into sharp triangles, to look effective on the cake.
CherryRipeCake3

Enjoy, and happy baking! X

Wedding Cakes, Sesame Street and more!

Well, I did say it could be a while. However, I am back, and back with lots of photos of cake! The last month has been absolutely flat out with cakes for me, and it doesn’t look like I’ll be slowing down any time soon! Which is not a bad thing, it is nice to busy making cake, than busy writing essays! Anyway, lets get to the important stuff – this cake below was made for a very special family wedding in late November, and I was super happy with how they turned out:

WeddingCake

WeddingCake1

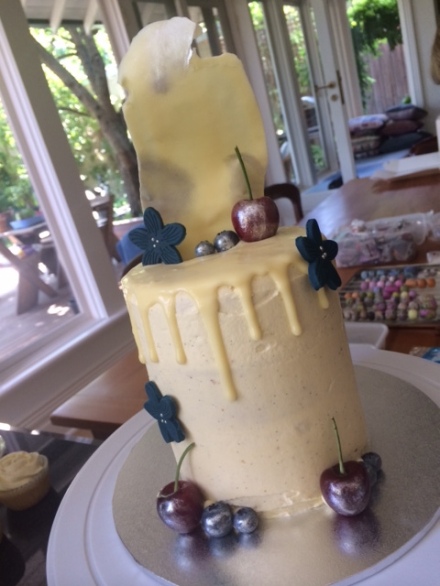
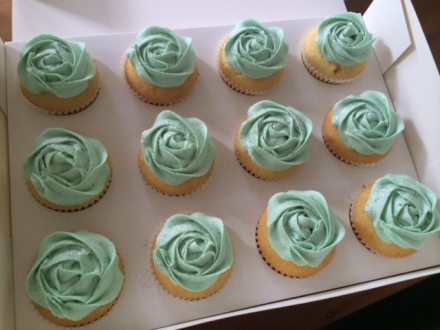
The top cake was a 4” vanilla bean layer cake, filled with lemon curd. All of the cupcakes were a nice simple vanilla bean, with fondant flowers to match the bride’s beautiful dress. I love making vanilla bean cake, because it’s so simple, but has such a lovely flavour (providing you use good quality paste or beans). I am definitely a chocolate girl at heart, but vanilla bean brings a nice change and is so underrated.

WeddingCake2

I used the trusty vanilla bean cupcake recipe by Taste.com, which I have been using for years, for both cakes. The recipe is so versatile – the result is always great with cupcakes, and small and large layer cakes.

WeddingCake3

These cupcakes below have to be the most fun I have ever had making cakes! I was a little nervous to make these because I have never done anything like it before, but I was very happy with the results! As you probably know from my previous work, I am not a fan of fondant at all, but I had to make a slight exception for these cuties 🙂

photo 1-2

It was only the second time I have attempted bright red buttercream, because the first time, it was a nightmare! Red is such a difficult colour to get right, because you have to use sooooo much colour for it to be deep enough. However, if you add too much gel to the buttercream, it splits due to the amount of liquid = disaster. It took me two times to get it right, and the trick for me was to start with a deep pink, and then add the red to deepen the colour. If anyone has any tips for red buttercream – please let me know!! 🙂

photo 2-2

Below are some other Birthday and Christmas cupcake orders I have been lucky enough to make 🙂

photo

photo 5-2

photo 4

photo 3-2

photo 1-3

photo 2-3

Happy Christmas baking to you all, stay tuned for a delicious festive dessert soon! x

P.S. For more regular photos and updates, follow me on Instagram – @whiskitforabiscuit


Cappuccino Naked Layer Cake with Chocolate Ganache

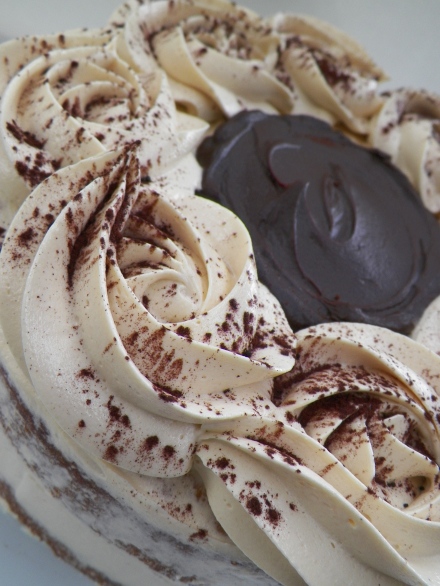
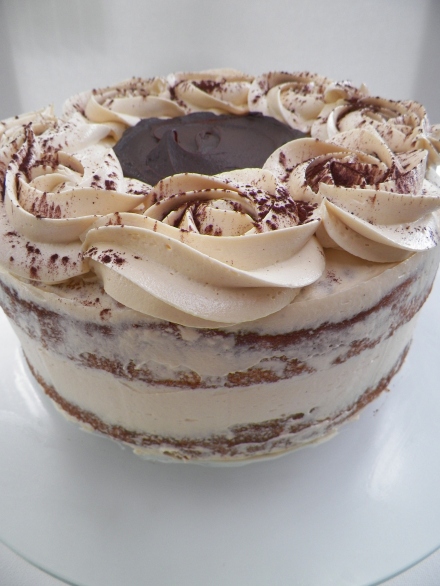
These naked cakes seem to be on trend at the moment! I really enjoyed making this cake, and I really like the combination of the rustic buttercream around the cake, and the rosettes and pool of chocolate ganache on top. This cake was made for my Mum’s birthday, as she loves coffee and chocolate. So, this flavour was a no-brainer!

000_0004

 I used the trusted vanilla cupcake recipe for this cake, as it converts quite well into a round cake, too. I tried to get a good quality coffee flavour into the buttercream by using real espresso shots, and this worked really well. I also used dark chocolate ganache in the middle of the layers as well as on the top. It was a nice addition and it cut through the creaminess of the buttercream, and really, who doesn’t love ganache?!

000_0008

 Vanilla Cakes:

  • 200g butter, chopped and softened
  • 1 1/2 cups caster (white) sugar
  • 2 tsp vanilla bean paste/natural extract
  • 4 eggs
  • 2 3/4 cups self-raising flour
  • 1 cup milk

Line two 22cm round springform cake tins with baking paper. Preheat oven to 180c. Beat butter, sugar and  vanilla bean paste until pale and creamy. Add the eggs, one at a time, until each is well combined. Add the flour and milk gradually, in alternating batches. Stir with a wooden spoon to combine after each addition. Ensure you begin and finish with flour. Divide mixture evenly between the two prepared cake tins. Bake in preheated oven for approximately 30-40 minutes, or until a skewer is inserted and comes out clean. I had a bit of a problem with my cakes taking a while to cook in the middle, and one of them sunk quite a bit after I had taken it out of the oven. If you find this starting to happen in the few minutes after you have taken the cake/s out, place them back in, and lower the oven temperature if the edges of the cake are cooked. You don’t want dry edges and a  raw middle. Yuk! Once cakes have cooked, leave them to cool completely in tins. Release gently from tins once cool. If you are not assembling the cakes immediately, wrap them tightly in cling wrap and place in the fridge until ready to assemble. I prefer to assemble cakes cold, especially this one, because you will need to carve the tops. Always bring cake down to room temperature to serve and eat. 🙂

Dark Chocolate Ganache:

  •  250g good quality chocolate chips, or dark chocolate, chopped
  • 1/3 cup thickened cream

Combine chocolate and cream together in a medium saucepan, and cook over a low-medium heat, stirring, until melted and smooth. Pour into a heatproof bowl, and leave until set. If you are not using ganache on the same day, refrigerate, and slightly warm in the microwave to use.

Espresso Buttercream:

  • 400g butter, chopped and softened (I prefer to use salted butter when making buttercream)
  • 3 1/2 cups icing sugar mixture
  • 1 tsp vanilla bean paste/natural extract
  • 30ml espresso coffee (try to use real espresso if you can. If it is not possible, use a good instant coffee powder with 30ml boiling water

Beat butter and vanilla until pale and creamy. Gradually add the sugar and coffee and beat until well combined. With the sugar and coffee, you don’t have to stick to these quantities if they are not to your taste. Taste as you go and add what you are happy with.

000_0001

Assembly:

Place one vanilla cake on the stand or board which you will present on. Using a serrated bread knife, gently cut the top of the cake, horizontally, until you have created an even top. Using a palette knife or a spatula, generously spread approximately 2/3 cup of buttercream over the top of the first cake. Then, using a tablespoon, spoon approximately 2-3 tablespoons of dark chocolate ganache on top of the buttercream and push out toward the edges of the cake, taking care not to mix the two – you want the ganache on top of the buttercream. Place the second cake on top of the first, and again, gently cut across it to create an even top, and spread with the buttercream only. After this, using your palette knife or spatula again, gently coat the outside of the cake with buttercream, taking care to gently scrape the edges, creating a smooth, naked cake appearance. Then, place approximately 2 1/2 cups of buttercream into a large piping bag fitted with a large, star nozzle. Pipe rosettes or swirls around the edges of the cake, and lightly dust with cocoa powder. Spoon 1/2 cup of dark chocolate ganache into the middle of the cake, and gently spread out to the rosettes if you need to. As mentioned earlier, always bring cake down to room temperature to eat. Serve, and enjoy!

000_0005

Happy Baking!

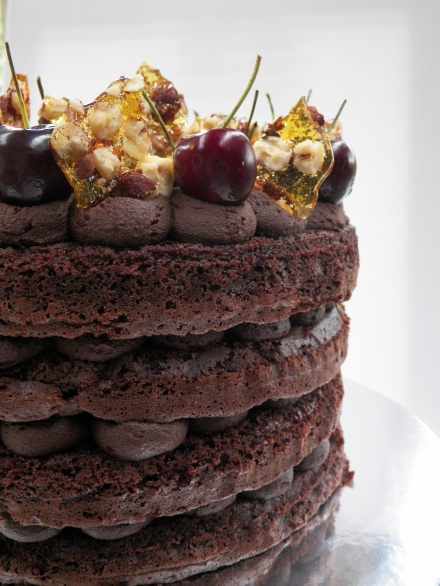
Chocolate Mudcake Layers, with Red Wine Ganache, Fresh Cherries and Hazelnut Praline

Happy New Year to you! I am back with a bang – with this bee-yoo-tiful chocolate mud cake with all the bells and whistles! I hope you all had a wonderful Christmas and New Year, and enjoyed the break with your loved ones. I know I certainly did, and am feeling refreshed and ready to attack 2015 head on!

000_0020
I must say, I am super proud of this cake. I knew exactly what I wanted it to look like, and I had all the flavours imagined in my mind. It turned out perfectly, and it was really delicious, if I say so myself. This cake was inspired by the fantastically awesome Katherine Sabbath. If you don’t know who she is, pretty please check out her Instagram – you will be amazed!
000_0014
The thing I loved most about this cake, apart from how it looked, was the combination of the dark chocolate red wine ganache, and the fresh cherries. The richness of the chocolate and the red wine together, with the hit of the juicy fresh cherries, full of flavour, was downright damned delicious. The cherries here in Australia at the moment are so yummy, and so cheap! Yay for Summer! If only it lasted all year long.
Chocolate Mud Cake Layers: (recipe by Janelle Bloom)
Makes 4 x 23cm layers
  • 400g butter
  • 200g good quality dark chocolate, chopped
  • 1/2 cup water
  • 1/2 cup good quality cocoa
  • 2 tbs good quality drinking chocolate or instant coffee powder, or 1 tbs of each if you want
  • 1 tsp vanilla bean paste/natural extract
  • 2 cups caster (white) sugar
  • 6 eggs, at room temperature
  • 1 1/2 cups self-raising flour, sifted
  • Approximately 500g fresh cherries, stones removed and halved
  • Approximately 30 fresh cherries, with stems (I used a 695g bag altogether, and it was just enough)

Preheat oven to 160c. Line 23cm springform cake tins with baking paper. I had two tins, therefore had to repeat the process.

In a medium saucepan, combine butter, chocolate, water, cocoa, drinking chocolate and/or coffee powder and vanilla. Cook over a medium heat, stirring constantly, until melted and smooth. Remove from heat, and set aside for 10 minutes or until lukewarm.

In the meantime, beat eggs and sugar together in a stand mixer, on medium speed, until pale and creamy. Stream the chocolate mixture down the side of the stand mixer to incorporate into egg mixture. Beat until well combined. Stop the mixer, and add the flour. Beat again until well combined and smooth.

Weigh mixture into four even portions (I did this with digitial scales), to ensure even layers. Pour mixture into prepared tins. Bake for 25 minutes in preheated oven, or until a skewer is inserted, and comes out clean. Repeat process, depending on how many cake tins you have.

Cool cakes for 15-20 minutes in tins, and transfer to a wire rack. If not using immediately, wrap tightly with cling film once cakes are completely cool, and refrigerate. Bring down to room temperature to assemble and eat.

Dark Chocolate and Red Wine Ganache:

  • 500g good quality dark chocolate, chopped
  • 2/3 cup thickened cream
  • 1/2 cup red wine, I used Shiraz

Place chocolate and cream in a medium saucepan, and cook, over a medium heat, stirring, until melted and smooth. Remove from heat, and slowly add red wine. Stir until well combined and mixture is thick (wine will hang at the top of the mixture, but keep stirring, as it may take a couple of minutes for it to be mixed in properly). Pour ganache into a heatproof bowl, cover in cling film, and refrigerate. If using ganache that day, you will need to wait until it is set to use it. It may be a good idea to make the ganache first. If using the next day, you will need to slightly warm ganache in the microwave, for 10 seconds only.

FYI – for best results, beat your ganache in the stand mixer before piping, especially if it has been in the fridge overnight and has been warmed in the microwave. It will make the ganache nice and fluffy, and will be much easier to pipe.

Hazelnut Praline:

  • 1 cup caster (white) sugar
  • 3 tbs water
  • 1/2 cup hazelnuts, roughly chopped

Line an oven tray with non-stick baking paper. Arrange hazelnuts neatly on the tray. Place sugar and water in a medium saucepan, and cook, on a low-medium heat, until sugar has completely dissolved. Then, turn heat up to high, and cook, stirring occasionally, until sugar mixture turns a deep golden colour. Pour sugar mixture over the hazelnuts, and leave to set and cool, which will take approximately 30 minutes. If not using praline immediately, break into pieces and store in an air-tight container, in the freezer. This will prevent the praline from becoming sticky.


000_0022

Assembly:

Spoon mixed ganache into a piping bag with a wide, round nozzle. Place one mud cake on a stand, board or plate. Pipe one round of ganache in the centre of the cake. Place cherries, cut side down, around ganache. Repeat process around the cherries with the ganache, and repeat again. It should go: ganache, cherries, ganache, cherries, ganache (see photo below). Repeat with the second and third layers of mud cake. For the final layer, the top of the cake, do the exact same thing with the ganache, but instead, place the whole cherries on this layer. In addition, place whole cherries on top of the ganache rounds on the edge, just to give the cake a bit more height. Trim the ends of the cherry stems if they are brown, with a pair of kitchen scissors. Arrange praline as desired. ENJOY! 🙂

Layer

This cake was made for my Dad and Nanna’s birthdays, and to see their faces light up when they saw this cake was wonderful, and then again when they tasted it. It really was a labour of love. I hope I get the opportunity to make this special cake again soon.

000_0016

Until next time…x

Follow @whiskitforabiscuit on Instagram here.

White Chocolate and Maple Macadamia Baked Cheesecake with Candied Bacon

Happy Birthday to me! I decided to make myself a cake resembling a pizza/cheese and bacon roll this year. Although, it was not my first intention, I’m quite happy with how it looks, it’s a little rustic, not the prettiest, but it tastes good 😉 I was very excited about this cake, as it was something I had in my mind for a while, and I thought, what better occasion to make it than my own birthday! I am a very big fan of baked cheesecakes, and I have made a few in my time, but the only thing that puts me off baking them more often is that they are time consuming, and soooo expensive. Especially when you put a big packet of macadamias in it, and real maple syrup, which costs a small fortune on its own. Nonetheless, it was very delicious.

cheesecake

I have used this recipe before to make a raspberry and white chocolate cheesecake, and it’s really great. You can play around with flavours, too, which is always good. Aside from the cheesecake itself, I kind of made the other bits up in my head, which is a sure fire sign of a great recipe!

cheesecake1

Baked Cheesecake: (adapted from Taste.com.au)

  • Melted butter, to grease tin
  • 250g plain, sweet biscuits (I used Arnott’s plain Teddy Bears)
  • 100g hazelnut meal
  • 150g butter, melted
  • 3 x 250g cream cheese, at room temperature
  • 2/3 cup caster (white) sugar
  • 1 tsp vanilla bean paste/vanilla extract
  • 3 eggs
  • 250g block good quality white chocolate, chopped
  • 250g macadamias, quartered
  • 1/4 cup real maple syrup
  • 1/3 cup real maple syrup
  • 1 cup streaky bacon, chopped into rough 1cm pieces

Grease 22cm springform baking tin with butter. Use a food processor to crush biscuits until they resemble fine crumbs. Add the hazelnut meal and melted butter and process until all well combined. Place mixture into prepared tin, and spread evenly. You can use a straight sided glass to evenly spread the base mixture evenly around tin. Cover with cling wrap and place in refrigerator for 30 minutes. If you are not using base straight away, just make sure you take it out 30-40 minutes prior to baking.

Preheat oven to 160c. Beat cream cheese, sugar and vanilla together until well combined and smooth. Add the eggs, one at a time, and mix until each is well incorporated. Using a wooden spoon, gently stir in the white chocolate, macadamias and 1/4 cup maple syrup. Pour mixture into prepared tin, and bake for 1 hour, or until just set in the centre. For me, 1 hour was perfect, but you can wobble the tin a little to test if the cake is cooked throughout. For 2 hours, leave the cheesecake in the oven, with the door ajar. I just a wooden spoon to keep the door open. This will prevent the top of the cheesecake from cracking.

Place bacon and 1/3 cup maple syrup in a bowl together and mix until well coated. Spread evenly on an oven tray lined with non-stick baking paper, and bake for approximately 20 minutes on 180c, or until bacon is crispy and sticky. Let bacon cool on tray, then spread across the top of the cheesecake. If not serving the cheesecake straight away, ensure it is stored in the rerigerator, and brought down to room temperature to eat. If the cake is still cold, it is a nightmare to cut – I made this mistake!

cheesecake4

One of my favourite parts of this cake was the candied bacon. People often balk at the idea, but it really works well and the maple/bacon combination is becoming quite popular. You can see the recipe for my Maple Bacon Macarons here, which I posted a couple of years ago. They are just as yummy! Happy Baking 🙂

cheesecake5

Lamington Cake with Balsamic Strawberry Jam

Happy Australia Day to all you Aussies! I hope everyone is having a relaxing long weekend 🙂 As a country, Australia does not really have a defined cuisine of its own. I guess it has something to do with being derived from Britain, and not really having a whole lot of history of our own. However, there is one sweet that we do claim do be our own (aside from the humble Pav, of course!). It is the delicious Lamington. If you do not know what a Lamington is, you are missing out, big time! They are slices of sponge-y cake, filled with jam, and covered in chocolate icing and coconut. Yum! I had actually never made a Lamington before, so I wasn’t sure how it would go, but I decided on a cake version for my Mum’s birthday, and I must say, it was delicious, and a big hit.

000_0008

I was going to use the recipe from the ‘BAKE’ book, from the Australian’s Women’s Weekly (AWW are the go-to’s for great recipes for many Aussies), for normal Lamington’s. However, I just had to look on my favourite site, Taste, of course, to see if they may have had a recipe for a cake. Luckily, I found the perfect one with great reviews, so I went with that, with a few of my own additions. I guess I could be more sure of the measurements this way, instead of having to adapt a slice into a cake. Anyhoo, the recipe was great – easy to follow and not ridiculously time consuming, either. Winner 🙂

000_0004

Lamington Cake: (recipe from Taste.com)

  • Cooking oil spray, to grease
  • 1/2 cup self-raising flour
  • 1/4 cup plain (all-purpose) flour
  • 1/4 cup cornflour
  • 4 eggs, at room temperature
  • 3/4 cup caster (white) sugar
  • 2 cups coconut
  • 250ml thickened cream
  • 1/3 cup icing (confectioner’s) sugar
  • 1 tsp vanilla bean paste/natural extract

Preheat your oven to 180c/356f. Grease two 20cm round springform baking tins with cooking oil spray, and line with non-stick baking paper. Set aside.

Sift all three flours into one bowl. In a separate bowl, beat all of the eggs, and the sugar, for approximately ten minutes, or until the mixture is thick, pale and creamy. Then, sift half of the flour mixture into egg mixture, and  gently fold it in with a metal spoon until well combined. Repeat with the remaining flour. Make sure the flour is all combined as it can be difficult to see in a large bowl – the flour will just sink to the bottom. And remember to be gentle as you don’t want to knock too much air out of the sponge.

Divide the mixture evenly into the 2 prepared tins. Smooth the surfaces with a metal spoon to ensure the mixture is even. Bake for 12-15 minutes (mine took 14, but ensure you check at 12). Insert a skewer to ensure cake is cooked – the skewer will come out clean. Leave in tins to cool, then place on a wire rack.

Chocolate Icing:

  • 2 cups icing (confectioner’s) sugar
  • 1/3 cup good quality cocoa powder
  • 1/2 cup water

Sift the icing sugar and cocoa into a bowl together, and add the water. Mix well until combined and smooth. Pour the icing into a large, shallow dish. Pour the coconut out onto a large baking tray.

Place one side of the sponge cake into the icing, cover the sides, then dip the other side of the sponge in the icing. Cover in coconut and place on a large cake stand. Repeat with remaining sponge cake, except place this one on a plate or another baking tray. I found this process super messy and it took me a while, but I got there in the end!

000_0001

Balsamic Strawberry Jam:

  • 1 medium punnet of strawberries, hulled and quartered
  • 1 tsp vanilla bean paste/natural extract
  • 1 cup caster (white) sugar
  • 1/3 cup balsamic vinegar
  • Splash of water

Place strawberries and water (I literally used a splash, just to moisten the strawberries) in a medium sized saucepan. Cook on a medium heat until the berries begin to soften (about 2 minutes). Add the vanilla and sugar, and cook over a low heat for about 10 minutes, or until strawberries have broken down. Add balsamic vinegar, and continue cooking on low until mixture becomes a sticky, jam like consistency. Pour into a bowl, and leave to cool. If you are not using the jam on the day of making it, cover with cling wrap and place it in the fridge. I made my jam two days beforehand.

Lamington Cake

Assembly:

Whip up 250ml thickened cream, with 1/3 cup icing (confectioner’s) sugar, and 1 tsp of vanilla bean paste/natural extract. With one sponge cake already on the cake stand, cover with whipped cream, ensuring you spread the cream right to the edges of the cake (if you want to decorate it like my cake, leave a little bit of cream behind to pipe on top). Then, spread over the strawberry jam – although this time don’t spread it right to the edges, leave about 1cm. Place the other sponge on top of the cream and jam. Decorate as desired 🙂 EAT!

Messy goodness

HAPPY AUSTRALIA DAY! (check out my past Australia Day posts here.)

000_0011

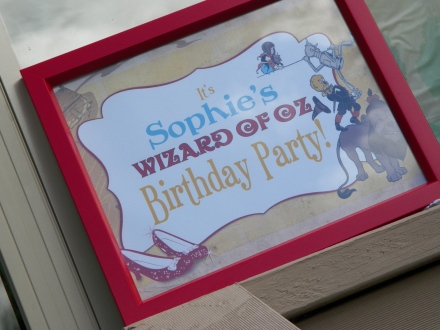
A Wonderful Wizard of Oz Party!

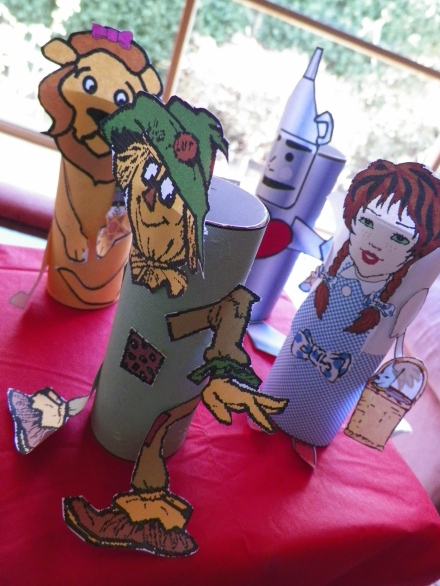
Last Sunday, it was my little sister’s wonderful Wizard of Oz party. Well, it was more of a production actually, as our house was temporarily taken over by Oz paraphernalia and resembled quite the tornado. It was a lot of fun, and the amount of work my parents put into making the place look like it was straight out of the movie set was astronomical. As was the amount of time I spent in the kitchen! I made so many little bits and pieces I thought I would dedicate a whole blog post to it 🙂

100_0067

000_0049

100_0063

My ‘Emerald City Macarons’ – Redskin flavoured, with edible gold glitter. This flavour was SO delicious!

000_0036

100_0062

‘Yellow Bricks’ – aka Salted Caramel Rice Bubble Slice

100_0057

000_0048

100_0061

Unfortunately, I did not make these. I had never tried a cake pop before, I have heard they are very difficult to make. These ones not only look amazing, but tasted it, too. Inside were gooey, chocolatey, fudgey balls of cake. YUM!

100_0072

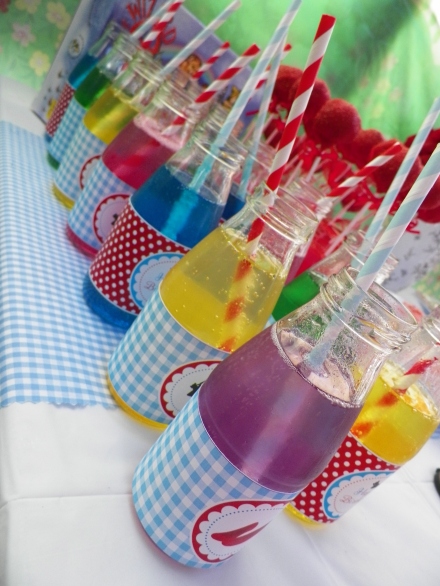
Rainbow lemonade for the kiddies 🙂

100_0052

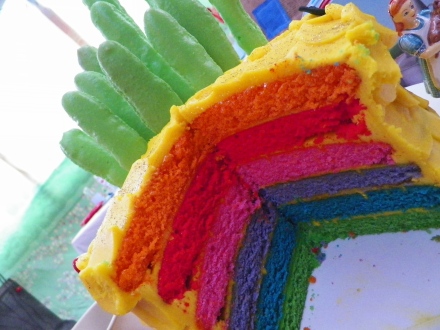
The cake I made – Somewhere Over The Rainbow Layer Cake, with Yellow Brick Buttercream and a Macaron Emerald City.

100_0074

100_0075

This was the same recipe I used to create last year’s Rainbow Cake. It’s not at all difficult, it just takes a lot of time. The end result is well worth it, though. Especially when kids are involved!

100_0066

Follow the Yellow Brick Road…

Lemon Meringue Layer Cake with Macarons

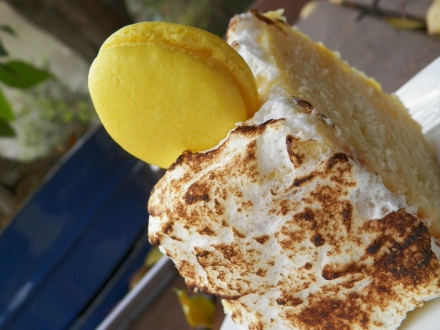
This cake was tasty, very tasty indeed. I made this cake for my boyfriend’s birthday, as he loves all things lemon and meringue – you may remember from last year. I was really happy with the flavour of this cake and the lemon curd that filled it, and the macarons turned out quite well, too. I’ve been a bit lucky with macarons of late, lets hope it stays that way!
000_0002
000_0017
I pictured the merinuge on the outside to look a little different. It wasn’t as glossy and high as I would have liked, but I think it was because I didn’t make enough sugar syrup. However, that’s a minor detail. The part I loved most about making this cake was blowtorching it! I love watching the meringue cook and change colour, I could stand there all day and blowtroch…or maybe I just love playing with flames?! I used my usual vanilla cupcake recipe and just added a bunch of lemon juice and zest and it worked a real treat! It was moist, lemony and buttery all at the same time – yum 😉 The lemon curd recipe I used was from the ever wonderful Zumbo, and it was unsurprisingly delicious and unlike many lemon curds, it remained thick and did not leak out the sides of the macarons like lemon curds often do! Winner 🙂
000_0013
Macarons:

This recipe is Adriano Zumbo’s, and was published a couple of years ago in the Herald Sun. You will definitely need kitchen scales to make macarons.

  •  135g almond meal
  • 135g icing sugar
  • 125g caster sugar
  • 45g egg whites
  • 50g egg whites
  • 40g water
  • 1/4 tsp colouring gel, yellow

Spray four oven trays with cooking oil spray around the edges, and line with baking paper and set aside. Place almond meal and icing sugar in a large bowl, and sift together 3 times. Set aside, along with the 45g egg whites. Put 50g egg whites in a separate bowl. Heat caster sugar and water in a small saucepan, over a low-medium heat, until the sugar completely dissolves (if it slightly burns my tongue, it’s done!). If you do not want to burn your tongue, Zumbo suggests investing in a candy thermometer and heating the syrup until it reaches 118 degrees C (244 degrees F). If the syrup becomes thick and powdery in appearance, you will need to start again. This is because the sugar has been heated too much, too quickly, and instead of dissolving, it has cooked.

Begin beating the 50g egg whites with one hand, and with the other, stream the hot sugar syrup down the side of the bowl to create an italian meringue. Beat until stiff peaks form, the meringue should be thick and very glossy. If you want to add flavouring/colouring, now’s your moment. So add the colouring now. Just lightly beat them into the meringue. Pour meringue into the almond meal, icing sugar and 45g egg whites mixture and mix roughly to combine. When combined, fold mixture together (one single stroke) until there are no air bubbles left. Make a spread across the top of the mixture, and it should disappear in about 20 seconds. Spoon mixture into a piping bag fitted with a round nozzle. (If you don’t have a piping bag set, most supermarkets sell plastic ones, they are Multix brand, in an orange box and contain 5 piping bags with a few different nozzles, plus they’re only about $3. You should be able to find them in the baking aisle). Lock the bag by spinning the top around 4 times. Pipe 3-4cm rounds on the oven trays prepared earlier. Tap the bottom of the trays on the kitchen bench and let them sit for about half an hour, or until mixture is dry to the touch. Meanwhile, preheat the oven to 145c (135c fan forced).

Place in oven and bake for 16-20 minutes. Check macarons at 16 minutes, and to test if they are cooked, pull a macaron off the baking paper. If it is stuck, keep cooking and checking regularly. Cool on trays for 5 minutes, then peel off and place on a wire rack. The mixture should make about 12 -15 large macarons, and about 25 smaller macarons. Macarons keep really well (about 5 days in the fridge) and some say that the longer they are refrigerated, the more the flavour is likely to develop. Macarons taste best when they are stored in the fridge, then brought down to room temperature to eat.

 Lemon Meringue Cake

Lemon Vanilla Cake: (adapted from Taste’s recipe)
  • 200g butter, chopped and softened
  • 1 3/4 cups caster sugar
  • 2 tsp vanilla bean paste
  • 4 eggs
  • 2 3/4 cups self-raising flour
  • 1/2 cup milk
  • zest and juice of 3 lemons
Preheat the oven to 180c. Grease and line a round baking tin with baking paper (I have two tins, so I baked two cakes then another one), and set aside. Beat the butter, sugar and vanilla until pale and creamy. One at a time, add the eggs and beat until just combined. Add the lemon juice and zest and stir to combine. Add the flour and milk in alternate batches, ensuring you start and finish with the adding the flour. Stir with a wooden spoon until combined. To ensure layers are even, weigh mixture and divide into three. I think, from memory, each layer weighed about 312g. Pour mixture into prepared tins and smooth the top with the back of a spoon. Place in oven for 15 – 20 minutes, or until a skewer comes out clean. It should just be slightly golden. Let cakes cool in tins for approximately 15 minutes before removing and placing on a wire rack. When completely cooled, gently wrap cakes in glad wrap and if not using immediately, place in fridge until they are needed.
000_0005
Lemon Curd: (from Zumbarons: A Fantasy Land of Macarons p. 28)
  • 160g lightly beaten egg
  • 240g caster sugar
  •  Finely grated zest of 5 lemons
  • 160g fresh lemon juice (this amounted to be exactly 5 lemons for me)
  • 300g butter, chopped and softened
Put the egg and sugar in a saucepan and mix well. Stir in the lemon zest and juice. Heat over a low-medium heat, stirring constantly until the mixture reaches 85c/185f (You can buy thermometers from homeware or discount stores). Strain the curd into a bowl, discarding the zest and any little bits of cooked egg (I had a few – it’s so easy to do!). Cool the mixture to 50c/133f. When the curd is at the right temperature, beat in the butter gradually until smooth and shiny. If not using straight away, refrigerate. If you are using immediately, allow to curd to cool until it becomes firm enough to pipe.
Lemon Curd
 
 Italian Meringue: (italian meringue is made by making a sugar syrup and adding it to the egg whites to create an extremely thick and glossy mixture)
  • 6 egg whites, at room temperature
  • 1 cup caster sugar
  • 1/3 cup cold water
To make the sugar syrup, slowly heat the sugar and water in a saucepan on a low heat until sugar is dissolved. Turn the heat up to medium until mixture begins to bubble – some people heat their syrup to a certain temperature but I usually do it by touch, usually when the mixture is just too hot for my finger it is done! Begin beating the egg whites, and slowly stream the sugar syrup down the side of the bowl. Beat until mixture is thick and very glossy. NOTE – don’t make the meringue ahead of time otherwise it will become limp. Make it straight before you cover and blowtorch the cake.
000_0015
Assembly:
Place one layer of cake on a cake stand, and generously spread lemon curd on top. Place another layer of cake on top of the lemon curd, and once again cover it with lemon curd. Place the final layer of cake on top. and cover will lemon curd. There should be a couple of teaspoons left after the cake and macarons have been filled. With a round-edged knife, generously cover the cake completely with the meringue mixture, making flicks with the knife as you go to create an element of height and visual appeal 🙂 With a chef’s blowtorch, gently go over the meringue from about 10cm, depending on how brown you want the meringue to be. To completely blowtorch the cake took me about 10-15 minutes. If you are not serving the cake immediately, gently cover it with glad wrap and keep it in a cool dry place. Enjoy!
000_0011
 000_0016

Dark Chocolate and Peanut Butter Tart

All I can say is YUM! And….omnomnomnomnomnom! Omnomnomnom. Omnom. Nom. Nom. This mouthwatering tart had been a work in progress inside my head for a while, and I wanted to make it for my birthday, as I LOVE LOVE LOVE anything with peanut butter. I was pretty happy with how it looked, even though the pastry was a little rustic looking. Okay, it was completely rustic looking. Plus, I forgot to put sugar in the pastry :/ oops! But it was still pretty awesome, even if I say so myself!
Instagram
I’m sure you can already tell, but this tart was super, super rich. Especially after the amazing slab of pork belly I had for my birthday dinner, it’s safe to say I was bursting by the end of it all! This tart was heaven for me, and will be for anyone else who loves the combination of peanut butter and chocolate. It was fairly simple to make, too. It just requires a bit of organising and beginning things the day before. You don’t have to make your own pastry if you don’t want to, either. There are some pretty good frozen pastries around that will still work really well 🙂 The shortcrust pastry recipe I used, I probably wouldn’t recommend. It was ok, but there are heaps of better ones out there. Have a look here to check them out.
000_0010
Peanut Butter ganache (adapted from Donna Hay):
  • 1 cup icing (confectioner’s) sugar
  • 1 1/2 cups of smooth peanut butter
  • 120g butter, chopped and softened
  • 1/2 tsp vanilla bean paste/extract
  • 2/3 cup (80ml) cream, thickened
  • Pinch of salt

Place sugar peanut butter, butter and vanilla in a bowl, and beat until light and fluffy (on high for about 5 minutes). Add the cream slowly and beat for another 2 minutes. If not using straight away, cover and refrigerate.

Pastry

Chocolate Ganache:
  • 100g dark chocolate (I used Green and Black’s 70% cocoa), chopped
  • 1/3 cup heavy thickened cream
  • 2 tbs butter
Place all ingredients in a small saucepan and stir over a low heat until melted. Place in bowl and let cool.
000_0005
Assembly:
Once the pastry has cooled completely, you can start assembling. Spoon the peanut butter ganache over the pastry and spread it out with a spoon so it is nice and even. Pour cooled chocolate ganache over the peanut butter ganache and gently spread out with a teaspoon, being careful not to blend the peanut butter with the chocolate – you want to create two definitive layers. Ideally, it is best to refrigerate the tart overnight, but if you’re using it sooner, try and refrigerate it for the maximum amount of time possible.
Sliced
You don’t have to decorate the tart if you do not want to, it would look great with nothing on top. I had heaps of leftover peanut butter ganache hence why I did all the piping on top. It probably made it that much richer, but it certainly photographed well, I think 🙂
000_0004

Jaffa Ombre Layer Cake

One thing is fairly obvious: I love cake. I try not to eat tooo much cake, but with this one, it was difficult to stay away. I was convinced this cake would be super-rich, but surprisingly, it was quite light. It was certainly still decadent, and I will definitely be making this one again. I know I say this with a lot of things, but I’ve had the idea of making this cake in my head for quite some time. My Mum’s birthday seemed like the perfect occasion – as she (and my Dad) both love the Jaffa Macarons, and I haven’t done ombre, or any type of layer cake really, for a while.

Follow me on Instragram - GemmaAsh

 The recipe I used for the orange cake is from the always amazing Raspberri Cupcakes. It is a beautfiul cake, not too buttery, and the zest from the oraange was intense, but in a great way. This particular post – Orange Cake with Fruit Tingles Icing, is one of my favourite posts from Raspberri Cupcakes, and was one of the recipes I was inspired by, to begin blogging myself (see Musk Layer Cake + Musky Macarons)!

000_0001
Orange Cake: (adapted from Raspberri Cupcakes)
  • 165g butter
  • 3/4 cup caster (white) sugar
  • 3 eggs
  • 2 cups self-raising flour
  • Zest and juice from 1 1/2 large oranges (I had about 1/3 cup of juice)
  • Wilton’s colouring gel, orange
Preheat the oven to 180c (170c) fan forced. Line a 22cm springform cake tin with baking paper and set aside. Beat butter until pale and fluffy. Gradually add sugar. Beat eggs in one at a time until well combined. Stir in the orange zest and juice and flour, until well combined. To divide cake into batches, weigh mixture and divide the number by 3. Pour into three separate, clean bowls. Add small amounts of colouring gel to mixtures, until you have 3 clearly different shades of orange. Pour one batch of mixture into cake tin, and spread with a spoon so it is nice and even. I had a little bit of trouble with this because the cakes were so small, but they were all fine in the end. If you have more than one cake tin, it is okay to put two on the top shelf of your oven, if they fit. Bake cakes for 10-15 mintutes, or until a skewer comes out clean. Begin checking the cakes from 10 minutes.
Let cakes cool in the tin for 10-15 minutes. If you are using the cakes straight away, let them cool completely on a wire rack, and then begin layering and decorating. If not, gently wrap cakes in cling wrap tightly – be very careful as the layers will be quite thin and fragile. Place in fridge overnight. It is best to bake cakes the day before, or on the day of use. You could probably freeze them if you were really time poor, however, sometimes I find that cakes can taste a bit strange when they have been frozen!
000_0006
Jaffa Ganache:
This is the same ganache I used for the Jaffa Swirl Macarons, however I just quadrupled it.
  • 400g good quality dark chocolate, chopped
  • 2 cups thickened cream
  • Zest of 2 1/2 oranges
Place all ingredients in a medium saucepan and stir over a low heat until smooth. If using the next day, cover and refrigerate, then take out an hour or two before use. If using on the same day, cover and refrigerate for about 30 mins, or until ganache has slightly set. I probably made my ganache a little too late for when I needed the cake, so you can see in the pictures that it was still quite runny. I tried to make the best of it though, and exposed the colours of the cake by letting the ganache drip around the side. I originally wanted to cover the cake completely in ganache, but I think it still looked nice.
JaffaCake
 
Assembly:
Place the bottom cake on a large cake stand or a cake board. With a round-edged knife, spread a layer of ganache on the top, and layer with the second cake. Repeat the process, and cover the cake completely with the ganache. If the ganache is too hard, dip the knife in warm water – it will make it a lot easier to spread out.
000_0010
You can decorate the cake however you like – you don’t even have to decorate it thought, if you don’t want to. You could use cachous, glitter, you could pipe swirls of ganche – anything you like! As you can see here, I went for choc-dipped orange segments with a tiny bit of gold glitter.
000_0003