Cherry Ripe Layer Cake

Happy New Year! I hope you all had a wonderful Christmas and New Year, and managed to relax over the holiday season. I can’t believe the best time of the year is over already, it always goes too quickly! Usually, for me, January is a busy month for cakes, with most of my families’ birthdays. This year, however, almost my whole family were sick, and celebrations kept getting put off! So, this beauty of a cake was made for three peoples’ birthday, and delicious it was. Excuse the crappy photos, my awesome proper camera broke, and my the photos from my phone just aren’t the same 😦
CherryRipeCake

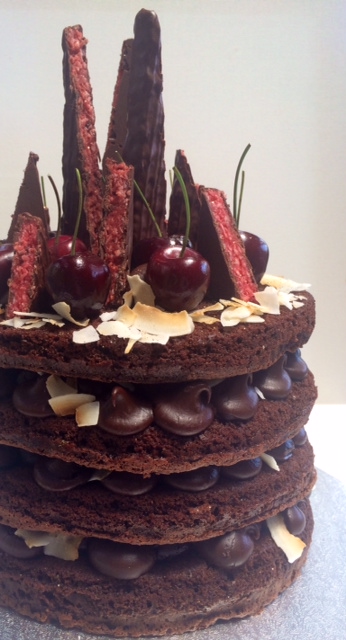
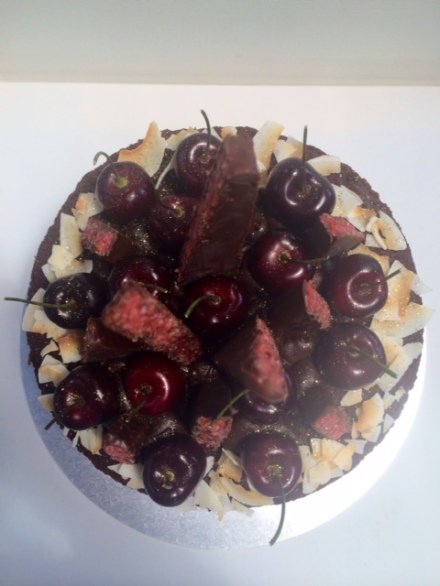
This cake is quite similar to this one I made about the same time last year, with red wine ganache. However, I omitted the red wine this year, and added toasted coconut flakes and cherry ripe bars.
CherryRipeCake1

Chocolate Mud Cake Layers: (recipe by Janelle Bloom)

Makes 4 x 23cm layers

400g butter
200g good quality dark chocolate, chopped
1/2 cup water
1/2 cup good quality cocoa
2 tbs good quality drinking chocolate or instant coffee powder, or 1 tbs of each if you want
1 tsp vanilla bean paste/natural extract
2 cups caster (white) sugar
6 eggs, at room temperature
1 1/2 cups self-raising flour, sifted
Approximately 500g fresh cherries, stones removed and halved
Approximately 30 fresh cherries, with stems (I used a 695g bag altogether, and it was just enough)

Preheat oven to 160c. Line 23cm springform cake tins with baking paper. I had two tins, therefore had to repeat the process.

In a medium saucepan, combine butter, chocolate, water, cocoa, drinking chocolate and/or coffee powder and vanilla. Cook over a medium heat, stirring constantly, until melted and smooth. Remove from heat, and set aside for 10 minutes or until lukewarm.

In the meantime, beat eggs and sugar together in a stand mixer, on medium speed, until pale and creamy. Stream the chocolate mixture down the side of the stand mixer to incorporate into egg mixture. Beat until well combined. Stop the mixer, and add the flour. Beat again until well combined and smooth.

Weigh mixture into four even portions (I did this with digitial scales), to ensure even layers. Pour mixture into prepared tins. Bake for 25 minutes in preheated oven, or until a skewer is inserted, and comes out clean. Repeat process, depending on how many cake tins you have.

Cool cakes for 15-20 minutes in tins, and transfer to a wire rack. If not using immediately, wrap tightly with cling film once cakes are completely cool, and refrigerate. Bring down to room temperature to assemble and eat.
CherryRipeCake2

Dark chocolate ganache: (you will need to make the ganache the day before serving the cake)

· 300g good quality dark chocolate, chopped, or choc bits
· 300ml thickened cream

In a medium saucepan, combine the chocolate and cream, and place over a low-medium heat, constantly stirring until melted. Place in a large bowl and let cool at room temperature. When ganache has cooled, cover with cling wrap and leave overnight at room temperature.

Assembly:

· Toasted coconut flakes or dessicated coconut
· 900g cherries, pitted and halved
· 100g whole cherries

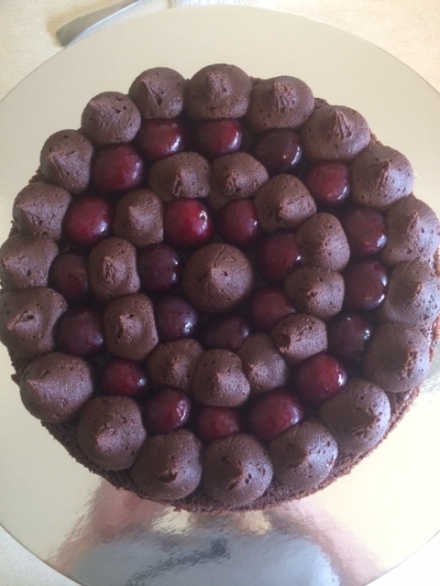
Place one layer of mud cake on the stand/base. Place ganache in a piping bag fitted with a large round nozzle. Pipe one small dob of ganache in the middle of the cake, and place halves of cherries around it. Repeat the process with ganache around the other side of the cherries, and repeat again. Sprinkle with coconut. The end result should look like this:
CherryRipeCake4

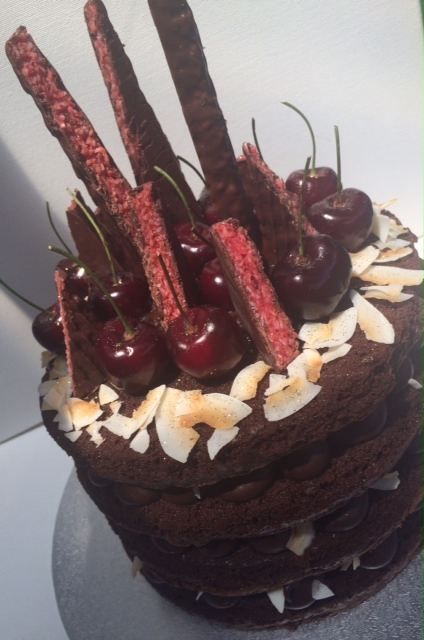
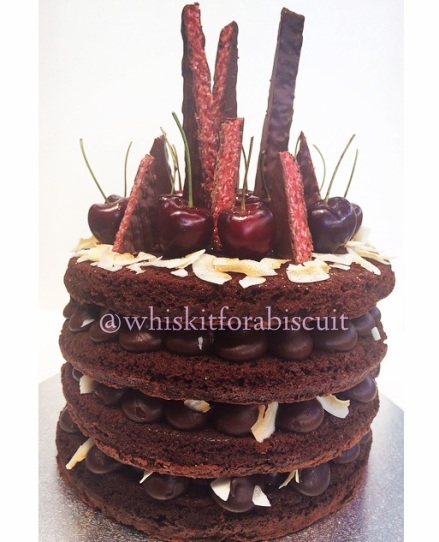
Repeat the process three times, until you reach the top layer. You can really decorate the top layer however you want. I used the ganache for the middle of the top layer, and as you can, sprinkled coconut around the edges. I stuck the whole cherries in with the ganache, to ensure they weren’t going to fall off. I sliced the cherry ripes into sharp triangles, to look effective on the cake.
CherryRipeCake3

Enjoy, and happy baking! X

Cappuccino Naked Layer Cake with Chocolate Ganache

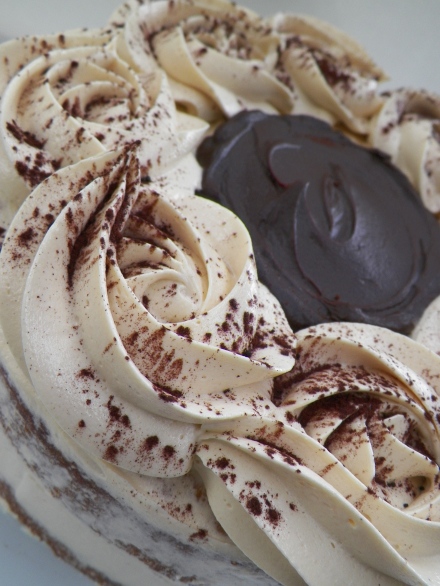
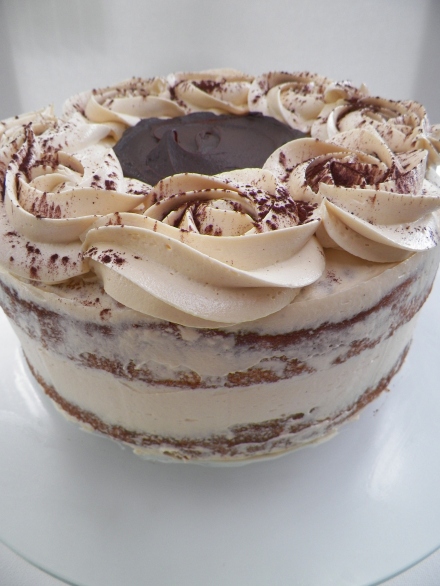
These naked cakes seem to be on trend at the moment! I really enjoyed making this cake, and I really like the combination of the rustic buttercream around the cake, and the rosettes and pool of chocolate ganache on top. This cake was made for my Mum’s birthday, as she loves coffee and chocolate. So, this flavour was a no-brainer!

000_0004

 I used the trusted vanilla cupcake recipe for this cake, as it converts quite well into a round cake, too. I tried to get a good quality coffee flavour into the buttercream by using real espresso shots, and this worked really well. I also used dark chocolate ganache in the middle of the layers as well as on the top. It was a nice addition and it cut through the creaminess of the buttercream, and really, who doesn’t love ganache?!

000_0008

 Vanilla Cakes:

  • 200g butter, chopped and softened
  • 1 1/2 cups caster (white) sugar
  • 2 tsp vanilla bean paste/natural extract
  • 4 eggs
  • 2 3/4 cups self-raising flour
  • 1 cup milk

Line two 22cm round springform cake tins with baking paper. Preheat oven to 180c. Beat butter, sugar and  vanilla bean paste until pale and creamy. Add the eggs, one at a time, until each is well combined. Add the flour and milk gradually, in alternating batches. Stir with a wooden spoon to combine after each addition. Ensure you begin and finish with flour. Divide mixture evenly between the two prepared cake tins. Bake in preheated oven for approximately 30-40 minutes, or until a skewer is inserted and comes out clean. I had a bit of a problem with my cakes taking a while to cook in the middle, and one of them sunk quite a bit after I had taken it out of the oven. If you find this starting to happen in the few minutes after you have taken the cake/s out, place them back in, and lower the oven temperature if the edges of the cake are cooked. You don’t want dry edges and a  raw middle. Yuk! Once cakes have cooked, leave them to cool completely in tins. Release gently from tins once cool. If you are not assembling the cakes immediately, wrap them tightly in cling wrap and place in the fridge until ready to assemble. I prefer to assemble cakes cold, especially this one, because you will need to carve the tops. Always bring cake down to room temperature to serve and eat. 🙂

Dark Chocolate Ganache:

  •  250g good quality chocolate chips, or dark chocolate, chopped
  • 1/3 cup thickened cream

Combine chocolate and cream together in a medium saucepan, and cook over a low-medium heat, stirring, until melted and smooth. Pour into a heatproof bowl, and leave until set. If you are not using ganache on the same day, refrigerate, and slightly warm in the microwave to use.

Espresso Buttercream:

  • 400g butter, chopped and softened (I prefer to use salted butter when making buttercream)
  • 3 1/2 cups icing sugar mixture
  • 1 tsp vanilla bean paste/natural extract
  • 30ml espresso coffee (try to use real espresso if you can. If it is not possible, use a good instant coffee powder with 30ml boiling water

Beat butter and vanilla until pale and creamy. Gradually add the sugar and coffee and beat until well combined. With the sugar and coffee, you don’t have to stick to these quantities if they are not to your taste. Taste as you go and add what you are happy with.

000_0001

Assembly:

Place one vanilla cake on the stand or board which you will present on. Using a serrated bread knife, gently cut the top of the cake, horizontally, until you have created an even top. Using a palette knife or a spatula, generously spread approximately 2/3 cup of buttercream over the top of the first cake. Then, using a tablespoon, spoon approximately 2-3 tablespoons of dark chocolate ganache on top of the buttercream and push out toward the edges of the cake, taking care not to mix the two – you want the ganache on top of the buttercream. Place the second cake on top of the first, and again, gently cut across it to create an even top, and spread with the buttercream only. After this, using your palette knife or spatula again, gently coat the outside of the cake with buttercream, taking care to gently scrape the edges, creating a smooth, naked cake appearance. Then, place approximately 2 1/2 cups of buttercream into a large piping bag fitted with a large, star nozzle. Pipe rosettes or swirls around the edges of the cake, and lightly dust with cocoa powder. Spoon 1/2 cup of dark chocolate ganache into the middle of the cake, and gently spread out to the rosettes if you need to. As mentioned earlier, always bring cake down to room temperature to eat. Serve, and enjoy!

000_0005

Happy Baking!

Pear and Chocolate Layer Cake with Salted Caramel Buttercream

My friend asked me to make a special cake for a very special occasion, and she gave me complete freedom to choose the flavours and look of this special cake. I was a bit worried, because I wanted it to not only be creative and interesting, but also a crowd pleaser. It took me a while to come up with the idea that eventuated into the pretty little thing below,and I kept umm-ing and ahh-ing about every last detail. I’m pretty happy with the result.

000_0019

This is the first ‘naked’ cake I’ve made, and I must say I really like the look of the naked cake. It first worried me a little because covering a cake in icing kind of gives you a security blanket in that you can cover up all the flaws on the cake itself, but I love the rustic look, and also the autumn colours this cake has.

000_0017

I have used the combination of pear and caramel before, and really, adding chocolate to this magnificent duo, is certainly not going to do any harm! While it may seem a little rich, the pear is a nice fresh hit when paired peared with the creamy caramel and breaks the decadence up nicely, even though I would be so much more than happy to down a bowl of that caramel buttercream on its own.

000_0016


The recipes used here are nothing I haven’t made before, I’ve just adapted them a little differently.  You can find the caramel buttercream recipe on this post for Caramel au buerre sale macarons, and you can find the chocolate cake recipe here – I have just made it into three round cakes instead of cupcakes. As for the pear, there is one pear, chopped, in each layer, plus the whole baked pear in the middle of the top layer. Enjoy!

000_0014

Pink Champagne & Strawberry Layer Cake + Mini Cupcakes

I had always wondered what Pink Champagne would taste like in a dessert, as I had heard many stories and seen many recipes, but still wasn’t one hundred per cent convinced. As was it was my Nanna’s 81st Birthday coming up, I thought it would be the perfect time to try something Pink Champagney-cakey, because my Nanna lovvvvvvvvvvvvvvvvvvves Champagne, more than anyone else I know. I began my search for an inspiring recipe and stumbled across a Pink Champagne Cake Pop number from the ever-amazing Sweetapolita. I knew then I had to make it, because when it comes to cake, Sweetapolita is up there with the best and I knew it would be fantastic!

Unfortunately, when I made the cake I was running quite low on time (nothing ever changes!), and it wasn’t as pretty as I hoped it would be. So, it was definitely a rustic looking cake. The photos don’t do the cake justice either, I literally finished icing it and had to run out the door in my ten-inch heels, so the fact that the cake survived the journey to the restaurant is a miracle in itself! Lucky it did though, because it was really, really yummy. There was just enough booze to counteract the amount of butter and sugar in the icing, and the tang of the soaked strawberries in the middle certainly made it one delightful biteful!

My favourite part of the cake was definitely the Pink Champagne soaked strawberries in the middle. I cooked them down with some vanilla and a bit of sugar, and they were soooooo good! I could have happily eaten them all there and then.

Pink Champagne & Strawberry Layer Cake: (adapted from Sweetapolita)

  • 3 cups cake flour (if you don’t know what Cake Flour is – read this)
  • 1 ½ tsp baking powder
  • ¾ tsp baking soda
  • ¾ tsp salt
  • 170g butter, chopped and softened – not melted
  • 2 cups caster sugar
  • 6 egg whites
  • 1 tsp vanilla bean paste/vanilla extract
  • 2 cups Pink Champagne
  • 1 cup chopped strawberries

Preheat a fan forced oven to 175c (350F), and grease and line two 22cm spring form pans. Beat the butter and sugar together until pale and creamy, about 5 minutes. Sift the dry ingredients (flour, baking powder, baking soda and salt) together and set aside. To the butter and sugar mixture, gradually add the egg whites, followed by the vanilla. Add and alternate the dry ingredients and the champagne – make sure you begin and end with dry (3 dry, 2 wet). Stir in chopped strawberries. Mix until fully combined, but ensure you do not over mix. Evenly distribute the cake batter (use scales to ensure they are exact) into the two prepared tins. Place in preheated oven, and cook for 35 minutes, or until a skewer comes out clean. The cakes should spring back slightly when done. Do not open the oven until the cakes have been cooking for 25 minutes. Leave cakes in pan to cool for 10 minutes, then turn out onto a wire rack.

 Pink Champagne Buttercream: (this can be made a few days in advance and stored in the fridge)

  • 350g salted butter, chopped and softened, not melted
  • 2 cups icing sugar mixture
  • 1/3 cup Pink Champagne
  • ½ tsp vanilla bean paste/vanilla extract

Beat butter until pale and fluffy, about 5 minutes. Add the vanilla. Gradually add the Pink Champagne and sugar. After buttercream is fully incorporated, beat for another 5-8 minutes.

Pink Champagne soaked Strawberries:

  • 1 small punnet strawberries, roughly chopped
  • 1/3 cup Pink Champagne
  • 1 tsp vanilla bean paste/vanilla extract
  • 3 tsp caster sugar

Place all ingredients in a small bowl and leave to soak for up to an hour (you could leave it longer if you wanted to). Pour ingredients into a small saucepan and cook over a medium heat until mixture is boiling. When it starts to boil, turn the heat down to low and simmer for 45 minutes, or until mixture is thick and syrupy. Let strawberries cool before you put them on the cake.

Assembly:

Place one layer of cake on a stand or board, or whatever you’re using. Spread a very thin layer of buttercream over the first cake, and evenly pour the soaked strawberries, and sandwich with the second layer of cake. Cover the entire cake with a layer of buttercream, using a round edged knife. I find the easiest way to do this is to get a cup of warm water, and to regularly dip – it just goes on smoother and won’t break the cake. Top the cake with a handful of strawberries for decoration and freshness 😉

I also made some mini cupcakes with the leftover Pink Champagne buttercream I had. I managed to get some better photos of these ones…

I used the foolproof recipe I always use for Vanilla Cupcakes, they work perfectly every time and are so easy!