Cappuccino Naked Layer Cake with Chocolate Ganache

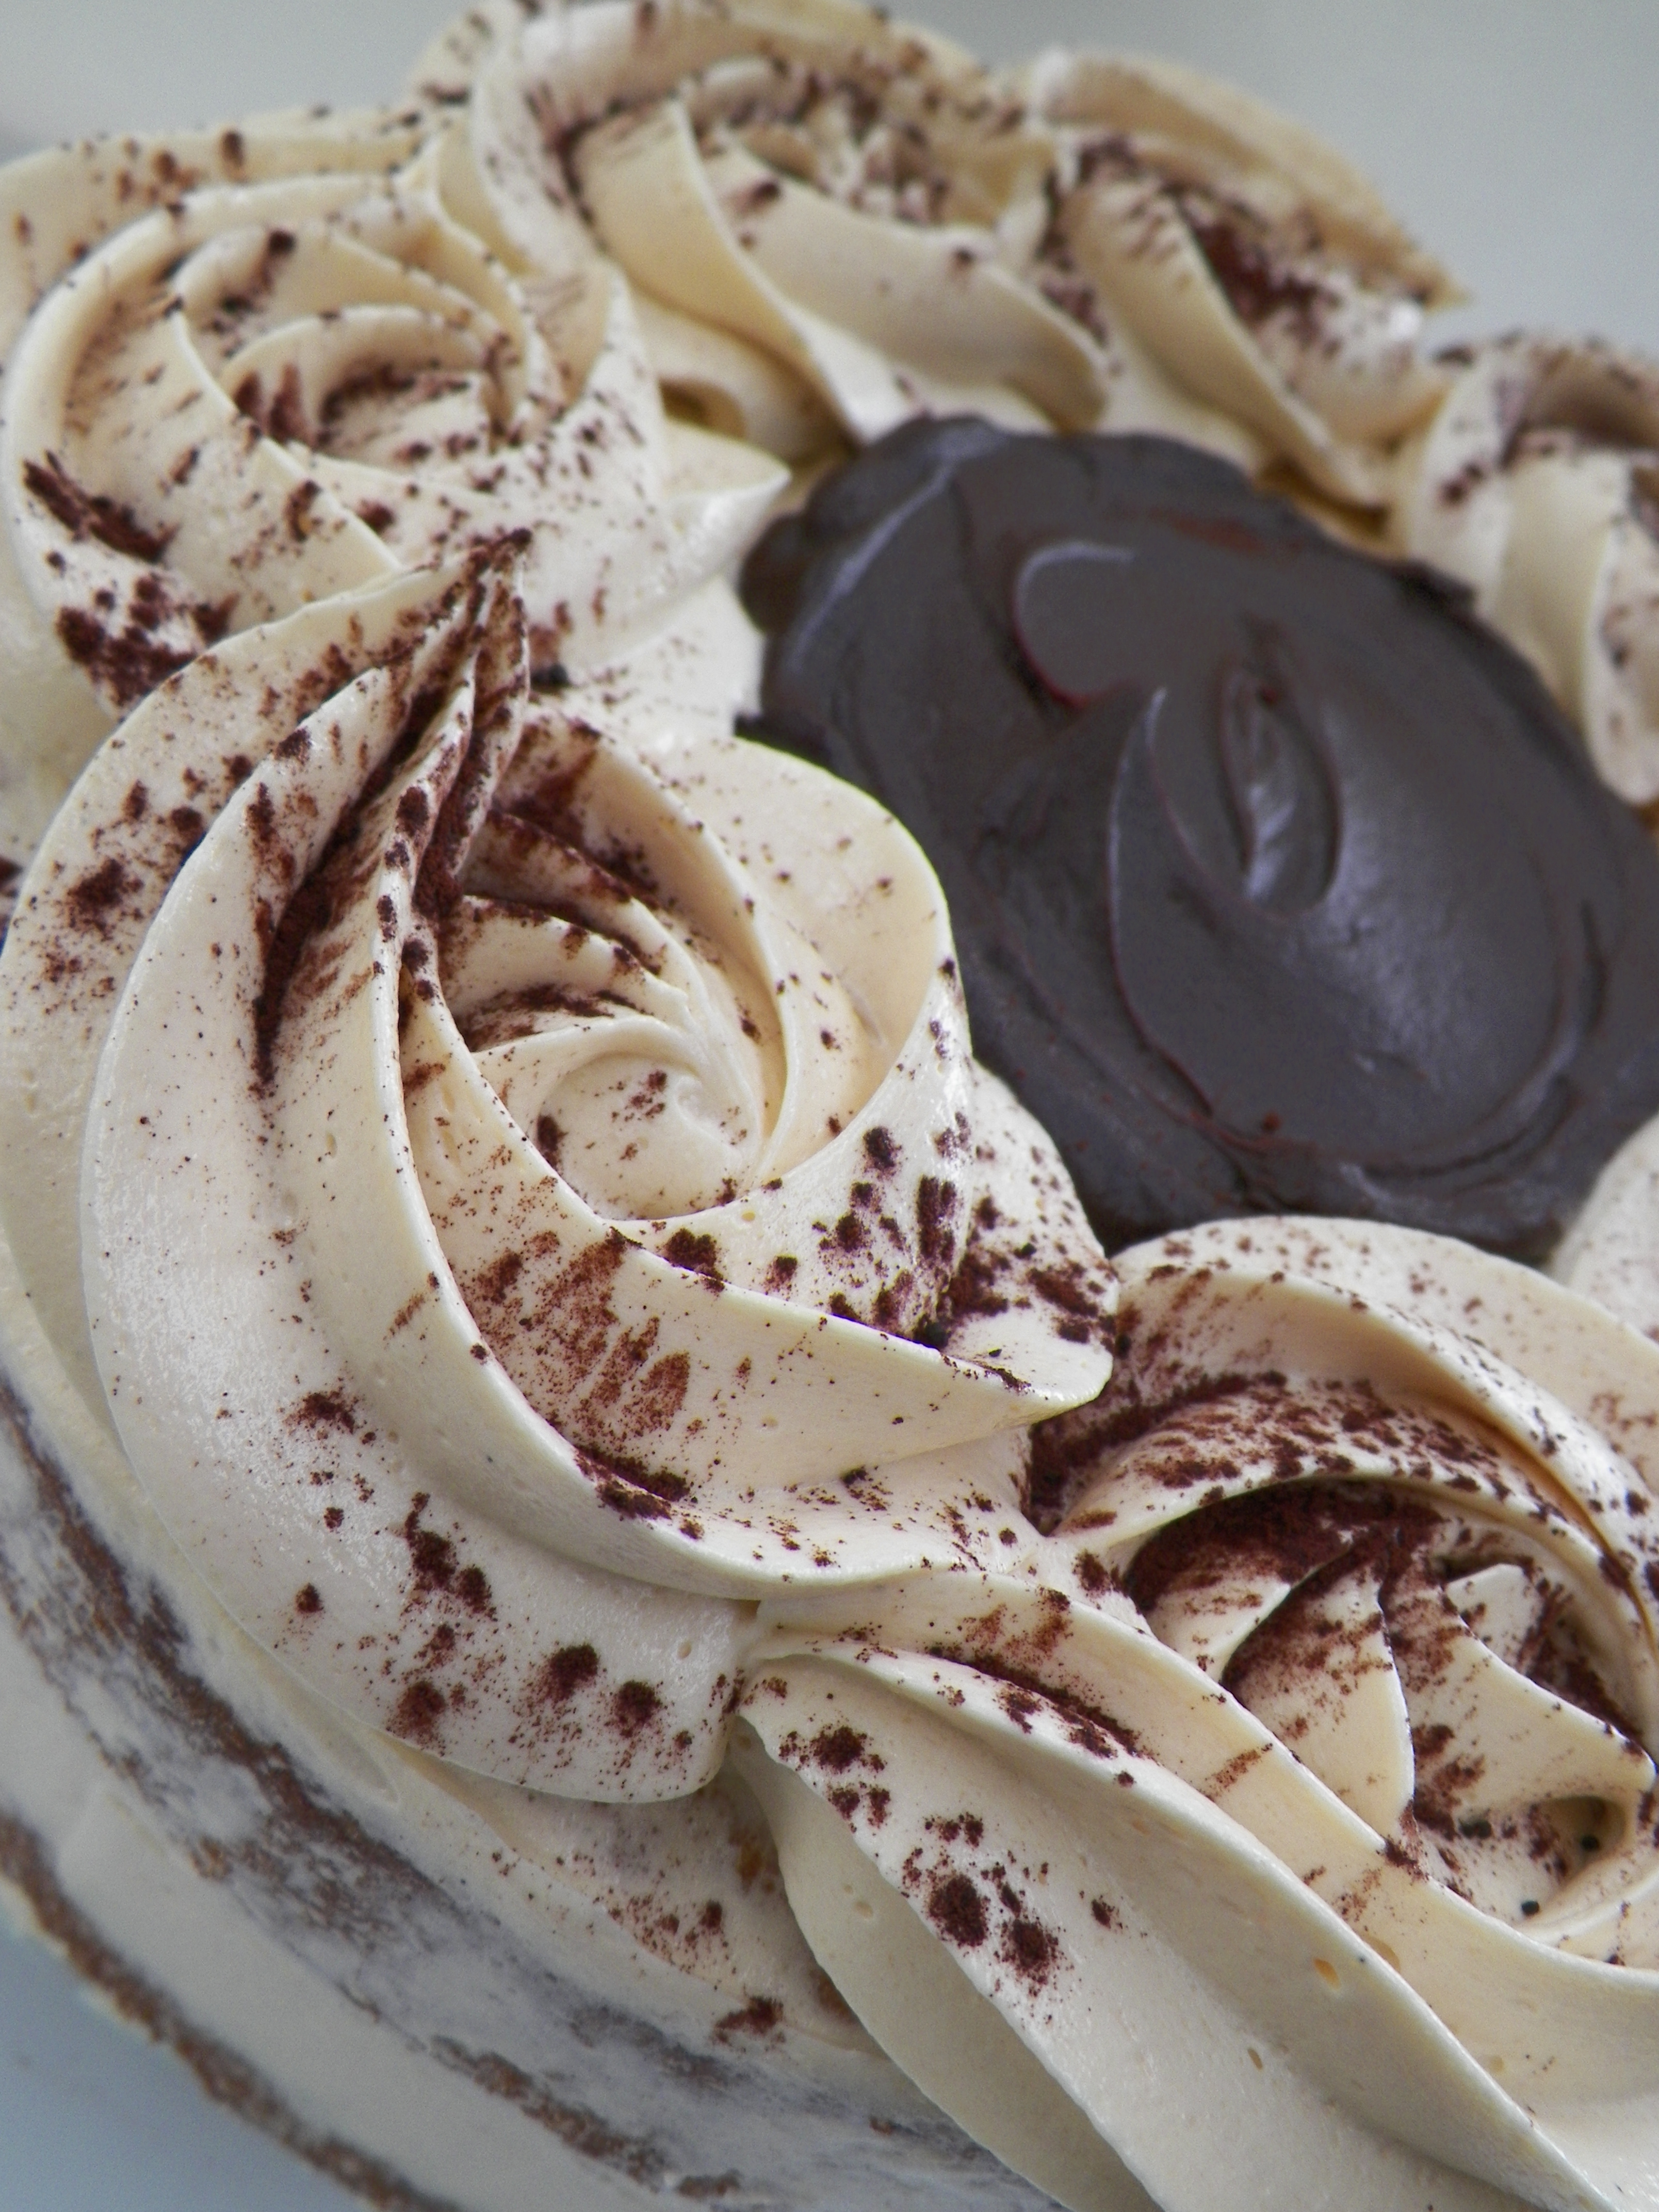
These naked cakes seem to be on trend at the moment! I really enjoyed making this cake, and I really like the combination of the rustic buttercream around the cake, and the rosettes and pool of chocolate ganache on top. This cake was made for my Mum’s birthday, as she loves coffee and chocolate. So, this flavour was a no-brainer!

000_0004

 I used the trusted vanilla cupcake recipe for this cake, as it converts quite well into a round cake, too. I tried to get a good quality coffee flavour into the buttercream by using real espresso shots, and this worked really well. I also used dark chocolate ganache in the middle of the layers as well as on the top. It was a nice addition and it cut through the creaminess of the buttercream, and really, who doesn’t love ganache?!

000_0008

 Vanilla Cakes:

  • 200g butter, chopped and softened
  • 1 1/2 cups caster (white) sugar
  • 2 tsp vanilla bean paste/natural extract
  • 4 eggs
  • 2 3/4 cups self-raising flour
  • 1 cup milk

Line two 22cm round springform cake tins with baking paper. Preheat oven to 180c. Beat butter, sugar and  vanilla bean paste until pale and creamy. Add the eggs, one at a time, until each is well combined. Add the flour and milk gradually, in alternating batches. Stir with a wooden spoon to combine after each addition. Ensure you begin and finish with flour. Divide mixture evenly between the two prepared cake tins. Bake in preheated oven for approximately 30-40 minutes, or until a skewer is inserted and comes out clean. I had a bit of a problem with my cakes taking a while to cook in the middle, and one of them sunk quite a bit after I had taken it out of the oven. If you find this starting to happen in the few minutes after you have taken the cake/s out, place them back in, and lower the oven temperature if the edges of the cake are cooked. You don’t want dry edges and a  raw middle. Yuk! Once cakes have cooked, leave them to cool completely in tins. Release gently from tins once cool. If you are not assembling the cakes immediately, wrap them tightly in cling wrap and place in the fridge until ready to assemble. I prefer to assemble cakes cold, especially this one, because you will need to carve the tops. Always bring cake down to room temperature to serve and eat. 🙂

Dark Chocolate Ganache:

  •  250g good quality chocolate chips, or dark chocolate, chopped
  • 1/3 cup thickened cream

Combine chocolate and cream together in a medium saucepan, and cook over a low-medium heat, stirring, until melted and smooth. Pour into a heatproof bowl, and leave until set. If you are not using ganache on the same day, refrigerate, and slightly warm in the microwave to use.

Espresso Buttercream:

  • 400g butter, chopped and softened (I prefer to use salted butter when making buttercream)
  • 3 1/2 cups icing sugar mixture
  • 1 tsp vanilla bean paste/natural extract
  • 30ml espresso coffee (try to use real espresso if you can. If it is not possible, use a good instant coffee powder with 30ml boiling water

Beat butter and vanilla until pale and creamy. Gradually add the sugar and coffee and beat until well combined. With the sugar and coffee, you don’t have to stick to these quantities if they are not to your taste. Taste as you go and add what you are happy with.

000_0001

Assembly:

Place one vanilla cake on the stand or board which you will present on. Using a serrated bread knife, gently cut the top of the cake, horizontally, until you have created an even top. Using a palette knife or a spatula, generously spread approximately 2/3 cup of buttercream over the top of the first cake. Then, using a tablespoon, spoon approximately 2-3 tablespoons of dark chocolate ganache on top of the buttercream and push out toward the edges of the cake, taking care not to mix the two – you want the ganache on top of the buttercream. Place the second cake on top of the first, and again, gently cut across it to create an even top, and spread with the buttercream only. After this, using your palette knife or spatula again, gently coat the outside of the cake with buttercream, taking care to gently scrape the edges, creating a smooth, naked cake appearance. Then, place approximately 2 1/2 cups of buttercream into a large piping bag fitted with a large, star nozzle. Pipe rosettes or swirls around the edges of the cake, and lightly dust with cocoa powder. Spoon 1/2 cup of dark chocolate ganache into the middle of the cake, and gently spread out to the rosettes if you need to. As mentioned earlier, always bring cake down to room temperature to eat. Serve, and enjoy!

000_0005

Happy Baking!

Chocolate Mudcake Layers, with Red Wine Ganache, Fresh Cherries and Hazelnut Praline

Happy New Year to you! I am back with a bang – with this bee-yoo-tiful chocolate mud cake with all the bells and whistles! I hope you all had a wonderful Christmas and New Year, and enjoyed the break with your loved ones. I know I certainly did, and am feeling refreshed and ready to attack 2015 head on!

000_0020
I must say, I am super proud of this cake. I knew exactly what I wanted it to look like, and I had all the flavours imagined in my mind. It turned out perfectly, and it was really delicious, if I say so myself. This cake was inspired by the fantastically awesome Katherine Sabbath. If you don’t know who she is, pretty please check out her Instagram – you will be amazed!
000_0014
The thing I loved most about this cake, apart from how it looked, was the combination of the dark chocolate red wine ganache, and the fresh cherries. The richness of the chocolate and the red wine together, with the hit of the juicy fresh cherries, full of flavour, was downright damned delicious. The cherries here in Australia at the moment are so yummy, and so cheap! Yay for Summer! If only it lasted all year long.
Chocolate Mud Cake Layers: (recipe by Janelle Bloom)
Makes 4 x 23cm layers
  • 400g butter
  • 200g good quality dark chocolate, chopped
  • 1/2 cup water
  • 1/2 cup good quality cocoa
  • 2 tbs good quality drinking chocolate or instant coffee powder, or 1 tbs of each if you want
  • 1 tsp vanilla bean paste/natural extract
  • 2 cups caster (white) sugar
  • 6 eggs, at room temperature
  • 1 1/2 cups self-raising flour, sifted
  • Approximately 500g fresh cherries, stones removed and halved
  • Approximately 30 fresh cherries, with stems (I used a 695g bag altogether, and it was just enough)

Preheat oven to 160c. Line 23cm springform cake tins with baking paper. I had two tins, therefore had to repeat the process.

In a medium saucepan, combine butter, chocolate, water, cocoa, drinking chocolate and/or coffee powder and vanilla. Cook over a medium heat, stirring constantly, until melted and smooth. Remove from heat, and set aside for 10 minutes or until lukewarm.

In the meantime, beat eggs and sugar together in a stand mixer, on medium speed, until pale and creamy. Stream the chocolate mixture down the side of the stand mixer to incorporate into egg mixture. Beat until well combined. Stop the mixer, and add the flour. Beat again until well combined and smooth.

Weigh mixture into four even portions (I did this with digitial scales), to ensure even layers. Pour mixture into prepared tins. Bake for 25 minutes in preheated oven, or until a skewer is inserted, and comes out clean. Repeat process, depending on how many cake tins you have.

Cool cakes for 15-20 minutes in tins, and transfer to a wire rack. If not using immediately, wrap tightly with cling film once cakes are completely cool, and refrigerate. Bring down to room temperature to assemble and eat.

Dark Chocolate and Red Wine Ganache:

  • 500g good quality dark chocolate, chopped
  • 2/3 cup thickened cream
  • 1/2 cup red wine, I used Shiraz

Place chocolate and cream in a medium saucepan, and cook, over a medium heat, stirring, until melted and smooth. Remove from heat, and slowly add red wine. Stir until well combined and mixture is thick (wine will hang at the top of the mixture, but keep stirring, as it may take a couple of minutes for it to be mixed in properly). Pour ganache into a heatproof bowl, cover in cling film, and refrigerate. If using ganache that day, you will need to wait until it is set to use it. It may be a good idea to make the ganache first. If using the next day, you will need to slightly warm ganache in the microwave, for 10 seconds only.

FYI – for best results, beat your ganache in the stand mixer before piping, especially if it has been in the fridge overnight and has been warmed in the microwave. It will make the ganache nice and fluffy, and will be much easier to pipe.

Hazelnut Praline:

  • 1 cup caster (white) sugar
  • 3 tbs water
  • 1/2 cup hazelnuts, roughly chopped

Line an oven tray with non-stick baking paper. Arrange hazelnuts neatly on the tray. Place sugar and water in a medium saucepan, and cook, on a low-medium heat, until sugar has completely dissolved. Then, turn heat up to high, and cook, stirring occasionally, until sugar mixture turns a deep golden colour. Pour sugar mixture over the hazelnuts, and leave to set and cool, which will take approximately 30 minutes. If not using praline immediately, break into pieces and store in an air-tight container, in the freezer. This will prevent the praline from becoming sticky.


000_0022

Assembly:

Spoon mixed ganache into a piping bag with a wide, round nozzle. Place one mud cake on a stand, board or plate. Pipe one round of ganache in the centre of the cake. Place cherries, cut side down, around ganache. Repeat process around the cherries with the ganache, and repeat again. It should go: ganache, cherries, ganache, cherries, ganache (see photo below). Repeat with the second and third layers of mud cake. For the final layer, the top of the cake, do the exact same thing with the ganache, but instead, place the whole cherries on this layer. In addition, place whole cherries on top of the ganache rounds on the edge, just to give the cake a bit more height. Trim the ends of the cherry stems if they are brown, with a pair of kitchen scissors. Arrange praline as desired. ENJOY! 🙂

Layer

This cake was made for my Dad and Nanna’s birthdays, and to see their faces light up when they saw this cake was wonderful, and then again when they tasted it. It really was a labour of love. I hope I get the opportunity to make this special cake again soon.

000_0016

Until next time…x

Follow @whiskitforabiscuit on Instagram here.

Coconut and Lime Ombre Cake

Happy slightly belated New Year to you all! I can’t believe it is 2014, and January the 1st marked whiskitforabiscuit’s second birthday. Yay 🙂 The beginning of the year is always a bit of a baking whirlwind for me, because almost every member of my family has their birthday in January. So, here is the first of the birthday cakes:

CoconutLimeCake

I love the combination of coconut and lime. It’s really fresh and summery, which is nice when you’re in the middle of the horrible heatwave Melbourne is experience at the moment! The last thing you feel like doing is forcing down a piece of heavy mud cake down your pie hole, so this cake, I thought, was ideal.

000_0007

As you may have seen, I enjoy making layer cakes with different colours and gradients; it just makes it a bit more fun, especially when kids are around. I also decided, instead of covering and filling the cake in buttercream, I used a fresh and tangy lime curd to sandwich the layers, and whipped cream to cover the cake, with some coconut, too. Buttercream does not go down well in heat!

Layers

For the cake, I used my trust vanilla cake recipe I have used many times before (which is originally a cupcake recipe, but it works just as well for larger cakes), and just added a bunch of lime zest, lime juice and coconut. It’s so easy and it works perfectly every time, especially when adding different flavourings. I only had a couple of hours to make this cake, so the layers are not quite as even as I’d like them to be. Oh well, it still tasted pretty awesome!

000_0003

I hope you all had an amazing New Year, and that 2014 is everything you wish it to be! Happy Baking 🙂

Salted Caramel, Chocolate Mousse and Brownie Stackers

Some may call it sad, but I made my own birthday cake. I decided it was just a chance to try something new and different, and new and different this certainly was. I combined my three all-time favourite desserts/flavours/textures – salted caramel, chocolate mousse and rich, chocolate brownie to create this mouthwatering mini tower.

It was the first time I had ever used a ring mould, and it actually worked quite well. It all sounded great in my head, but when I started stacking the pieces together I began to slightly freak out because brownie was breaking, caramel was sticking to everything and I was becoming covered in mousse! Uh oh. But they worked, a bit messier than I had imagined, but that’s okay.

The taste of these ‘stackers’ was seriously out of this world! I’m not sure what I was expecting, but they were so good. The mousse was quite bitter, as I mainly used 70% chocolate, but when combined with the sweet and salty, thick caramel, it really worked. I also used 70% chocolate in the brownie, so the cake on a whole was still extremely rich and decadent, but it was far from sickly sweet which is what I wanted to achieve.

I simply used three different recipes (doubled the quantity for the brownie and the mousse) and stacked away. It did take me a while, but it really wasn’t that difficult. It’s definitely well worth it if you’re a chocolate and caramel feind like me 🙂

Janelle Bloom’s Chocolate Brownie Base: (this recipe is from Janelle Bloom’s ‘Fast, Fresh and Fabulous’ – a great book. This is actually the base for an amazing New York baked cheesecake). Makes 8-10 stackers.

  • 200gm dark chocolate, chopped
  • 200gm butter, chopped
  • 3 tablespoons cocoa powder
  • 1 cup caster (white) sugar
  • 2 eggs, lightly beaten
  • 1/2 cup of plain (all-purpose) flour
  • 4 tablespoons self-raising flour

Preheat oven to 185c fan forced. Grease and line 2 oven trays 1-2cm deep. Although, you could really use any oven proof dish, just spread the mixture 1-2cm thick. Place chocolate and butter in a microwave safe bowl, and microwave on high for 2 minutes. Stir until smooth. Whisk in cocoa powder until smooth. Stir in flours, sugar and eggs until well combined. Spread mixture evenly over base of prepared trays. Bake for 10-12 minutes or until a skewer comes out clean. Don’t worry if the mixture is still a little soft. Cool for 15 minutes, then refrigerate while mixture is still in trays. Tip – make sure the mixture is completely cold before the circles are pressed out. There is a LOT of butter in this recipe, so it really needs to be hardened otherwise it will crumble to pieces (yes, this did happen!).

When brownie mixture is completely cold, press out circles with the ring moulds. There should be about 16-20 circles. When finished, refrigerate in an airtight container.

The Chocolate Mousse I made is from Taste.com, and it is really yummy and fairly simple. I doubled the quantities of the recipe, and it made HEAPS! If you don’t want mousse for lunch for the next week, maybe just do another half of the recipe. Obviously, I did not use the extra cream or the cherries.

Salted Caramel:

  • 2 cans sweetened condensed milk
  • 1 teaspoon sea salt flakes

Remove paper from condensed milk cans, and place them in a large saucepan, lying down. Cover with boiling water and simmer for 3 hours, occasionally topping up the water to ensure cans are always covered. Remove cans from saucepan and let cool for 20-30 minutes. Open with a can opener, and pour caramel into a large bowl. Add salt flakes and stir to combine. You can use as much or as little salt as you like, but I usually stick to half a teaspoon per can of caramel. If using on the day, make sure caramel is completely cooled. Otherwise, refrigerate overnight.

Assembly:

Now for the fiddly part! To begin assembling, place a brownie circle inside the bottom of the ring mould.

Place two teaspoons of salted caramel on top of the first brownie and smooth evenly. Place another brownie on top of the salted caramel layer.

Place 2 generous teaspoons of mousse on top of the second brownie layer, and smooth evenly.

Now cross your fingers and toes! To release the cake from the mould, gently tap cake on the bench until it begins to slip out from the mould. Once this has happened, you can either very gently pull the brownie further and further until it comes out, or keep tapping. It should look a little something like this…

They were a bit messier than I would have liked, so I tied a ribbon around each stacker in an attempt to make them neater! If you’re a perfectionist like me, use a round edged knife or a cheese knife and some warm water to smooth the tops and the edges.

Happy Baking! X