Wedding Cakes, Sesame Street and more!

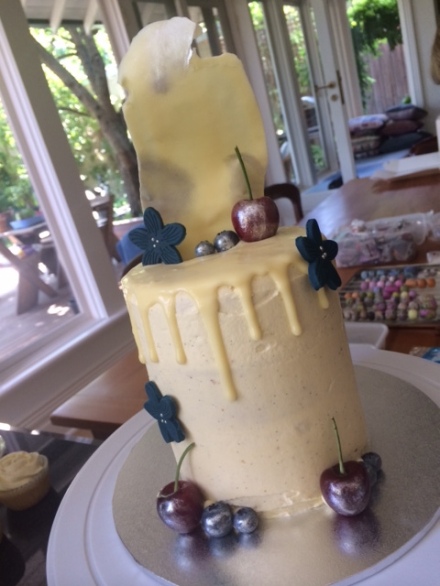
Well, I did say it could be a while. However, I am back, and back with lots of photos of cake! The last month has been absolutely flat out with cakes for me, and it doesn’t look like I’ll be slowing down any time soon! Which is not a bad thing, it is nice to busy making cake, than busy writing essays! Anyway, lets get to the important stuff – this cake below was made for a very special family wedding in late November, and I was super happy with how they turned out:

WeddingCake

WeddingCake1

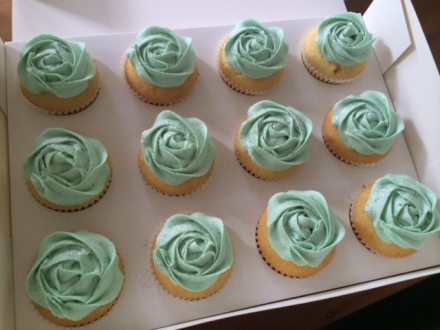
The top cake was a 4” vanilla bean layer cake, filled with lemon curd. All of the cupcakes were a nice simple vanilla bean, with fondant flowers to match the bride’s beautiful dress. I love making vanilla bean cake, because it’s so simple, but has such a lovely flavour (providing you use good quality paste or beans). I am definitely a chocolate girl at heart, but vanilla bean brings a nice change and is so underrated.

WeddingCake2

I used the trusty vanilla bean cupcake recipe by Taste.com, which I have been using for years, for both cakes. The recipe is so versatile – the result is always great with cupcakes, and small and large layer cakes.

WeddingCake3

These cupcakes below have to be the most fun I have ever had making cakes! I was a little nervous to make these because I have never done anything like it before, but I was very happy with the results! As you probably know from my previous work, I am not a fan of fondant at all, but I had to make a slight exception for these cuties 🙂

photo 1-2

It was only the second time I have attempted bright red buttercream, because the first time, it was a nightmare! Red is such a difficult colour to get right, because you have to use sooooo much colour for it to be deep enough. However, if you add too much gel to the buttercream, it splits due to the amount of liquid = disaster. It took me two times to get it right, and the trick for me was to start with a deep pink, and then add the red to deepen the colour. If anyone has any tips for red buttercream – please let me know!! 🙂

photo 2-2

Below are some other Birthday and Christmas cupcake orders I have been lucky enough to make 🙂

photo

photo 5-2

photo 4

photo 3-2

photo 1-3

photo 2-3

Happy Christmas baking to you all, stay tuned for a delicious festive dessert soon! x

P.S. For more regular photos and updates, follow me on Instagram – @whiskitforabiscuit


Cappuccino Choc-Dip Macarons

Trust me to make macarons more difficult than they already are! I didn’t think the choc dip component of these special delights would be that tricky, but they turned out to be quite fiddly, and very messy. It was worth it though, as they were quite delicious. It’s been forever since I have made anything remotely coffee, and I tend to forget how yummy coffee flavoured desserts and sweets can be. This flavour went down really well with my family and colleagues, and even my boyfriend who loathes coffee quite enjoyed it, too. Winner! Also, apologies for the photos. I’ve been having issues with my good camera, so my iPhone had to do the job this time around.

Cappuccino Macarons

 The filling was super easy to make. It’s a basic buttercream with a bit of coffee thrown in. You just have to make sure to get the balance just right – not too much coffee, not too little. The flavour worked really well with the salted butter, and the dark chocolate dip. Even though it was messy, I’d totally do the choc dip again. It makes them just that little bit extra indulgent – perfect in the throes of Winter!

Macarons:

This recipe is Adriano Zumbo’s, and was published a couple of years ago in the Herald Sun. You will definitely need kitchen scales to make macarons.

  • 135g almond meal
  • 135g icing sugar
  • 125g caster sugar
  • 45g egg whites
  • 50g egg whites
  • 40g water

Spray four oven trays with cooking oil spray around the edges, and line with baking paper and set aside. Place almond meal and icing sugar in a large bowl, and sift together 3 times. Set aside, along with the 45g egg whites. Put 50g egg whites in a separate bowl. Heat caster sugar and water in a small saucepan, over a low-medium heat, until the sugar completely dissolves (if it slightly burns my tongue, it’s done!). If you do not want to burn your tongue, Zumbo suggests investing in a candy thermometer and heating the syrup until it reaches 118 degrees C (244 degrees F). If the syrup becomes thick and powdery in appearance, you will need to start again. This is because the sugar has been heated too much, too quickly, and instead of dissolving, it has cooked.

Begin beating the 50g egg whites with one hand, and with the other, stream the hot sugar syrup down the side of the bowl to create an italian meringue. Beat until stiff peaks form, the meringue should be thick and very glossy. Pour meringue into the almond meal, icing sugar and 45g egg whites mixture and mix roughly to combine. When combined, fold mixture together (one single stroke) until there are no air bubbles left. Make a spread across the top of the mixture, and it should disappear in about 20 seconds. Spoon mixture into a piping bag fitted with a round nozzle. If you don’t have a piping set, most supermarkets sell plastic disposable ones with a few different nozzles. You should be able to find them in the baking aisle. Lock the bag by spinning the top around 4 times. Pipe 3-4cm rounds on the oven trays prepared earlier. Tap the bottom of the trays on the kitchen bench and let them sit for about half an hour, or until mixture is dry to the touch. Don’t rush this process – you want the shells to be completely dry. Otherwise, it is unlikely that the ‘foot’ of the macaron will be formed.  Preheat your oven to 125c or 135c, fan forced.

Macarons

Place in oven and bake for 8 minutes. Turn trays around, and bake for another 9 minutes. To check if shells are cooked, gently lift one off the baking paper. If it peels of easily, they are done, if not, keep checking at 2 minute intervals. Furthermore, if you notice the tops have a slightly crumpled look after you take them out of the oven, put them back in for another couple of minutes. In my experience, this means that they are slightly undercooked and/or haven’t dried out enough before cooking. Cool on trays for 5 minutes, then peel off and place on a wire rack. The mixture should make about 12 -15 large macarons, and about 25 smaller macarons. Macarons keep really well (about 5 days in the fridge) and some say that the longer they are refrigerated, the more the flavour is likely to develop. Macarons taste best when they are stored in the fridge, then brought down to room temperature to eat.

Cappuccino Buttercream:

  • 200g salted butter, chopped and softened
  • Approx. 1 cup icing (confectioner’s) sugar
  • 1 tsp vanilla bean paste
  • Approx. 30ml espresso (you can use coffee bags or instant powdered/granule coffee as well, just make sure it’s not too watered down)

Beat butter until pale and creamy. Add vanilla bean paste and beat until combined. Gradually add sugar and coffee to butter mixture. Please be careful with adding the coffee, as you don’t want to add too much liquid at once, otherwise the butter may split and curdle. Add it slowly and keep tasting until happy with the strength and flavour.

Cappuccino Macarons1

For the choc dip, melt good quality dark chocolate in a small glass bowl/ramekin. Don’t use anything too deep because it will make it harder to dip the macaron in and out of the chocolate. I melted the chocolate gradually, as I needed it, as I didn’t want it to harden, because the dipping process did take a while. Overall, I ended up using about 200g of melts (small chocolate bits). Melt chocolate in 20 second increments in the microwave, and use a metal spoon to stir. Melting the chocolate in short  increments will keep it from burning and turning into that horrible lumpy, grainy consistency. Once chocolate is smooth and glossy, gently dip each macaron half way into the chocolate, using a teaspoon to remove the excess, and place on an oven tray lined with a fresh sheet of baking paper. Once chocolate has hardened, dust macarons with cocoa. Place in an airtight container in the refrigerator, and bring to room temperature to eat.

Cappuccino Macarons2

 Whilst the weather here in Melbourne is pretty horrible at the moment, like, ice-all-over-your-car-in-the-morning kind of horrible (Aussie’s are not used to this!), the upside is that it’s perfect macaron making weather! No humidity, no air conditioning. Take advantage of it if you can!


Have a great weekend, and Happy Baking! 🙂

Pork Belly with Apple Cider Vinegar Gravy and Roasted Apples

I can’t believe Christmas is over already! 😦 This makes me a bit sad, because it is, by far, my favourite time of the year. My favourite time from this Christmas was probably eating this pork belly. It was that good, even if I do say so myself. Pork Belly is hands down, one of my favourite foods in general. If the piece of tender meat along with the layer of juicy fat isn’t enough to whet your appetite, then the thick slab of crispy, salty crackling (that should always be there) surely must!

Served

The recipe that I used was awesome to say the least, and it will certainly be making a regular enough appearance on my kitchen table. I searched for awhile to find a recipe I was happy with, and that didn’t seem too hard, because pork belly is definitely not the easiest thing to cook. I really loved the roasted apples that went with the pork, because they were all lovely and caramelised from the butter and brown sugar I put with them in the oven, and it was a welcome change from the standard super sweet store bought apple sauce! Plus, the whole apples look much nicer on the plate, too.

Apples, butter and sage

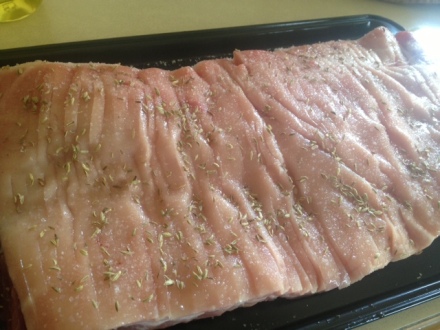
I’m not going to worry about writing the recipe out for you, because I followed it word for word from Taste.com, my go to site for awesome recipes. You can find it here. If you are going to try cooking pork belly yourself, I have a couple of tips for you. Not that I am an expert on the subject, but they certainly helped me out. Firstly, ask your butcher to score the pork rind for you, it makes preparing the meat a lot easier. Second, do not be afraid of salt! Salt will draw moisture out of the pork, and create crispy, crackly goodness. I put three layers of coarse sea salt on my rind, along with the fennel seeds called for in the recipe. Lastly, if your pork is not as crispy in the middle as it is on the edges, it is okay to leave it in the oven for longer, just turn down the temperature a little, and it is unlikely that the meat will dry out.There is a lotttttttttttt of fat in pork belly, it will keep the meat moist.

Before1

And, of course, enjoy every moment of eating that pork. I am not often happier than I am when eating freshly roasted pork crackling, as silly as it sounds. I love it!

After

I hope you all had a wonderful Christmas, and enjoy bringing in 2014! Thanks very much for reading whiskitforabiscuit’s adventures this year 🙂 See you next year. Happy Baking!

Hazelnut Jaffa Melting Moments

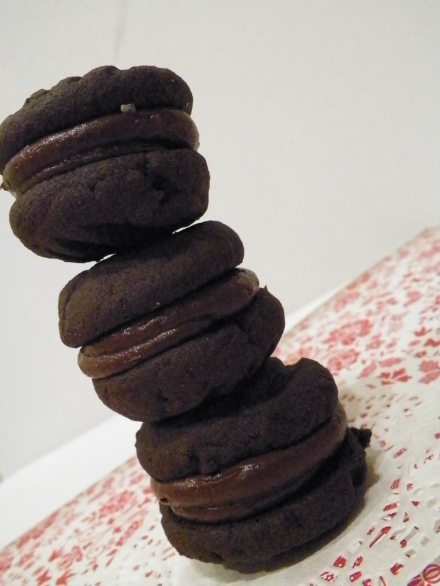
I made these little gems for the Australia’s Biggest Morning Tea which was held at work to raise money for the Cancer Council (for those who are not aware!). I just didn’t have the time, or the energy to make macarons this week, but I must admit I was pretty happy with how these melting moments, aka Yoyo’s, turned out. Melting moments were one of my favourite biscuits as a child, only second to the humble Monte Carlo. I thought I would put a bit of a spin on the traditional version, and they went down quite well with my colleagues 🙂 Well enough for one of them to order some for the weekend! Also, my apologies for the crap photos, I had no choice but to take them at night.

IG

I found a great recipe for hazelnut melting moments that used nutella in the ganache, and I thought orange would go perfectly with that. The great thing about melting moments is that they are super easy, just beat the butter and add all the dry ingredients and you’re done. Plus, they kind of look pretty, too, a bit rustic, but pretty. And they melt in your mouth…..mmmmm 🙂
000_0027
Hazelnut Jaffa Melting Moments: (adapted from Taste.com – I doubled the original recipe)
For the biscuits:
  • 250g butter, chopped and softened – not melted
  • 230g plain flour
  • 90g icing sugar mixture
  • 4 tbs cornflour
  • 4 tbs cocoa powder
  • Zest of 1 orange
  • Cocoa powder, extra to dust
For the ganache:
  • 100g dark chocolate, chopped, or choc bit
  • 50g butter, chopped and softened – not melted
  • 5 tbs Nutella (or similar hazelnut spread)
  • Zest of 1/2 an orange
  • 1/2 tsp sea salt
Preheat the oven to 160c. Line 3 baking trays with baking paper, and set aside. Using a stand mixer or electic beater, beat butter until pale and creamy. Add the flour, icing sugar mixture, cornflour, cocoa powder, orange zest and a pinch of salt, and stir with a wooden spoon until well combined. Using clean hands, roll small teaspoons of the dough into balls, and place on the prepared trays (leave about 2cm in between each biscuit). With a fork dusted in cocoa powder, gently flatten the biscuit. Sprinkle each biscuit with a small amount of salt, and bake in preheated oven for 15 minutes. Remove from the oven and let cool for 15 minutes or until biscuits have hardened.
Biscuits
To make ganache, place chocolate in a microwavable bowl and microwave for 20-30 second increments. Each time the chocolate comes out of the microwave, stir as much as possible with a metal spoon to distribute the heat evenly – sometimes the chocolate looks as though it is not melted but will begin to melt when stirred. Doing this will prevent the chocolate burning and becoming gluggy. When chocolate is completely melted, set aside for 3 minutes. Add the 50g softened butter, nutella, orange zest and salt and mix until well combined.
Little poos
Assembly:
Pair up similar sized melting moment biscuits. To fill biscuits, you can use either a piping bag or a knife. To use a piping bag, spoon ganache into a piping bag fitted with a wide round nozzle. Sandwich together with remaining biscuit. Melting moments are best stored in an airtight container at room temperature, and are best consumed within 1-3 days. Yum!
000_0028

Roast Pumpkin and Brown Sugar Blondies

If you are unsure what a blondie is, you are definitely not alone. I showed these to my Dad and got “what on earth is that?!” For those of you wondering, blondies are fairly self explanatory. A blondie is a brownie, made with white chocolate instead of milk or dark. Genius, hey? I think so, because I can assure you these delicious slices definitely taste a lotttttt better than they look.

000_0010

There are lots of great flavours you could put in a blondie. I decided to branch a little out of the ordinary, and I’m pretty happy that I did. I think pumpkin in desserts is great when done well – the humble pumpkin pie is an all time American classic. With a hint of cinnamon, salt and olive oil, the pumpkin in these blondies was quite the delicious bite. It was really subtle, but you could definitely taste it. If I were making it only for myself and other pumpkin lovers, I would have gladly put in a bit hell of a lot more.
000_0006
Pumpkin Mash:
  • 3/4 cup diced pumpkin (if you really love pumpkin you could definitely use more)
  • Olive oil, to drizzle on top
  • Cinnamon, to sprinkle
  • Salt and Pepper
Preheat oven to 190c (180c fan forced). Prepare oven tray with baking paper. Spread pumpkin out on baking paper, drizzle generously with olive oil and mix with hands to coat. Sprinkle with a tiny bit of pepper, salt and a generous amount of cinnamon. Bake for 30-40 minutes or until soft. Remove from oven and let cool slightly for 5 minutes. Place pumpkin pieces in mortar and mash with pestle until it reaches a mash-y consistency, but still a little bit chunky. Set aside.
Pumpkin
Roast Pumpkin and Brown Sugar Blondies: (adapted from Katy’s Lazy Blondies on Nigella Lawson’s forum)
  • 100g white chocolate, chopped
  • 100g butter
  • 200g brown sugar
  • 2 eggs
  • 110g plain flour
  • 100g additional white chocolate chips
  •  roast pumpkin mash

Blondies

Prepare a slice tin (approx. 20cm long) by spraying with olive oil spray or butter and lining with non-stick baking paper. In a microwavable bowl, heat 100g chocolate and butter until melted. For me, this took about a minute and I still had a few lumps, and being a bit silly I heated it for an extra 10 seconds and it curdled a little, but it didn’t make a difference at all to the final product 🙂 Set aside. In a separate large bowl, beat brown sugar and eggs until well combined. Slowly add the chocolate and butter mixture. Stir in the flour gently until fully incorporated. Mix in the additional chocolate chips and the pumpkin mash, and ensure they are evenly distributed. Pour mixture into prepared tin, sprinkle with cinnamon and bake in preheated oven for 30-35 minutes. If you like your brownies/blondies gooey, you can probably take them out a little earlier. Just keep testing with a skewer until you are happy 🙂 Set tin aside to cool, then slice into 15 pieces. Store and serve at room temperature, but they are also delicious warmed up!
000_0009
If you have never tried, or have never heard of blondies, I stongly urge that you familiarise yourself 🙂 You won’t regret it!

Salted Butter Popcorn Macarons

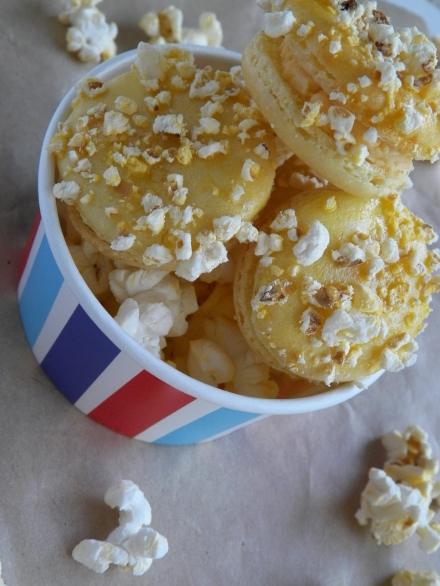
Macs are back! This makes me very happy. Very happy indeed. As you would have seen earlier in the year, the last time I made macarons, it didn’t go so well. These still weren’t perfect, that’s for sure, but they do look like macarons, and they taste pretty amazeballs. And that’s all I really care about 🙂

IG

This mac flavour is from Zumbo’s Fantasy Land of Macarons (p. 57), and the recipe had intrigued me for a quite a while, but I was just a bit scared to give them a go. I’m very glad I did though, because they were definitely worth it. Surprising or not, they taste exactly like a big mouthful of butter popcorn, just with a few different textures. I am a massive fan of sweets with salt, so these were a major winner in my eyes! The only thing I think I would do differently next time, would be to blitz the popcorn a bit more, because I had some big chunky bits on my shells, so they didn’t look quite as dainty as Zumbo the Great’s.
000_0010

Macarons:

This recipe is Adriano Zumbo’s, and was published a couple of years ago in the Herald Sun. You will definitely need kitchen scales to make macarons.

  • 135g almond meal
  • 135g icing sugar
  • 125g caster sugar
  • 45g egg whites
  • 50g egg whites
  • 40g water
  • 1/4 tsp colouring gel, yellow

Spray four oven trays with cooking oil spray around the edges, and line with baking paper and set aside. Place almond meal and icing sugar in a large bowl, and sift together 3 times. Set aside, along with the 45g egg whites. Put 50g egg whites in a separate bowl. Heat caster sugar and water in a small saucepan, over a low-medium heat, until the sugar completely dissolves (if it slightly burns my tongue, it’s done!). If you do not want to burn your tongue, Zumbo suggests investing in a candy thermometer and heating the syrup until it reaches 118 degrees C (244 degrees F). If the syrup becomes thick and powdery in appearance, you will need to start again. This is because the sugar has been heated too much, too quickly, and instead of dissolving, it has cooked.

Begin beating the 50g egg whites with one hand, and with the other, stream the hot sugar syrup down the side of the bowl to create an italian meringue. Beat until stiff peaks form, the meringue should be thick and very glossy. If you want to add flavouring/colouring, now’s your moment. So add the colouring now. Just lightly beat them into the meringue. Pour meringue into the almond meal, icing sugar and 45g egg whites mixture and mix roughly to combine. When combined, fold mixture together (one single stroke) until there are no air bubbles left. Make a spread across the top of the mixture, and it should disappear in about 20 seconds. Spoon mixture into a piping bag fitted with a round nozzle. (If you don’t have a piping bag set, most supermarkets sell plastic ones, they are Multix brand, in an orange box and contain 5 piping bags with a few different nozzles, plus they’re only about $3. You should be able to find them in the baking aisle). Lock the bag by spinning the top around 4 times. Pipe 3-4cm rounds on the oven trays prepared earlier. Tap the bottom of the trays on the kitchen bench and let them sit for about half an hour, or until mixture is dry to the touch. Meanwhile, preheat the oven to 145c (135c fan forced).

Making

Place in oven and bake for 16-20 minutes. Check macarons at 16 minutes, and to test if they are cooked, pull a macaron off the baking paper. If it is stuck, keep cooking and checking regularly. Cool on trays for 5 minutes, then peel off and place on a wire rack. The mixture should make about 12 -15 large macarons, and about 25 smaller macarons. Macarons keep really well (about 5 days in the fridge) and some say that the longer they are refrigerated, the more the flavour is likely to develop. Macarons taste best when they are stored in the fridge, then brought down to room temperature to eat.

000_0013

Buttercream: (from Zumbarons: A Fantasy Land of Macarons, p.57.)
(I still made the full recipe, even though it could have filled double the shells I had. I am sure I will use it for something…maybe eating it from the bowl…maybe…)
  • 100g caster sugar
  • 38g water
  • 75g lightly beaten egg
  • 45g egg yolks
  • 200g butter, chopped and softened
  • Sea salt, to taste
You will need digital scales and a thermometer to make this buttercream. The thermometer I use is just an ordinary one used for coffee. You can find them at homeware or discount stores.
Beat the butter until pale and creamy, about 4 minutes. Put the egg and egg yolks together in a large bowl, and set aside. In a small saucepan, combine the sugar and water, and cook over a low-medium heat until sugar dissolves. Turn the heat up to medium, and cook mixture until it reaches 121c. Begin beating the eggs for a minute or so, and then very slowly pour the sugar syrup down the side of the bowl into the egg mixture. Continue whisking the mixture until it is thick, and cooled to 50c. A teaspoon at a time, add the butter to the egg and sugar mixture, and mix well after each addition to ensure there is no lumps. Once all the butter has been incorporated, fold in the salt to taste. It should look a little something like this:
Buttercream
Assembly:
Cook the microwave popcorn according to instructions. Blitz approximately half of the popcorn in a food processor, until they look like small chunky crumbs. Place popcorn on a large plate or in a shallow bowl. Pair up macaron shells. Spoon buttercream into a piping bag fitted with a round nozzle, and pipe 1/2 tsp onto shells, and sandwich with another. Melt 1 (if you want to brush 1 shell) or 2 tablespoons of butter (if you want to brush both shells) and completely brush the shell/s with the melted butter.
000_0005
Immediately place buttered shell/s into the popcorn and place on an oven tray with baking paper. Once you have completed all of the macarons, place in fridge to set overnight. This will help develop the flavour. After 24 hours or so, place macarons in airtight container if not serving immediately. Store in fridge, and bring down to room temperature to serve.
000_0001

Caramel au beurre sale macarons (Salted Butter Caramel Macarons)

Caramel has always been my favourite dessert flavour. McDonalds sundaes, always caramel, milkshakes, always caramel. So when the idea of salted caramel became quite the phenomenon, I was delighted. Salt and Caramel are the best flavour combination, and when coupled with butter, really, how can one go wrong? Surprisingly, I had never tried making a real, homemade caramel. Although now that I have, I definitely think it will be a regular occurrence! So, here are my Caramel au beurre sale` macarons, my Salted Butter Caramel macarons.

The recipe I used for the caramel was another of Zumbo’s wonders. It is a two-step process and does take quite a lot of effort, but trust me, if you are a caramel lover, you will be in heaven, I guarantee.

Macarons:

This recipe is Adriano Zumbo’s, and was published a couple of years ago in the Herald Sun. You will definitely need kitchen scales to make macarons.

  • 135g almond meal
  • 135g icing sugar
  • 125g caster sugar
  • 45g egg whites
  • 50g egg whites
  • 40g water
  • 1/2 tsp good quality cocoa

Preheat oven to 170c (160c fan forced). Spray four oven trays with cooking oil spray around the edges, and line with baking paper and set aside. Place almond meal and icing sugar in a large bowl, and sift together 3 times. Set aside, along with the 45g egg whites. Put 50g egg whites in a separate bowl. Heat caster sugar and water in a small saucepan, over a low-medium heat, until the sugar completely dissolves (if it slightly burns my tongue, it’s done!). If you do not want to burn your tongue, Zumbo suggests investing in a candy thermometer and heating the syrup until it reaches 118 degrees C (244 degrees F). If the syrup becomes thick and powdery in appearance, you will need to start again. This is because the sugar has been heated too much, too quickly, and instead of dissolving, it has cooked.

Begin beating the 50g egg whites with one hand, and with the other, stream the hot sugar syrup down the side of the bowl to create an italian meringue. Beat until stiff peaks form, the meringue should be thick and very glossy. If you want to add flavouring/colouring, now’s your moment. So add the cocoa now. Just lightly beat them into the meringue. Pour meringue into the almond meal, icing sugar and 45g egg whites mixture and mix roughly to combine. When combined, fold mixture together (one single stroke) until there are no air bubbles left. Make a spread across the top of the mixture, and it should disappear in about 20 seconds. Spoon mixture into a piping bag fitted with a round nozzle. (If you don’t have a piping bag set, most supermarkets sell plastic ones, they are Multix brand, in an orange box and contain 5 piping bags with a few different nozzles, plus they’re only about $3. You should be able to find them in the baking aisle). Lock the bag by spinning the top around 4 times. Pipe 3-4cm rounds on the oven trays prepared earlier. Tap the bottom of the trays on the kitchen bench, and let them sit for about half an hour, or until mixture is dry to the touch.

Place in oven and bake for 8 minutes. Turn tray around in the oven and bake for another 7 minutes. To test, pull a macaron off the baking paper. If it is stuck, keep cooking and checking regularly. Cool on trays for 5 minutes, then peel off and place on a wire rack.

The mixture should make about 12 -15 large macarons, and about 25 smaller macarons. Macarons keep really well (about 5 days in the fridge) and some say that the longer they are refrigerated, the more the flavour is likely to develop. Macarons taste best when they are stored in the fridge, then brought down to room temperature to eat.

Caramel Maison: (this recipe is on page 245 of Adriano Zumbo’s cookbook)

  • 220g pouring (whipping) cream (35% fat)
  • 1 vanilla bean, split and seeds scraped (I used 1 tsp vanilla bean paste)
  • 120g water (this is just under 1 cup)
  • 300g caster (white) sugar
  • 60g liquid glucose (available at most supermarkets)

Place the cream and vanilla in a small saucepan over a medium heat and bring to the boil. Then, remove from the heat, and remove the vanilla bean if you are using one. In the meantime, place the water, sugar and glucose in a larger saucepan over a low-medium heat and cook until the glucose and sugar are fully dissolved, stirring occasionally. Zumbo’s says to use a clean pastry brush dipped in water to clean the sides of the saucepan in order to avoid crystalisation, however you can also just place the saucepan in really hot water with suds just after use and the sugar will melt off really easily. Increase the heat to medium, and cook the sugar mixture until it reaches a dark amber colour. This does take quite a while, and I was getting worried that mine would not work, but persistence is key here, it will eventually darken after 6-7 minutes. Very carefully stir the cream mixture into the sugar mixture slowly – be very careful because it spits and releases lot of heat. I found the best way to do this was with a spoon with a very long handle, as you want to keep your face as far away from the saucepan whilst it is spitting. If you don’t have a spoon with a super long handle, just add the cream really slowly and try to stir as best you can! Keep stirring as much as you can until the caramel settles down, then stir until completely smooth. Transfer to a bowl, let it cool to room temperature, cover with plastic wrap and place in the fridge.

Caramel Buttercream: (this recipe is on page 42 of Zumbo’s cookbook)

  • 150g unsalted butter, chopped and softened
  • 300g caramel maison
  • 4.5g sea salt flakes

Place the butter in a bowl, and beat until light and fluffy. Warm the caramel maison in the microwave until it reaches a pouring consistency (mine needed 1 min, 20 seconds on high as it was in the fridge overnight), however, just warm it in stages to prevent burning the caramel. With the beater running slowly, add the caramel maison to the butter and continue mixing until thick. Once I had added about half of my caramel, I got a bit worried because it looked like it was curdling, however as I kept adding the caramel, it began to thicken up. So don’t freak out until you have added all of the caramel to the butter 🙂 Once you have added all of the caramel, fold in the salt. I did not measure my salt, as I used a shaker. So if you too are using a shaker, just salt to taste.

Place caramel buttercream in a piping bag with a round nozzle, and pipe 1/2 – 3/4 tsp onto a macaron shell, and sandwich with another. Place in refrigerator to set. Bring macarons down to room temperature to serve.

If you are not up to making macarons just yet, this caramel buttercream could be used for so many different things. It would be great mixed into a hot chocolate, in a milkshake, or as a topping over ice cream. You could also use it as a tart filling, and even as icing on a cupcake. Mmm…I’m getting hungry just thinking about them all!

Have a great weekend! X