A Wonderful Wizard of Oz Party!

Last Sunday, it was my little sister’s wonderful Wizard of Oz party. Well, it was more of a production actually, as our house was temporarily taken over by Oz paraphernalia and resembled quite the tornado. It was a lot of fun, and the amount of work my parents put into making the place look like it was straight out of the movie set was astronomical. As was the amount of time I spent in the kitchen! I made so many little bits and pieces I thought I would dedicate a whole blog post to it 🙂

100_0067

000_0049

100_0063

My ‘Emerald City Macarons’ – Redskin flavoured, with edible gold glitter. This flavour was SO delicious!

000_0036

100_0062

‘Yellow Bricks’ – aka Salted Caramel Rice Bubble Slice

100_0057

000_0048

100_0061

Unfortunately, I did not make these. I had never tried a cake pop before, I have heard they are very difficult to make. These ones not only look amazing, but tasted it, too. Inside were gooey, chocolatey, fudgey balls of cake. YUM!

100_0072

Rainbow lemonade for the kiddies 🙂

100_0052

The cake I made – Somewhere Over The Rainbow Layer Cake, with Yellow Brick Buttercream and a Macaron Emerald City.

100_0074

100_0075

This was the same recipe I used to create last year’s Rainbow Cake. It’s not at all difficult, it just takes a lot of time. The end result is well worth it, though. Especially when kids are involved!

100_0066

Follow the Yellow Brick Road…

Advertisement

Jaffa Ombre Layer Cake

One thing is fairly obvious: I love cake. I try not to eat tooo much cake, but with this one, it was difficult to stay away. I was convinced this cake would be super-rich, but surprisingly, it was quite light. It was certainly still decadent, and I will definitely be making this one again. I know I say this with a lot of things, but I’ve had the idea of making this cake in my head for quite some time. My Mum’s birthday seemed like the perfect occasion – as she (and my Dad) both love the Jaffa Macarons, and I haven’t done ombre, or any type of layer cake really, for a while.

Follow me on Instragram - GemmaAsh

 The recipe I used for the orange cake is from the always amazing Raspberri Cupcakes. It is a beautfiul cake, not too buttery, and the zest from the oraange was intense, but in a great way. This particular post – Orange Cake with Fruit Tingles Icing, is one of my favourite posts from Raspberri Cupcakes, and was one of the recipes I was inspired by, to begin blogging myself (see Musk Layer Cake + Musky Macarons)!

000_0001
Orange Cake: (adapted from Raspberri Cupcakes)
  • 165g butter
  • 3/4 cup caster (white) sugar
  • 3 eggs
  • 2 cups self-raising flour
  • Zest and juice from 1 1/2 large oranges (I had about 1/3 cup of juice)
  • Wilton’s colouring gel, orange
Preheat the oven to 180c (170c) fan forced. Line a 22cm springform cake tin with baking paper and set aside. Beat butter until pale and fluffy. Gradually add sugar. Beat eggs in one at a time until well combined. Stir in the orange zest and juice and flour, until well combined. To divide cake into batches, weigh mixture and divide the number by 3. Pour into three separate, clean bowls. Add small amounts of colouring gel to mixtures, until you have 3 clearly different shades of orange. Pour one batch of mixture into cake tin, and spread with a spoon so it is nice and even. I had a little bit of trouble with this because the cakes were so small, but they were all fine in the end. If you have more than one cake tin, it is okay to put two on the top shelf of your oven, if they fit. Bake cakes for 10-15 mintutes, or until a skewer comes out clean. Begin checking the cakes from 10 minutes.
Let cakes cool in the tin for 10-15 minutes. If you are using the cakes straight away, let them cool completely on a wire rack, and then begin layering and decorating. If not, gently wrap cakes in cling wrap tightly – be very careful as the layers will be quite thin and fragile. Place in fridge overnight. It is best to bake cakes the day before, or on the day of use. You could probably freeze them if you were really time poor, however, sometimes I find that cakes can taste a bit strange when they have been frozen!
000_0006
Jaffa Ganache:
This is the same ganache I used for the Jaffa Swirl Macarons, however I just quadrupled it.
  • 400g good quality dark chocolate, chopped
  • 2 cups thickened cream
  • Zest of 2 1/2 oranges
Place all ingredients in a medium saucepan and stir over a low heat until smooth. If using the next day, cover and refrigerate, then take out an hour or two before use. If using on the same day, cover and refrigerate for about 30 mins, or until ganache has slightly set. I probably made my ganache a little too late for when I needed the cake, so you can see in the pictures that it was still quite runny. I tried to make the best of it though, and exposed the colours of the cake by letting the ganache drip around the side. I originally wanted to cover the cake completely in ganache, but I think it still looked nice.
JaffaCake
 
Assembly:
Place the bottom cake on a large cake stand or a cake board. With a round-edged knife, spread a layer of ganache on the top, and layer with the second cake. Repeat the process, and cover the cake completely with the ganache. If the ganache is too hard, dip the knife in warm water – it will make it a lot easier to spread out.
000_0010
You can decorate the cake however you like – you don’t even have to decorate it thought, if you don’t want to. You could use cachous, glitter, you could pipe swirls of ganche – anything you like! As you can see here, I went for choc-dipped orange segments with a tiny bit of gold glitter.
000_0003

Salted Caramel Bejewelled Profiteroles

If you are a regular reader of this blog, you will know how much I absolutely adore salted caramel. I have made choux pastry for eclairs twice before – once when we added 2 tablespoons of salt to the mixture (yes, that’s what the crazy recipe said!), and the other time, I undercooked them and they looked like little sunken balls of pancake. So, logically, I decided I would give them another go for Christmas Day lunch. Ta da 🙂

Follow me on Instagram - GemmaAsh

Profiteroles

They worked! Thank goodness they did, because the world probably would have ended if they hadn’t. Once again, Taste.com certainly did not let me down, and I will definitely be using this recipe many times over. I already have used it since actually, and the result was just as great. So many people seem to think that choux pastry is a difficult thing to get right, and it can be if you get a little confused or don’t follow the recipe word for word, which can be really easy to do. If you are going to give this recipe a go, make sure to sit down and read it through before you make it – and understand each step. Otherwise, not only can it be really dishearteneing, it’s also a waste of quality ingredients and money 😦 The good news is though, once you do understand the recipe and know what to do from experience, your cooking will be much better for it 🙂 There’s my words of wisdom for the day!

Profiteroles1

Here is the recipe for Choux Pastry. The only part is, it definitely does not make 25-30 profiteroles like it says. It makes 18 at most, so if you want more, simply double the recipe.

Choux pastry

Before and after

Caramel Maison: (from p. 242 of Adriano Zumbo’s book, Zumbo):

•220g pouring (whipping) cream (35% fat)
•1 vanilla bean, split and seeds scraped (I used 1 tsp vanilla bean paste)
•120g water (this is just under 1 cup)
•300g caster (white) sugar
•60g liquid glucose (available at most supermarkets)

Place the cream and vanilla in a small saucepan over a medium heat and bring to the boil. Then, remove from the heat, and remove the vanilla bean if you are using one. In the meantime, place the water, sugar and glucose in a larger saucepan over a low-medium heat and cook until the glucose and sugar are fully dissolved, stirring occasionally. Zumbo’s says to use a clean pastry brush dipped in water to clean the sides of the saucepan in order to avoid crystalisation, however you can also just place the saucepan in really hot water with suds just after use and the sugar will melt off really easily. Increase the heat to medium, and cook the sugar mixture until it reaches a dark amber colour. This does take quite a while, and I was getting worried that mine would not work, but persistence is key here, it will eventually darken after 6-7 minutes. Very carefully stir the cream mixture into the sugar mixture slowly – be very careful because it spits and releases lot of heat. I found the best way to do this was with a spoon with a very long handle, as you want to keep your face as far away from the saucepan whilst it is spitting. If you don’t have a spoon with a super long handle, just add the cream really slowly and try to stir as best you can! Keep stirring as much as you can until the caramel settles down, then stir until completely smooth. Transfer to a bowl, let it cool to room temperature, cover with plastic wrap and place in the fridge.

Making the caramel

Caramel Buttercream: (this recipe is on page 42 of Zumbo’s cookbook)
•150g unsalted butter, chopped and softened
•300g caramel maison
•4.5g sea salt flakes

Place the butter in a bowl, and beat until light and fluffy. Warm the caramel maison in the microwave until it reaches a pouring consistency (mine needed 1 min, 20 seconds on high as it was in the fridge overnight), however, just warm it in stages to prevent burning the caramel. With the beater running slowly, add the caramel maison to the butter and continue mixing until thick. Once I had added about half of my caramel, I got a bit worried because it looked like it was curdling, however as I kept adding the caramel, it began to thicken up. So don’t freak out until you have added all of the caramel to the butter. Once you have added all of the caramel, fold in the salt. I did not measure my salt, as I used a shaker. So if you too are using a shaker, just salt to taste.

Assembly:

Place the caramel in piping bag fitted with a small round nozzle. Gently pierce the bottom of the profiteroles with piping nozzle, so that the nozzle itself is inside the profiterole. Squeeze bag until profiterole feels heavier in your hand, and the caramel is slightly coming out of the profiterole. Gently scrape the profiterole on the edge of a bowl to get rid of the excess caramel. Repeat with other profiteroles. If you are not eating them straight away, refrigerate them until they are ready to serve.

Profits

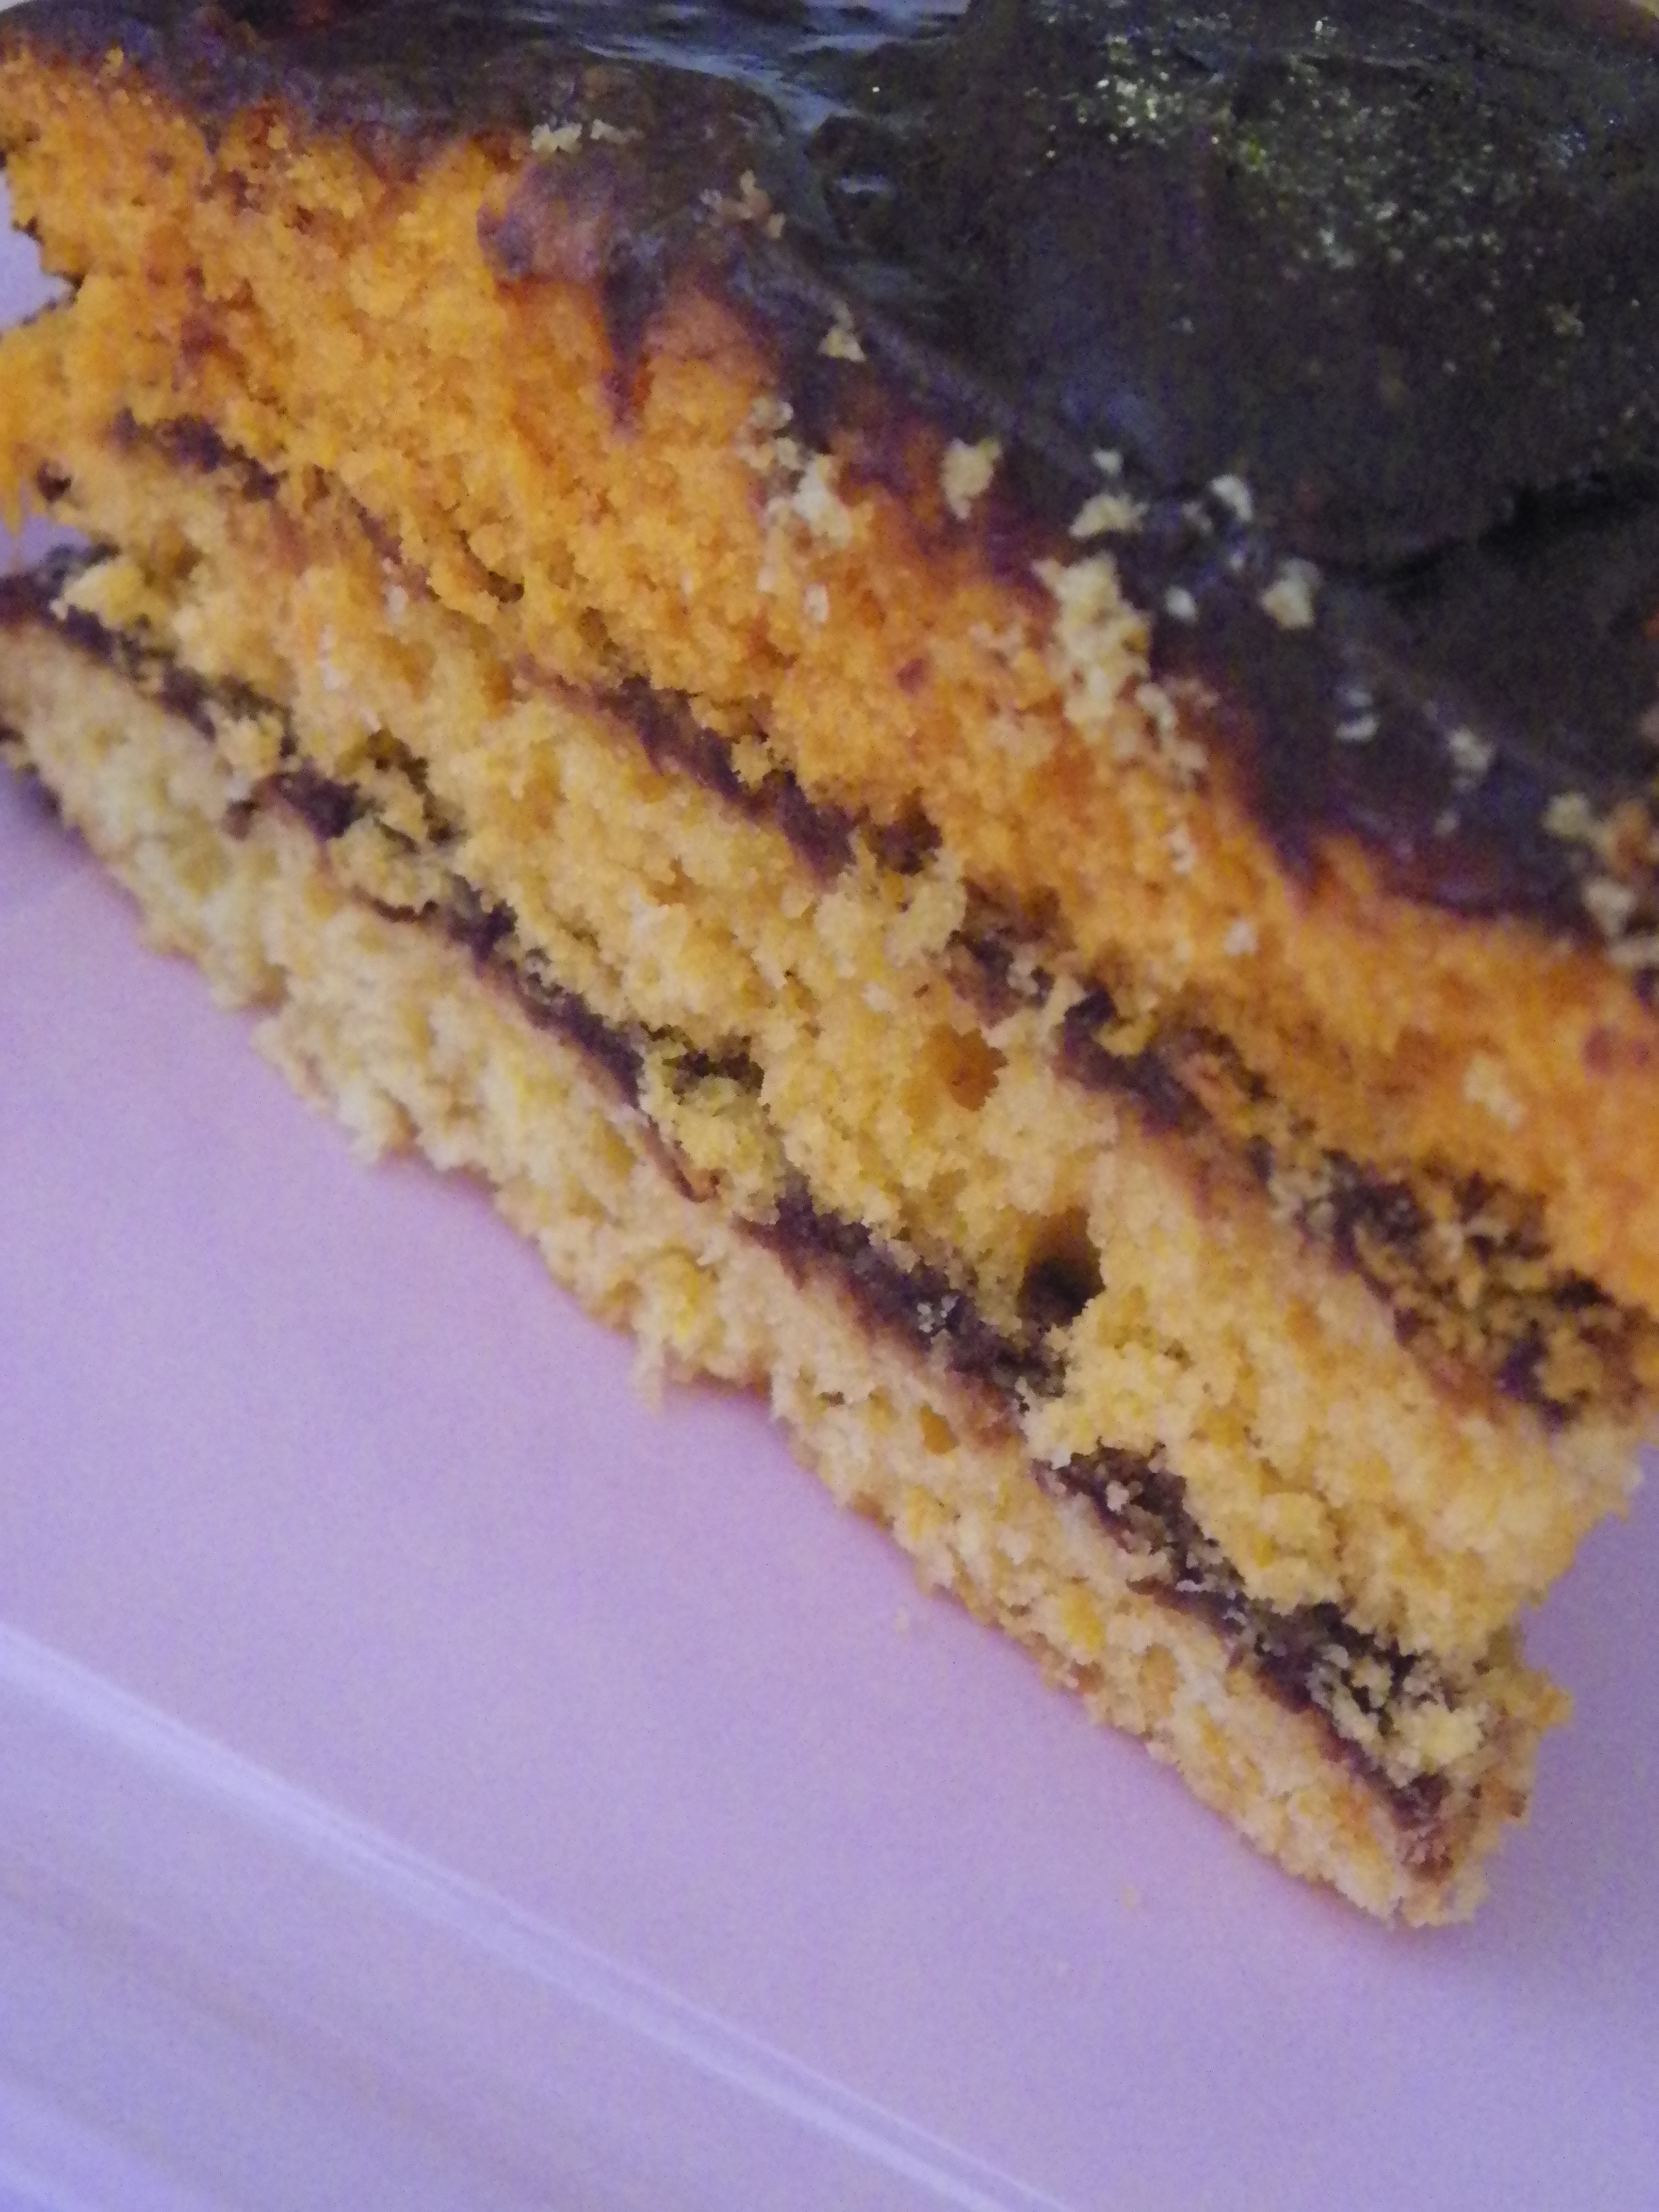
You can decorate the profiteroles however you wish! You can see that in both cases I dipped mine in melted chocolate, and sprinkled them with gold edible glitter and cachous. For the ones with the white chocolate, I added some caramel popcorn dipped in chocolate. Yum!

NYE profiteroles

Yum!

Follow me on Instagram – GemmaAsh! X

Cupcake Madness!

The vast majority of my time in the past week has been spent making over 100 cupcakes, and a heck of a lot of buttercream! 100 may not seem like much, but when you have never done that many before, it is certainly a challenge. But lots of fun too!

I had to make three different flavours for a 21st order – chocolate, vanilla bean and red velvet. The chocolate ones had the yellow buttercream, the red velvet ones had the bright orange buttercream and the vanilla bean ones had the bright red buttercream, and all cakes were sprinkled with gold glitter.

I was really happy with how all the cakes turned out, and the colours of the buttercream were really effective. The vanilla bean with the red icing was my favourite to look at because it was so bright and the gold  glitter looked great on it.

I’m not going to write out the recipes for this one, but here are the links for the Red Velvet and the Chocolate cupcakes. I used a different recipe for the vanilla bean, and I will post that up when I make them again soon 🙂

TIP –   when you want to make bright red buttercream, you need to use soooooooooo much colouring gel to make it intense. If you are doubling or tripling the recipe, colour it in batches and then mix them because it is a lot easier to control the colour that way. I tripled my recipe, and needed a good 3 1/2 tubs of Wilton’s gel (Rojo red I think it was). I was really unhappy with mine at first, but weirdly enough overnight in the fridge it brightened from a crimson red to an intense red! This is what it was like first:


And after:

And these were just some circusy-themed ones I made for my sister and her friends 🙂