Pomegranate, Salted Caramel and White Chocolate Pan Cookie

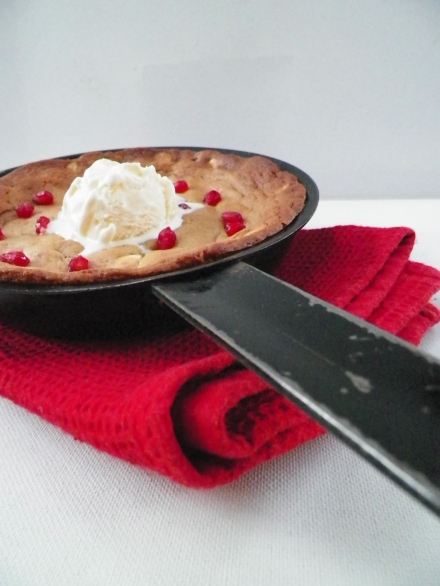
Delicious. Is just what this delightful pan cookie was. I have been wanting to make one of these for a while now, and it certainly did not disappoint. Crispy on the outside, soft and gooey on the inside, plus the addition of creamy salted caramel = YUM!

000_0005

 The combination of the sweet white chocolate, salty caramel, and the fresh little pops of the pomegranate seeds were a really great mix together. However, I also made smaller cookies on their own, which were delicious, but very, very soft, due to the amount of salted caramel I added! This combination is perfect for a pan cookie, topped with more pomegranate and some ice cream. Plus, these are so easy to make, and are a great dessert to share, or not to share 😉

000_0006

 Pomegranate, Salted Caramel and White Chocolate Pan Cookie: 

Makes 1 pan cookie, and approximately 12 smaller cookies. You could halve this recipe for the pan cookie only.

  • 125g butter, chopped and softened, not melted
  • 1/2 cup brown sugar, tightly packed
  • 1/2 cup castor (white) sugar
  • ½ tsp vanilla bean paste/natural extract
  • 1 egg
  • 1 3/4  cup self-raising flour
  • Pinch of sea salt
  • 250g good quality white choc chips
  • 2 tbs salted caramel (I used a homemade one, but you could also use Dulce de Leche, Nestle Top ‘N’ Fill Caramel)
  • Seeds of ½ a pomegranate

Preheat the oven to 160c. Grease a small non-stick pan (I used a 17cm pan) with butter, and set aside. Beat the butter and sugar together until pale and creamy, approximately 3-4 minutes. Add the vanilla, and the eggs, one at a time until well combined. Stir in the flour with a wooden spoon, until completely mixed. Add the chocolate, salted caramel and pomegranate seeds, and mix well. Spoon mixture into prepared pan, filling it to the top, and smooth over mixture with a spoon. Place in pre-heated oven, and bake for 15-20 minutes, or until golden. Let cool for 5 minutes, and top with more pomegranate seeds and ice cream. Enjoy!

000_0004

FYI – you could easily use a bigger or smaller pan for this recipe, you would just need to adjust the cooking time, and keep an eye out for when the cookie is golden, or to your liking 🙂 Also, sorry for the crappy photos. I had to quickly snap away before the sun went down!

000_0008

Halloween Spooky Spider Chocolate Oreos

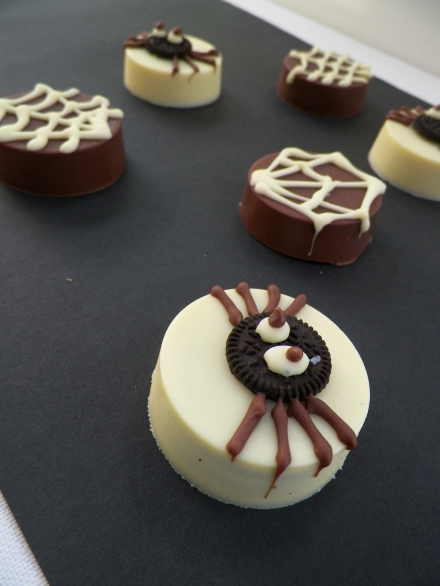
Can you believe it’s Halloween already?! I’m a little bit excited about this, as it means it’s getting nice and close to the best time of year – Christmas! Halloween is not really a huge deal in Australia, although it seems to have become more popular in recent years. This is only the second post I’ve ever done on Halloween, and I’m definitely looking forward to doing more. There are some pretty cool baking ideas I found on Pinterest for Halloween. People are so creative. These Oreos, however, are probably not the most creative. They are, in fact, very easy to make and insanely delicious.


000_0005

I am a little bit obsessed with chocolate covered Oreos at the moment. I see stacks of them on Instagram, and some people make them look  like the most amazing little morsels of sparkly treasure, and you would never know that a humble Oreo biscuit was nestled inside. I have officially been inspired. Yum.

000_0002

So, why not cover an Oreo with a totally justifiable amount of chocolate, and then whack another Oreo on top? Just as well I could turn them into spiders, and that it’s coincidentally the week of Halloween!

000_0004

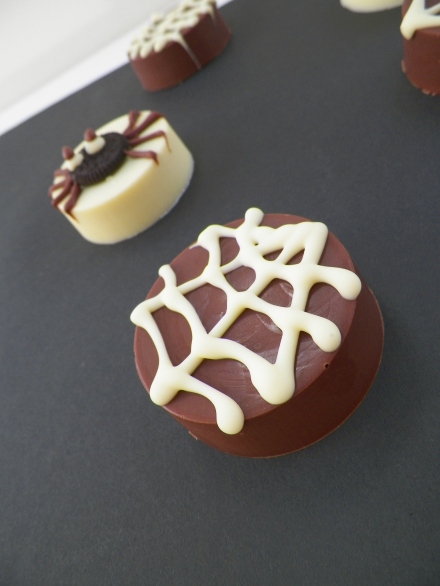
My chocolate piping skills are very obviously flawed! I can’t say I have really ever piped melted chocolate before, and it’s really not the easiest thing to do. The designs on these Oreos definitely could have been cleaner, but I don’t mind too much as the taste totally makes up for it! There is no recipe for these Oreos, it’s pretty self explanatory. A little bit of chocolate in the mould, the Oreo, and more chocolate. You just have to have the right moulds (I got mine from Baking Pleasures).

These Oreos are awesome. They are quick and easy to make, a great idea for cooking with kids and super versatiile – you can make them any colour and design them however you wish, and best of all, they are super delicious.

Happy Halloweeeeeeeeeeen!

000_0006

Top Deck Mini Cupcakes

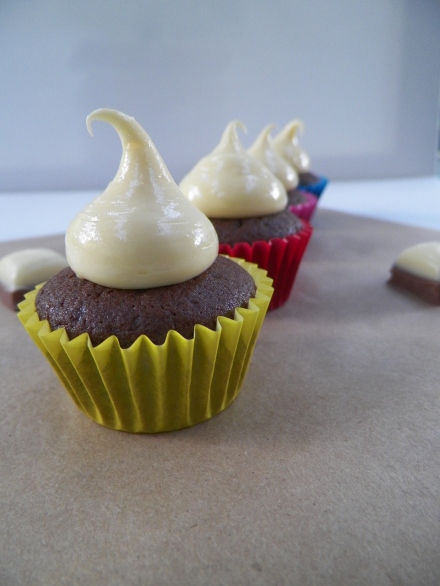
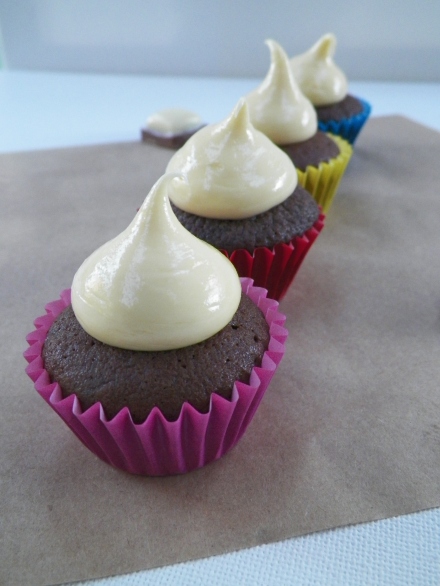
It’s been a busy few weeks. I have been popping cupcakes out of my kitchen like no tomorrow! So, here, I present to you, Top Deck Mini Cupcakes. White Chocolate, and Dark Chocolate. It’s that simple.

000_0006

 These cupcakes are super easy to make, and are very delicious. I used the extremely trustworthy chocolate cupcake recipe that never lets me down, and my own white chocolate ganache to top them with. White Chocolate ganache is something I have always struggled to make. I find it is always runny, and I usually have to add a truckload of butter before it becomes somewhat of a pipe-able consistency. Nevertheless, it was yum!

000_0010

Chocolate Cupcakes:  (from Taste.com.au) 

Makes approx. 55 mini cupcakes

  • 100g good quality dark chocolate, chopped
  • 1 cup water
  • 125g butter, chopped and softened, not melted
  • 1 1/4 cups brown sugar
  • 3 eggs
  • 1 1/2 cups self raising flour
  • 1/2 cup plain flour
  • 1/4 cup cocoa

Line trays with cupcake cases, and preheat oven to 160c, fan forced (170c regular). Place the chocolate and water together in a small saucepan, and place over a low heat, stirring with a metal spoon until chocolate is melted and mixture is smooth. Set aside. Beat butter and sugar together until pale and creamy, approximately 3-4 minutes. Add eggs, one at a time, and mix until each is well combined. Place flours and cocoa in a separate bowl, and stir to combine. Add the flour mixture to the butter, sugar and egg mixture and stir with a wooden spoon. Once combined, add the melted chocolate mixture and continue to stir with a wooden spoon until mixed. If the mixture is a little runny, leave it to settle for 10 minutes or so. Spoon mixture into cupcake cases, and bake for 15-18 minutes in preheated oven until cooked, or until a skewer comes out of the cake clean. Leave in trays to cool for 5 minutes, and transfer to a wire rack.

000_0013

 White Chocolate Ganache:

As I mentioned earlier, this is certainly not a perfect recipe. It took a lot of trial and error before I was happy with the taste and consistency. I would recommend making the white chocolate and cream mixture at least a few hours before, or even the day before.


  • 300g good quality white chocolate, chopped
  • 1/3 cup thickened cream
  • 300g butter, softened, not melted

Place the white chocolate and the cream into a small saucepan, and stir with a metal spoon, over a low heat, until melted and smooth. Pour mixture into a heat proof bowl, and place in refrigerator. Beat butter until pale and creamy. Depending on the consistency, you may need to put the white chocolate and cream mixture in the microwave for 10-15 seconds. Gradually add the mixture to the butter, and beat until combined.

000_0008

Spoon the ganache into a piping bag fitted with a small nozzle of your choice. Pipe ganache onto mini cupcakes. To store, place cupcakes in an airtight container, in a cool, dry place. Cupcakes will last approximately 2-3 days. Enjoy!

White Chocolate and Maple Macadamia Baked Cheesecake with Candied Bacon

Happy Birthday to me! I decided to make myself a cake resembling a pizza/cheese and bacon roll this year. Although, it was not my first intention, I’m quite happy with how it looks, it’s a little rustic, not the prettiest, but it tastes good 😉 I was very excited about this cake, as it was something I had in my mind for a while, and I thought, what better occasion to make it than my own birthday! I am a very big fan of baked cheesecakes, and I have made a few in my time, but the only thing that puts me off baking them more often is that they are time consuming, and soooo expensive. Especially when you put a big packet of macadamias in it, and real maple syrup, which costs a small fortune on its own. Nonetheless, it was very delicious.

cheesecake

I have used this recipe before to make a raspberry and white chocolate cheesecake, and it’s really great. You can play around with flavours, too, which is always good. Aside from the cheesecake itself, I kind of made the other bits up in my head, which is a sure fire sign of a great recipe!

cheesecake1

Baked Cheesecake: (adapted from Taste.com.au)

  • Melted butter, to grease tin
  • 250g plain, sweet biscuits (I used Arnott’s plain Teddy Bears)
  • 100g hazelnut meal
  • 150g butter, melted
  • 3 x 250g cream cheese, at room temperature
  • 2/3 cup caster (white) sugar
  • 1 tsp vanilla bean paste/vanilla extract
  • 3 eggs
  • 250g block good quality white chocolate, chopped
  • 250g macadamias, quartered
  • 1/4 cup real maple syrup
  • 1/3 cup real maple syrup
  • 1 cup streaky bacon, chopped into rough 1cm pieces

Grease 22cm springform baking tin with butter. Use a food processor to crush biscuits until they resemble fine crumbs. Add the hazelnut meal and melted butter and process until all well combined. Place mixture into prepared tin, and spread evenly. You can use a straight sided glass to evenly spread the base mixture evenly around tin. Cover with cling wrap and place in refrigerator for 30 minutes. If you are not using base straight away, just make sure you take it out 30-40 minutes prior to baking.

Preheat oven to 160c. Beat cream cheese, sugar and vanilla together until well combined and smooth. Add the eggs, one at a time, and mix until each is well incorporated. Using a wooden spoon, gently stir in the white chocolate, macadamias and 1/4 cup maple syrup. Pour mixture into prepared tin, and bake for 1 hour, or until just set in the centre. For me, 1 hour was perfect, but you can wobble the tin a little to test if the cake is cooked throughout. For 2 hours, leave the cheesecake in the oven, with the door ajar. I just a wooden spoon to keep the door open. This will prevent the top of the cheesecake from cracking.

Place bacon and 1/3 cup maple syrup in a bowl together and mix until well coated. Spread evenly on an oven tray lined with non-stick baking paper, and bake for approximately 20 minutes on 180c, or until bacon is crispy and sticky. Let bacon cool on tray, then spread across the top of the cheesecake. If not serving the cheesecake straight away, ensure it is stored in the rerigerator, and brought down to room temperature to eat. If the cake is still cold, it is a nightmare to cut – I made this mistake!

cheesecake4

One of my favourite parts of this cake was the candied bacon. People often balk at the idea, but it really works well and the maple/bacon combination is becoming quite popular. You can see the recipe for my Maple Bacon Macarons here, which I posted a couple of years ago. They are just as yummy! Happy Baking 🙂

cheesecake5

Chai & White Chocolate Hot Cross Buns with Cranberry Butter

Wow. It’s so hard to believe that Easter is upon us already! Even though I have been eating the occasional hot cross bun in secret since January 1st when they are available at the supermarket, I guess the week before Easter is finally the socially acceptable time to eat one, two or twenty hot cross buns. So, here we are. And they’re not too bad even if I say so myself. I made a couple of batches of original and choc-chip buns a few years back and I promised myself I would try to make them each year for Easter as they were just so damn good! Although, last year, I substituted the real things for something almost as good, Hot Cross Macs. This year, I wanted to try making the buns again, with a bit of a different flavour 🙂
IG
I found some really good chai tea from T2 in the cupboard, bursting with cardamom pods, cinnamon sticks and broken star anise. I knew then, I had to make my buns with this awesome chai. Mmm, and what to go with it? I didn’t want them to be too traditional, and since I was little, I have always been a loyal fan of the choc-chip variety (what kid hasn’t?!). White chocolate it was. I thought it would give the chai a bit of sweetness and provide the same great chunkiness as the choc-chip bun, and the white chocolate wouldn’t overpower the flavour of the chai like milk or dark chocolate would (I’m trying so hard not to sound like a wanker when I describe the flavour, lol).
000_0003
Chai and White Chocolate Hot Cross Buns (adapted from Sasko flour):
For the chai tea:
  • 2 x teabags, or T2 sachets or teaspoons of chai (if you are using sachets or teaspoons, you will need to strain before adding the honey, milk and vanilla)
  • 500 ml water
  • 1/2 tsp vanilla bean paste or extract
  • 30ml honey
  • 125ml milk
Place the tea in a saucepan, with the water. Simmer on a low heat until the water colours, and the flavours are prominent (about 8 mins). If you need to, strain the tea, and place back in the saucepan once strained. Stir in vanilla, honey and milk, and set aside to cool slightly.
MakingDough
For the dough:
  • 540g plain flour
  • 30g butter, at room temperature
  • 35g caster sugar
  • 1/2 tsp salt
  • 1 tsp cinnamon
  • 7g yeast
  • 1 egg, lightly beaten
  • 1 1/3 cups white chocolate chips
  • 100g plain flour
  • Water
Sift flour into a bowl, rub in the butter with your fingers, and stir in the cinnamon, salt and sugar. Measure out 280ml of the chai tea mixture, and lightly mix in the yeast. When it begins to foam (you only need a few bubbles, don’t freak out if it doesn’t look like a bubble bath – I have made this mistake before), add to the flour mixture, along with the lightly beaten egg. Mix with hands until a dough if formed. If the dough is too crumbly, add a tiny bit of water. Oil a large bowl, and place dough inside. Put a tea towel over the top of the bowl, and put in a warm place for about an hour, or until the dough has doubled in size. I put my dough in a sunroom and it was perfect. You could also put it beside a window which is getting some sunshine.
MakingDough1
Preheat the oven to 200c. Once the dough has doubled, remove from the bowl and knead with hands on a clean surface until soft and springy. Add white chocolate in 2 batches and knead well. Shape the dough into 12 even balls, and place in an oiled or greased tray. Leave in a warm place to double in size once again, for about 30-45 minutes. Use the 100g of flour and some water to make a paste. Keep adding small amounts of water until desired consistency is reached. Remember you can put more water in, but you can’t take it out! You want the paste to be rough but not stodgy. Place flour paste in a piping bag fitted with a medium sized round nozzle (the ones you get with the Multix ones are perfect). Pipe crosses on the buns, and place in preheated oven for 12-15 minutes. Remove from oven and let cool in tray.
Bunsintheoven
To make the glaze, use 100ml of chai tea mixture and 1/2 cup caster sugar, and place in a saucepan. Simmer on a medium heat until it comes to the boil. Remove from heat, and brush buns with a pastry brush. I needed 2 coats on mine for them to be glossy enough.
000_0006
Cranberry Butter:
  • 1/3 cup dried cranberries (craisins), roughly chopped
  • 1/2 cup butter
  • 1/2 tsp cinnamon
Place all ingredients in a small bowl and stir until combined. Spread on warm hot cross buns.
000_0008
Hot cross buns are heaps of fun to make. They are not difficult, but you definitely need to read the recipe beforehand. The only other thing is, you do need a bit of time, but I promise they are worth it! Don’t feel confined to making buns with the original flavours if you don’t wish to, mix it up with different fruits such as berries and citrus, and sweets such as different types of chocolates, caramel, nutella or jam.
000_0002
Enjoy! X