Top Deck Mini Cupcakes

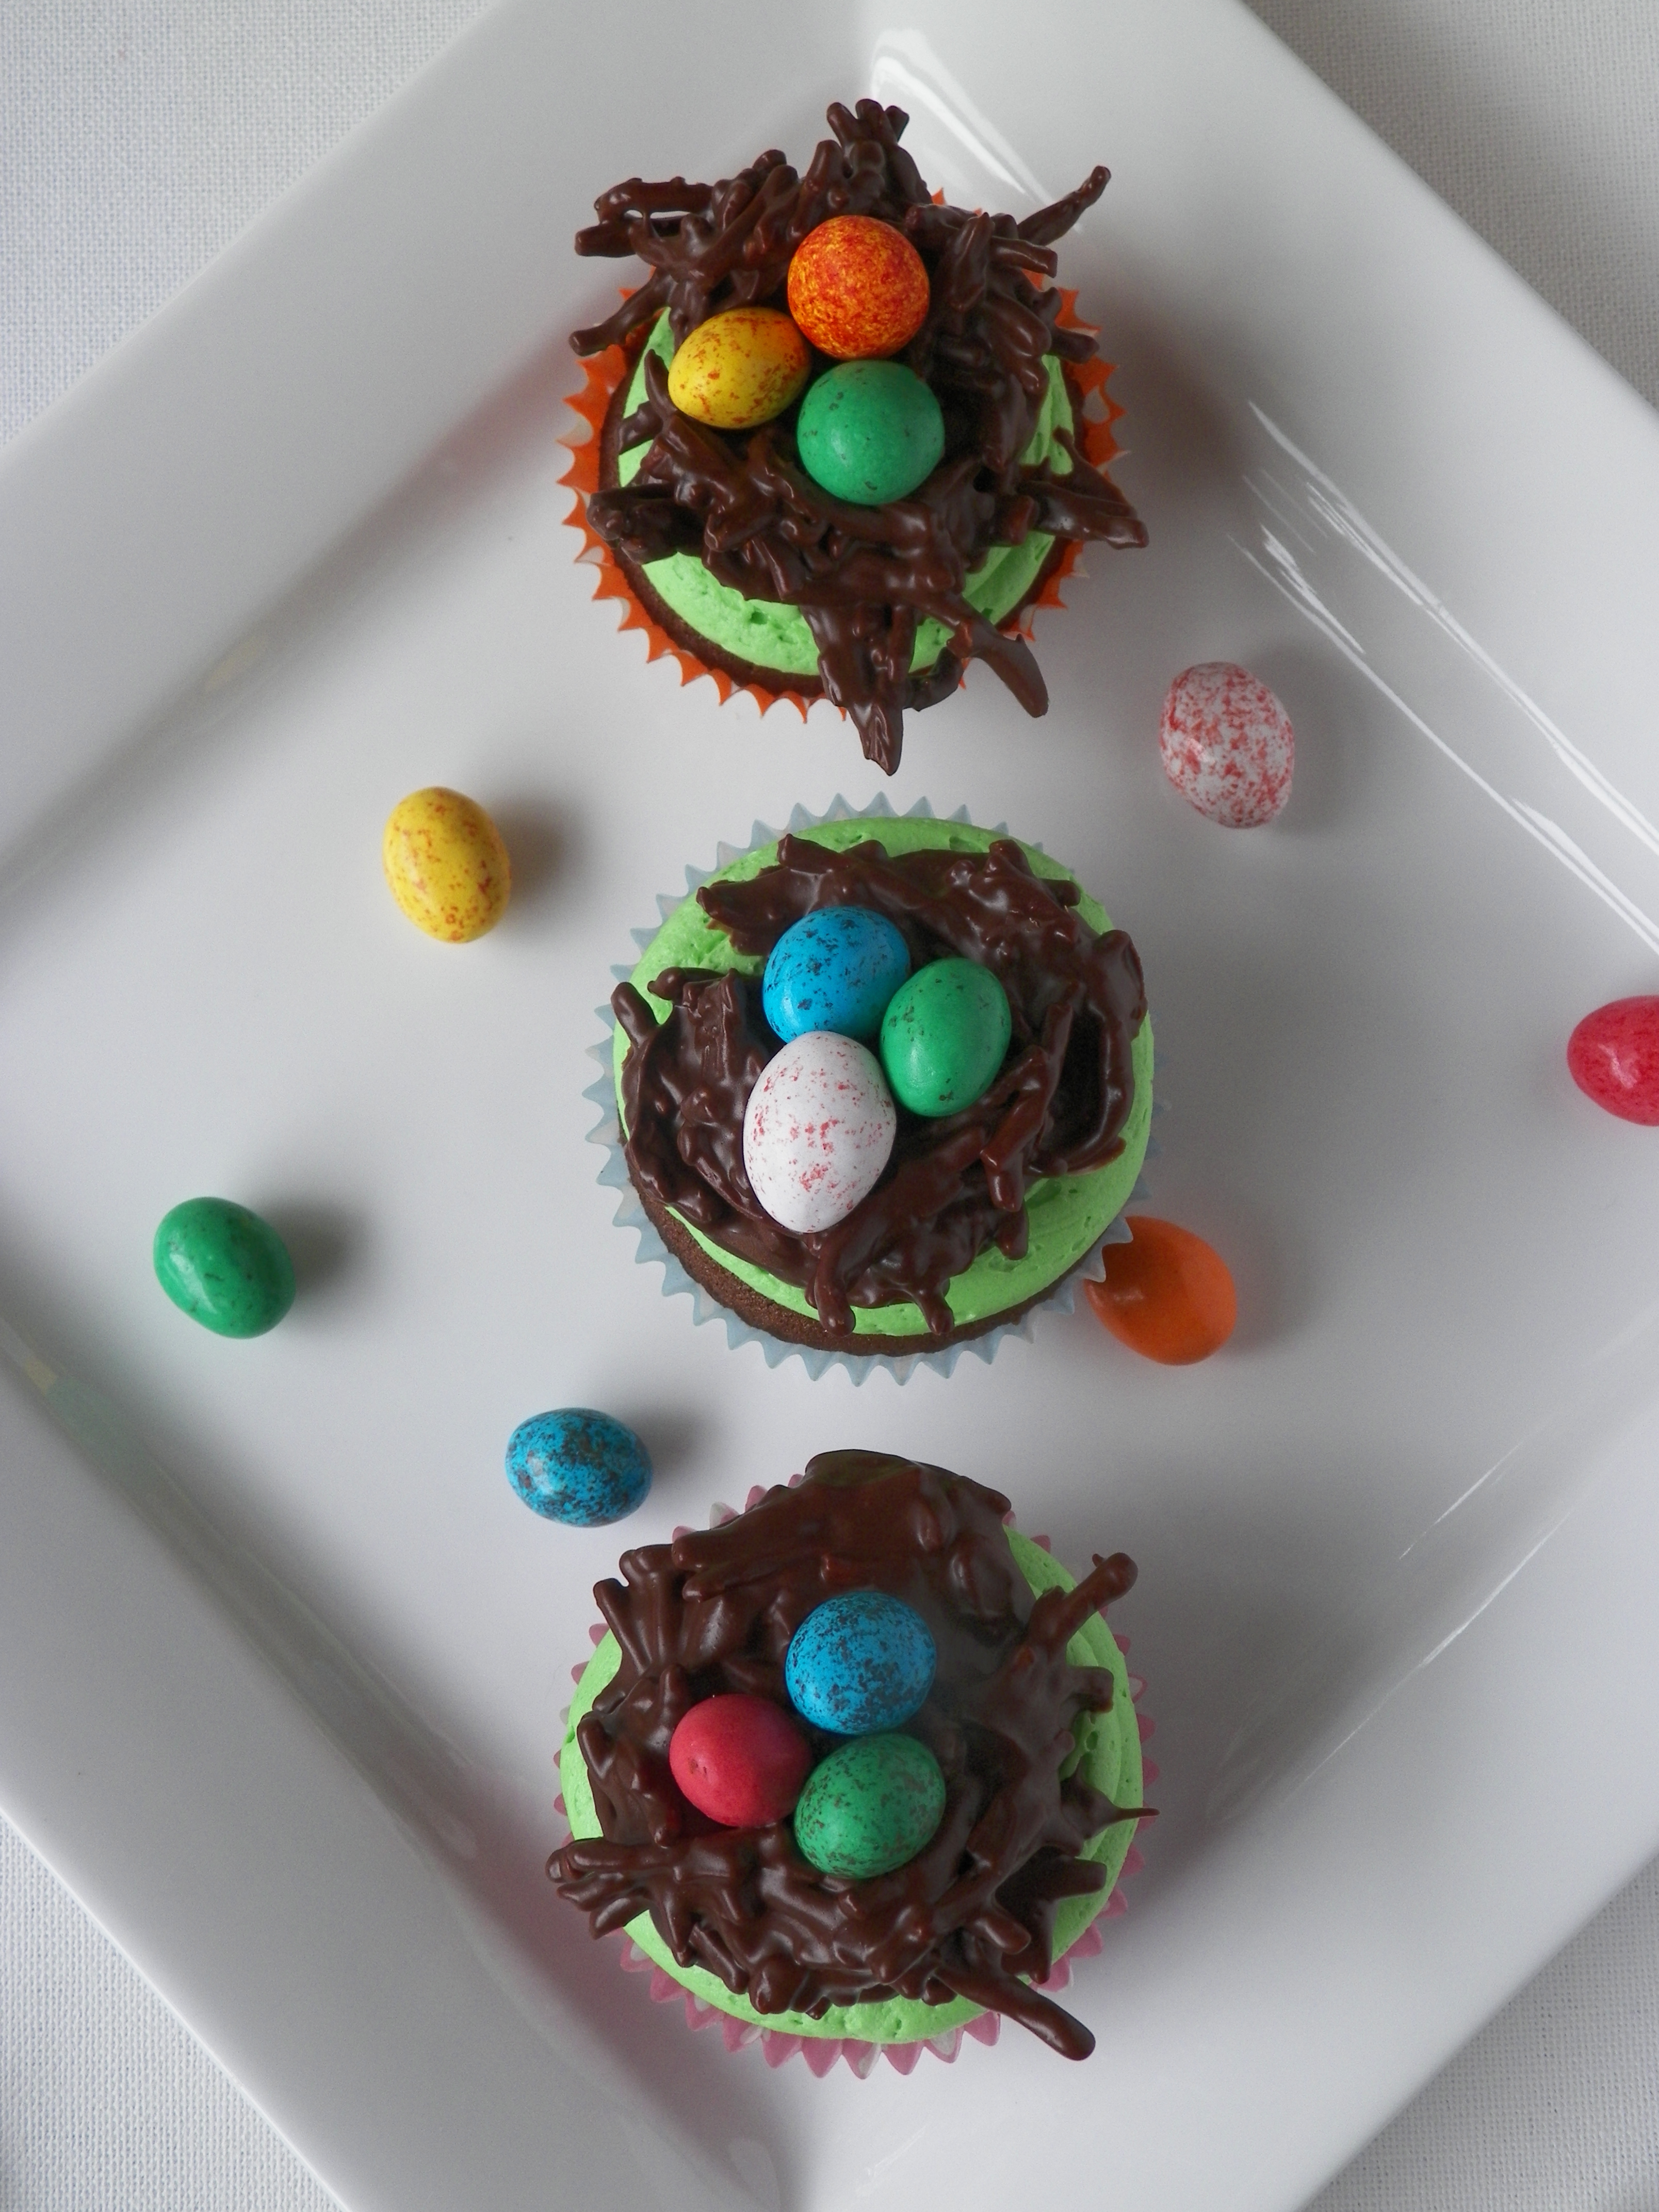
It’s been a busy few weeks. I have been popping cupcakes out of my kitchen like no tomorrow! So, here, I present to you, Top Deck Mini Cupcakes. White Chocolate, and Dark Chocolate. It’s that simple.

000_0006

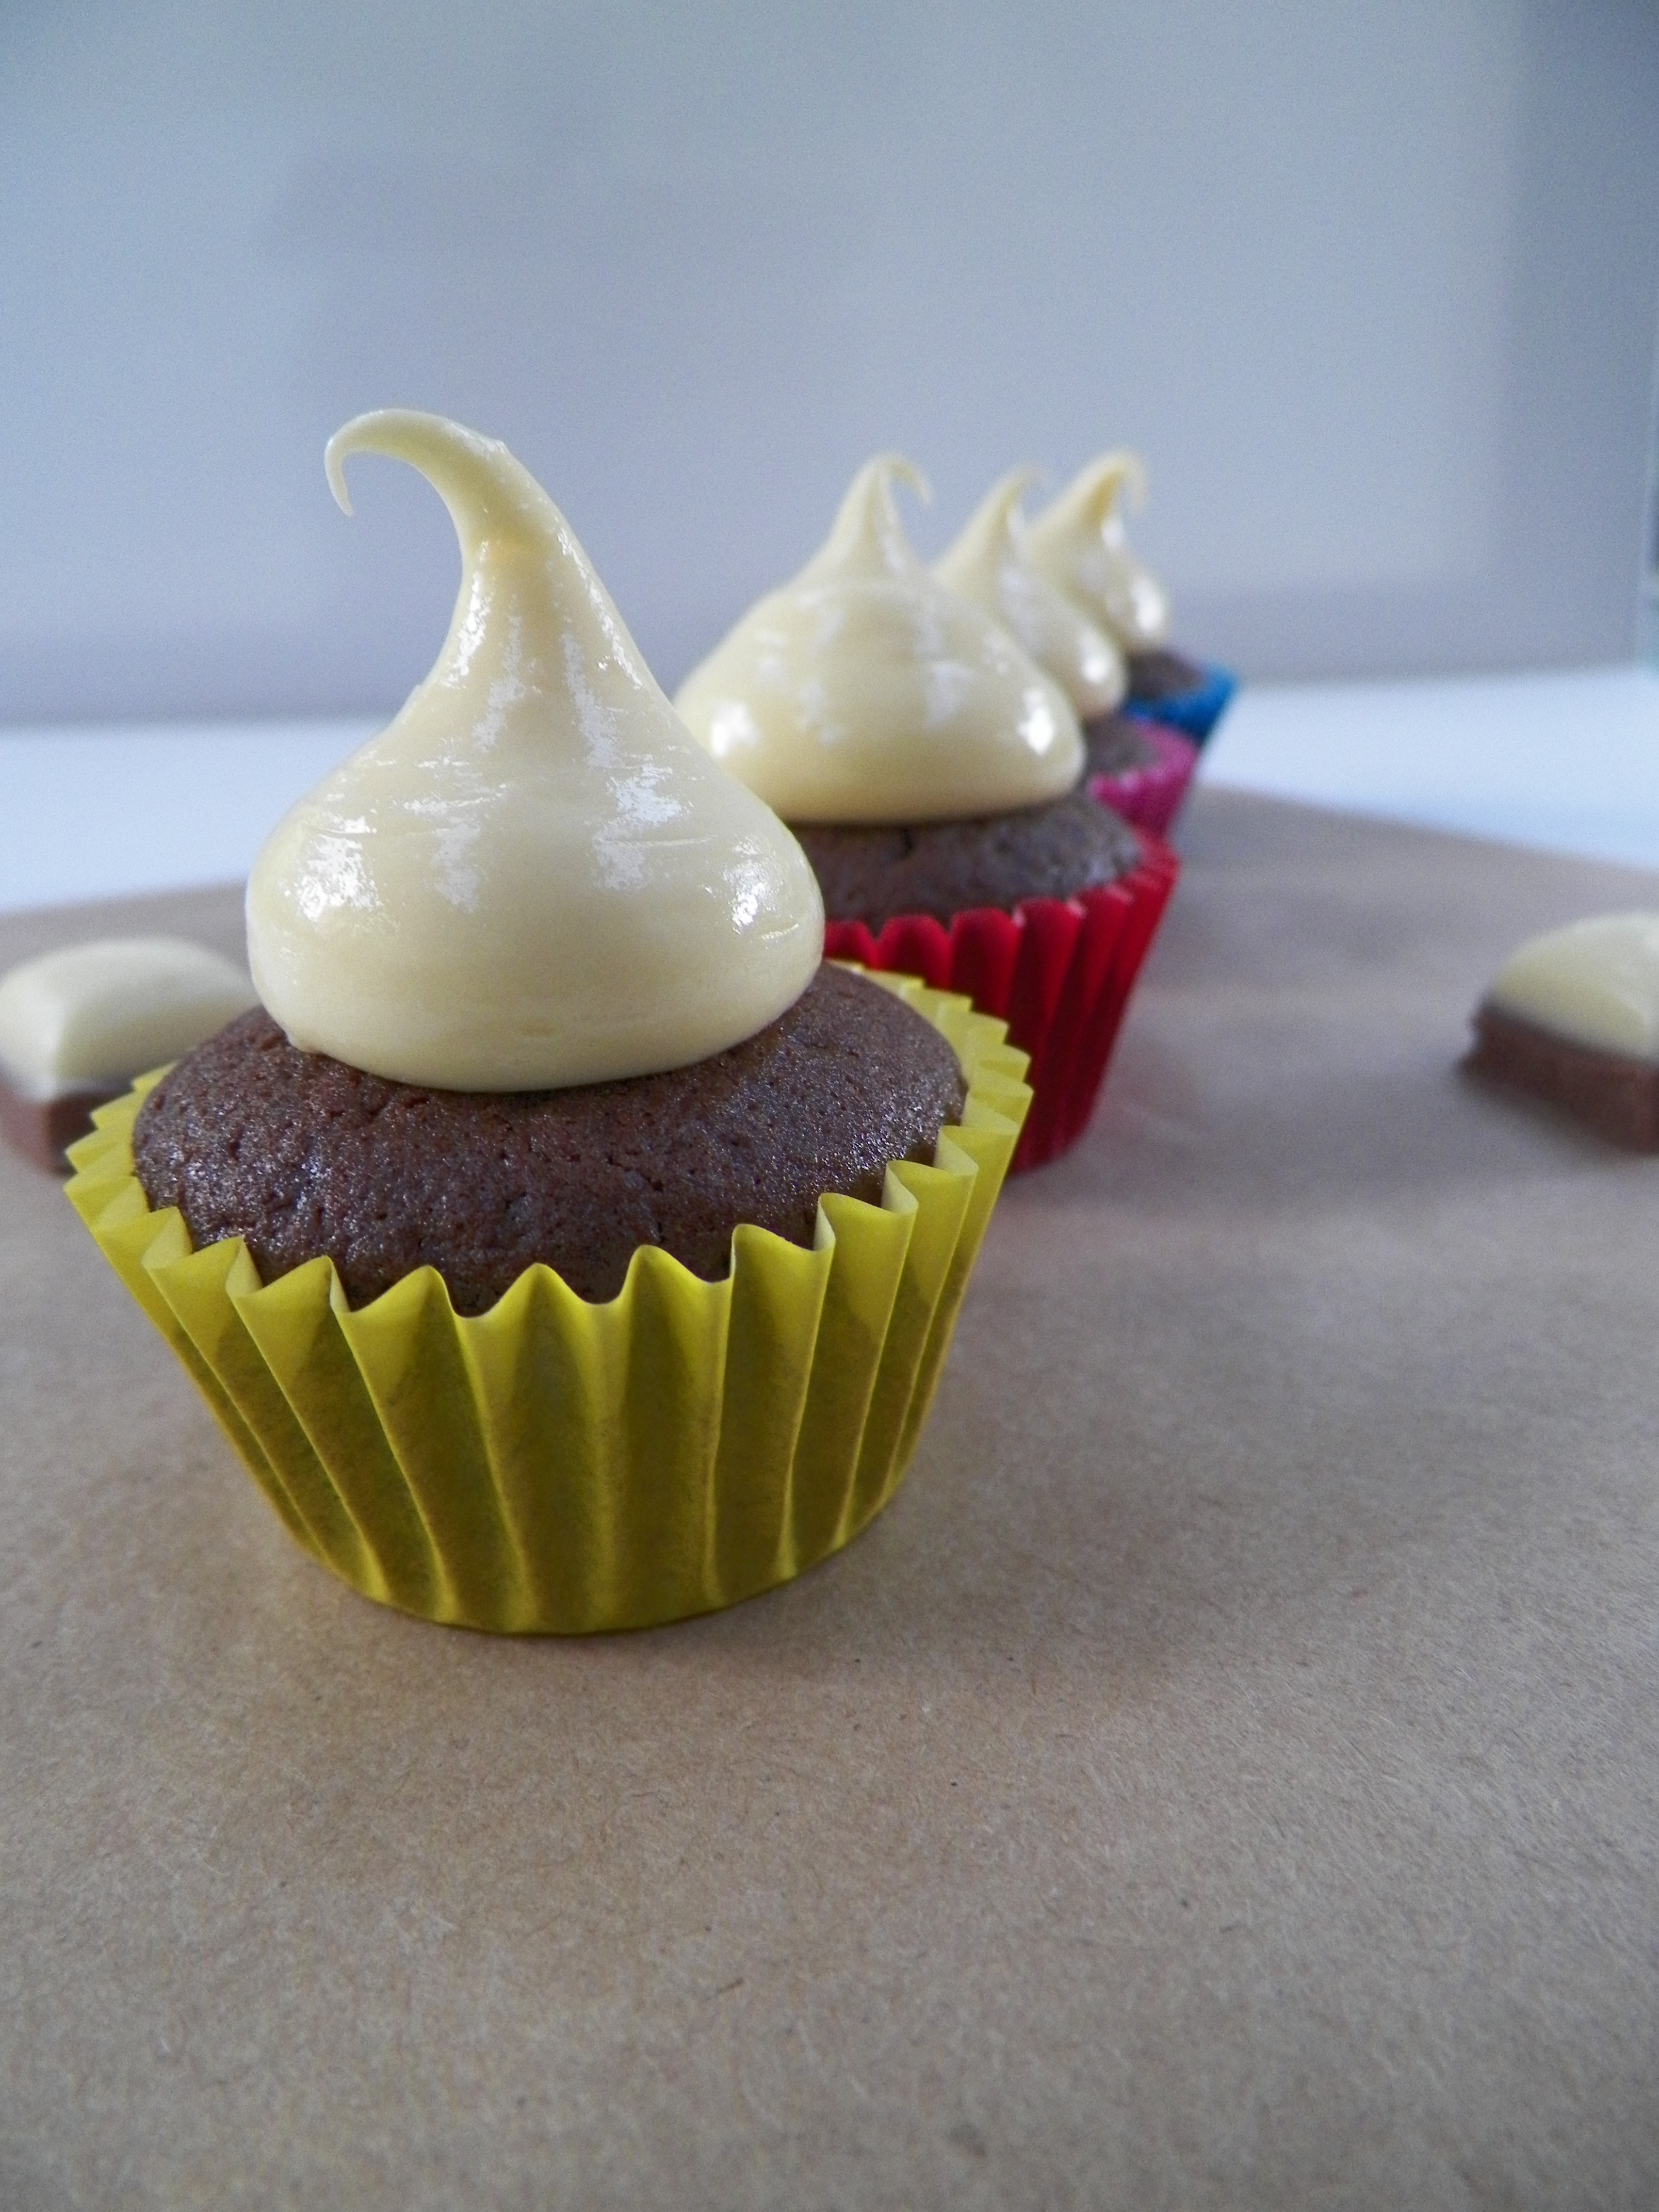
 These cupcakes are super easy to make, and are very delicious. I used the extremely trustworthy chocolate cupcake recipe that never lets me down, and my own white chocolate ganache to top them with. White Chocolate ganache is something I have always struggled to make. I find it is always runny, and I usually have to add a truckload of butter before it becomes somewhat of a pipe-able consistency. Nevertheless, it was yum!

000_0010

Chocolate Cupcakes:  (from Taste.com.au) 

Makes approx. 55 mini cupcakes

  • 100g good quality dark chocolate, chopped
  • 1 cup water
  • 125g butter, chopped and softened, not melted
  • 1 1/4 cups brown sugar
  • 3 eggs
  • 1 1/2 cups self raising flour
  • 1/2 cup plain flour
  • 1/4 cup cocoa

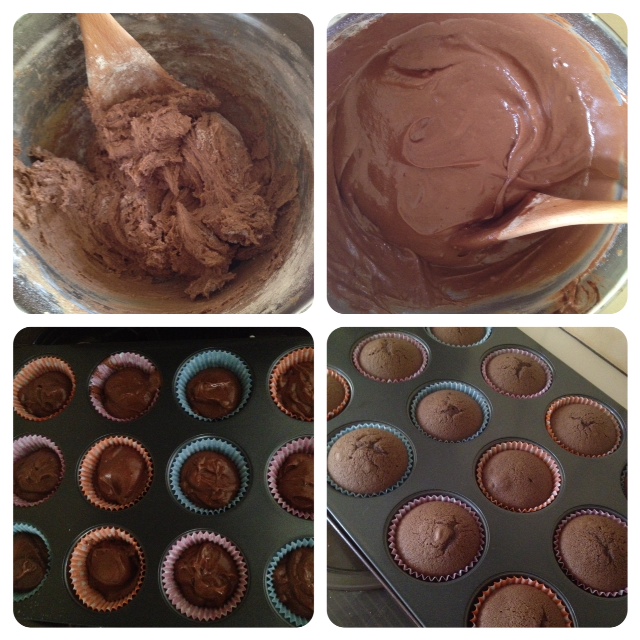
Line trays with cupcake cases, and preheat oven to 160c, fan forced (170c regular). Place the chocolate and water together in a small saucepan, and place over a low heat, stirring with a metal spoon until chocolate is melted and mixture is smooth. Set aside. Beat butter and sugar together until pale and creamy, approximately 3-4 minutes. Add eggs, one at a time, and mix until each is well combined. Place flours and cocoa in a separate bowl, and stir to combine. Add the flour mixture to the butter, sugar and egg mixture and stir with a wooden spoon. Once combined, add the melted chocolate mixture and continue to stir with a wooden spoon until mixed. If the mixture is a little runny, leave it to settle for 10 minutes or so. Spoon mixture into cupcake cases, and bake for 15-18 minutes in preheated oven until cooked, or until a skewer comes out of the cake clean. Leave in trays to cool for 5 minutes, and transfer to a wire rack.

000_0013

 White Chocolate Ganache:

As I mentioned earlier, this is certainly not a perfect recipe. It took a lot of trial and error before I was happy with the taste and consistency. I would recommend making the white chocolate and cream mixture at least a few hours before, or even the day before.


  • 300g good quality white chocolate, chopped
  • 1/3 cup thickened cream
  • 300g butter, softened, not melted

Place the white chocolate and the cream into a small saucepan, and stir with a metal spoon, over a low heat, until melted and smooth. Pour mixture into a heat proof bowl, and place in refrigerator. Beat butter until pale and creamy. Depending on the consistency, you may need to put the white chocolate and cream mixture in the microwave for 10-15 seconds. Gradually add the mixture to the butter, and beat until combined.

000_0008

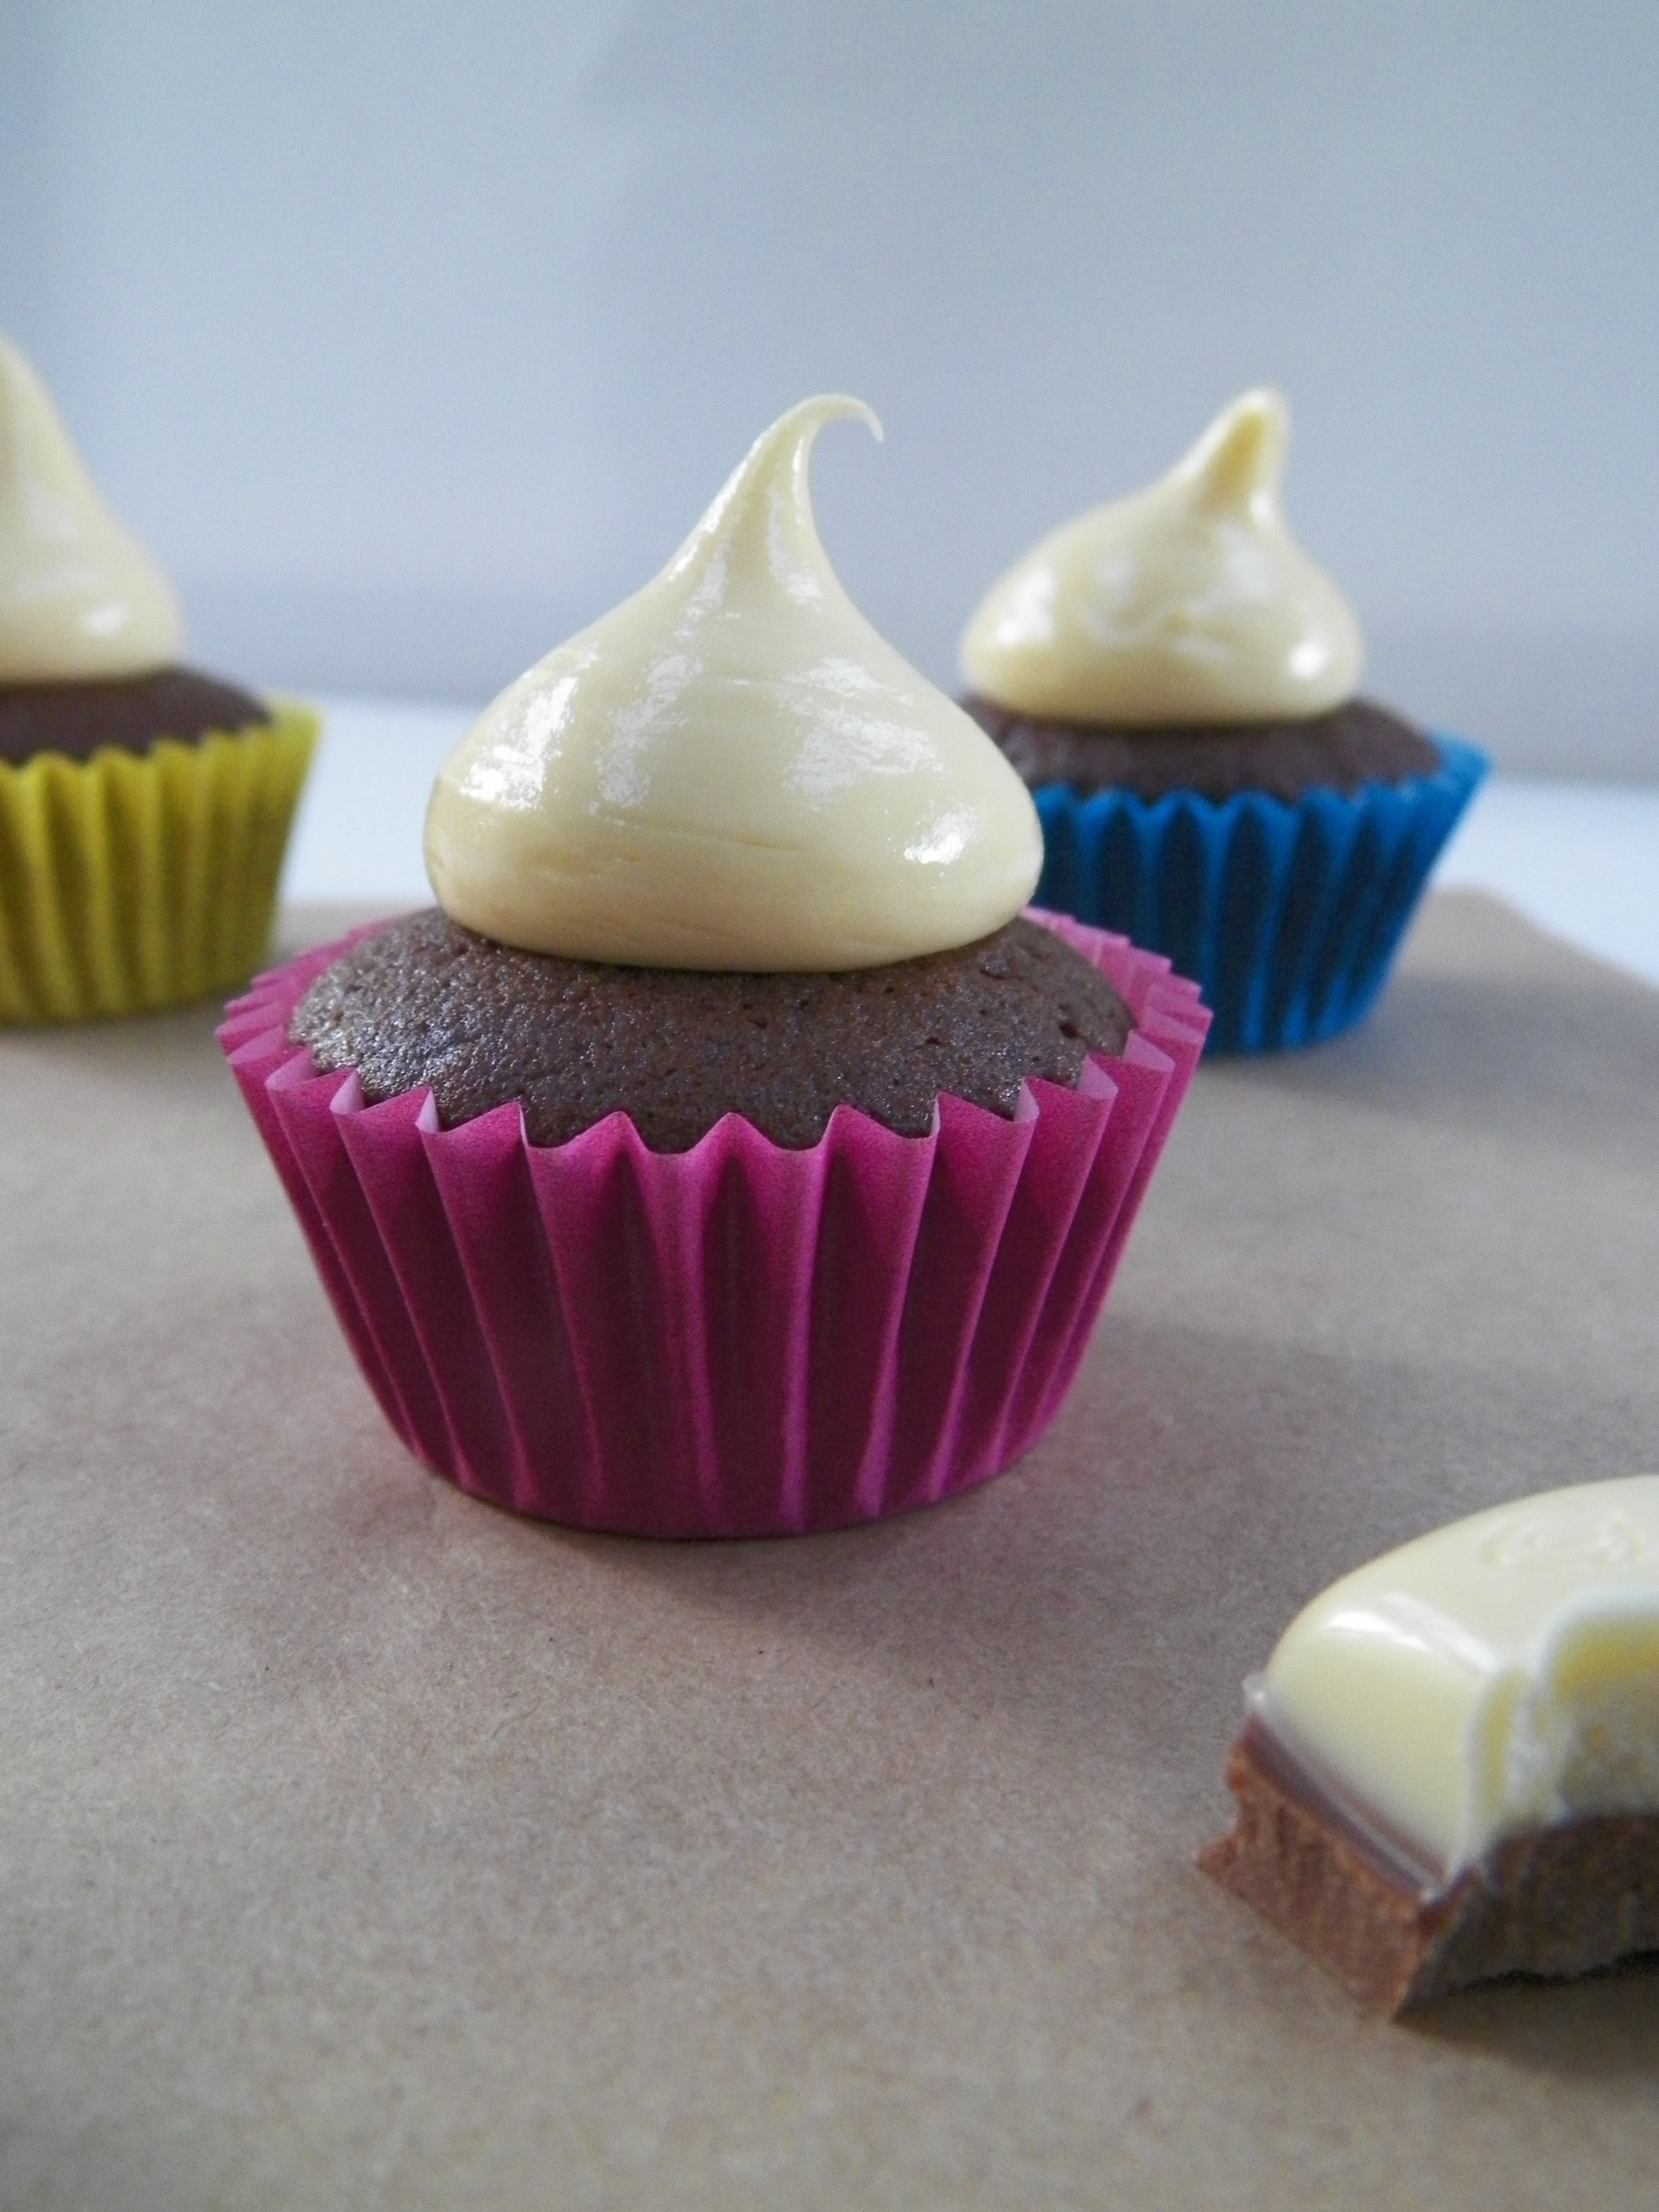
Spoon the ganache into a piping bag fitted with a small nozzle of your choice. Pipe ganache onto mini cupcakes. To store, place cupcakes in an airtight container, in a cool, dry place. Cupcakes will last approximately 2-3 days. Enjoy!

Triple Salted Caramel Mini Cupcakes

I made these super delicious morsels for the RSPCA Cupcake Day at work, and I believe they were quite the hit. Well, I’m guessing they were, as there were none left at the end! If you follow my blog, you will know I am the number one lover of all things salted caramel, and these cupcakes did nothing to change my opinion. They were yum. Really yum.

000_0007

I’m happy I made the wise decision to make them minis, though. They were the perfect size. Not too big, and not too small. Just enough to pop them in your mouth all at once, to close your eyes and go to heaven for a few seconds. If I could have, I would have popped and definitely not stopped. I really am a shocker. As I sit here, I have a fresh tub of the biggest Nutella (one of my many other loves) you can get at the supermarket, right next to me, and a spoon clumsily hanging from my mouth. I may have slightly freaked out about the prospect of a worldwide Nutella shortage. Anyway, back on track…

000_0015

Salted Caramel Cupcakes: (from Gourmet Getaways) Makes approx. 60 mini cupcakes

  • 190g butter, chopped and softened
  • 150g white chocolate, chopped
  • 1 cup brown sugar
  • 1/3 cup golden syrup
  • 1 cup milk
  • 2 1/2 cups plain (all-purpose) flour
  • 1 1/2 tsp baking powder
  • 2 eggs

Preheat oven to 170c. Line cupcakes trays with cases. In a large saucepan, combine butter, white chocolate, brown sugar and golden syrup, and place over a medium heat, stirring with a metal spoon until combined and melted, and the sugar is dissolved.

000_0002


Remove from the heat, add the milk, and let cool for 10 minutes. Stir through the flour and baking powder until combined. Add eggs, one at a time and stir until combined. Fill cupcakes evenly, and bake for approximately 18 minutes, or until a skewer comes out of the cakes clean. Cool in tins for 5-10 minutes, and let cool on wire racks.

000_0005

Caramel Maison: (this recipe is on page 245 of Adriano Zumbo’s cookbook)

  • 220g pouring (whipping) cream
  • 1 vanilla bean, split and seeds scraped (I used 1 tsp vanilla bean paste)
  • 120g water (this is just under 1 cup)
  • 300g caster (white) sugar
  • 60g liquid glucose (available at most supermarkets)

Place the cream and vanilla in a small saucepan over a medium heat and bring to the boil. Remove from the heat, and remove the vanilla bean if you are using one. In the meantime, place the water, sugar and glucose in a larger saucepan over a low-medium heat and cook until the glucose and sugar are fully dissolved, stirring occasionally. Zumbo says to use a clean pastry brush dipped in water to clean the sides of the saucepan in order to avoid crystalisation, however you can also just place the saucepan in really hot water with suds just after use and the sugar will melt off really easily. Increase the heat to medium, and cook the sugar mixture until it reaches a dark amber colour. This does take quite a while, and I was getting worried that mine would not work, but persistence is key here, it will eventually darken after 10-12 minutes. Very carefully stir the cream mixture into the sugar mixture slowly – be very careful because it spits and releases lot of heat. I found the best way to do this was with a spoon with a very long handle, as you want to keep your face as far away from the saucepan whilst it is spitting. If you don’t have a spoon with a super long handle, just add the cream really slowly and try to stir as best you can! Keep stirring as much as you can until the caramel settles down, then stir until completely smooth. Transfer to a bowl, let it cool to room temperature, cover with plastic wrap and place in the fridge.

Caramel Buttercream: (this recipe is on page 42 of Zumbo’s cookbook)

  • 150g unsalted butter, chopped and softened
  • caramel maison (prepared earlier. Leave 2 tbs for the sauce to drizzle on top of cupcakes)
  • approx. 2 tsp sea salt

Place the butter in a bowl, and beat until light and fluffy. Warm the caramel maison in the microwave until it reaches a pouring consistency (mine needed 1 min, 20 seconds on high as it was in the fridge overnight), however, just warm it in stages to prevent burning the caramel. With the beater running slowly, add the caramel maison to the butter and continue mixing until thick. Once I had added about half of my caramel, I got a bit worried because it looked like it was curdling, however as I kept adding the caramel, it began to thicken up. Once you have added all of the caramel, fold in the salt. I did not measure my salt, as I used a shaker. So if you too are using a shaker, you can salt to taste.

000_0014

Assembly:

Place your preferred piping nozzle in your piping bag, and fill with caramel buttercream. Pipe swirls/rounds onto cupcakes. For the sauce, take the 2 tbs of caramel maison left, warm in microwave until it is an almost liquid like consistency. Pour into a sauce bottle or similar, and drizzle over each cupcake. To store, place cupcakes in airtight containers, and leave at room temperature, in a dry area.

000_0018


St. Patrick’s Day Rainbow Cupcakes

Happy (belated) St. Patrick’s Day to you all, and top of the morning to ya! 😉 I have seen these super cute cupcakes many times on Pinterest, so I thought it was time to give them a go. They’re so adorable 🙂

000_0001

I used my trusted vanilla cupcake recipe for these, and once again, they worked a treat as always. To get the rainbow effect throughout your cake, you just need to divide your batter into separate bowls, colour them, and spoon them separately into the cupcake cases before baking.

 Cakes

I also loved the sour strap rainbow. As cute as it looked, it also gave the cupcake a nice sour tang and cut through the buttercream. Deeeeeeelicious.

000_0005

These little gems are really easy to make, too, and would be fun for kids to have a go at. You obviously don’t have to colour the batter, either. And you don’t have to pipe grass on the cupcakes, which I discovered is quite time consuming to get right!

IG

Happy Baking, Guinness drinking and potato eating! Hope you all have a great weekend 🙂

Ferrero Rocher Mini Cupcakes

In the last few weeks, it has been so hot and sticky here in Melbourne. The type of weather that sucks the energy right out of you, it’s not fun. And in this weather, baking is the last thing anyone would want to be doing! With a slight cool change earlier in the week, I jumped at the chance to make these little babies, and boy, I am glad I did. They are very yummy. I guess they are kind of my (belated) Valentine’s Day post. I have always loved Ferrero Rocher chocolates, but they have always been something I have had on a special occasion. Plus, my boyfriend loved them. So, there we have it.

000_0002

The chocolate cupcake recipe I used, is the one I have used many, many times before. It is fantastic, and works really well every time. I cut the Ferrero Rocher chocolates in half, which is not easy to do! You will probably get a really messy half and a neater half. Place the messier half inside the uncooked cupcake, and leave the other half for decorating. You can find the cupcake recipe  here. I halved the recipe for this batch, and it still made close to 30 mini cupcakes.

Cupcakes

Nutella Ganache:

  • 1 cup Nutella
  • 250g good quality white chocolate, chopped
  • 75g salted butter, softened, not melted

Melt the white chocolate in a glass bowl, in the microwave in spurts of 20 seconds. At the end of each stint in the microwave, stir chocolate with a metal spoon. When completely melted, stir in Nutella until well combined. Leave at room temperature to cool. When mixture is at room temperature, it may have become a little solid. If so, just run some lukewarm water around the outside of the bowl to soften up a bit. In a separate bowl, beat butter until pale and creamy. Spoon the butter into the Nutella mixture and beat altogether for a couple of minutes until whipped and smooth.

000_0004

To decorate: Spoon Nutella ganache into a piping bag fitted with a round wide nozzle. Pipe one single round onto each cupcake, and place halved Ferrero Rocher on top. Store in an airtight container, in a cool, dark place. If it’s really hot, you can place the cupcakes in the fridge, but bring them down to room temperature to eat. I am very reluctant to put cake in the fridge, and people always think this is weird. When you put cake in the fridge, the fat component of the cake (butter) becomes harder, so the cake becomes drier and often crumbly. By the way, you can freeze these cupcakes, too. Just do it as soon as they are decorated, and obviously, bring them down to room temperature to serve, preferably overnight.

Cupcakes1

Here are some I made with Malteasers. Equally as delicious!

Cupcakes2


Easter Egg Nest Chocolate Cupcakes

This week has been a great one for whiskitforabiscuit. With Easter arriving, I have had a lot of new visitors to the blog, which is so nice to see. I have also had a number of people telling me that they have tried my recipes, such as the Chai and White Chocolate Hot Cross Buns, and how they have succeeded and tasted awesome! So, thanks so much guys, I appreciate it more than you could know and I absolutely love hearing everyones stories and feedback 🙂 It’s also really nice to know that people are actually reading this and it’s not just me writing to my sad and lonely self, lol. Now, to the cupcakes.

IG

I had seen a few different takes on these egg nest cupcakes, on various sites such as Pinterest, and they just all looked so fantastic and fun! I had to give them a go, and use one of my all-time favourite childhood treats, the chocolate spider. No words can ever describe how much I adore the chocolate spider, seriously, they are just that delish. I really could go on forever and ever about these morsels of goodness, and it’s so great that they only have 3 ingredients! Life = complete.

000_0010

I have used this amazing chocolate cupcake recipe countless times, including in My First Order, and it’s never let me down! You can find the recipe here.
Makingcakes
Buttercream:
  • 350g butter, chopped and softened
  • 2 1/3 – 3 cups icing sugar mixture
  • 1 tsp vanilla bean paste or extract
  • Wilton’s colourng gel, green
Beat butter until pale and creamy, about 4-5 minutes. Gradually add in the icing sugar mixture until well combined. Beat in vanilla and green colouring until desired colour is achieved. Spoon buttercream into a piping bag with a large round nozzle. Pipe rounds on the cupcakes.
000_0014
Chocolate Spider Egg Nests:
  • 1 packet Chang’s noodles (available at most Australian supermarkets. I am sure there would be an equivalent in the US and UK, however I do not know what the brand is)
  • 2 tbs crunchy peanut butter
  • 200g chocolate, milk or dark
  • 1 packet M&M Crunchy speckled eggs, or Cadbury Mini Eggs

Makingspiders

Place chocolate and peanut butter in a microwavable bowl, and microwave for 60 seconds on high. Stir with a metal spoon, even if it does not look melted. If it needs more time, microwave in 10 second increments until completely melted. Don’t do what I did and keep microwaving because you can still see lumps,and then realise it’s just the nuts from the crunchy peanut butter. Idiot. Pour contents of noodles packet into the chocolate and peanut butter mixture until well coated. With two teaspoons, make small ‘nests’, on oven trays with baking paper. Place three speckled eggs on each nests straight away, as you do not want the chocolate to set, otherwise the eggs will not stay on the nests. Place in fridge. You can make these a few days in advance, just pop them in an airtight container when they have set.
Place egg nest onto the green buttercream on the cupcake. Done!
 000_0005
I hope everybody has a fantastic Easter with their loved ones! I am so lucky I have a little sister who gets so excited about the Easter bunny and the annual hunt we have on Easter Sunday morning, it makes it so much more fun with little kids around!
000_0003
Don’t forget to follow me on Instagram – GemmaAsh! Until next time…X