Aussie Beach Bum Cookies

Happy (belated) Australia Day! I hope all you Aussies had a great long weekend and celebrated with some snags on the barbie, a meat pie and a pav! If you are not an Aussie, you should definitely still celebrate with some snags on the barbie, a meat pie and a pav – or make some of these super cute and cheeky beach bum cookies to embrance your inner Australian! I saw these cookies on Pinterest a while ago, and just had to make them – they are too cute! They are really easy to make and decorate too.
000_0004
This recipe is once again from the fantastic Sweetapolita – they are basically the vanilla version of the Dark Chocolate Sugar Cookies with Gingerbread Buttercream that I made for Christmas. I halved the recipe, and I still had close to 50 cookies, so if you do not want that many, you could simply halve it again. You can put any flavour you like in the cookies as well. I was loyal to the recipe and kept the vanilla bean with a touch of lemon, but you could use any type of extract or oil really, such as Strawberry, Orange, or even Musk.
000_0002
Vanilla Sugar Cookies: (adapted from Sweetapolita – this post has a great tutorial on making sugar cookies, too!)
  • 1 cup butter – softened, not melted
  • 1 cup caster (white) sugar
  • 1 large egg
  • 3 cups plain (all-purpose) flour
  • 1/2 tsp vanilla bean paste
  • Juice of 1/2 lemon
  • 1/2 tsp salt
  • 3 cups (approx.) icing sugar mixture
  • Water
  • Cachous and sprinkles, to decorate
  • Colouring gels

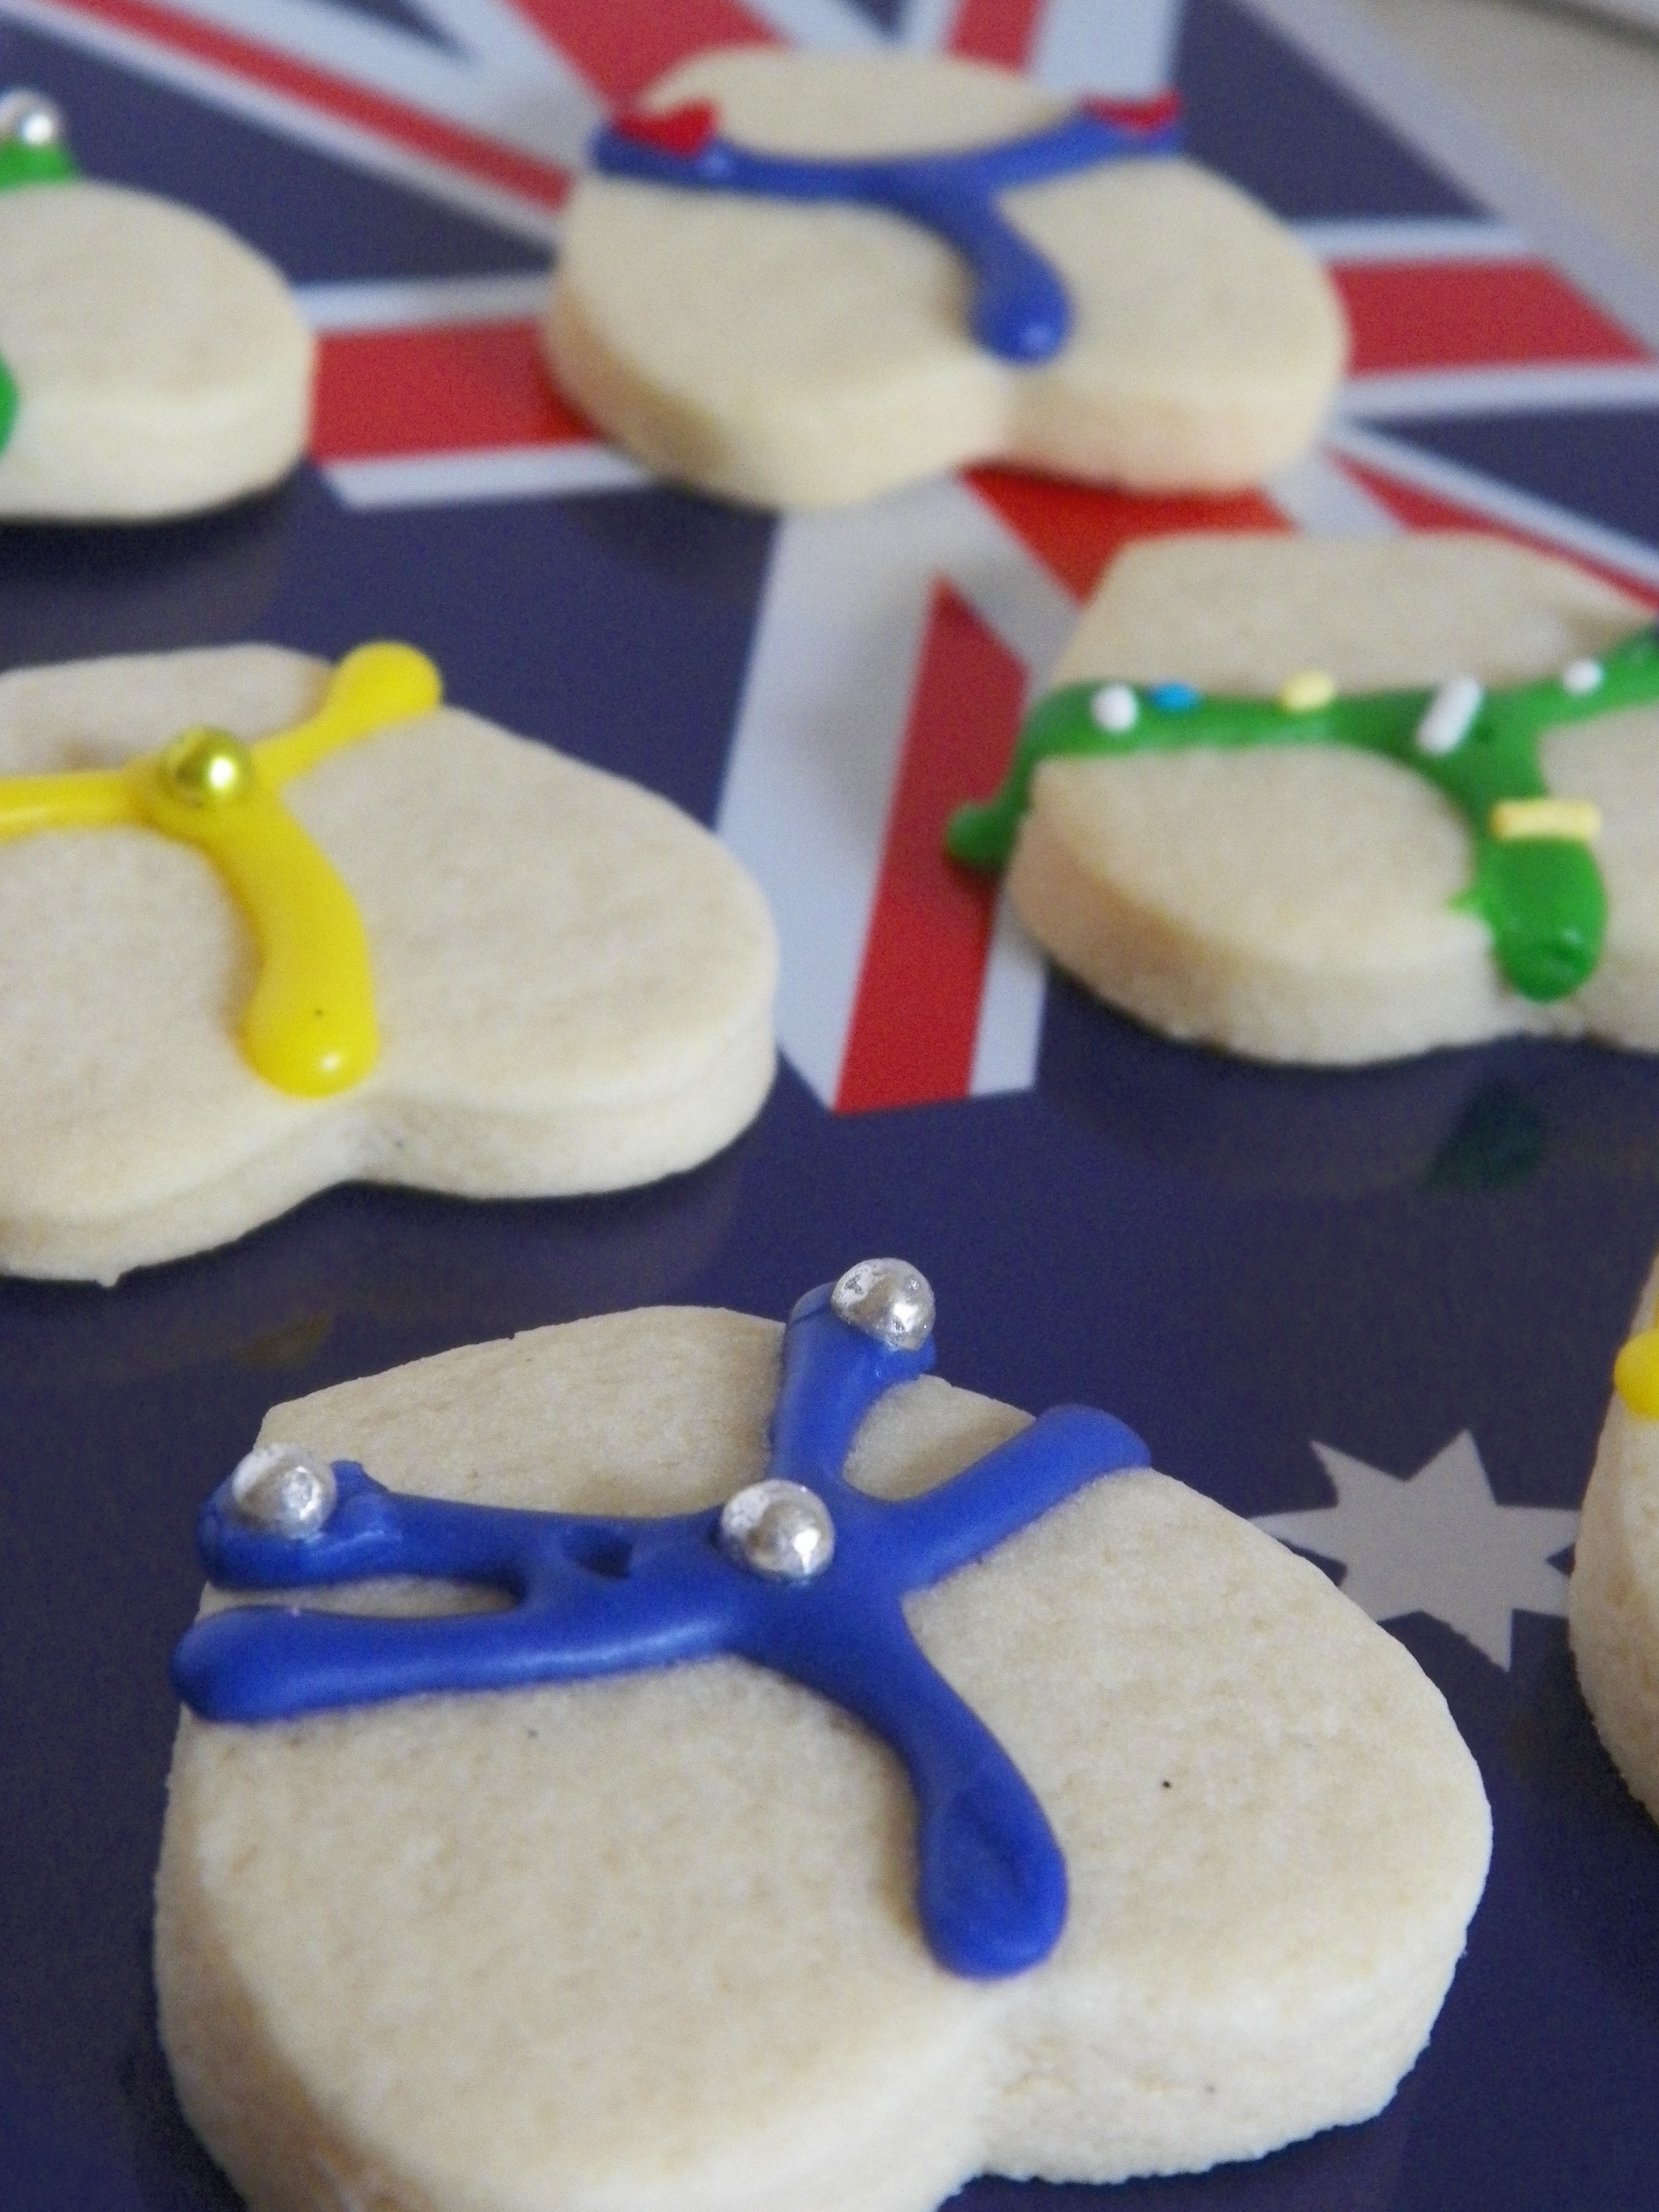
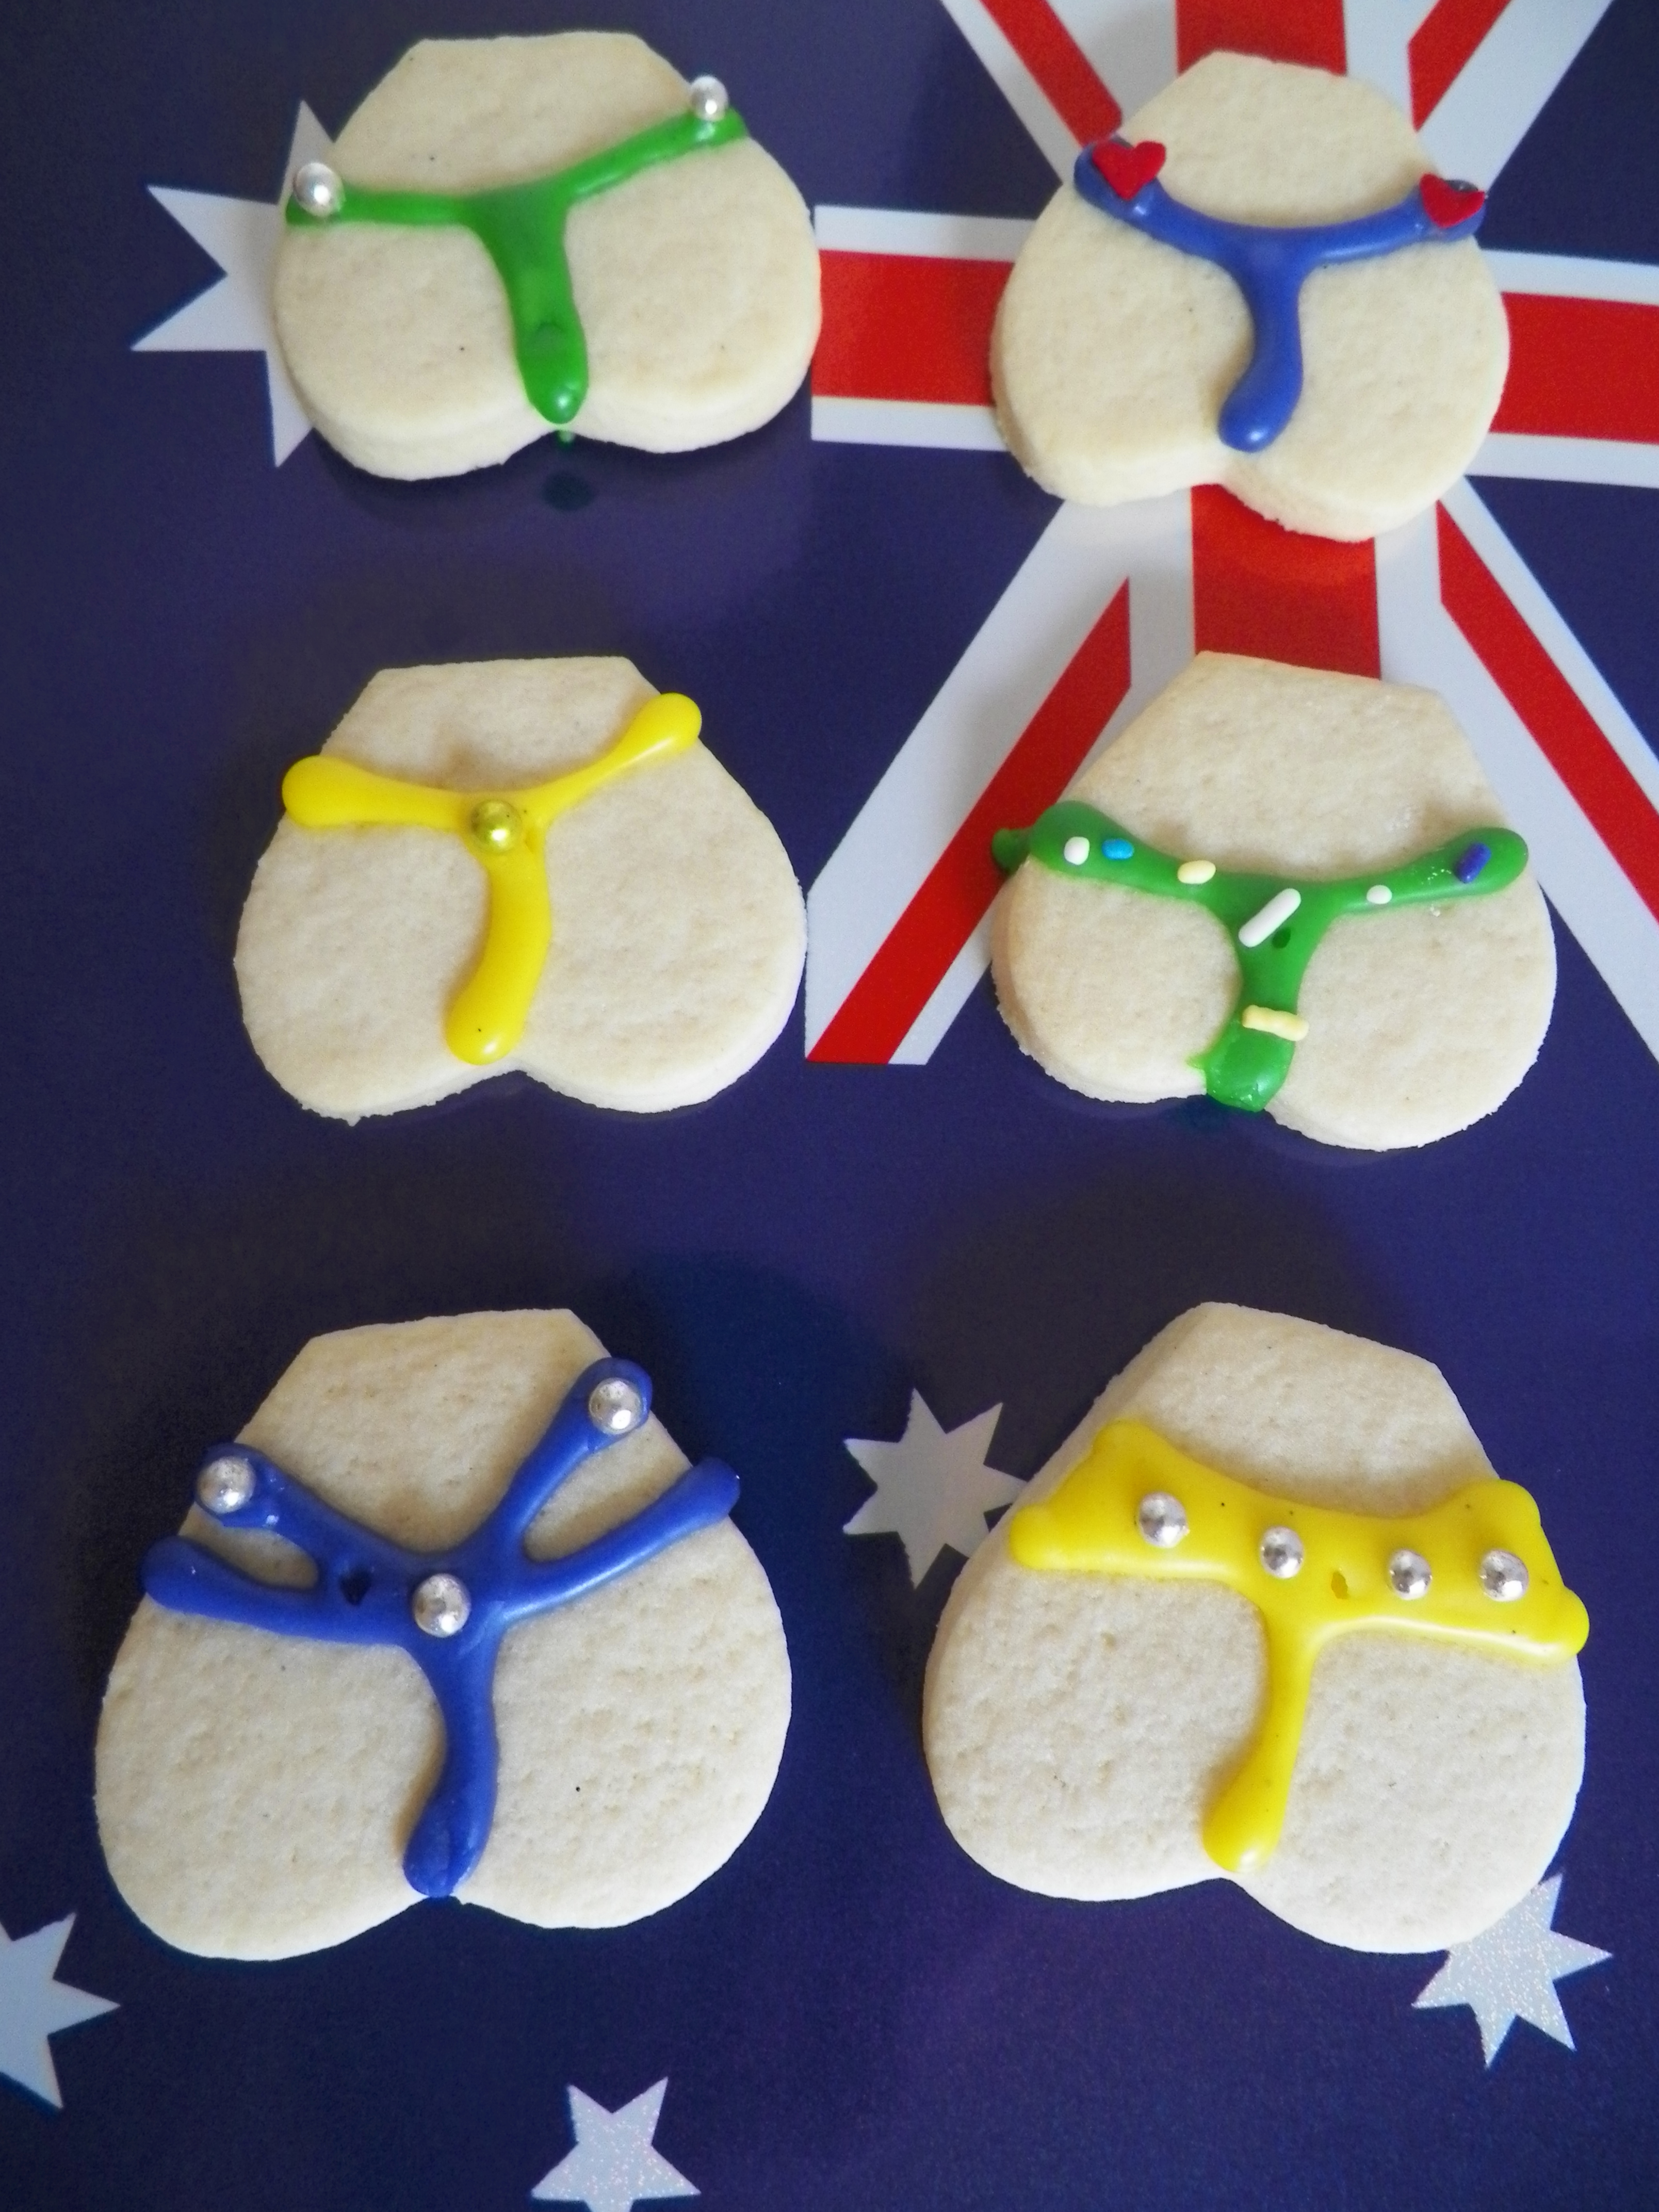
Preheat the oven to 160c fan forced, 170c non fan forced. Line 4 oven trays with baking paper, and set aside. Beat the butter and sugar in a large bowl until pale and fluffy. Beat in the egg until well combined. Sift flour and salt in a separate bowl, and gradually stir, with a wooden spoon, into the butter and sugar mixture. Knead the dough on a floured surface until smooth – keep adding flour in very small amounts if dough is still sticky. Divide dough into two batches, wrap tightly in cling wrap, and refrigerate for 45 minutes. Once dough is chilled, roll it out with a rolling pin, between two sheets of baking paper, until the dough is just under 1cm thick. With a heart shaped cookie cutter, carefully cut the shapes from the dough and place on the baking paper. When you have a full tray, gently and quickly cut the bottoms of the hearts off with a sharp, non-cerated knife. You don’t want to use a cerated bread and butter knife because it’s not sharp enough, and will cut a rough edge, rather than a clean edge. The only thing I would do differently when I make these again, would be to get a larger cookie cutter and cut off more from the bottom of the heart, so that they look like bigger, rounder bums!! Bake cookies in preheated oven for 12-15 minutes – make sure you check at 10 minutes! TIP – Don’t wait until the cookies begin to go brown – once the edges a even a tiny bit brown, the biscuits will be that overcooked you could nearly break your teeth on them! Make sure all the cookies are still completely ‘blonde.’ Let the cookies cool completely on the trays or wire racks until completely cool – you don’t want the icing to melt off!

 Cookies

To make the icing, combine icing sugar mixture with a tiny amount of water to make a paste. You can make as many or as little colours as you like – three was enough for me. Add a little of the colouring gel and a small amount of vanilla and stir until combined. Place icing in a piping bag fitted with a realllllllly small round nozzle. If you don’t have one, never fear! You can use a snap lock bag and cut the corner off. Decorate the cookies by piping different shapes and colours of underwear! G-Strings are the easiest to do 😛 The icing dries really quickly, so decorate the cookies as you go.

000_0005

I can’t believe it is the end of January already, it seemed like only yesterday it was Christmas! Happy belated Australia Day, and I’ll see you in February 🙂 Also, check out my music player on the side of the page, I will putting up some of my favourite songs for you to listen to when you come and visit!

Jaffa Ombre Layer Cake

One thing is fairly obvious: I love cake. I try not to eat tooo much cake, but with this one, it was difficult to stay away. I was convinced this cake would be super-rich, but surprisingly, it was quite light. It was certainly still decadent, and I will definitely be making this one again. I know I say this with a lot of things, but I’ve had the idea of making this cake in my head for quite some time. My Mum’s birthday seemed like the perfect occasion – as she (and my Dad) both love the Jaffa Macarons, and I haven’t done ombre, or any type of layer cake really, for a while.

Follow me on Instragram - GemmaAsh

 The recipe I used for the orange cake is from the always amazing Raspberri Cupcakes. It is a beautfiul cake, not too buttery, and the zest from the oraange was intense, but in a great way. This particular post – Orange Cake with Fruit Tingles Icing, is one of my favourite posts from Raspberri Cupcakes, and was one of the recipes I was inspired by, to begin blogging myself (see Musk Layer Cake + Musky Macarons)!

000_0001
Orange Cake: (adapted from Raspberri Cupcakes)
  • 165g butter
  • 3/4 cup caster (white) sugar
  • 3 eggs
  • 2 cups self-raising flour
  • Zest and juice from 1 1/2 large oranges (I had about 1/3 cup of juice)
  • Wilton’s colouring gel, orange
Preheat the oven to 180c (170c) fan forced. Line a 22cm springform cake tin with baking paper and set aside. Beat butter until pale and fluffy. Gradually add sugar. Beat eggs in one at a time until well combined. Stir in the orange zest and juice and flour, until well combined. To divide cake into batches, weigh mixture and divide the number by 3. Pour into three separate, clean bowls. Add small amounts of colouring gel to mixtures, until you have 3 clearly different shades of orange. Pour one batch of mixture into cake tin, and spread with a spoon so it is nice and even. I had a little bit of trouble with this because the cakes were so small, but they were all fine in the end. If you have more than one cake tin, it is okay to put two on the top shelf of your oven, if they fit. Bake cakes for 10-15 mintutes, or until a skewer comes out clean. Begin checking the cakes from 10 minutes.
Let cakes cool in the tin for 10-15 minutes. If you are using the cakes straight away, let them cool completely on a wire rack, and then begin layering and decorating. If not, gently wrap cakes in cling wrap tightly – be very careful as the layers will be quite thin and fragile. Place in fridge overnight. It is best to bake cakes the day before, or on the day of use. You could probably freeze them if you were really time poor, however, sometimes I find that cakes can taste a bit strange when they have been frozen!
000_0006
Jaffa Ganache:
This is the same ganache I used for the Jaffa Swirl Macarons, however I just quadrupled it.
  • 400g good quality dark chocolate, chopped
  • 2 cups thickened cream
  • Zest of 2 1/2 oranges
Place all ingredients in a medium saucepan and stir over a low heat until smooth. If using the next day, cover and refrigerate, then take out an hour or two before use. If using on the same day, cover and refrigerate for about 30 mins, or until ganache has slightly set. I probably made my ganache a little too late for when I needed the cake, so you can see in the pictures that it was still quite runny. I tried to make the best of it though, and exposed the colours of the cake by letting the ganache drip around the side. I originally wanted to cover the cake completely in ganache, but I think it still looked nice.
JaffaCake
 
Assembly:
Place the bottom cake on a large cake stand or a cake board. With a round-edged knife, spread a layer of ganache on the top, and layer with the second cake. Repeat the process, and cover the cake completely with the ganache. If the ganache is too hard, dip the knife in warm water – it will make it a lot easier to spread out.
000_0010
You can decorate the cake however you like – you don’t even have to decorate it thought, if you don’t want to. You could use cachous, glitter, you could pipe swirls of ganche – anything you like! As you can see here, I went for choc-dipped orange segments with a tiny bit of gold glitter.
000_0003

Summer Strawberry & Vanilla Cupcakes

I made these cute little cupcakes for two of my friends joint birthday this week, and am quite satisfied with how they turned out! My friend suggested the idea of putting strawberry into the plain vanilla bean cupcake, and it worked really well. They added a nice touch of summer and broke up the sweetness of the vanilla and rich creaminess of the buttercream. Yum!

Cupcakes!

Cupcakes1

I know it sounds a bit lame, but I LOVE piping cupcakes. I find it strangely therapeutic, but only when the buttercream swirls exactly the way I want it to :p Which definitely doesn’t always happen!

000_0005

I used my trusted vanilla bean cupcake recipe that I have used countless times. The great thing about this recipe is that you can double it, halve it, add anything you want to it (ie. Strawberries!), and the cakes will still be super moist and fluffy 🙂 Unlike macarons, where you can make the slightest of adjustments and every single shell will crack!

000_0019

Tower!

Cupcakes always look so pretty in photos, especially when they’re cute girly pastel colours like these ones. I love adding ribbon and cachous and other colour co-ordinated bits and pieces to the photos to brighten them up and to try and make a bit more of a story out of my food. I’m not sure if I’m any good at it, as I know next to nothing about photography, but it’s definitely fun to play around 🙂

000_0023

Salted Caramel Bejewelled Profiteroles

If you are a regular reader of this blog, you will know how much I absolutely adore salted caramel. I have made choux pastry for eclairs twice before – once when we added 2 tablespoons of salt to the mixture (yes, that’s what the crazy recipe said!), and the other time, I undercooked them and they looked like little sunken balls of pancake. So, logically, I decided I would give them another go for Christmas Day lunch. Ta da 🙂

Follow me on Instagram - GemmaAsh

Profiteroles

They worked! Thank goodness they did, because the world probably would have ended if they hadn’t. Once again, Taste.com certainly did not let me down, and I will definitely be using this recipe many times over. I already have used it since actually, and the result was just as great. So many people seem to think that choux pastry is a difficult thing to get right, and it can be if you get a little confused or don’t follow the recipe word for word, which can be really easy to do. If you are going to give this recipe a go, make sure to sit down and read it through before you make it – and understand each step. Otherwise, not only can it be really dishearteneing, it’s also a waste of quality ingredients and money 😦 The good news is though, once you do understand the recipe and know what to do from experience, your cooking will be much better for it 🙂 There’s my words of wisdom for the day!

Profiteroles1

Here is the recipe for Choux Pastry. The only part is, it definitely does not make 25-30 profiteroles like it says. It makes 18 at most, so if you want more, simply double the recipe.

Choux pastry

Before and after

Caramel Maison: (from p. 242 of Adriano Zumbo’s book, Zumbo):

•220g pouring (whipping) cream (35% fat)
•1 vanilla bean, split and seeds scraped (I used 1 tsp vanilla bean paste)
•120g water (this is just under 1 cup)
•300g caster (white) sugar
•60g liquid glucose (available at most supermarkets)

Place the cream and vanilla in a small saucepan over a medium heat and bring to the boil. Then, remove from the heat, and remove the vanilla bean if you are using one. In the meantime, place the water, sugar and glucose in a larger saucepan over a low-medium heat and cook until the glucose and sugar are fully dissolved, stirring occasionally. Zumbo’s says to use a clean pastry brush dipped in water to clean the sides of the saucepan in order to avoid crystalisation, however you can also just place the saucepan in really hot water with suds just after use and the sugar will melt off really easily. Increase the heat to medium, and cook the sugar mixture until it reaches a dark amber colour. This does take quite a while, and I was getting worried that mine would not work, but persistence is key here, it will eventually darken after 6-7 minutes. Very carefully stir the cream mixture into the sugar mixture slowly – be very careful because it spits and releases lot of heat. I found the best way to do this was with a spoon with a very long handle, as you want to keep your face as far away from the saucepan whilst it is spitting. If you don’t have a spoon with a super long handle, just add the cream really slowly and try to stir as best you can! Keep stirring as much as you can until the caramel settles down, then stir until completely smooth. Transfer to a bowl, let it cool to room temperature, cover with plastic wrap and place in the fridge.

Making the caramel

Caramel Buttercream: (this recipe is on page 42 of Zumbo’s cookbook)
•150g unsalted butter, chopped and softened
•300g caramel maison
•4.5g sea salt flakes

Place the butter in a bowl, and beat until light and fluffy. Warm the caramel maison in the microwave until it reaches a pouring consistency (mine needed 1 min, 20 seconds on high as it was in the fridge overnight), however, just warm it in stages to prevent burning the caramel. With the beater running slowly, add the caramel maison to the butter and continue mixing until thick. Once I had added about half of my caramel, I got a bit worried because it looked like it was curdling, however as I kept adding the caramel, it began to thicken up. So don’t freak out until you have added all of the caramel to the butter. Once you have added all of the caramel, fold in the salt. I did not measure my salt, as I used a shaker. So if you too are using a shaker, just salt to taste.

Assembly:

Place the caramel in piping bag fitted with a small round nozzle. Gently pierce the bottom of the profiteroles with piping nozzle, so that the nozzle itself is inside the profiterole. Squeeze bag until profiterole feels heavier in your hand, and the caramel is slightly coming out of the profiterole. Gently scrape the profiterole on the edge of a bowl to get rid of the excess caramel. Repeat with other profiteroles. If you are not eating them straight away, refrigerate them until they are ready to serve.

Profits

You can decorate the profiteroles however you wish! You can see that in both cases I dipped mine in melted chocolate, and sprinkled them with gold edible glitter and cachous. For the ones with the white chocolate, I added some caramel popcorn dipped in chocolate. Yum!

NYE profiteroles

Yum!

Follow me on Instagram – GemmaAsh! X