Easter Egg Nest Chocolate Cupcakes

This week has been a great one for whiskitforabiscuit. With Easter arriving, I have had a lot of new visitors to the blog, which is so nice to see. I have also had a number of people telling me that they have tried my recipes, such as the Chai and White Chocolate Hot Cross Buns, and how they have succeeded and tasted awesome! So, thanks so much guys, I appreciate it more than you could know and I absolutely love hearing everyones stories and feedback 🙂 It’s also really nice to know that people are actually reading this and it’s not just me writing to my sad and lonely self, lol. Now, to the cupcakes.

IG

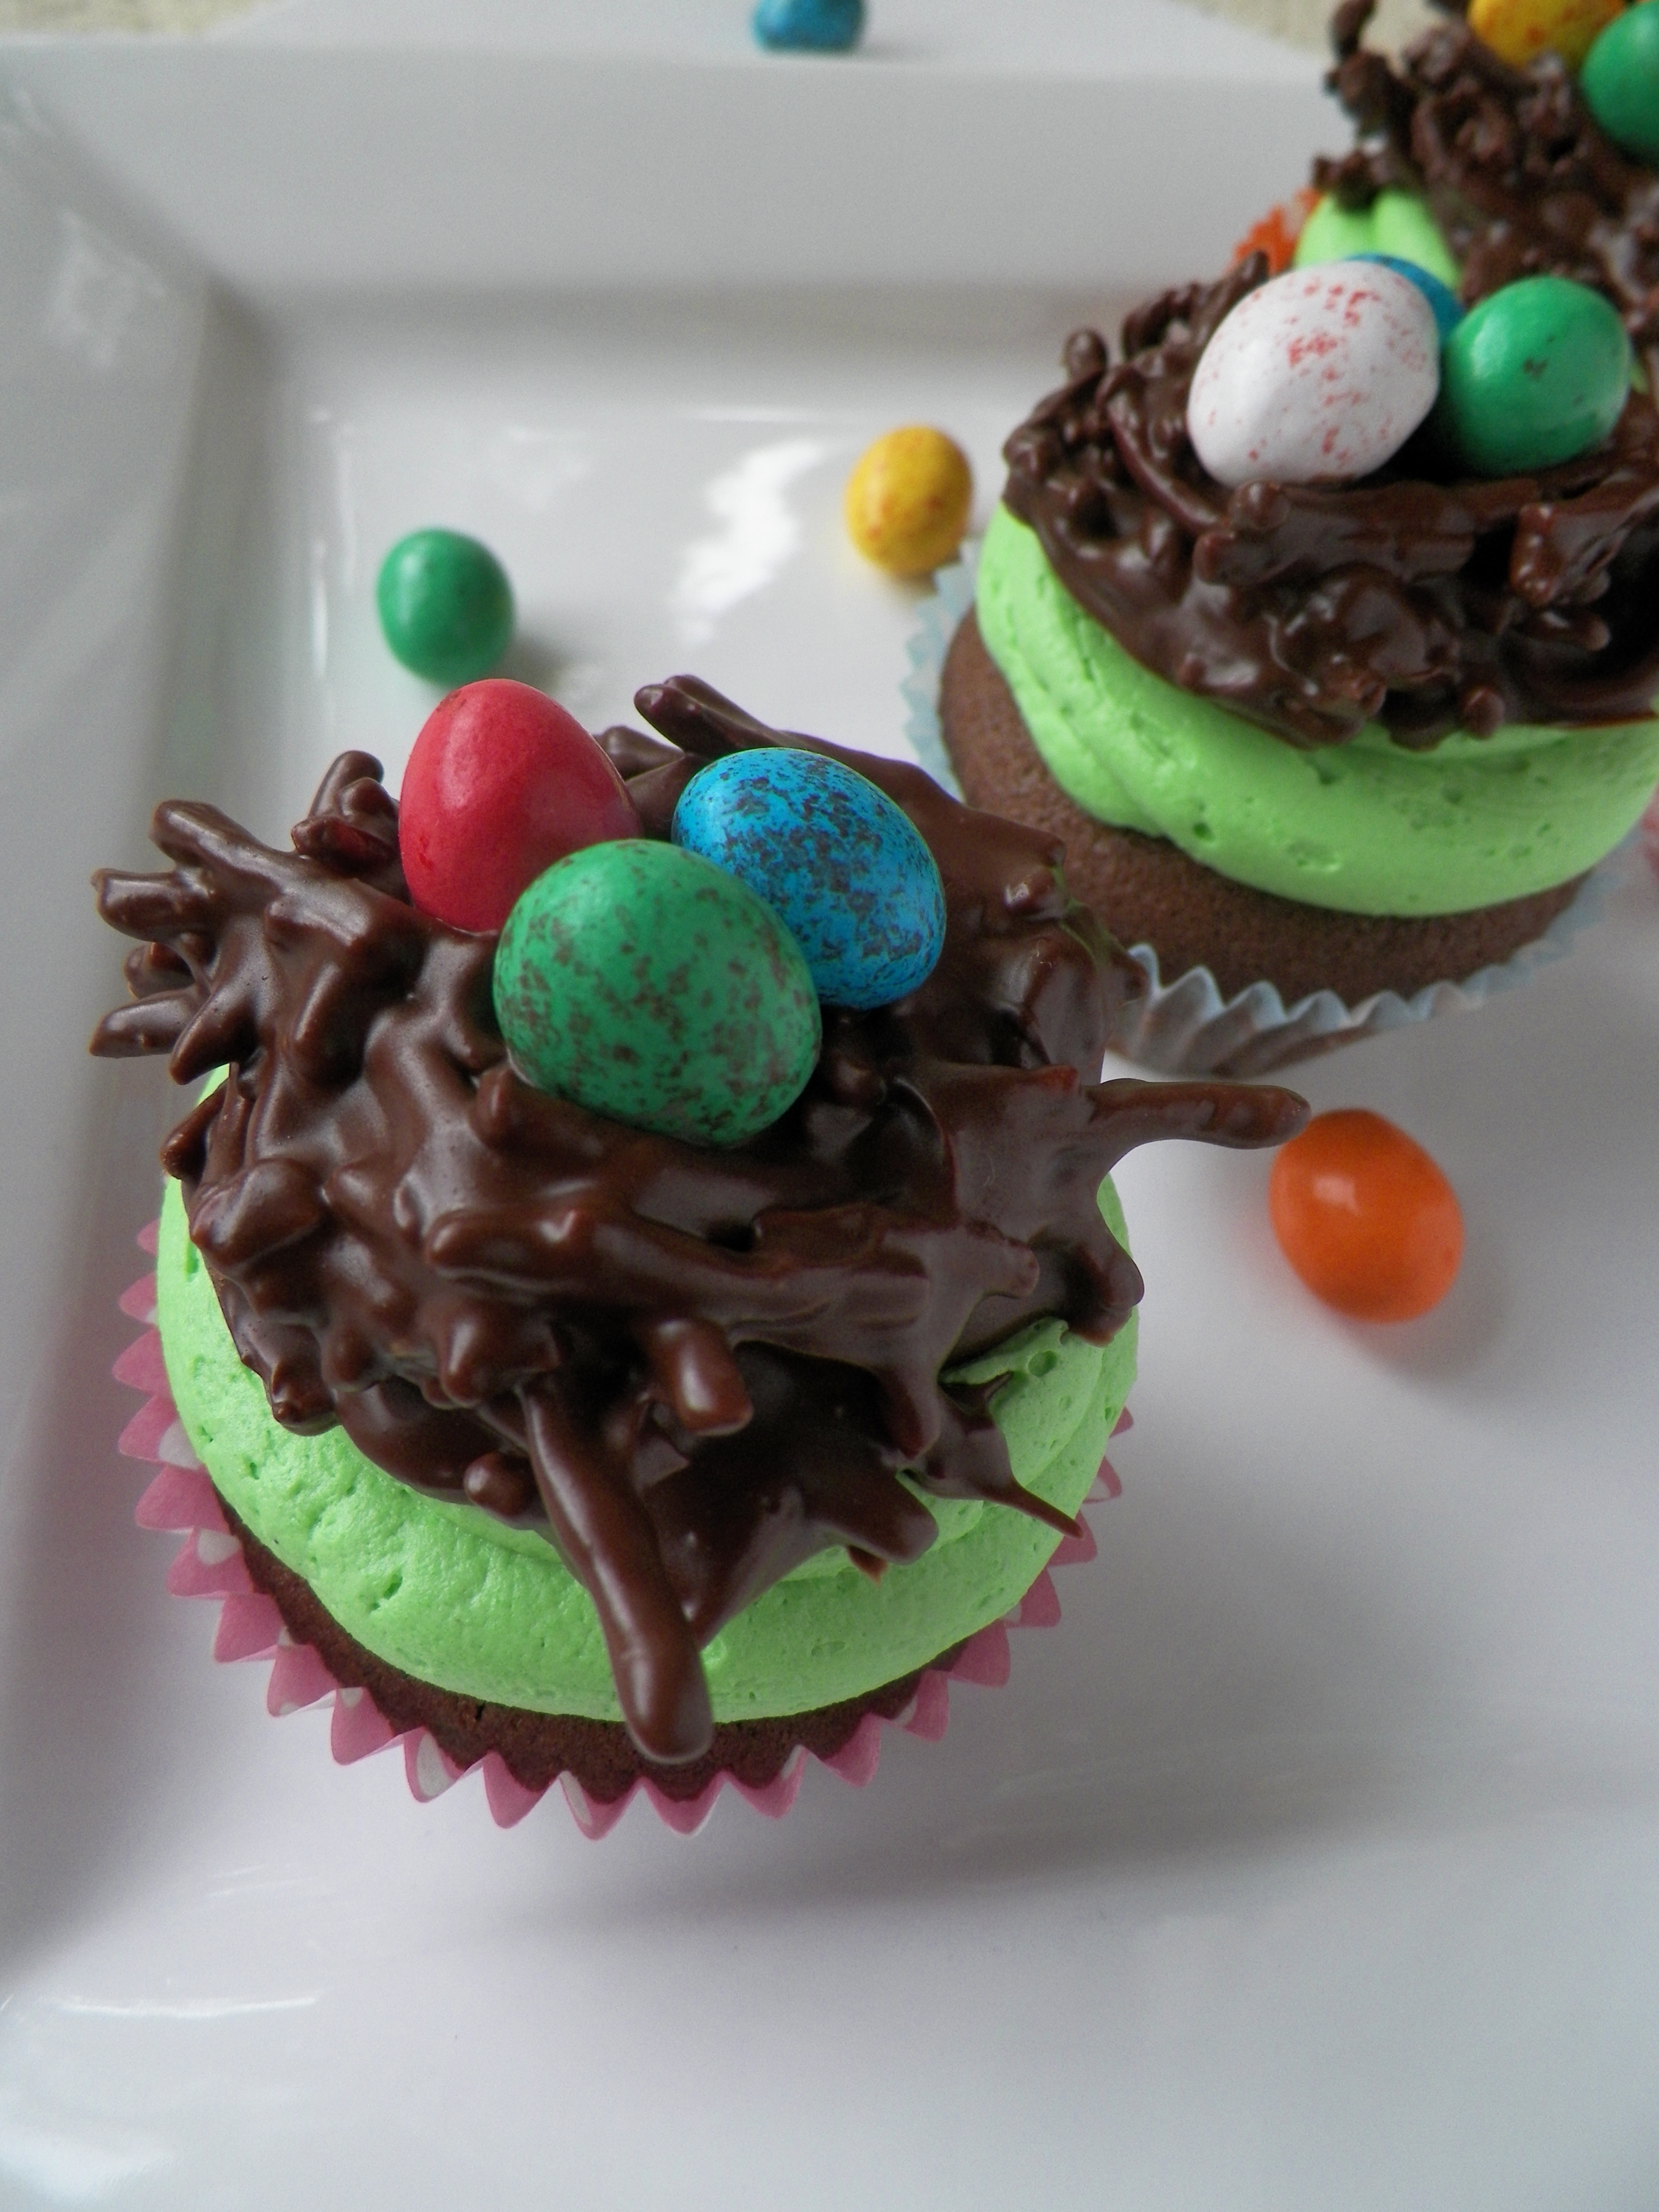
I had seen a few different takes on these egg nest cupcakes, on various sites such as Pinterest, and they just all looked so fantastic and fun! I had to give them a go, and use one of my all-time favourite childhood treats, the chocolate spider. No words can ever describe how much I adore the chocolate spider, seriously, they are just that delish. I really could go on forever and ever about these morsels of goodness, and it’s so great that they only have 3 ingredients! Life = complete.

000_0010

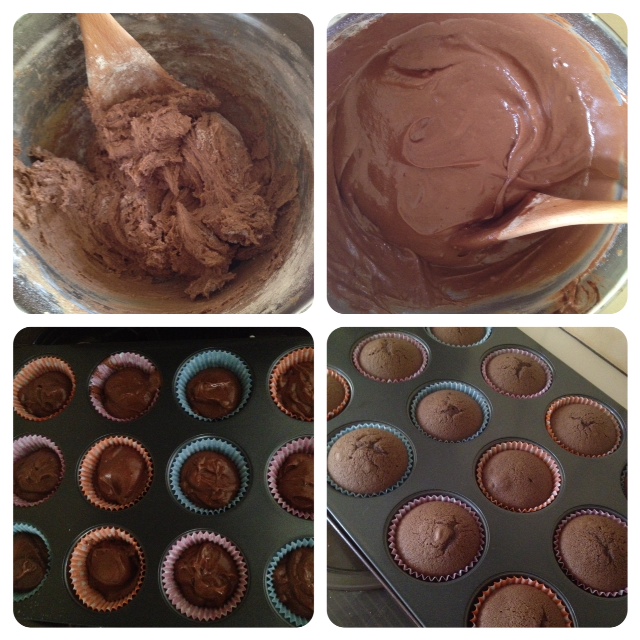
I have used this amazing chocolate cupcake recipe countless times, including in My First Order, and it’s never let me down! You can find the recipe here.
Makingcakes
Buttercream:
  • 350g butter, chopped and softened
  • 2 1/3 – 3 cups icing sugar mixture
  • 1 tsp vanilla bean paste or extract
  • Wilton’s colourng gel, green
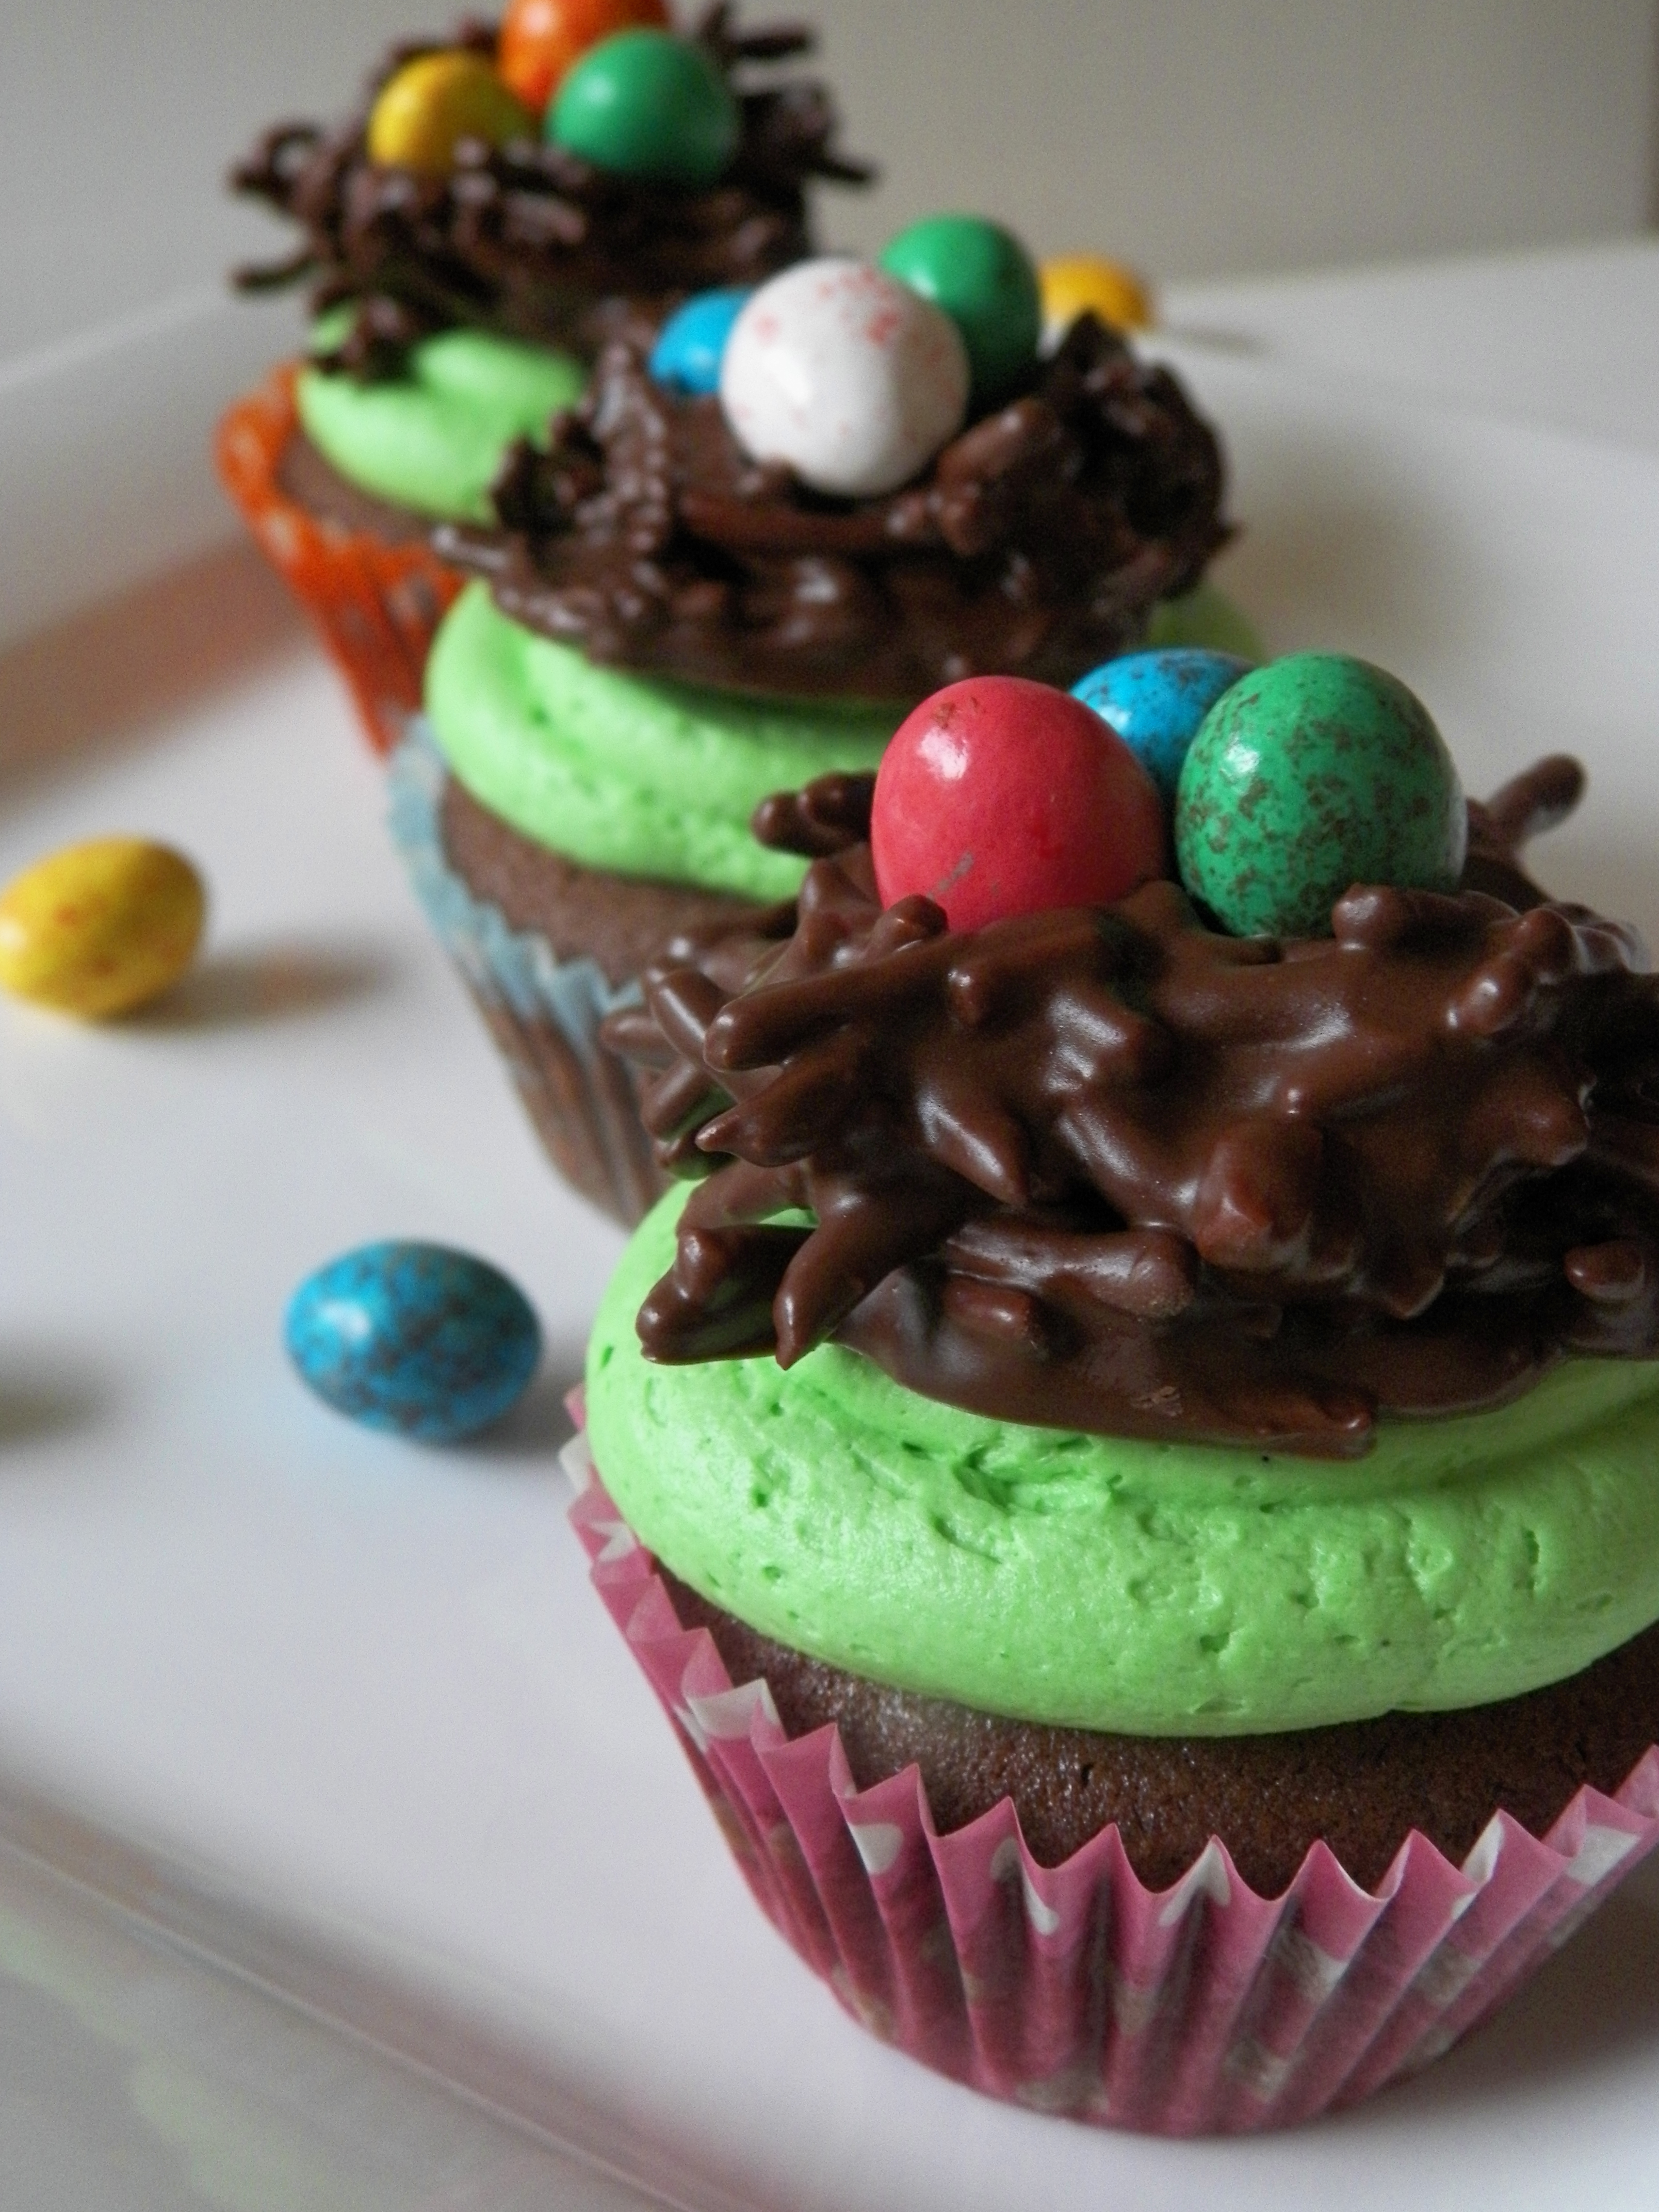
Beat butter until pale and creamy, about 4-5 minutes. Gradually add in the icing sugar mixture until well combined. Beat in vanilla and green colouring until desired colour is achieved. Spoon buttercream into a piping bag with a large round nozzle. Pipe rounds on the cupcakes.
000_0014
Chocolate Spider Egg Nests:
  • 1 packet Chang’s noodles (available at most Australian supermarkets. I am sure there would be an equivalent in the US and UK, however I do not know what the brand is)
  • 2 tbs crunchy peanut butter
  • 200g chocolate, milk or dark
  • 1 packet M&M Crunchy speckled eggs, or Cadbury Mini Eggs

Makingspiders

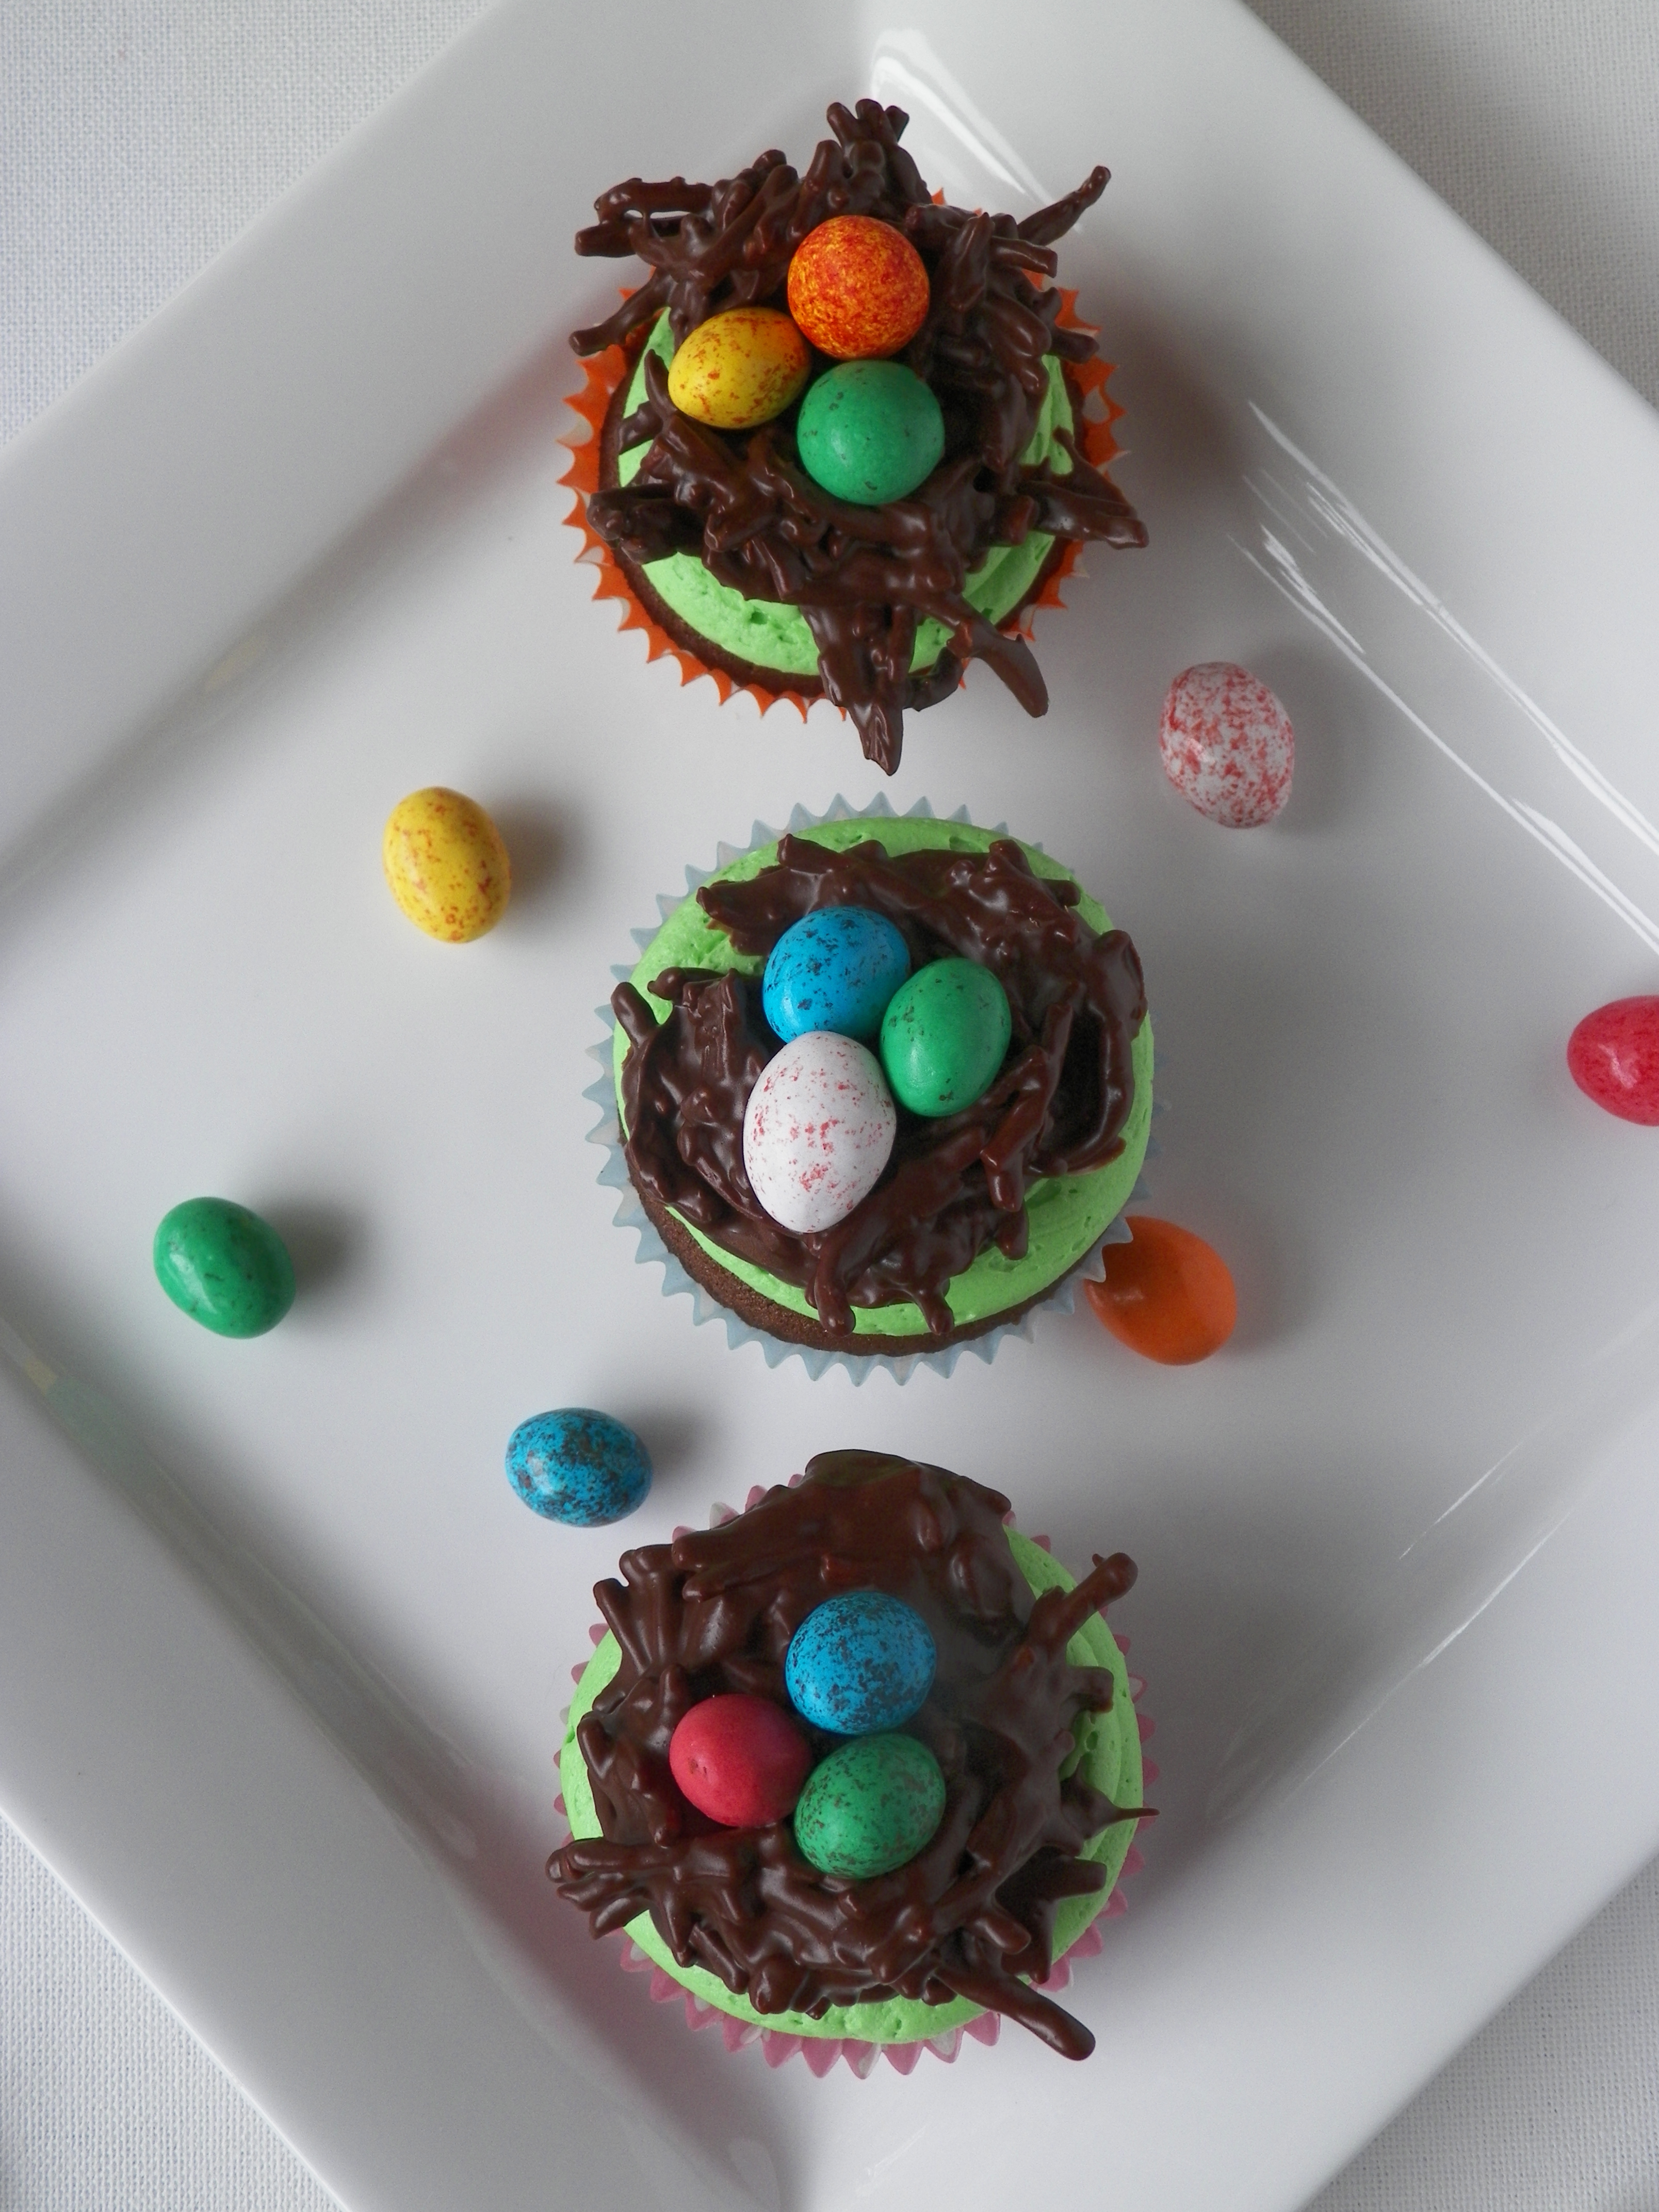
Place chocolate and peanut butter in a microwavable bowl, and microwave for 60 seconds on high. Stir with a metal spoon, even if it does not look melted. If it needs more time, microwave in 10 second increments until completely melted. Don’t do what I did and keep microwaving because you can still see lumps,and then realise it’s just the nuts from the crunchy peanut butter. Idiot. Pour contents of noodles packet into the chocolate and peanut butter mixture until well coated. With two teaspoons, make small ‘nests’, on oven trays with baking paper. Place three speckled eggs on each nests straight away, as you do not want the chocolate to set, otherwise the eggs will not stay on the nests. Place in fridge. You can make these a few days in advance, just pop them in an airtight container when they have set.
Place egg nest onto the green buttercream on the cupcake. Done!
 000_0005
I hope everybody has a fantastic Easter with their loved ones! I am so lucky I have a little sister who gets so excited about the Easter bunny and the annual hunt we have on Easter Sunday morning, it makes it so much more fun with little kids around!
000_0003
Don’t forget to follow me on Instagram – GemmaAsh! Until next time…X

Chai & White Chocolate Hot Cross Buns with Cranberry Butter

Wow. It’s so hard to believe that Easter is upon us already! Even though I have been eating the occasional hot cross bun in secret since January 1st when they are available at the supermarket, I guess the week before Easter is finally the socially acceptable time to eat one, two or twenty hot cross buns. So, here we are. And they’re not too bad even if I say so myself. I made a couple of batches of original and choc-chip buns a few years back and I promised myself I would try to make them each year for Easter as they were just so damn good! Although, last year, I substituted the real things for something almost as good, Hot Cross Macs. This year, I wanted to try making the buns again, with a bit of a different flavour 🙂
IG
I found some really good chai tea from T2 in the cupboard, bursting with cardamom pods, cinnamon sticks and broken star anise. I knew then, I had to make my buns with this awesome chai. Mmm, and what to go with it? I didn’t want them to be too traditional, and since I was little, I have always been a loyal fan of the choc-chip variety (what kid hasn’t?!). White chocolate it was. I thought it would give the chai a bit of sweetness and provide the same great chunkiness as the choc-chip bun, and the white chocolate wouldn’t overpower the flavour of the chai like milk or dark chocolate would (I’m trying so hard not to sound like a wanker when I describe the flavour, lol).
000_0003
Chai and White Chocolate Hot Cross Buns (adapted from Sasko flour):
For the chai tea:
  • 2 x teabags, or T2 sachets or teaspoons of chai (if you are using sachets or teaspoons, you will need to strain before adding the honey, milk and vanilla)
  • 500 ml water
  • 1/2 tsp vanilla bean paste or extract
  • 30ml honey
  • 125ml milk
Place the tea in a saucepan, with the water. Simmer on a low heat until the water colours, and the flavours are prominent (about 8 mins). If you need to, strain the tea, and place back in the saucepan once strained. Stir in vanilla, honey and milk, and set aside to cool slightly.
MakingDough
For the dough:
  • 540g plain flour
  • 30g butter, at room temperature
  • 35g caster sugar
  • 1/2 tsp salt
  • 1 tsp cinnamon
  • 7g yeast
  • 1 egg, lightly beaten
  • 1 1/3 cups white chocolate chips
  • 100g plain flour
  • Water
Sift flour into a bowl, rub in the butter with your fingers, and stir in the cinnamon, salt and sugar. Measure out 280ml of the chai tea mixture, and lightly mix in the yeast. When it begins to foam (you only need a few bubbles, don’t freak out if it doesn’t look like a bubble bath – I have made this mistake before), add to the flour mixture, along with the lightly beaten egg. Mix with hands until a dough if formed. If the dough is too crumbly, add a tiny bit of water. Oil a large bowl, and place dough inside. Put a tea towel over the top of the bowl, and put in a warm place for about an hour, or until the dough has doubled in size. I put my dough in a sunroom and it was perfect. You could also put it beside a window which is getting some sunshine.
MakingDough1
Preheat the oven to 200c. Once the dough has doubled, remove from the bowl and knead with hands on a clean surface until soft and springy. Add white chocolate in 2 batches and knead well. Shape the dough into 12 even balls, and place in an oiled or greased tray. Leave in a warm place to double in size once again, for about 30-45 minutes. Use the 100g of flour and some water to make a paste. Keep adding small amounts of water until desired consistency is reached. Remember you can put more water in, but you can’t take it out! You want the paste to be rough but not stodgy. Place flour paste in a piping bag fitted with a medium sized round nozzle (the ones you get with the Multix ones are perfect). Pipe crosses on the buns, and place in preheated oven for 12-15 minutes. Remove from oven and let cool in tray.
Bunsintheoven
To make the glaze, use 100ml of chai tea mixture and 1/2 cup caster sugar, and place in a saucepan. Simmer on a medium heat until it comes to the boil. Remove from heat, and brush buns with a pastry brush. I needed 2 coats on mine for them to be glossy enough.
000_0006
Cranberry Butter:
  • 1/3 cup dried cranberries (craisins), roughly chopped
  • 1/2 cup butter
  • 1/2 tsp cinnamon
Place all ingredients in a small bowl and stir until combined. Spread on warm hot cross buns.
000_0008
Hot cross buns are heaps of fun to make. They are not difficult, but you definitely need to read the recipe beforehand. The only other thing is, you do need a bit of time, but I promise they are worth it! Don’t feel confined to making buns with the original flavours if you don’t wish to, mix it up with different fruits such as berries and citrus, and sweets such as different types of chocolates, caramel, nutella or jam.
000_0002
Enjoy! X

Dark Chocolate and Peanut Butter Tart

All I can say is YUM! And….omnomnomnomnomnom! Omnomnomnom. Omnom. Nom. Nom. This mouthwatering tart had been a work in progress inside my head for a while, and I wanted to make it for my birthday, as I LOVE LOVE LOVE anything with peanut butter. I was pretty happy with how it looked, even though the pastry was a little rustic looking. Okay, it was completely rustic looking. Plus, I forgot to put sugar in the pastry :/ oops! But it was still pretty awesome, even if I say so myself!
Instagram
I’m sure you can already tell, but this tart was super, super rich. Especially after the amazing slab of pork belly I had for my birthday dinner, it’s safe to say I was bursting by the end of it all! This tart was heaven for me, and will be for anyone else who loves the combination of peanut butter and chocolate. It was fairly simple to make, too. It just requires a bit of organising and beginning things the day before. You don’t have to make your own pastry if you don’t want to, either. There are some pretty good frozen pastries around that will still work really well 🙂 The shortcrust pastry recipe I used, I probably wouldn’t recommend. It was ok, but there are heaps of better ones out there. Have a look here to check them out.
000_0010
Peanut Butter ganache (adapted from Donna Hay):
  • 1 cup icing (confectioner’s) sugar
  • 1 1/2 cups of smooth peanut butter
  • 120g butter, chopped and softened
  • 1/2 tsp vanilla bean paste/extract
  • 2/3 cup (80ml) cream, thickened
  • Pinch of salt

Place sugar peanut butter, butter and vanilla in a bowl, and beat until light and fluffy (on high for about 5 minutes). Add the cream slowly and beat for another 2 minutes. If not using straight away, cover and refrigerate.

Pastry

Chocolate Ganache:
  • 100g dark chocolate (I used Green and Black’s 70% cocoa), chopped
  • 1/3 cup heavy thickened cream
  • 2 tbs butter
Place all ingredients in a small saucepan and stir over a low heat until melted. Place in bowl and let cool.
000_0005
Assembly:
Once the pastry has cooled completely, you can start assembling. Spoon the peanut butter ganache over the pastry and spread it out with a spoon so it is nice and even. Pour cooled chocolate ganache over the peanut butter ganache and gently spread out with a teaspoon, being careful not to blend the peanut butter with the chocolate – you want to create two definitive layers. Ideally, it is best to refrigerate the tart overnight, but if you’re using it sooner, try and refrigerate it for the maximum amount of time possible.
Sliced
You don’t have to decorate the tart if you do not want to, it would look great with nothing on top. I had heaps of leftover peanut butter ganache hence why I did all the piping on top. It probably made it that much richer, but it certainly photographed well, I think 🙂
000_0004